The Khadas Edge: A new captain with an edge // Review
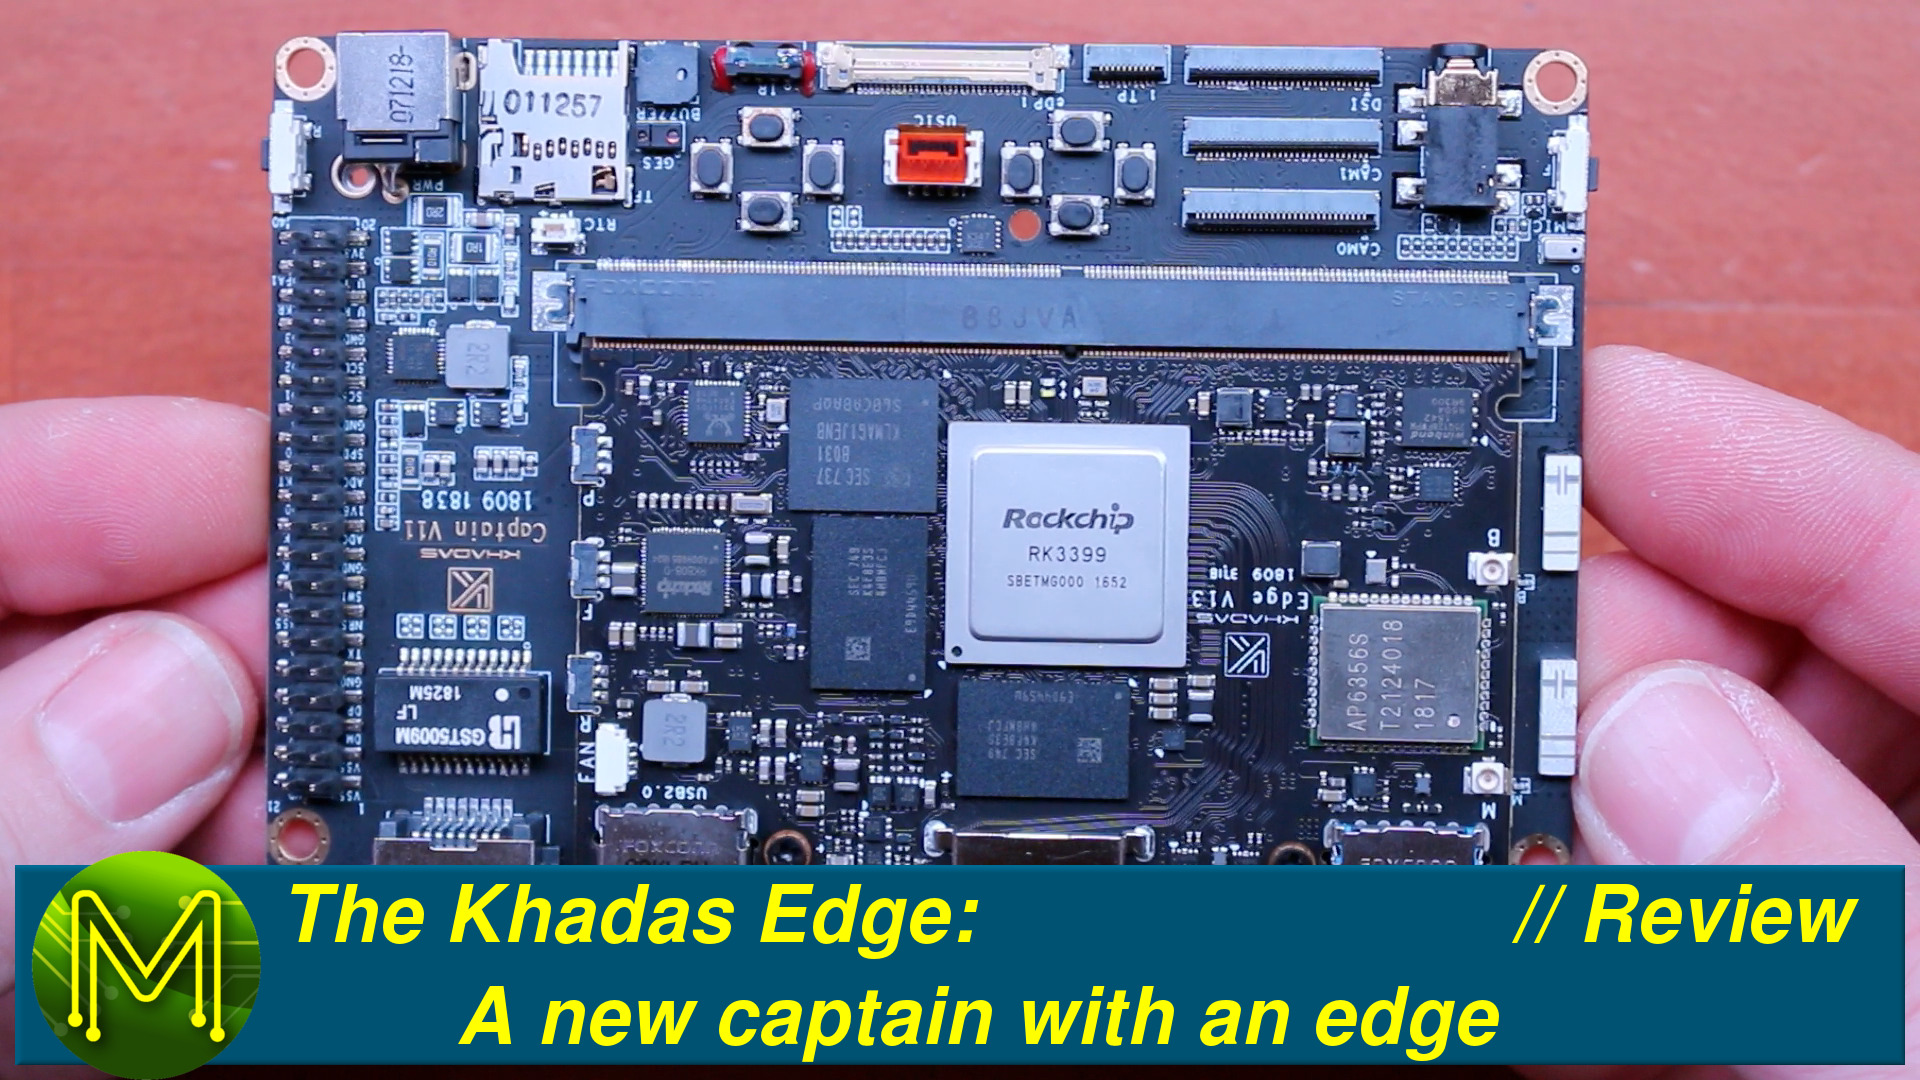
In this review I take a look at one of the newer members of the Khadas family; The Khadas Edge and Khadas Captain.
This board has some pretty interesting power management but, unfortunately, I saw the return of the magic smoke genie.
Full Disclosure
So, before I get started, there’s several things to note:
Firstly, full disclosure here; I normally purchase SBCs myself, but Khadas sent me review units of the Edge, Captain and also VIM2. However, like all my reviews, I say it, the way I see it.
Secondly, a while back Khadas reached out to a couple of primary developers and reviewers of SBCs to ask for feedback on how they could improve things. This is a pretty good sign that they want to listen to makers and not just shove something onto the market. I gave some fairly lengthy feedback and it looks like they’ve taken some of this advice onboard with the Khadas Edge.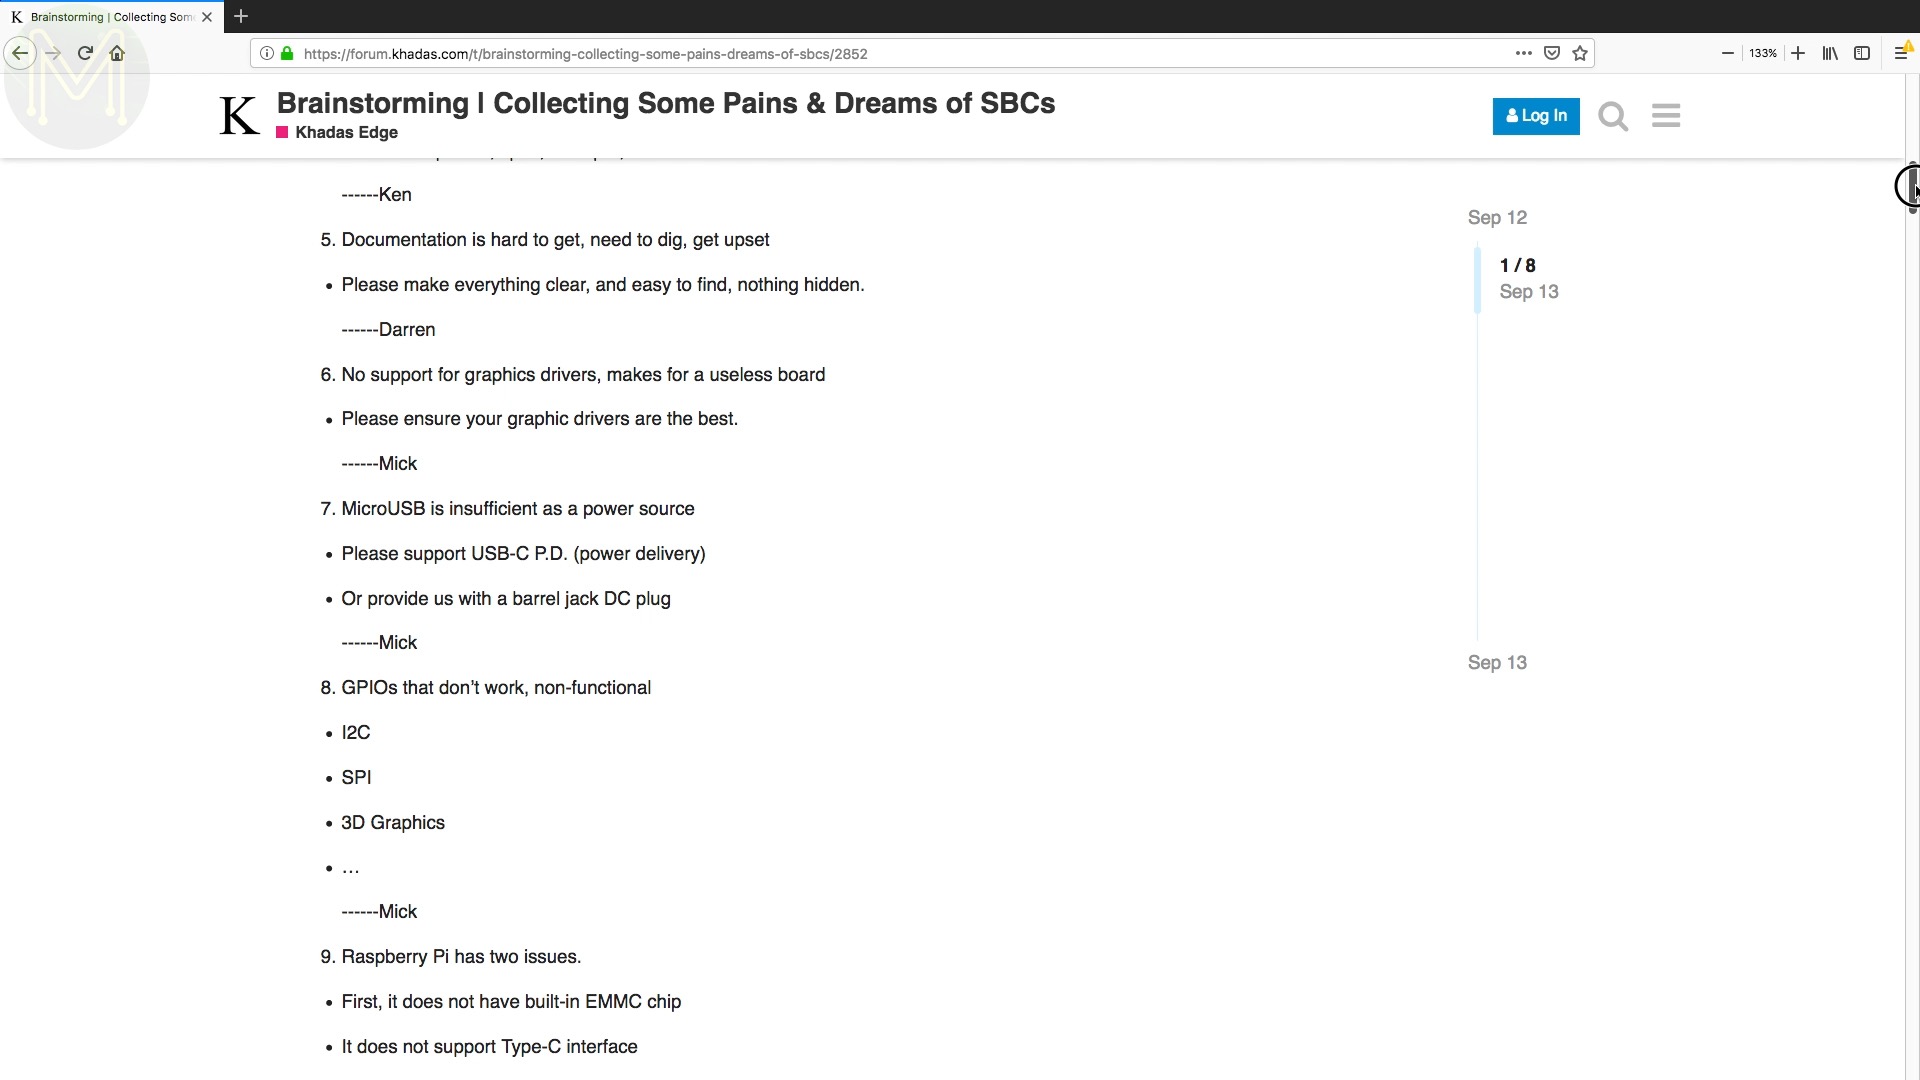
Thirdly, this is a pre-release SBC, with an IndieGoGo campaign still running, so some things are a bit rusty and some things may change.
Unboxing the Khadas Edge
So, like my previous LattePanda and NanoPC-T4 reviews, I’ll have to have a Part 1, Part 2 and more than likely a Part 3, because there’s so much to cover on this particular SBC. This video I’ll be looking at all the low level stuff, GPIOs, chips used and overall design of the board.
The Khadas Edge comes as a small footprint SBC with an edge connector, allowing you to use it standalone, or with a base board. This makes it a fairly compact low profile board. Possibly taking the title of the thinnest.
It can be used with or without the baseboard and breaks out a tonne of GPIOs onto an edge connector. This definitely gives the Edge the title of “most GPIOs accessible on an SBC”.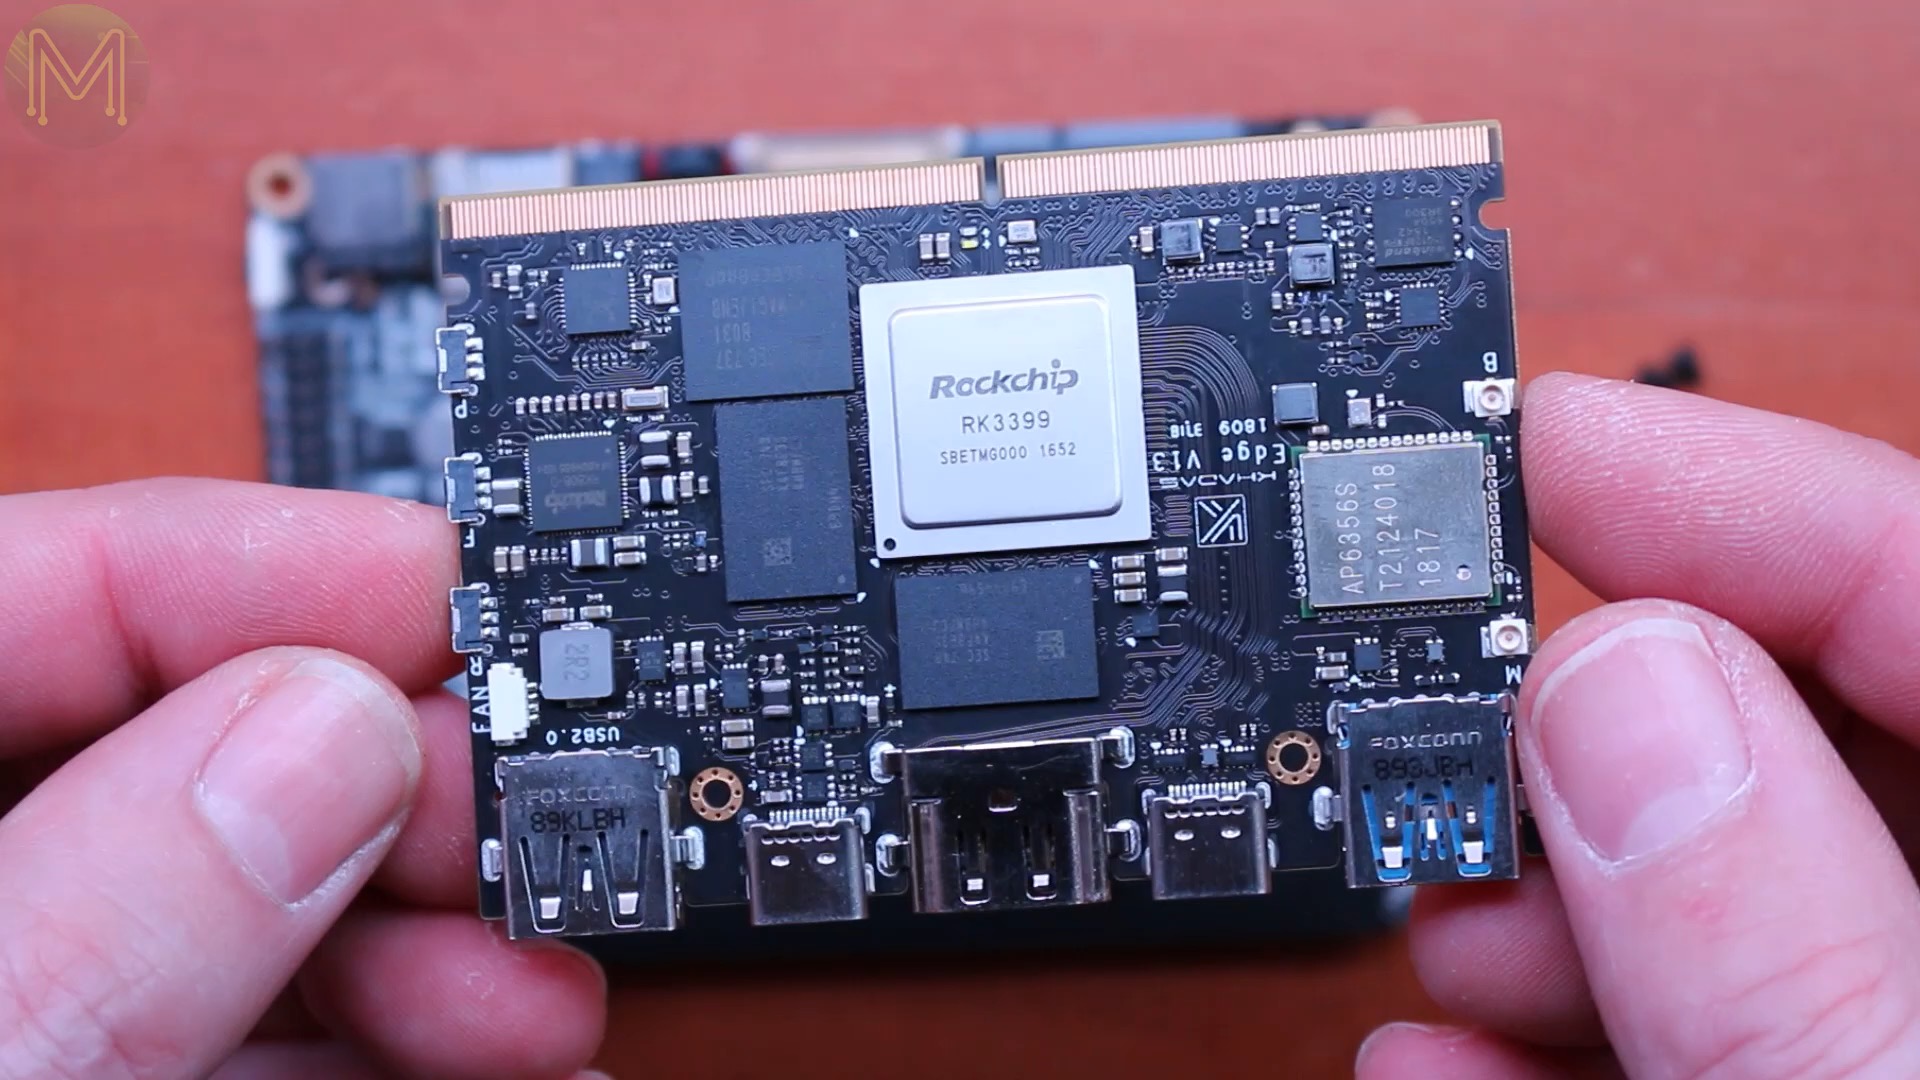
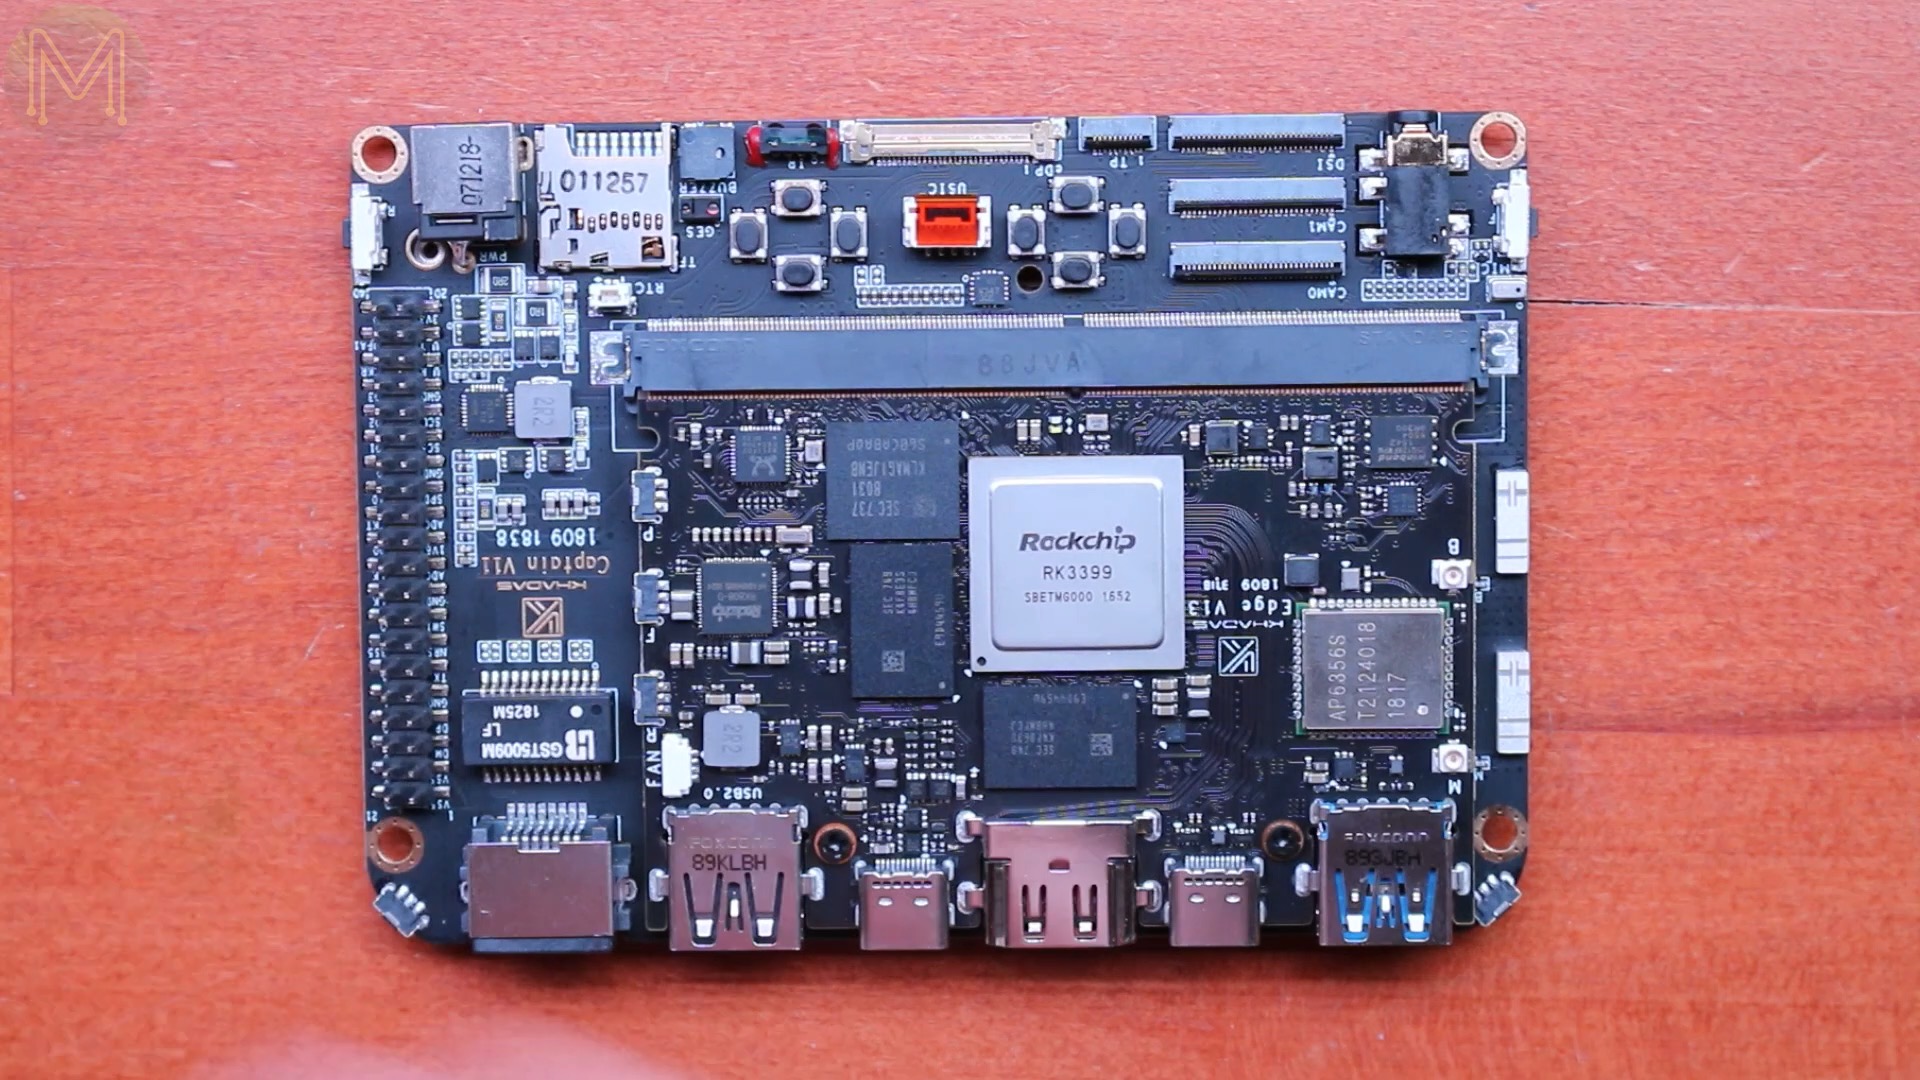
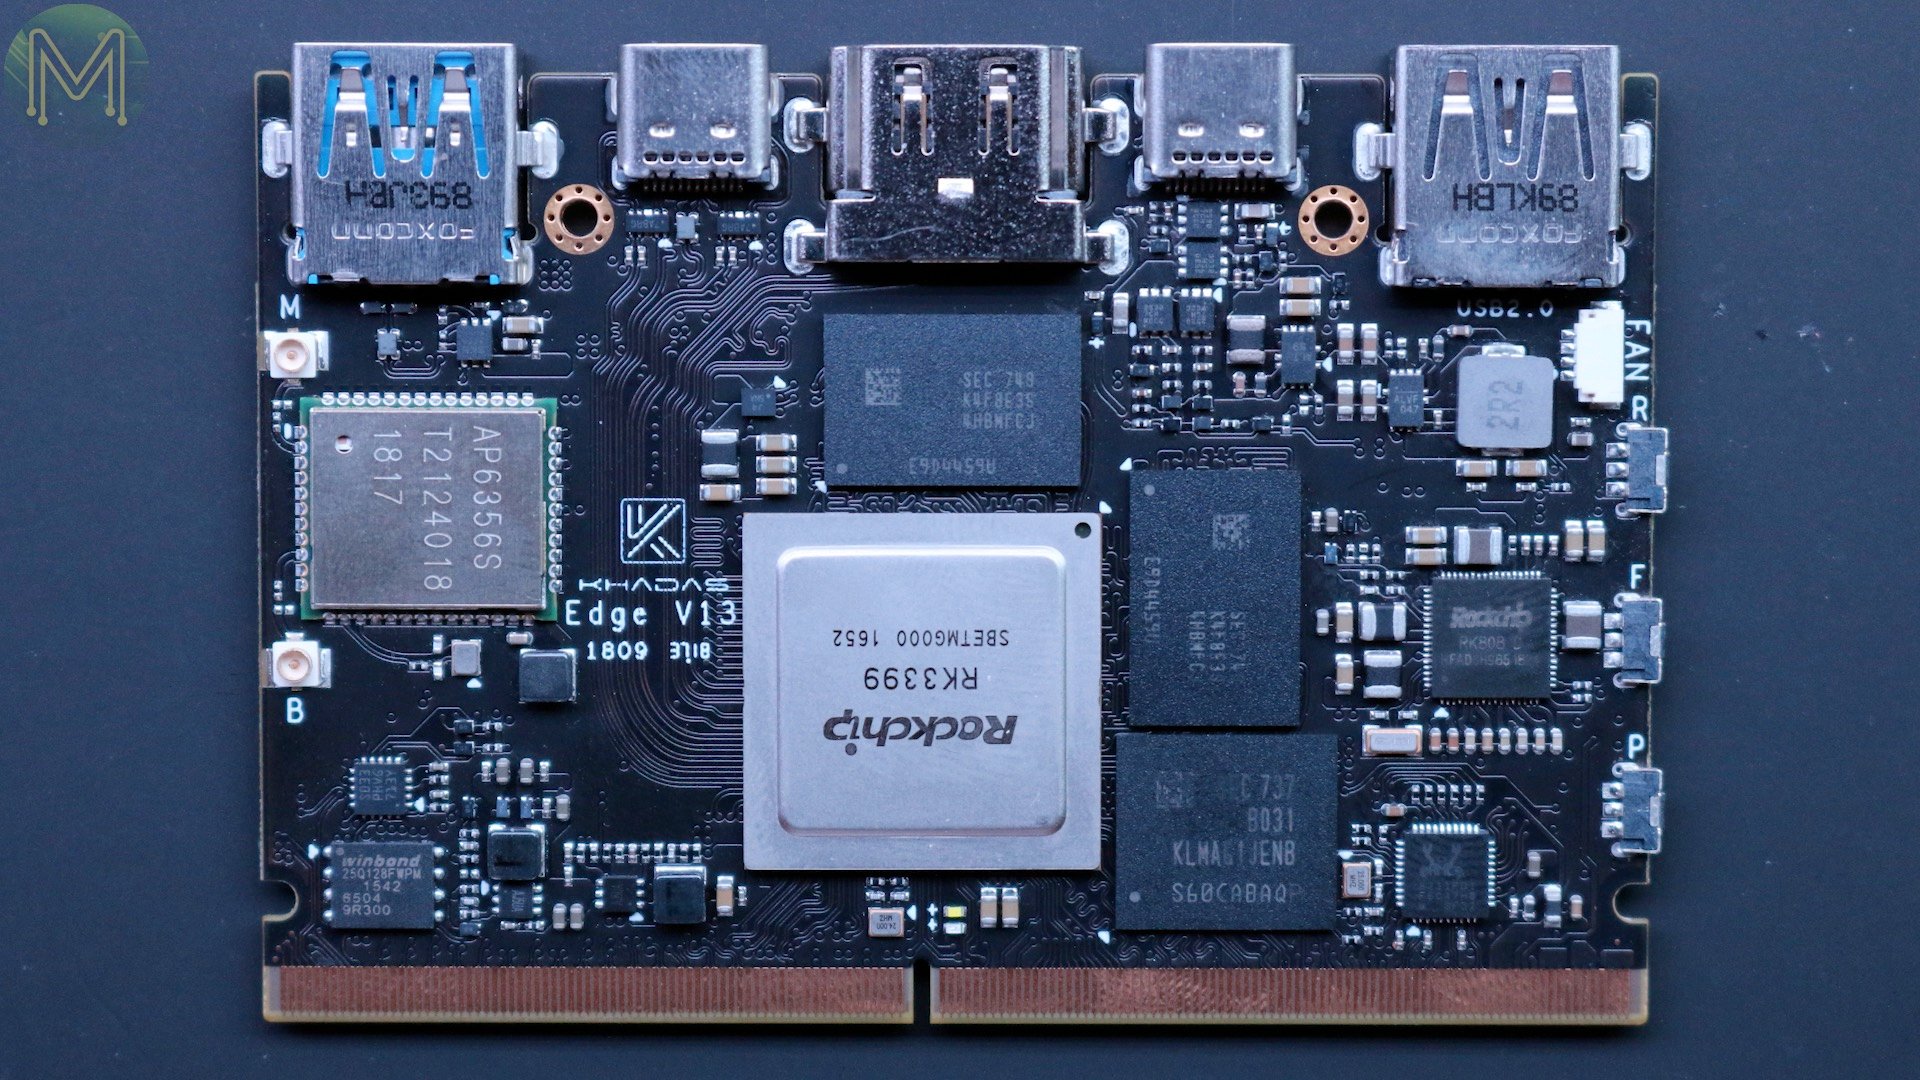
The Edge - top side
So, first looking at the Edge, what do you get? Starting from the top right, working clockwise we have …
- USB2.0 connector
- PWM based FAN control
- reset button
- function button, which allows selecting boot mode
- power button
- 314 pin header giving you waaaay more GPIOs than any other SBC
- i-pex WiFi & Bluetooth connectors
- USB 3.0
- USB Type C
- HDMI 2.0
- Another USB Type C
- and a USB 2.0
- Then there’s 16GB eMMC
- 2GB RAM
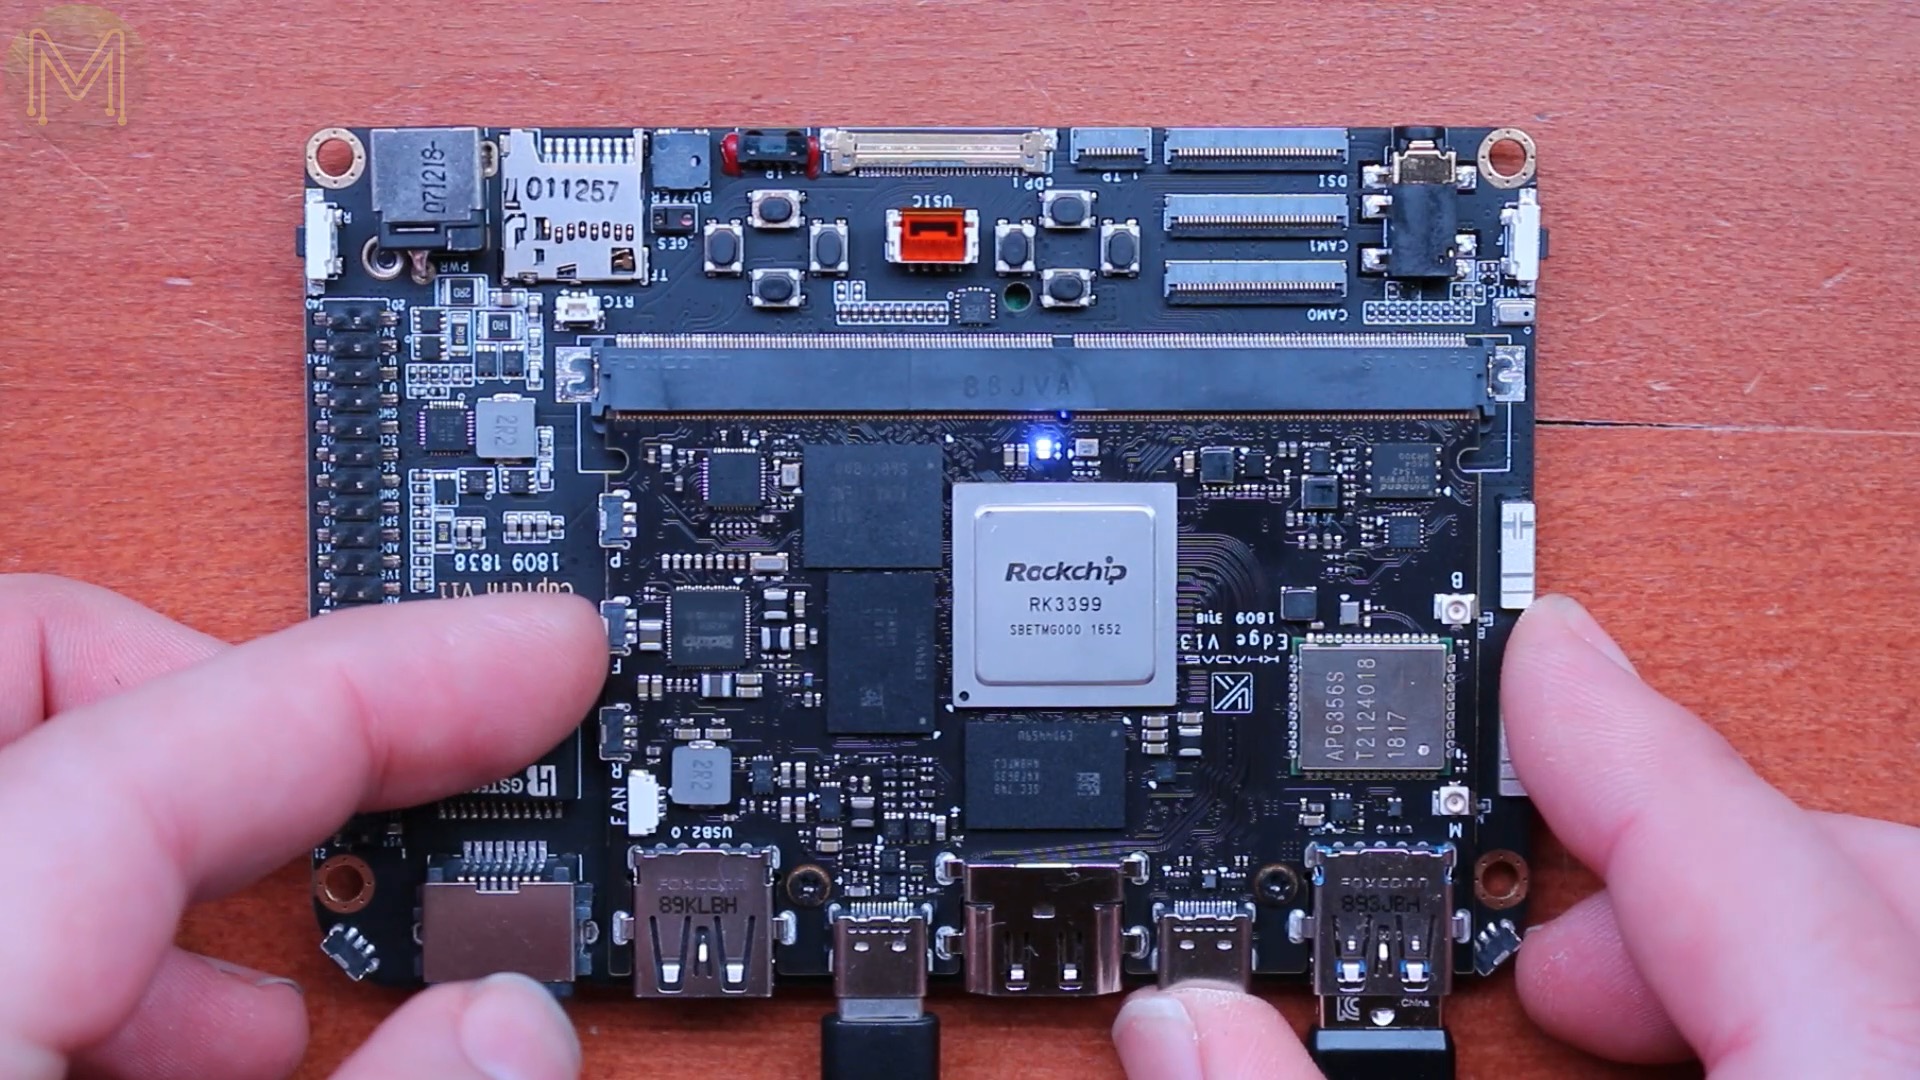
- and the 6-core RK3399 SoC.
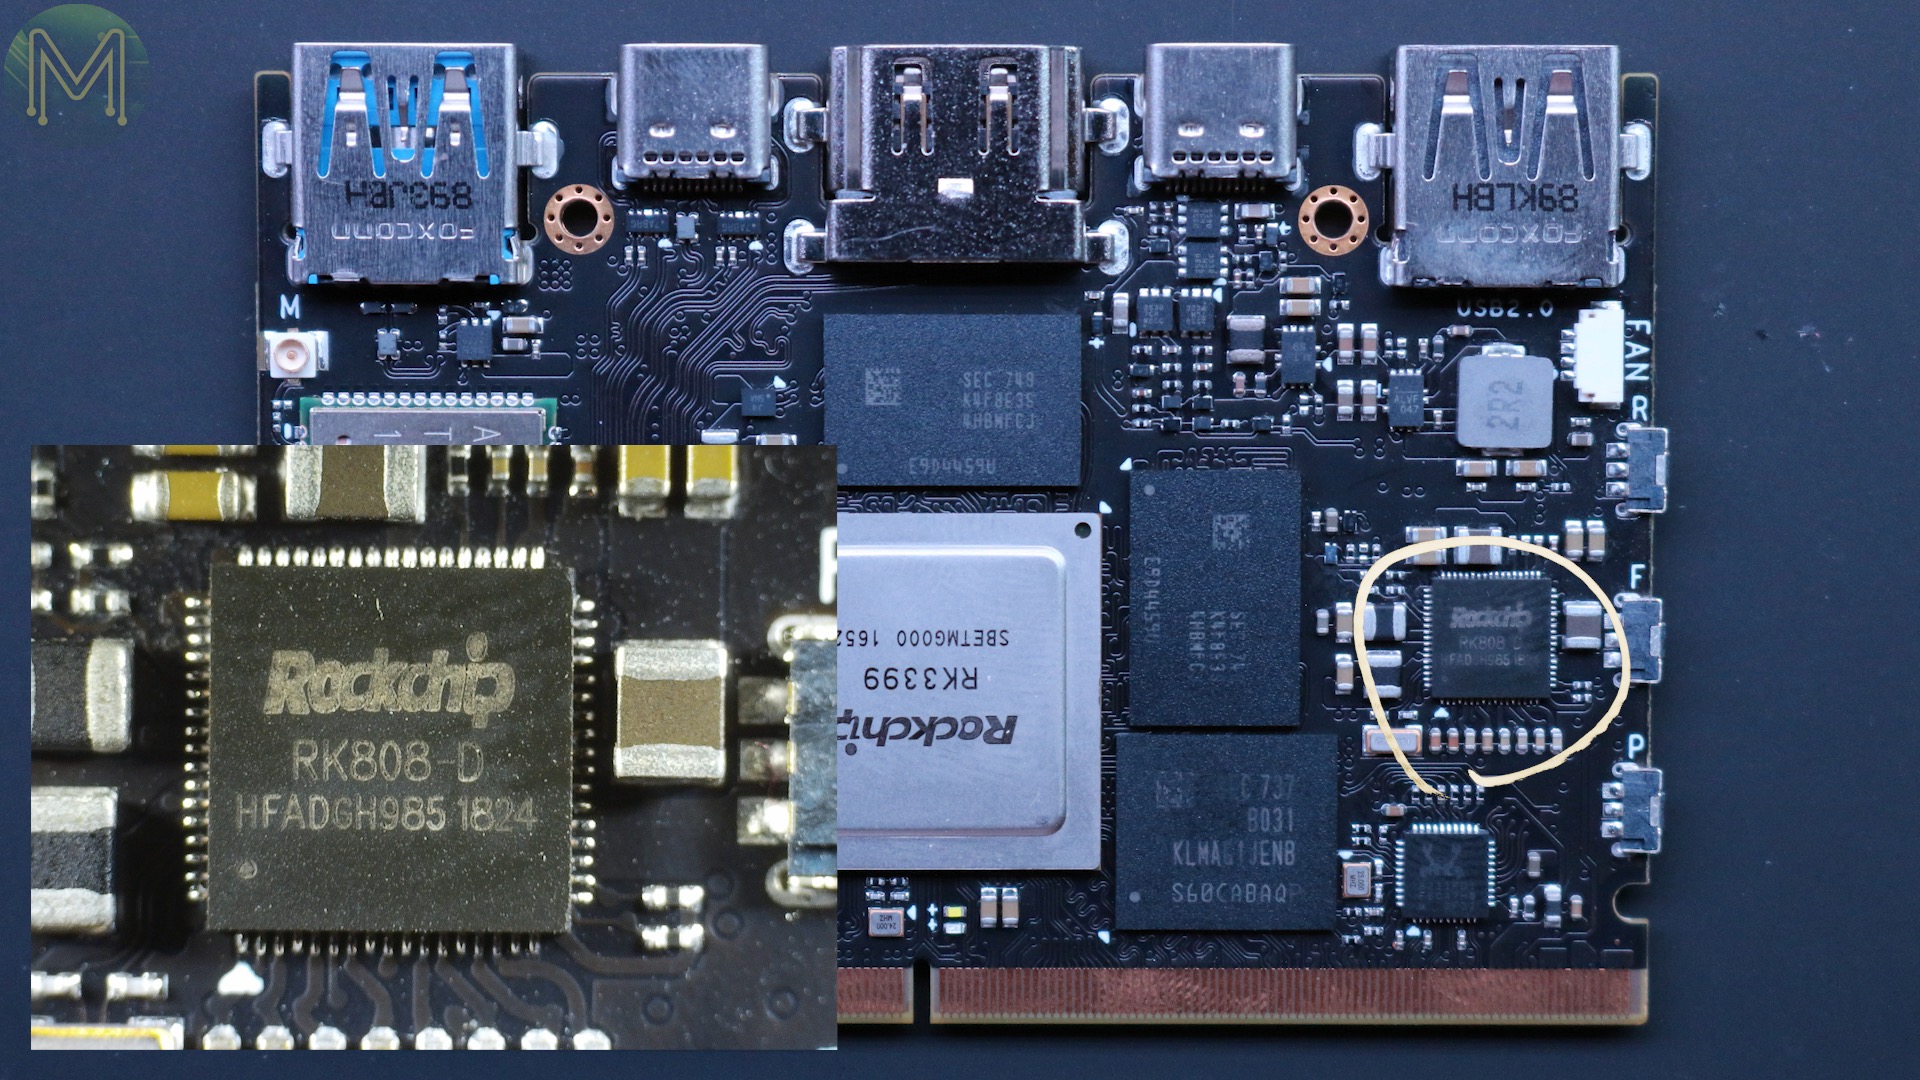
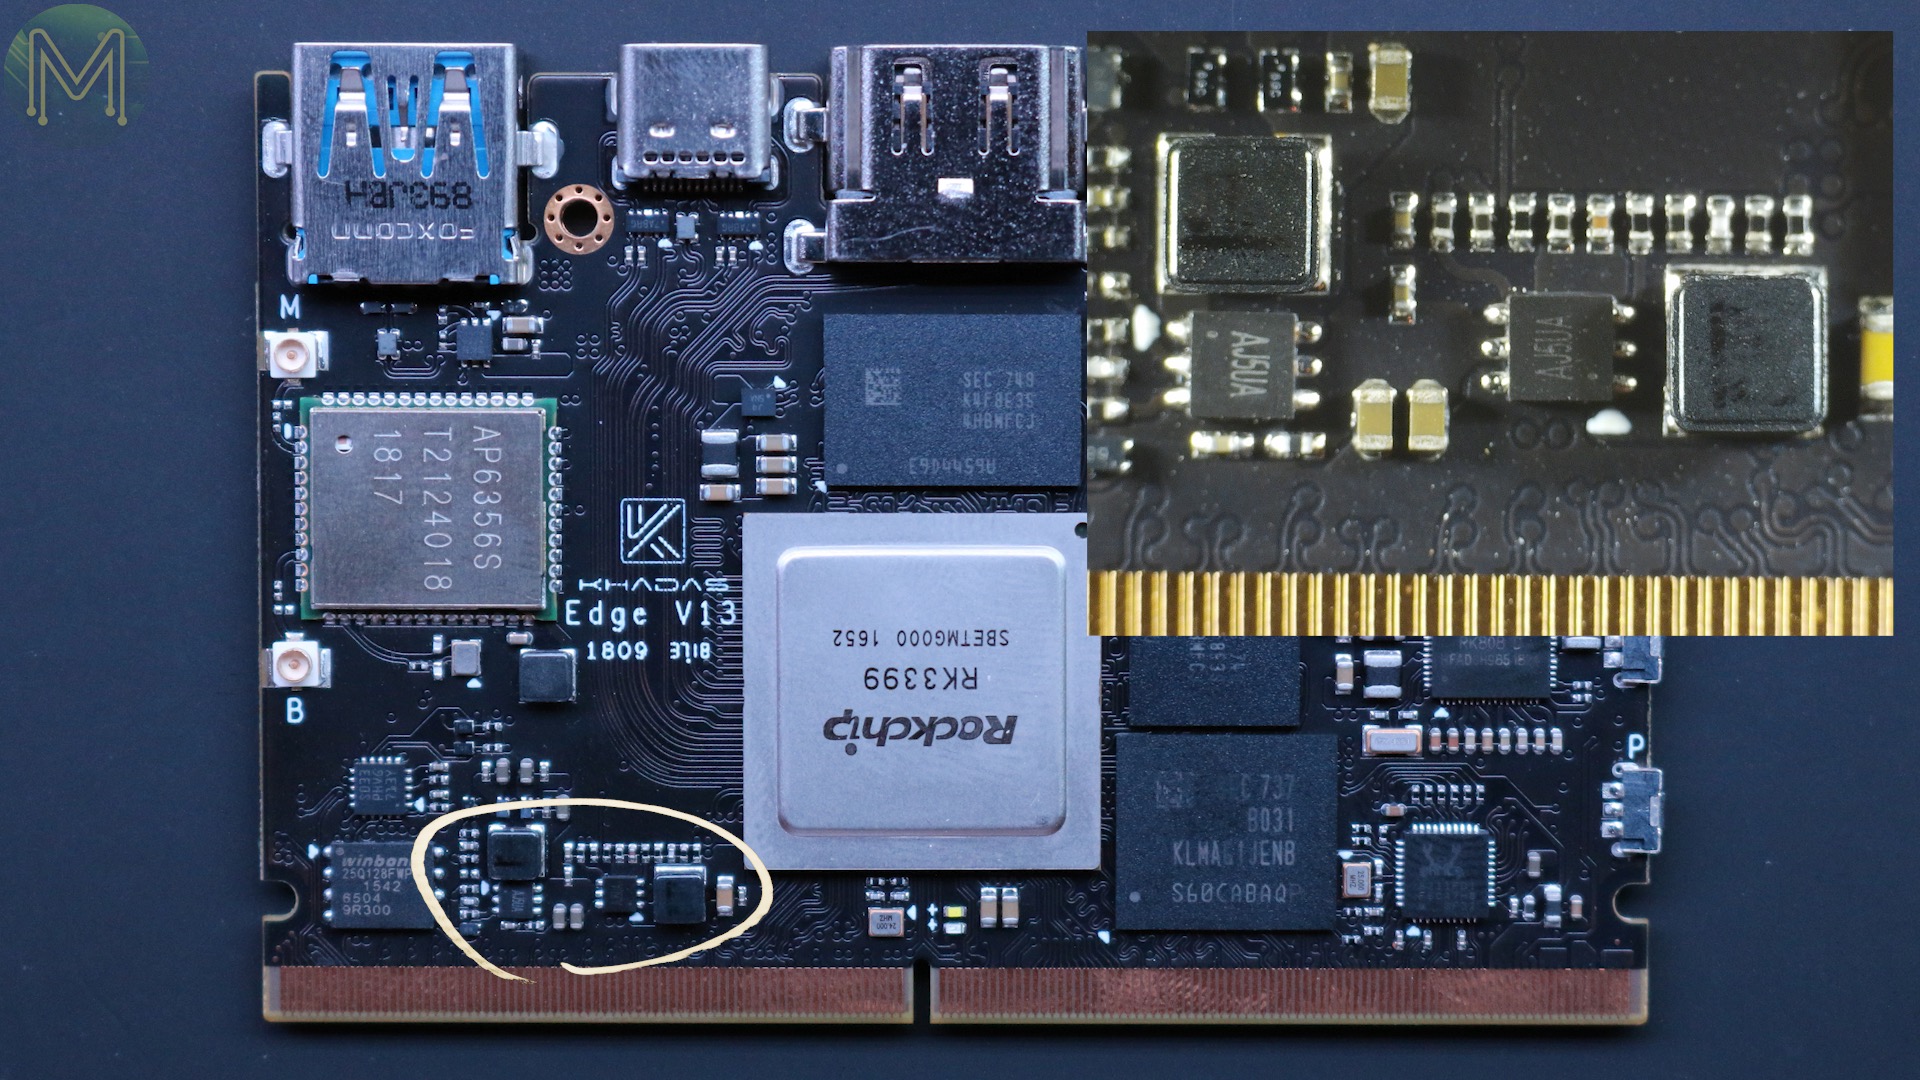
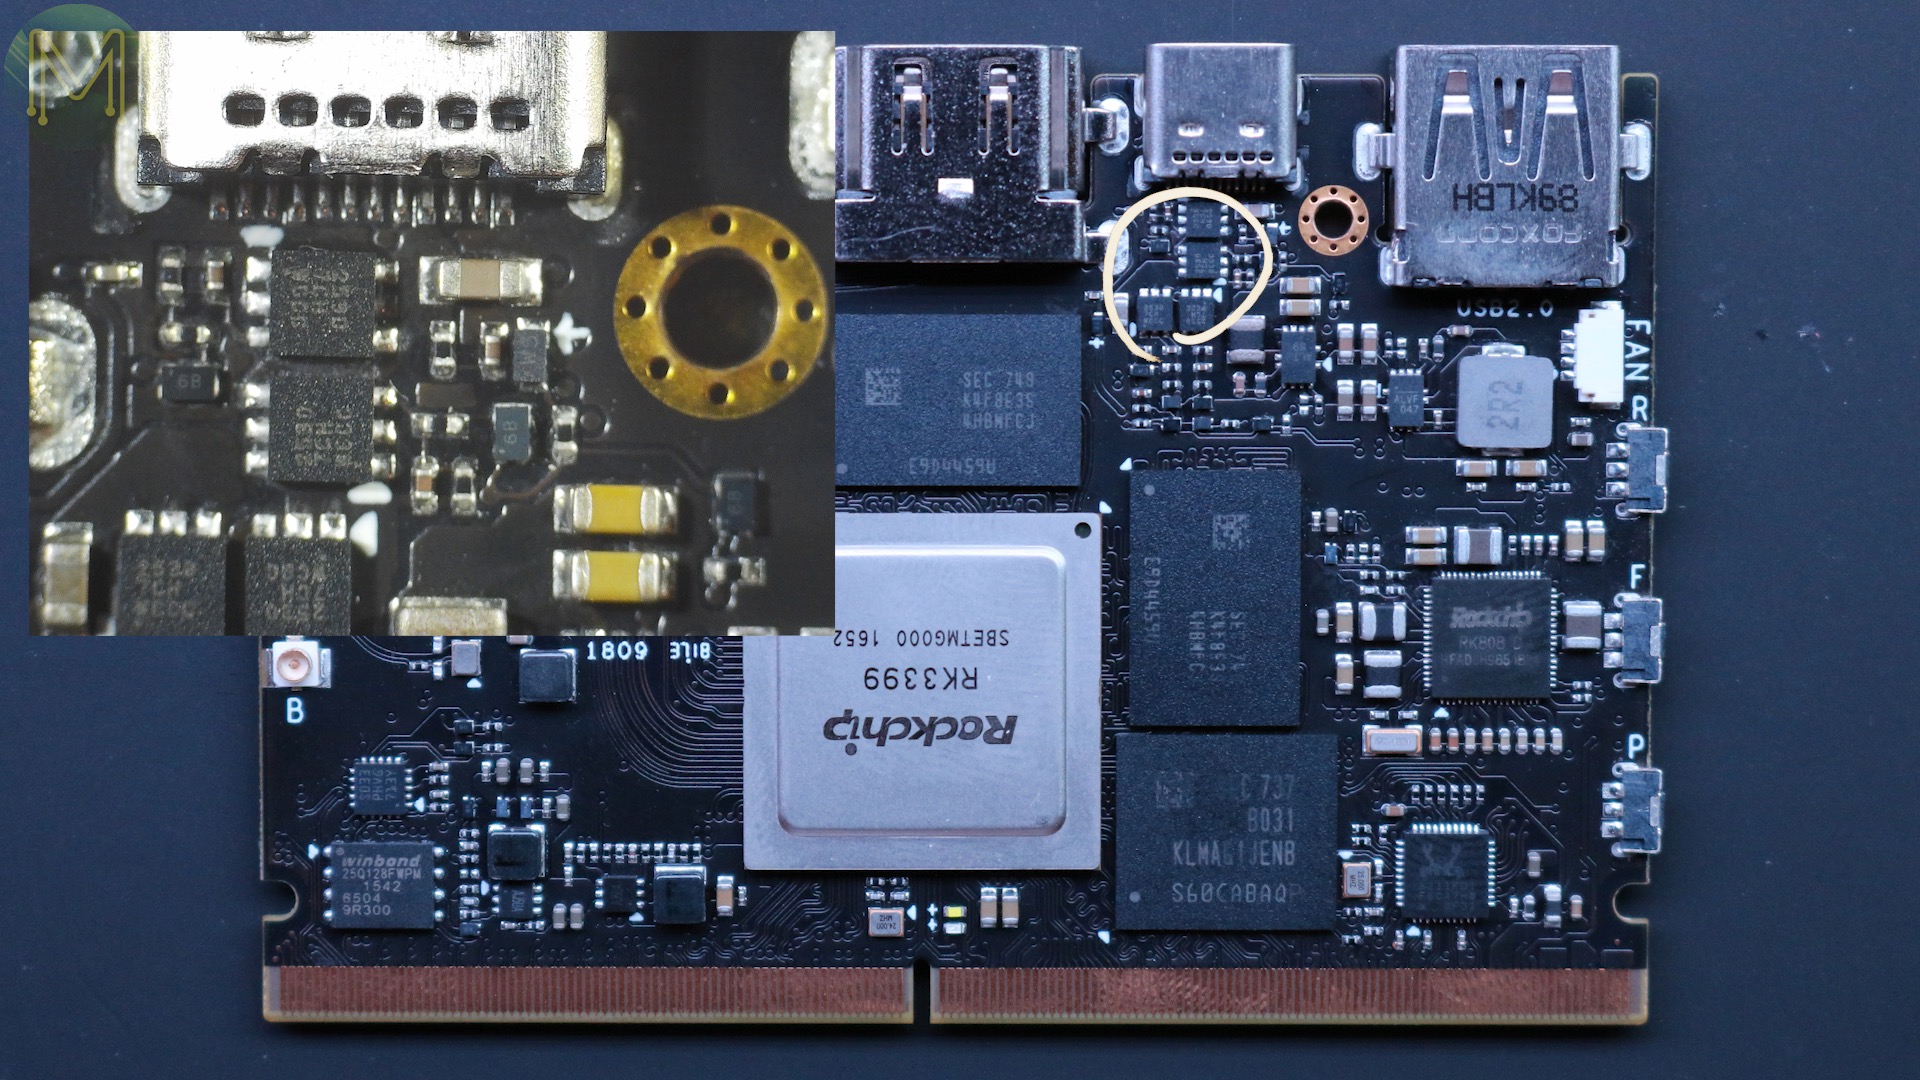
Top side ICs
Interestingly, the board can be powered from either of the USB Type C ports. Automatically switching between either of them.
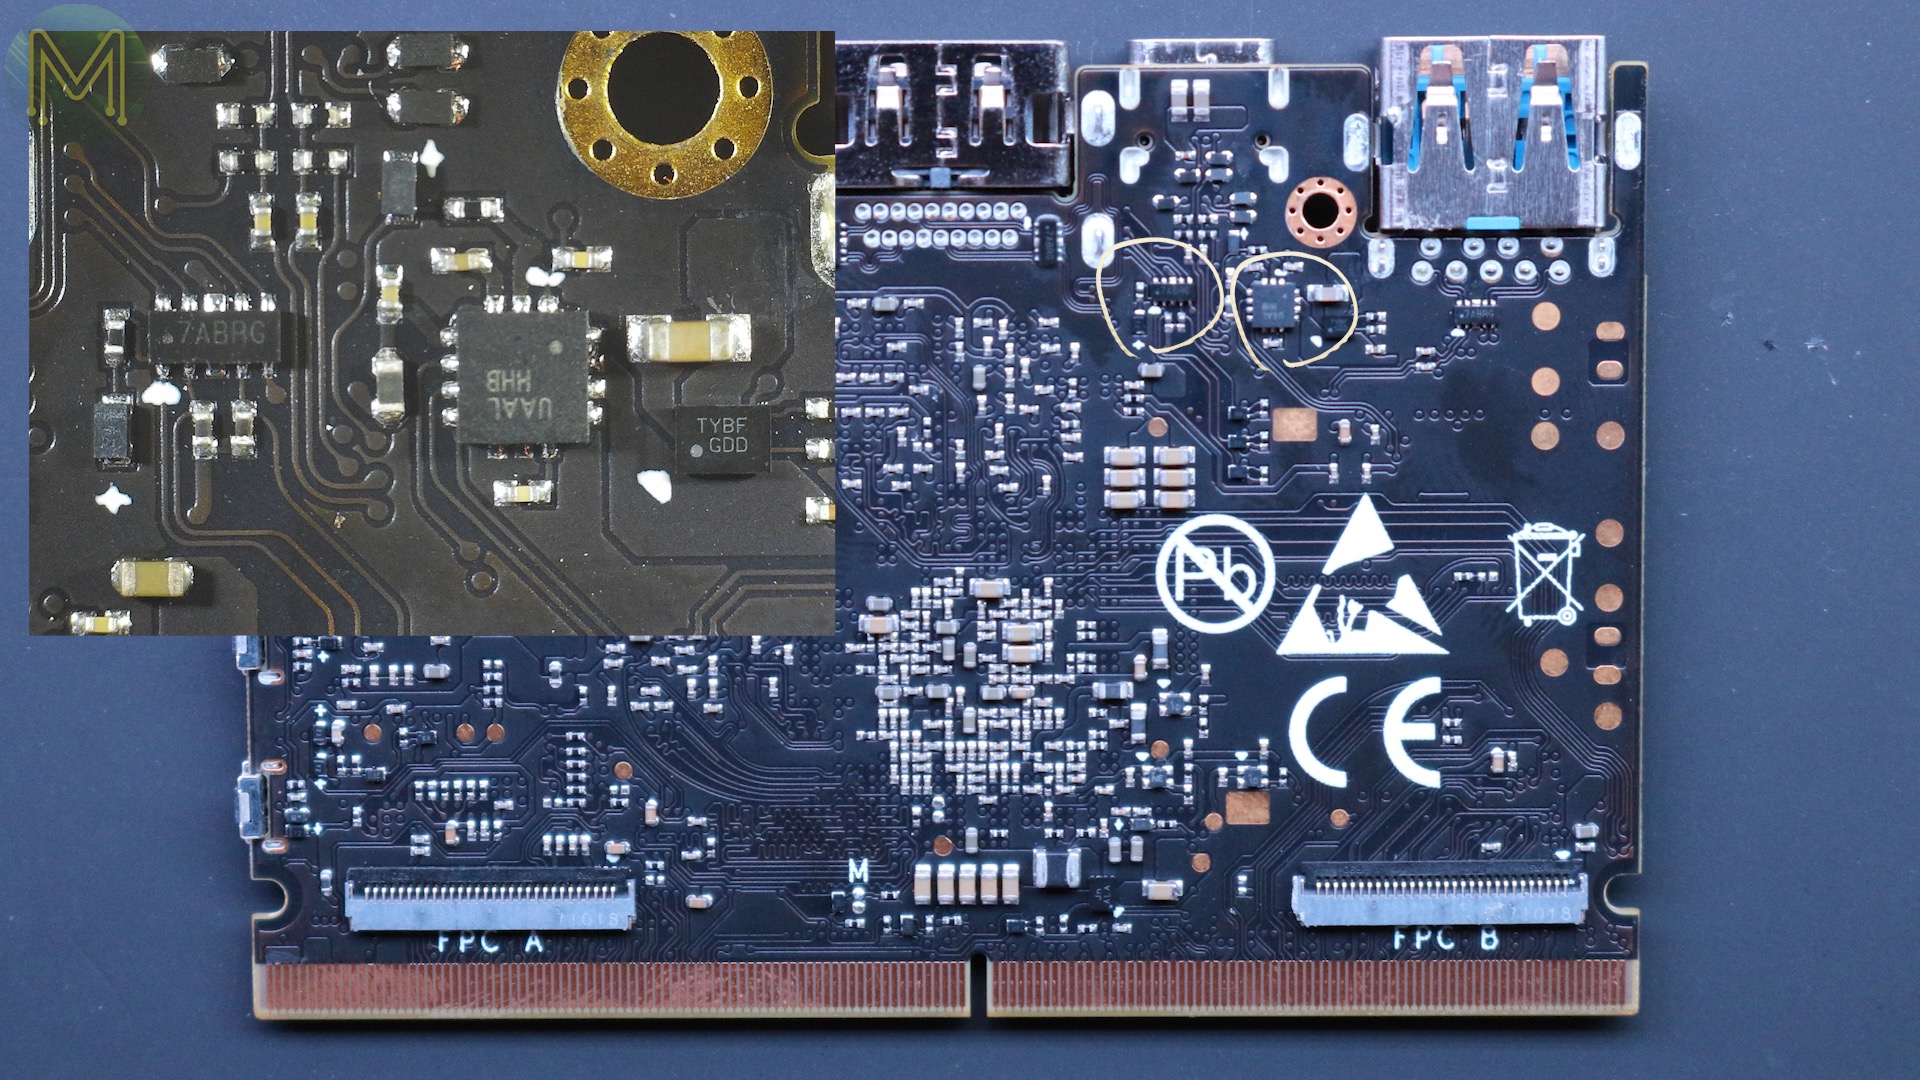
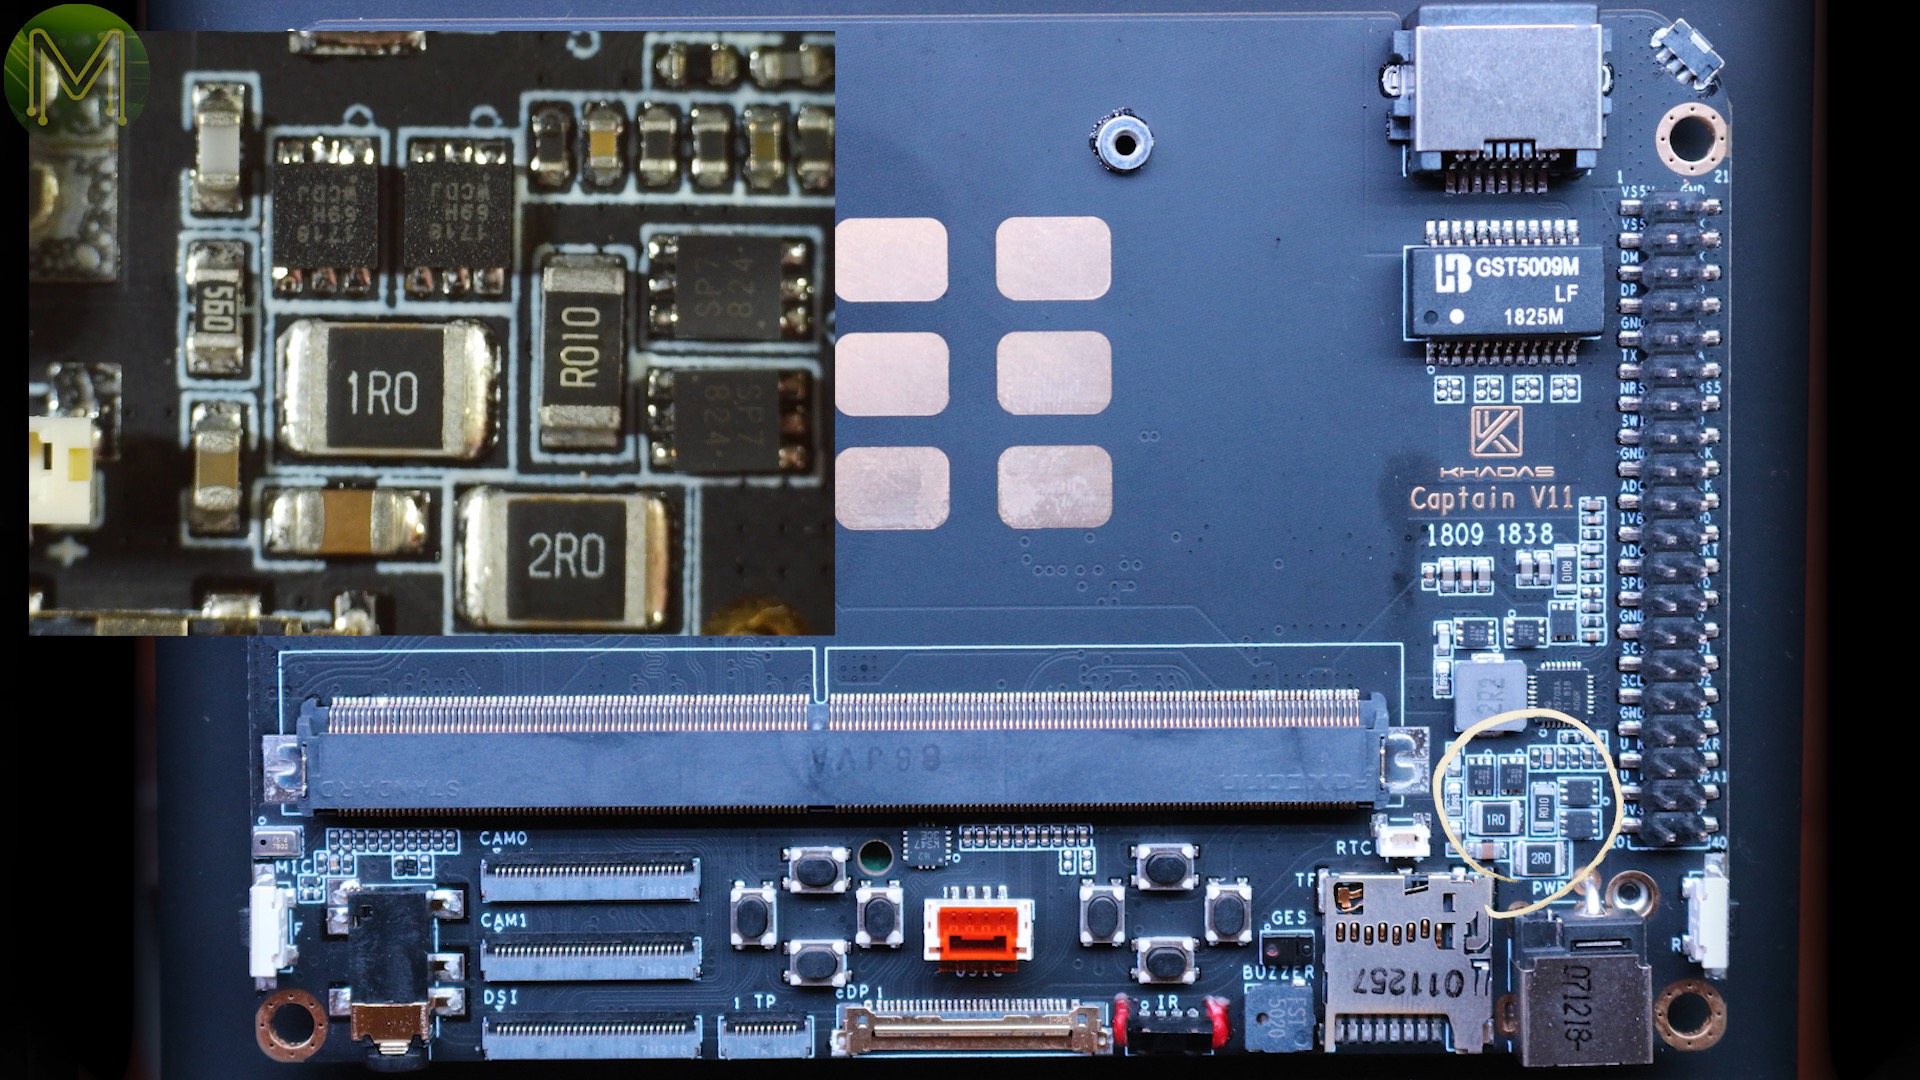
Two buck converters providing 5v, (NB679GD), and 3.3v, (NB680GD). Both buck converters can handle up to 28 volts DC input and supply up to 8A continuous and 10A maximum. They have automatic load regulation, soft start and over-voltage, over-current and over everything else protection.Then there’s the RockChip RK808 PMIC, which handles all the voltages to the CPU core. It has 4 DC buck converters, 8 linear regulators, two MoSFET switches and all controlled over I2C.Then the Realtek GbE transceiver - RTL8211FDI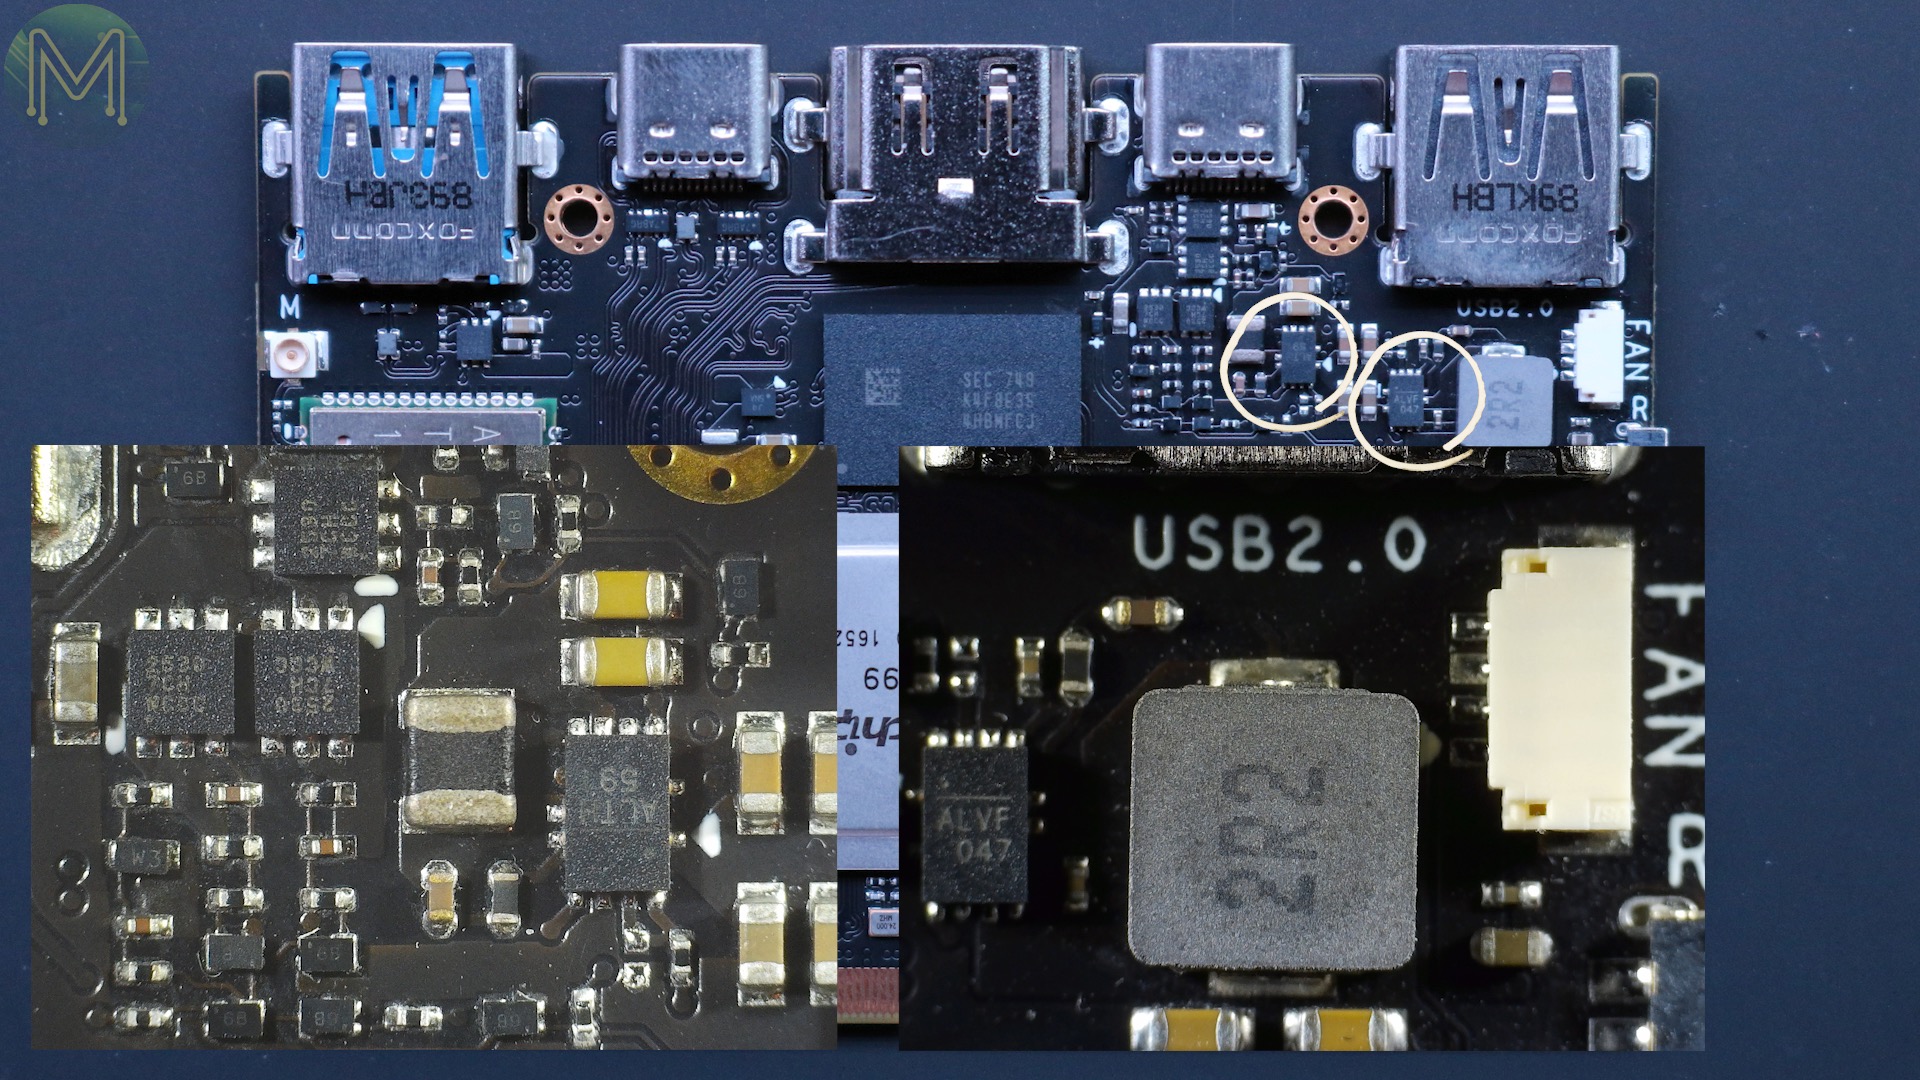

16GB eMMC - KLMAG1JENB-B031
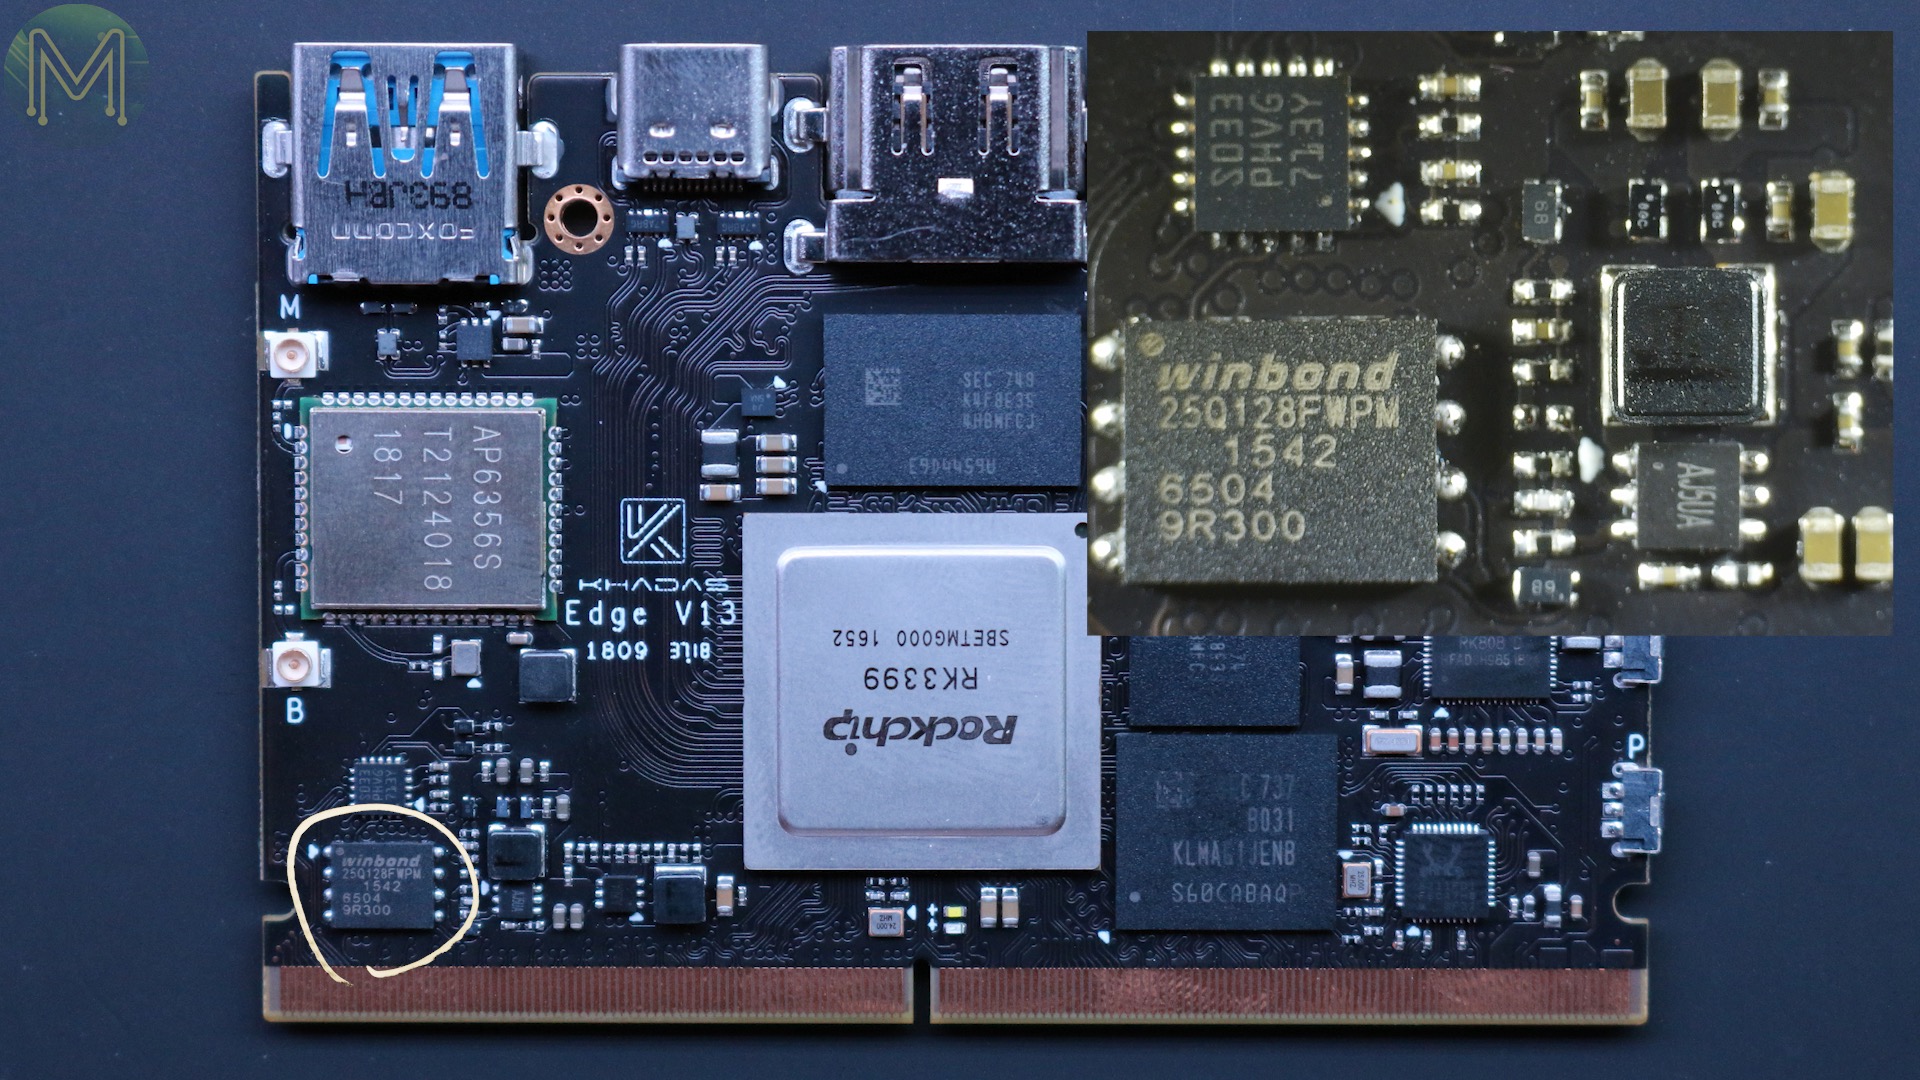
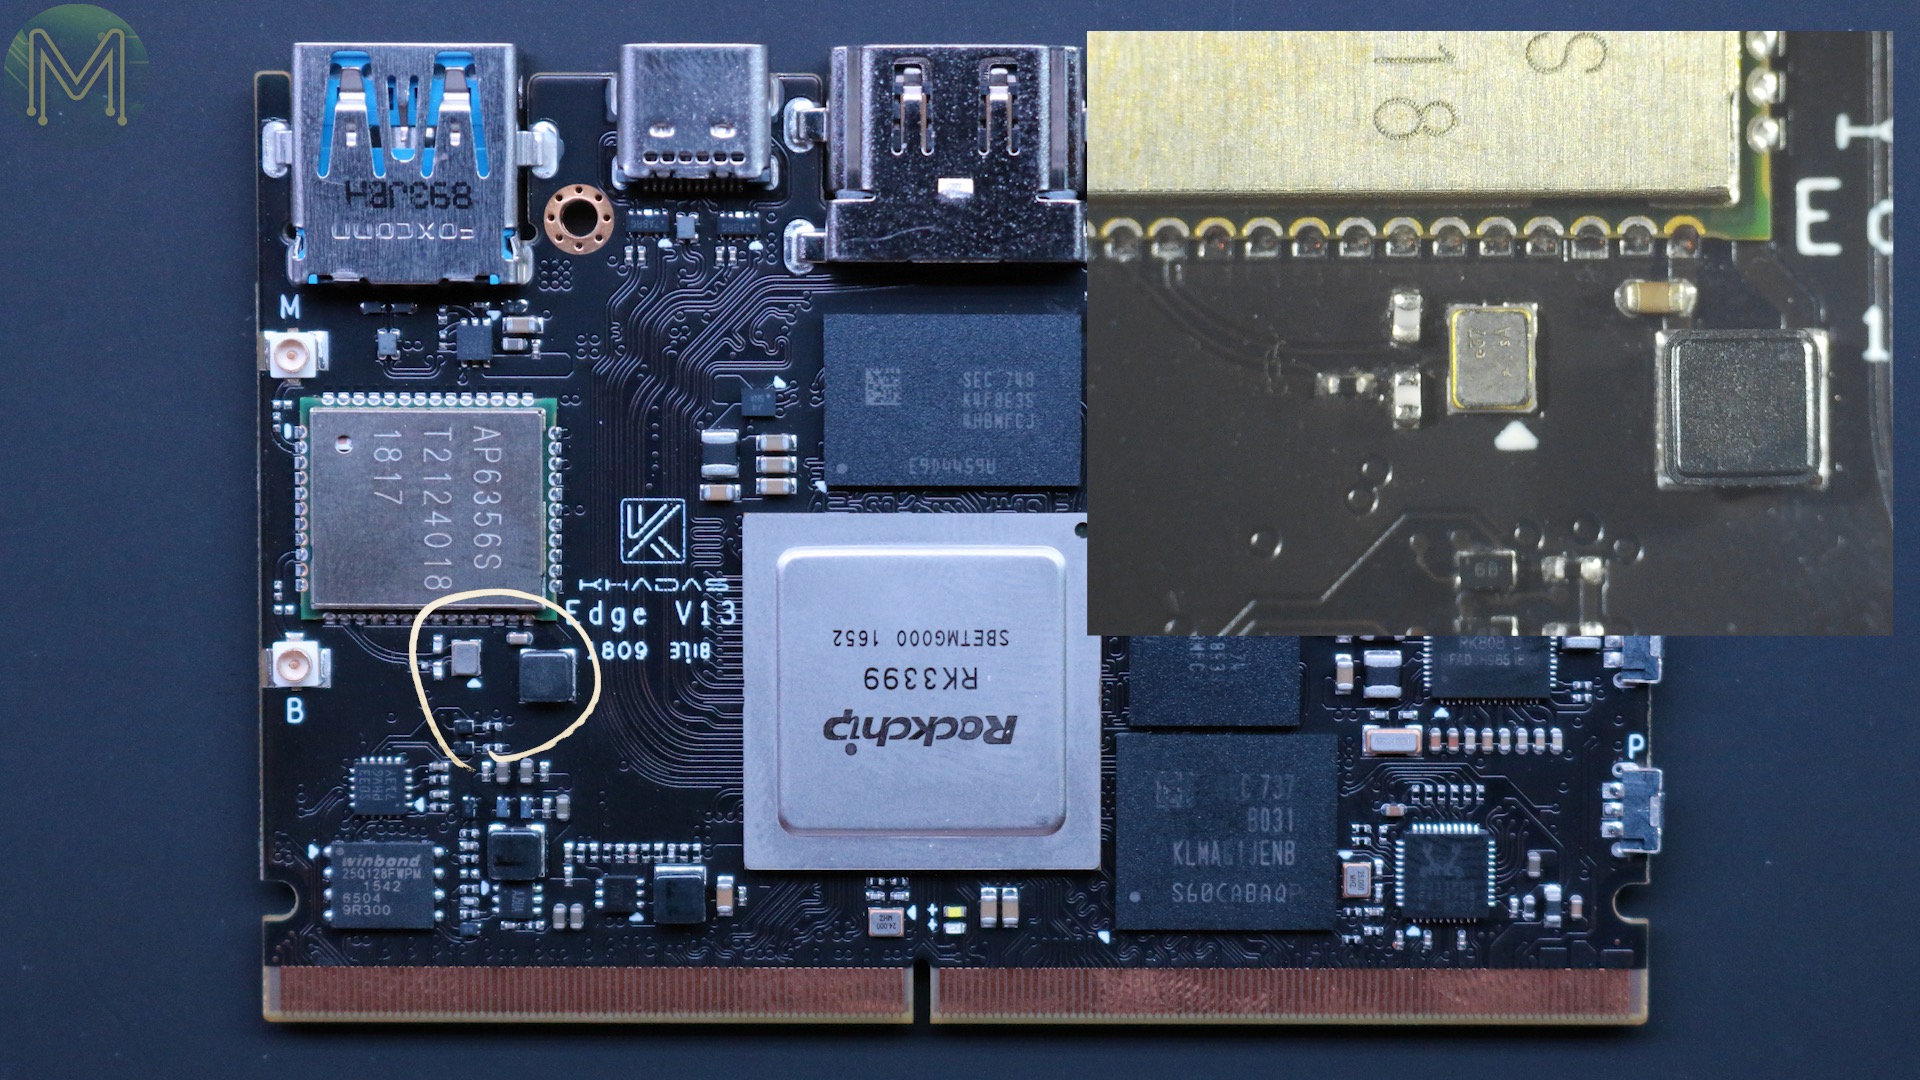
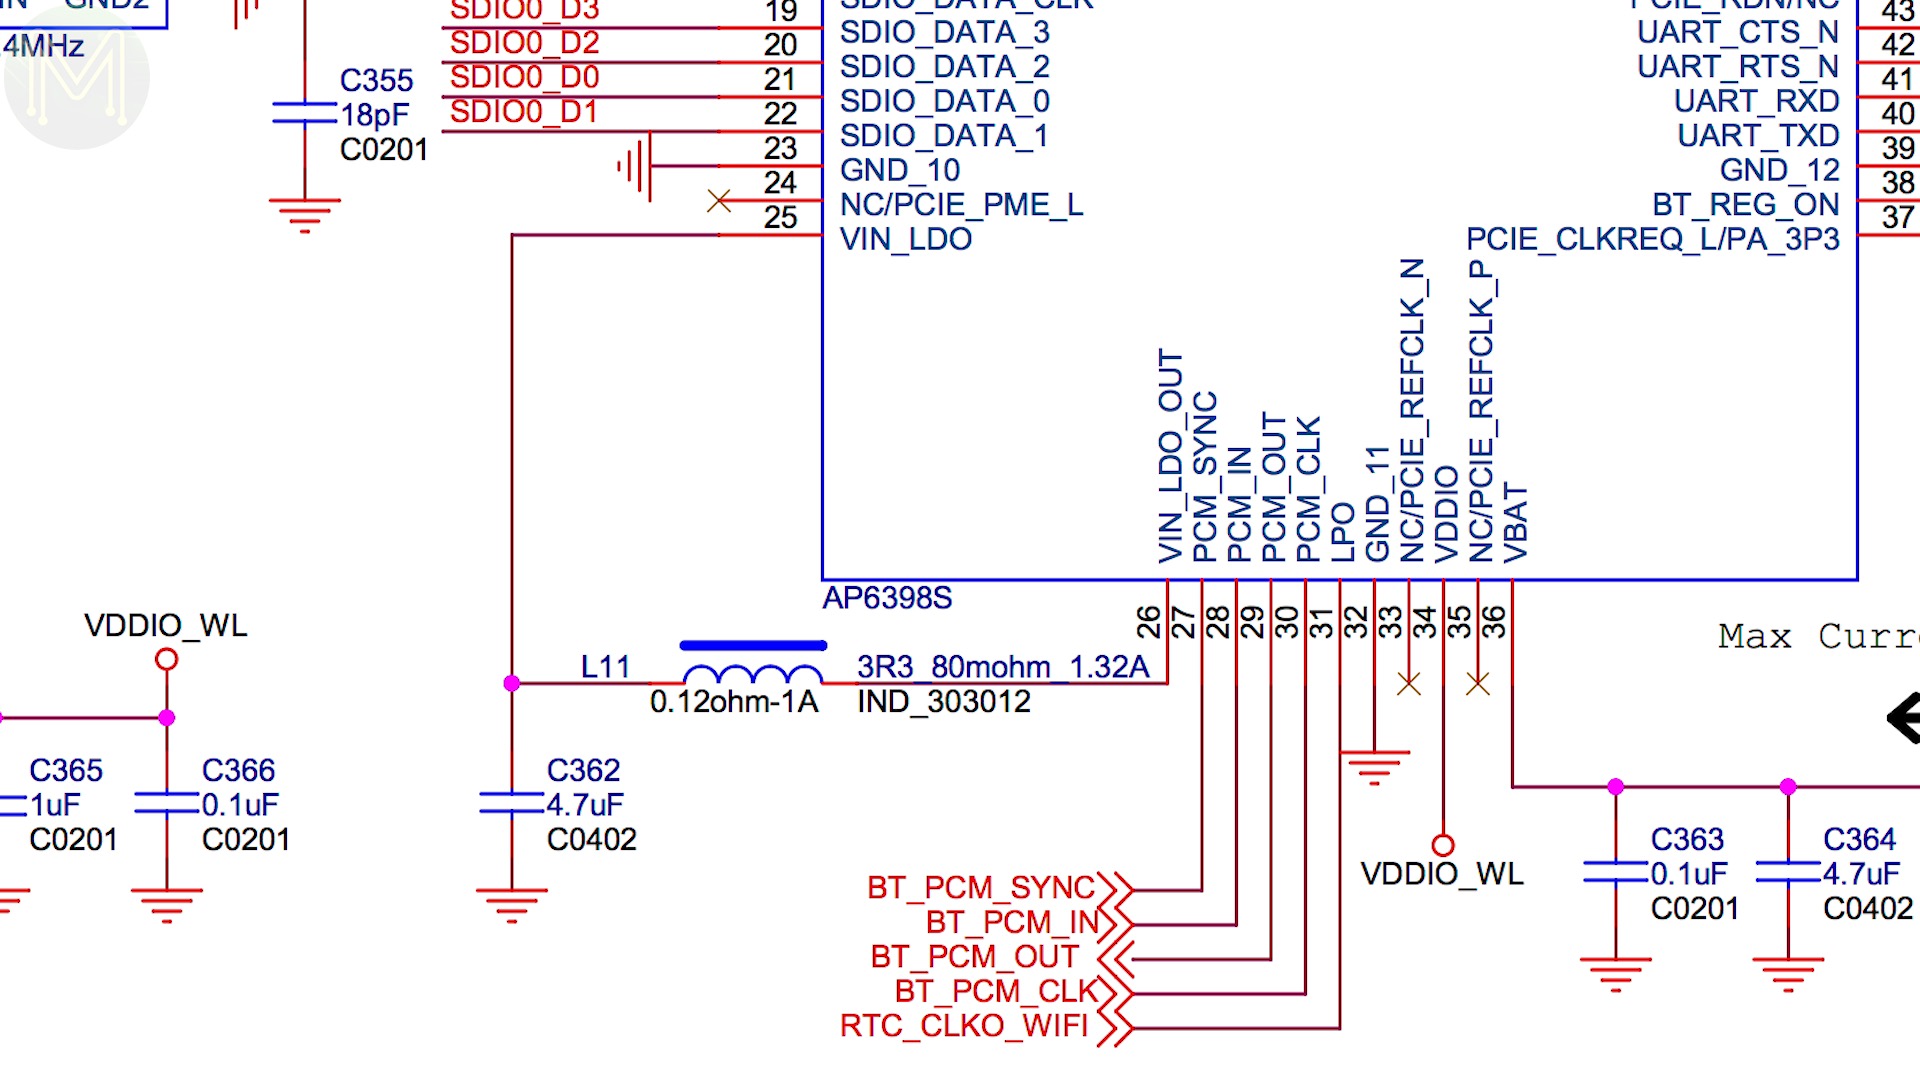
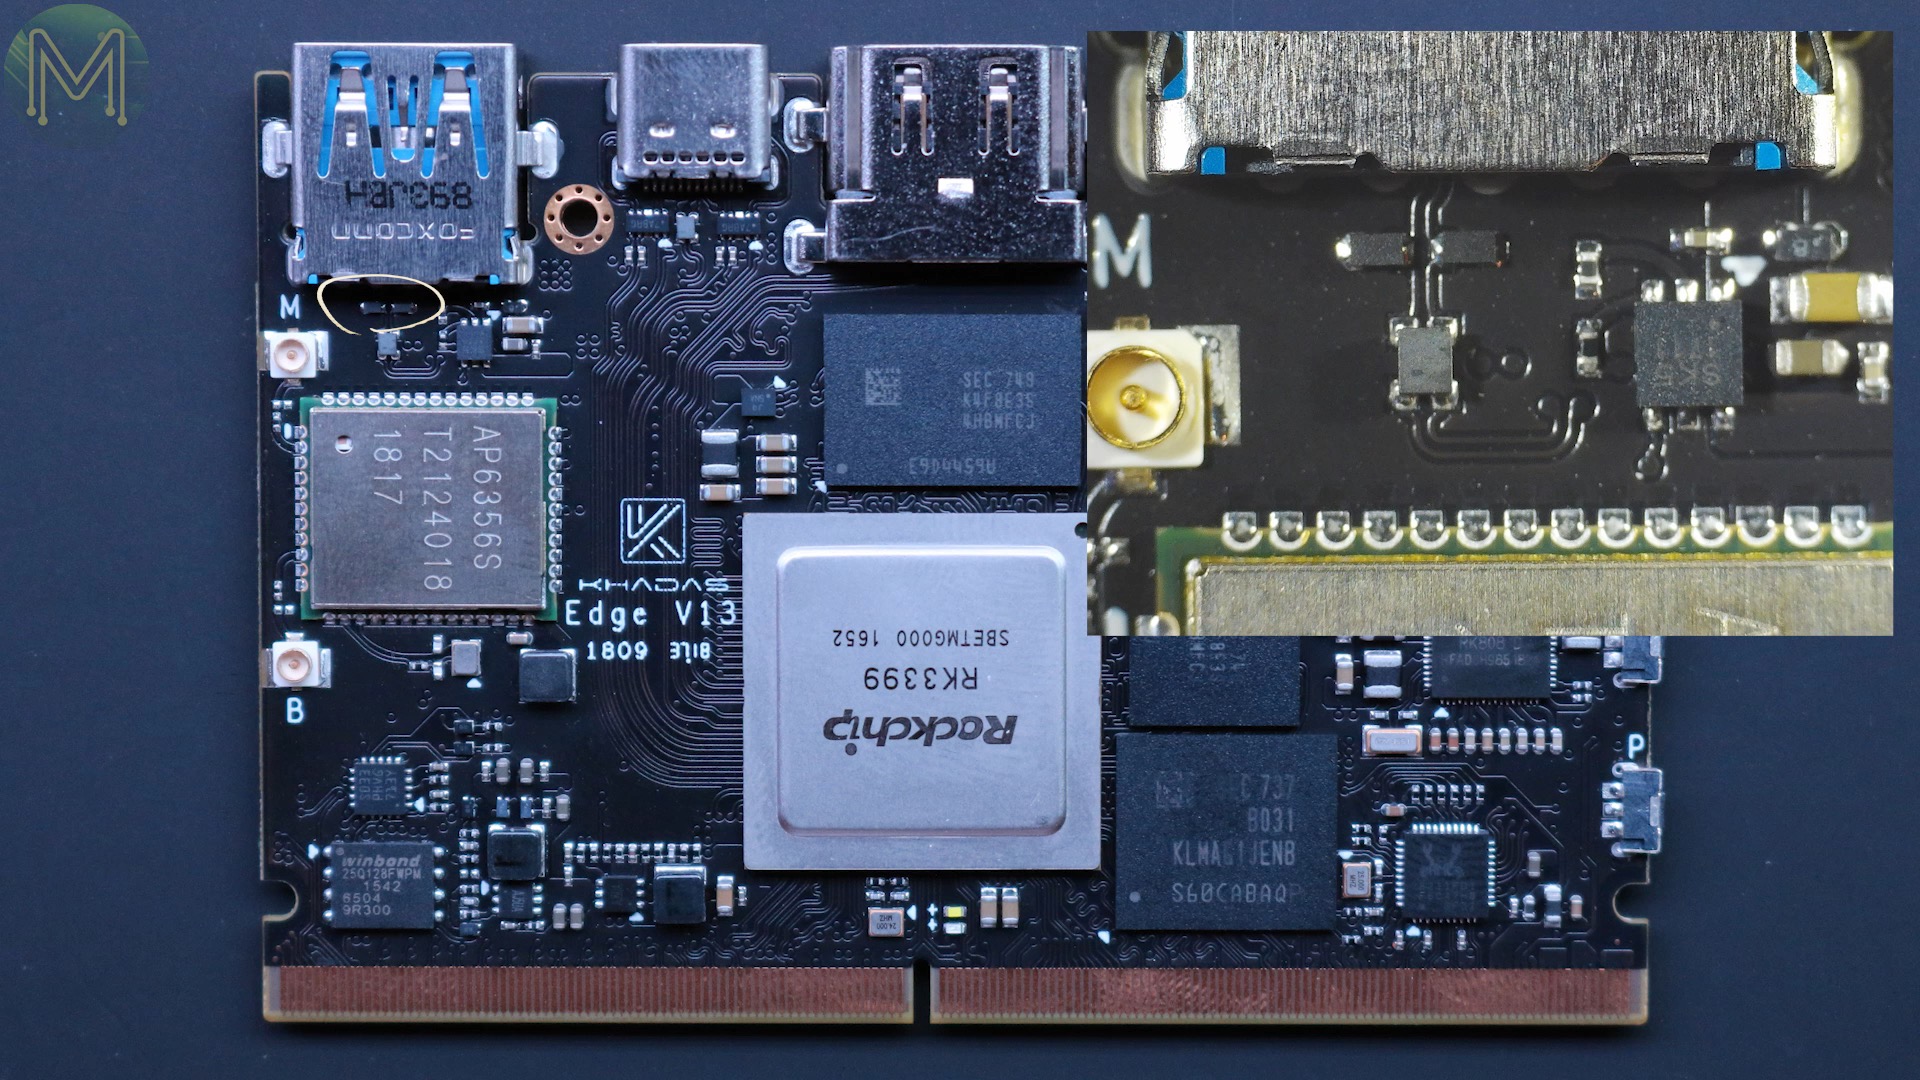
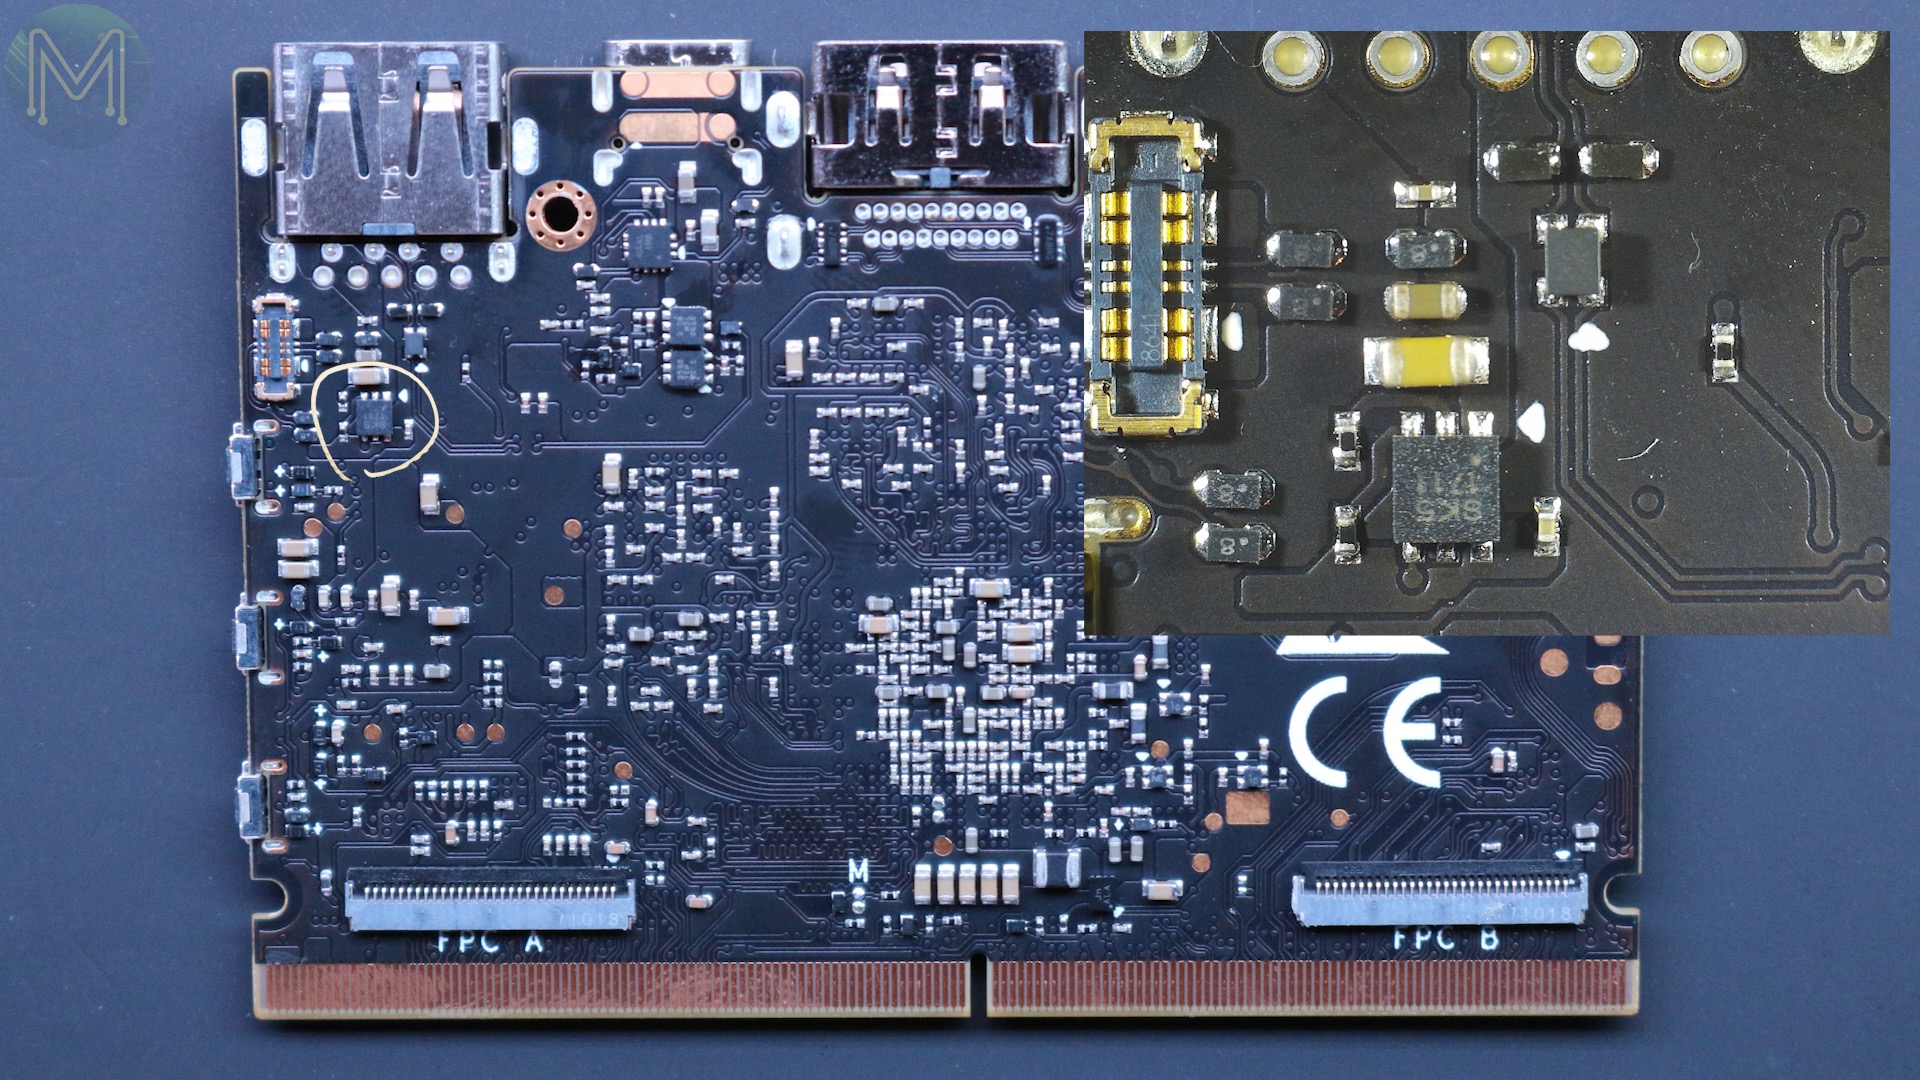
And as you’ll see there’s a heck of a lot of crystals on this board.A couple of unknowns; either some MoSFETs or Chinese spy chips.64Mbit Quad SPI flash from Winbond, (25q128fwpm), and interestingly an STM8S003, which, looking at the schematic handles all the logic over Wake On LAN, PMIC power, reset and booting, LEDs, buttons and Infra-red. As we’ll find out later, this is accessible on one of the I2C buses and acts as both a master and slave.Another couple of crystals.And a WiFi and Bluetooth module based on the ineffable AP6356S.Interestingly, the schematic says that it should be an AP6398S, so gathering that these are interchangeable, but can’t find any data sheets on that module.Then there’s some USB ESD protection, (ESD5451N), line filter, (CUWI11T-900Y), and load switch, (SGM2551A), with adjustable current limit from 100mA to 1.7A.6 channel ESD protection for one of the USB Type C ports, (TPD4E05U06), and another line filter, (CUWI11T-900Y).And pretty sure these are some P-Channel MOSFETs, (CSD25310Q2).


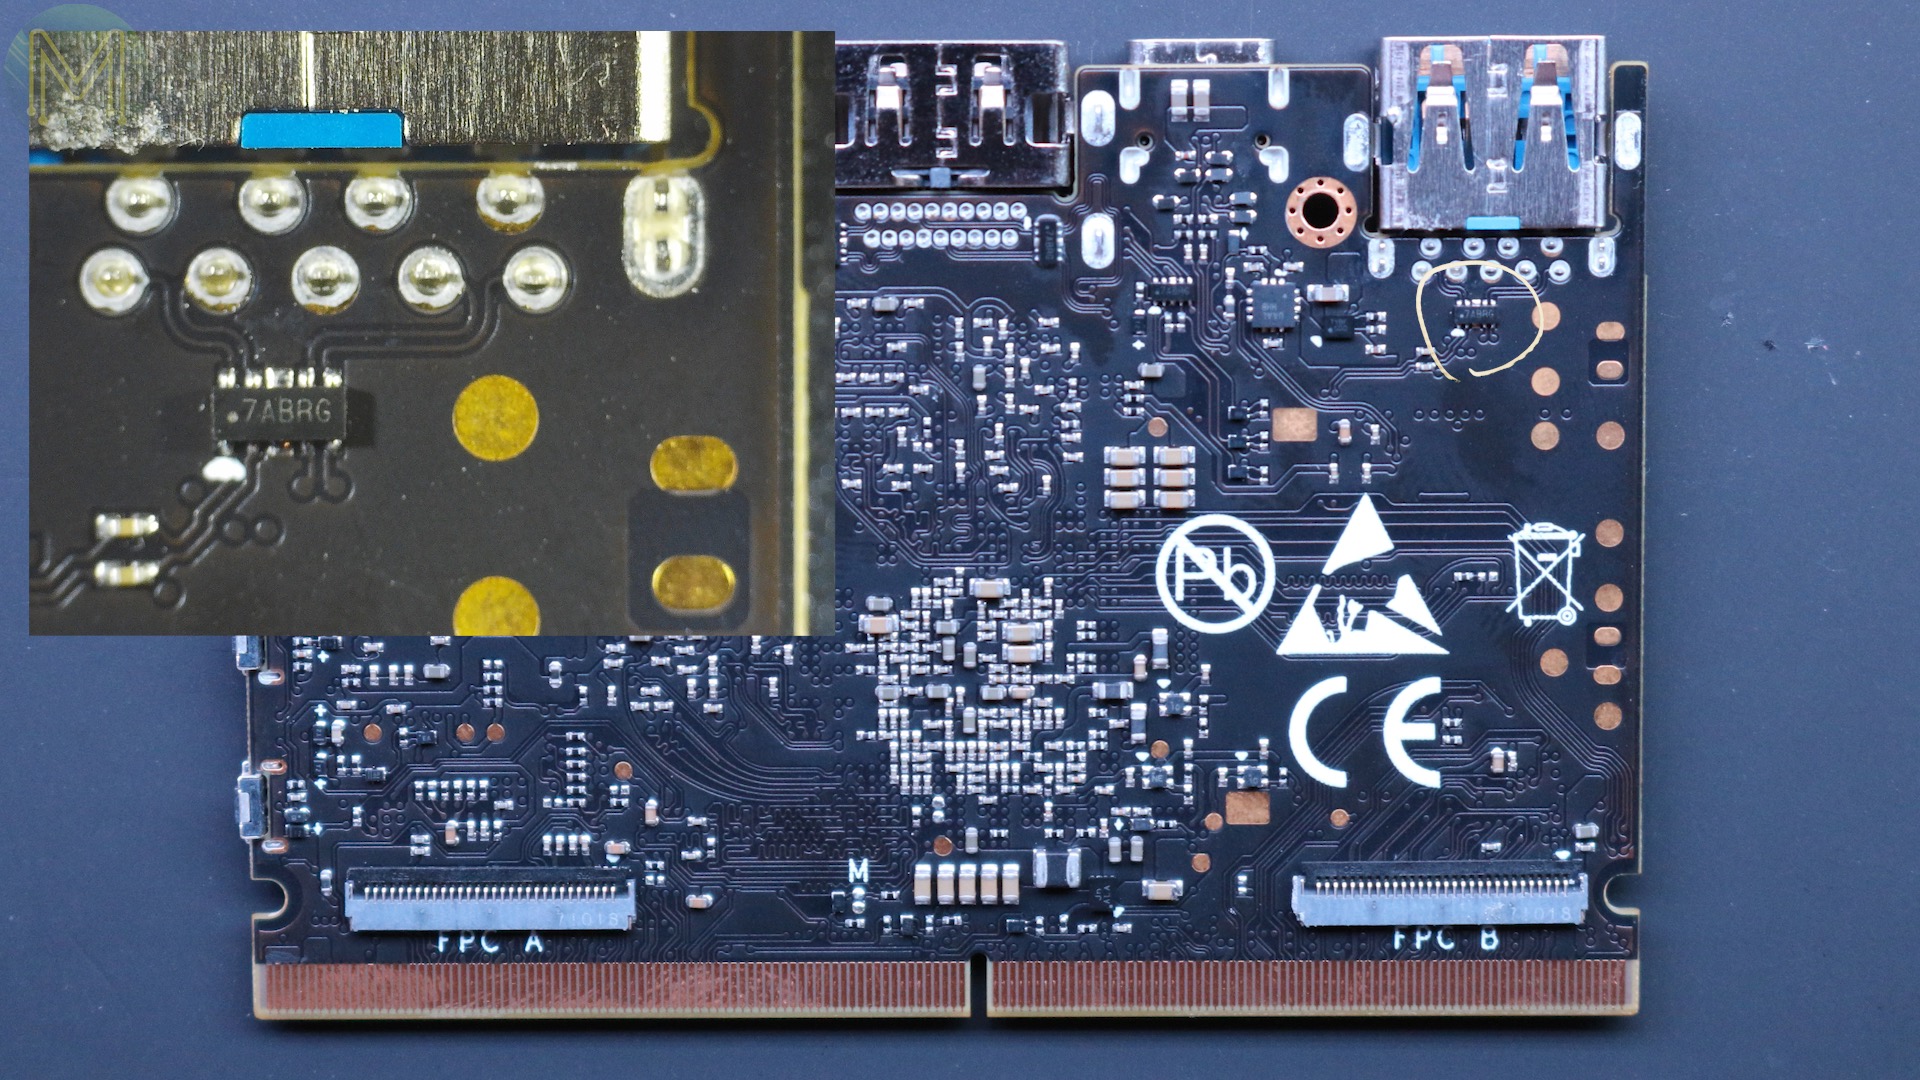
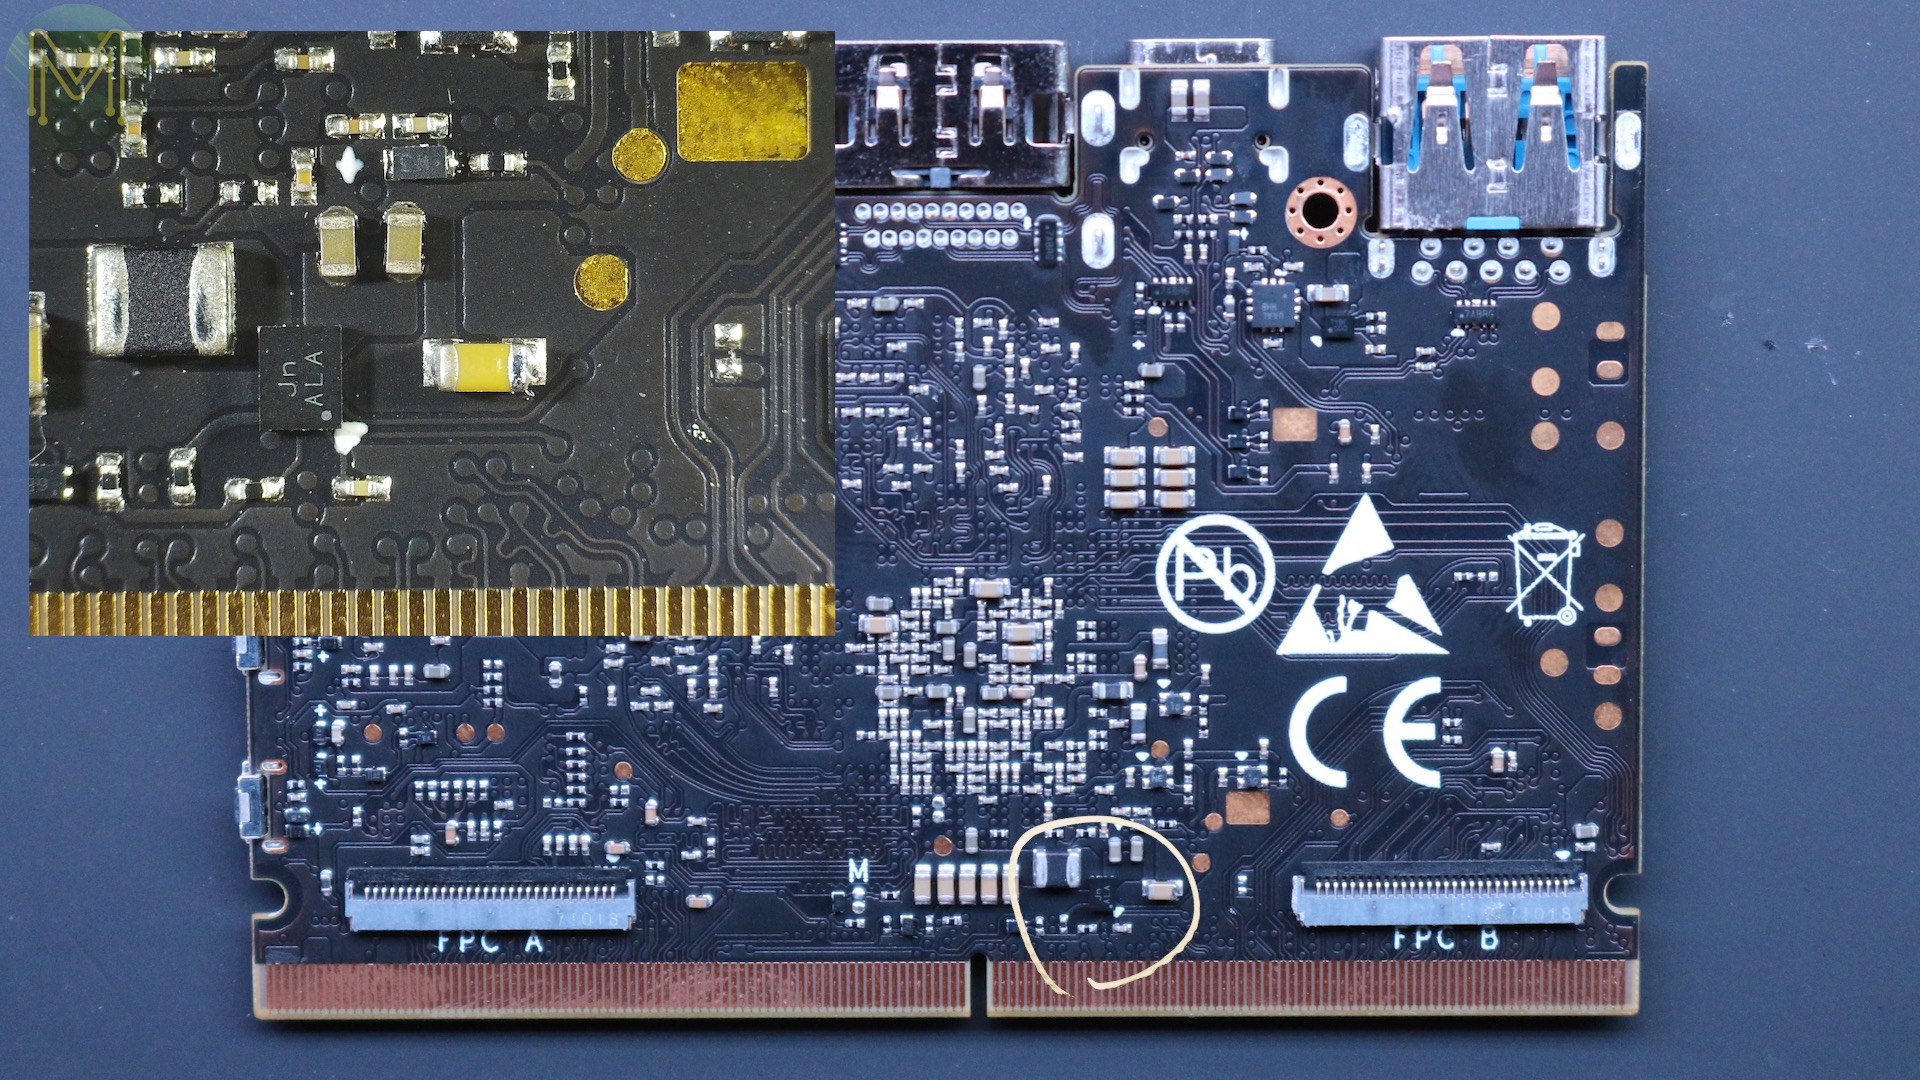
The Edge - dark side
Meanwhile, on the dark side of the board, we have two FPC connectors for GPIO expansion.And not else besides a few more 6 channel ESD protection for the USB 3.0 port, (TPD4E05U06), and a few more unknowns.A 28v 3.9A load switch with all sorts of over-voltage and over-current protection, (SGM2551A).Some more 6 channel ESD protection for the USB Type C port, (TPD4E05U06).Programmable USB Type C controller with PD and accessible on the I2C bus, (FUSB302B).And even more 6 channel ESD protection for the second USB Type C port, (TPD4E05U06), and USB Type C PD controller, (FUSB302B).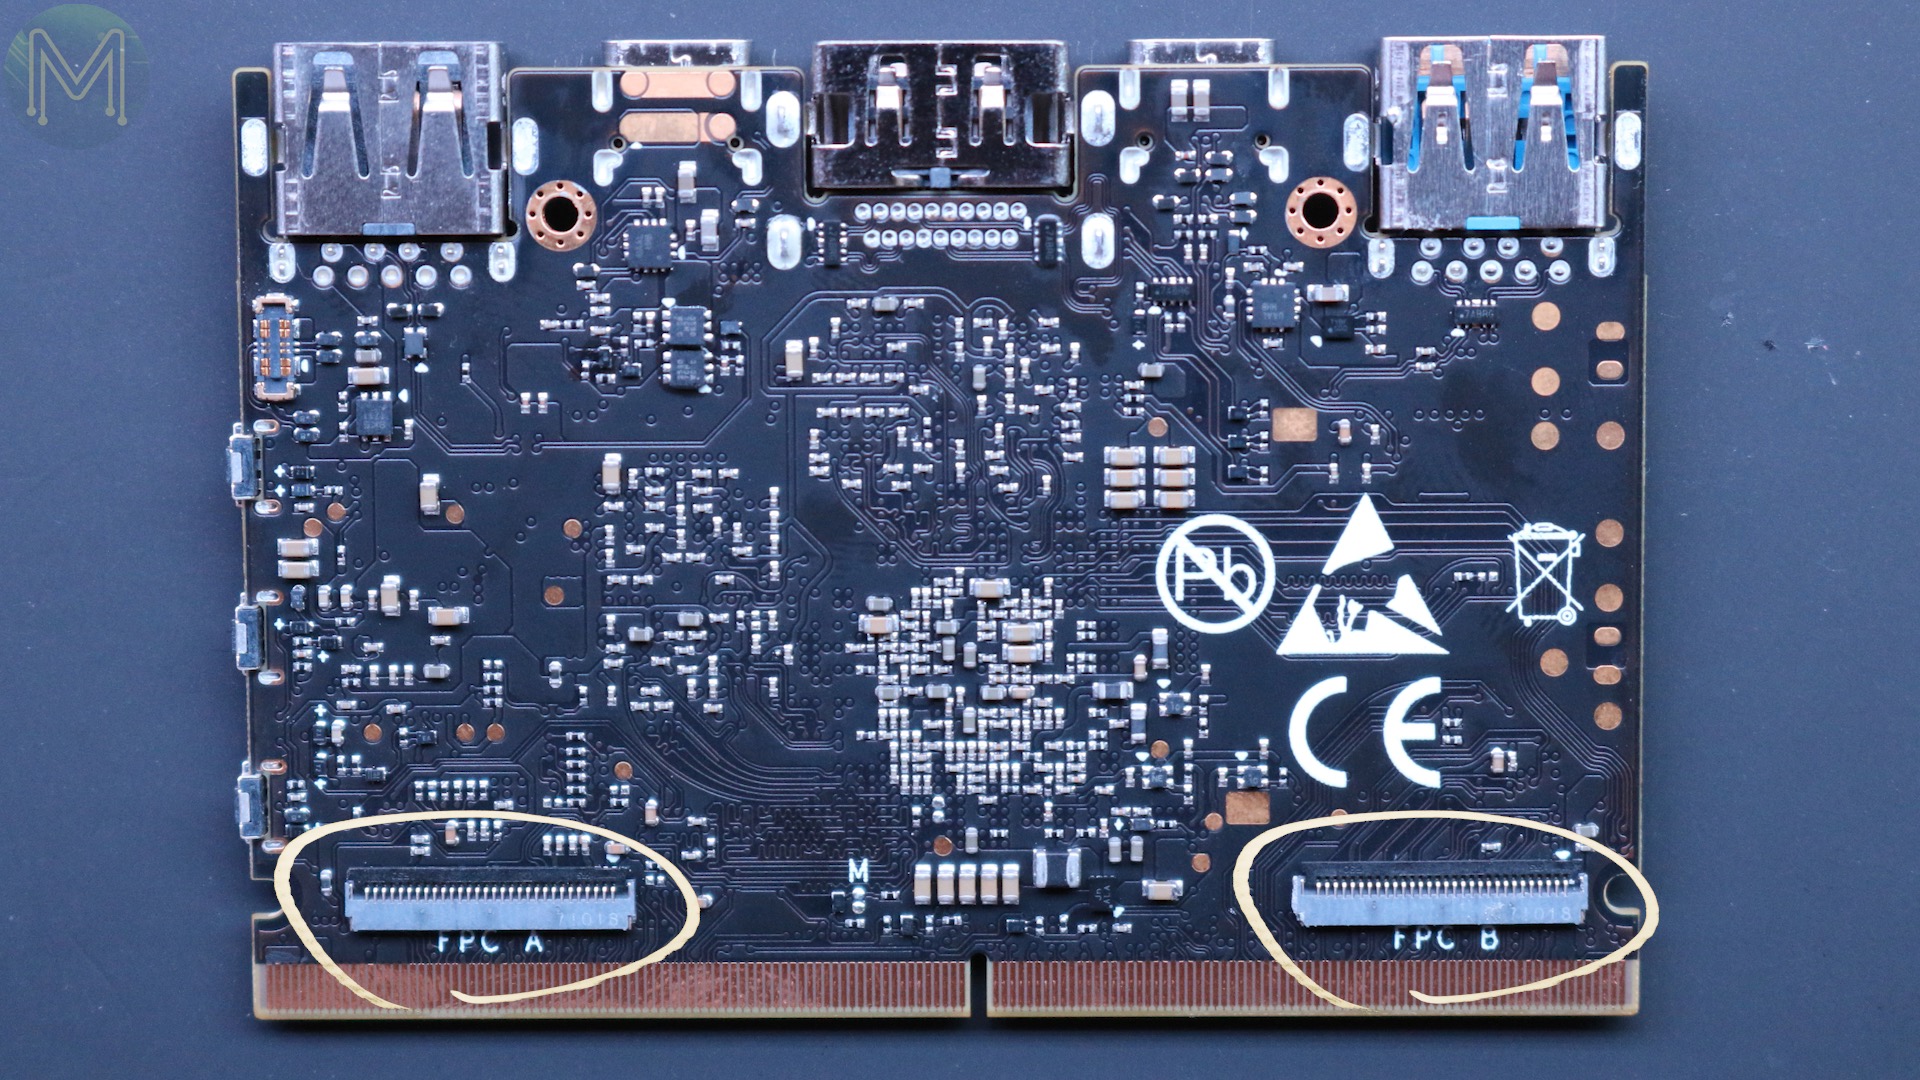


The Captain top side
Moving on to the Captain, we have …
- User accessible button on the corner
- 40 pin GPIO header, which is absolutely NOT Pi compatible, for so many reasons.
- Reset button, which mirrors the one on the Edge.
- 12v DC jack
- SD card slot
- Some buttons to mash
- Display Port connector
- Touch panel interface
- Some more buttons
- Two MIPI-CSI and
- one MIPI-DSI connector
- Audio jack
- Function button mirroring the Edge.
- MXM3 edge connector
- Another user accessible button
- and GbE port
The Captain ICs
And splattered throughout the board we have a few interesting semiconductors.
GbE isolation coils - GST5009MA buck/boost battery charge controller, (BQ25703A), supporting multiple batter chemistries. It can provide a steady 4.48 to 20.8v DC output at up to 6.35A from a 3.5 to 24v DC input.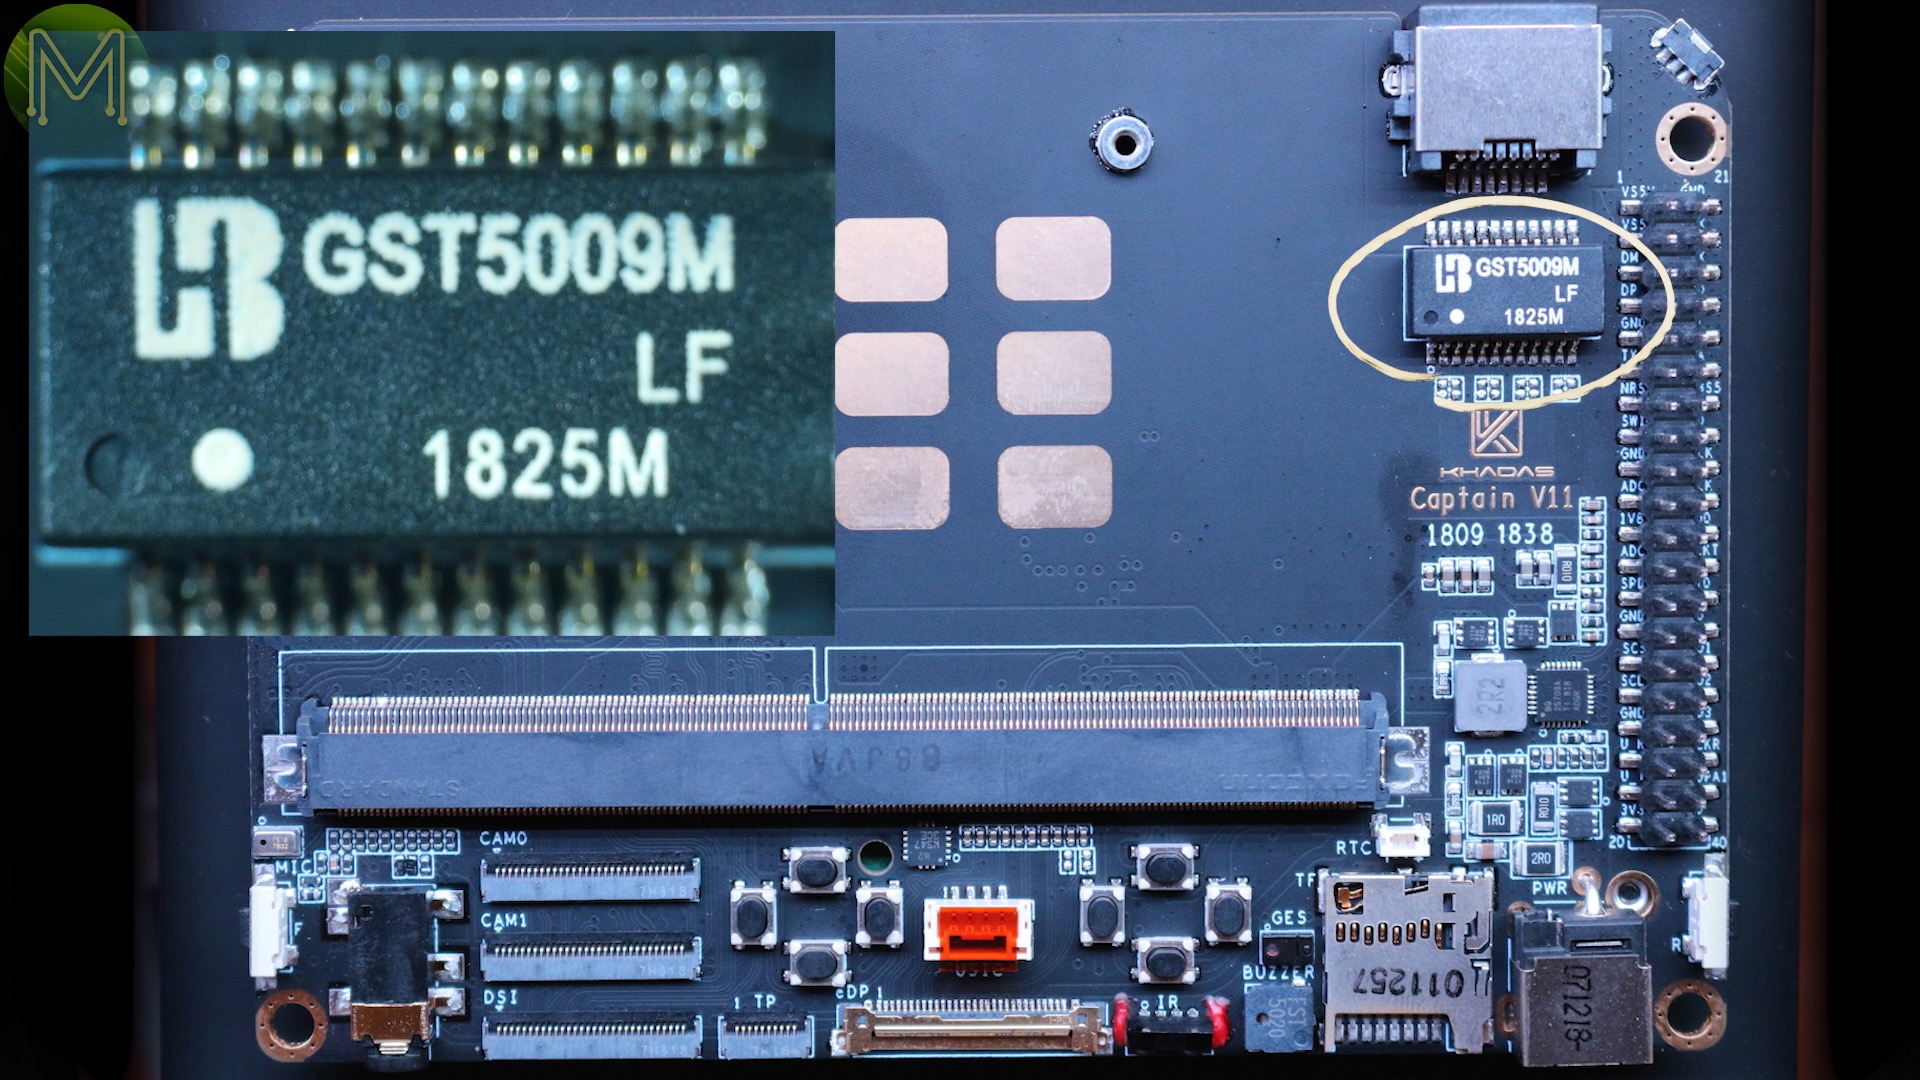

The output is fully USB 2.0, 3.0 and Type C PD compatible and has all the usual protection circuitry you’d expect these days. You can select the DC buck oscillator frequency from 800kHz to 1.2MHz, but gathering from the 2.2uH inductor it’s running at 800kHz.
As we’ll find out later, it’s also fully visible on the I2C bus.
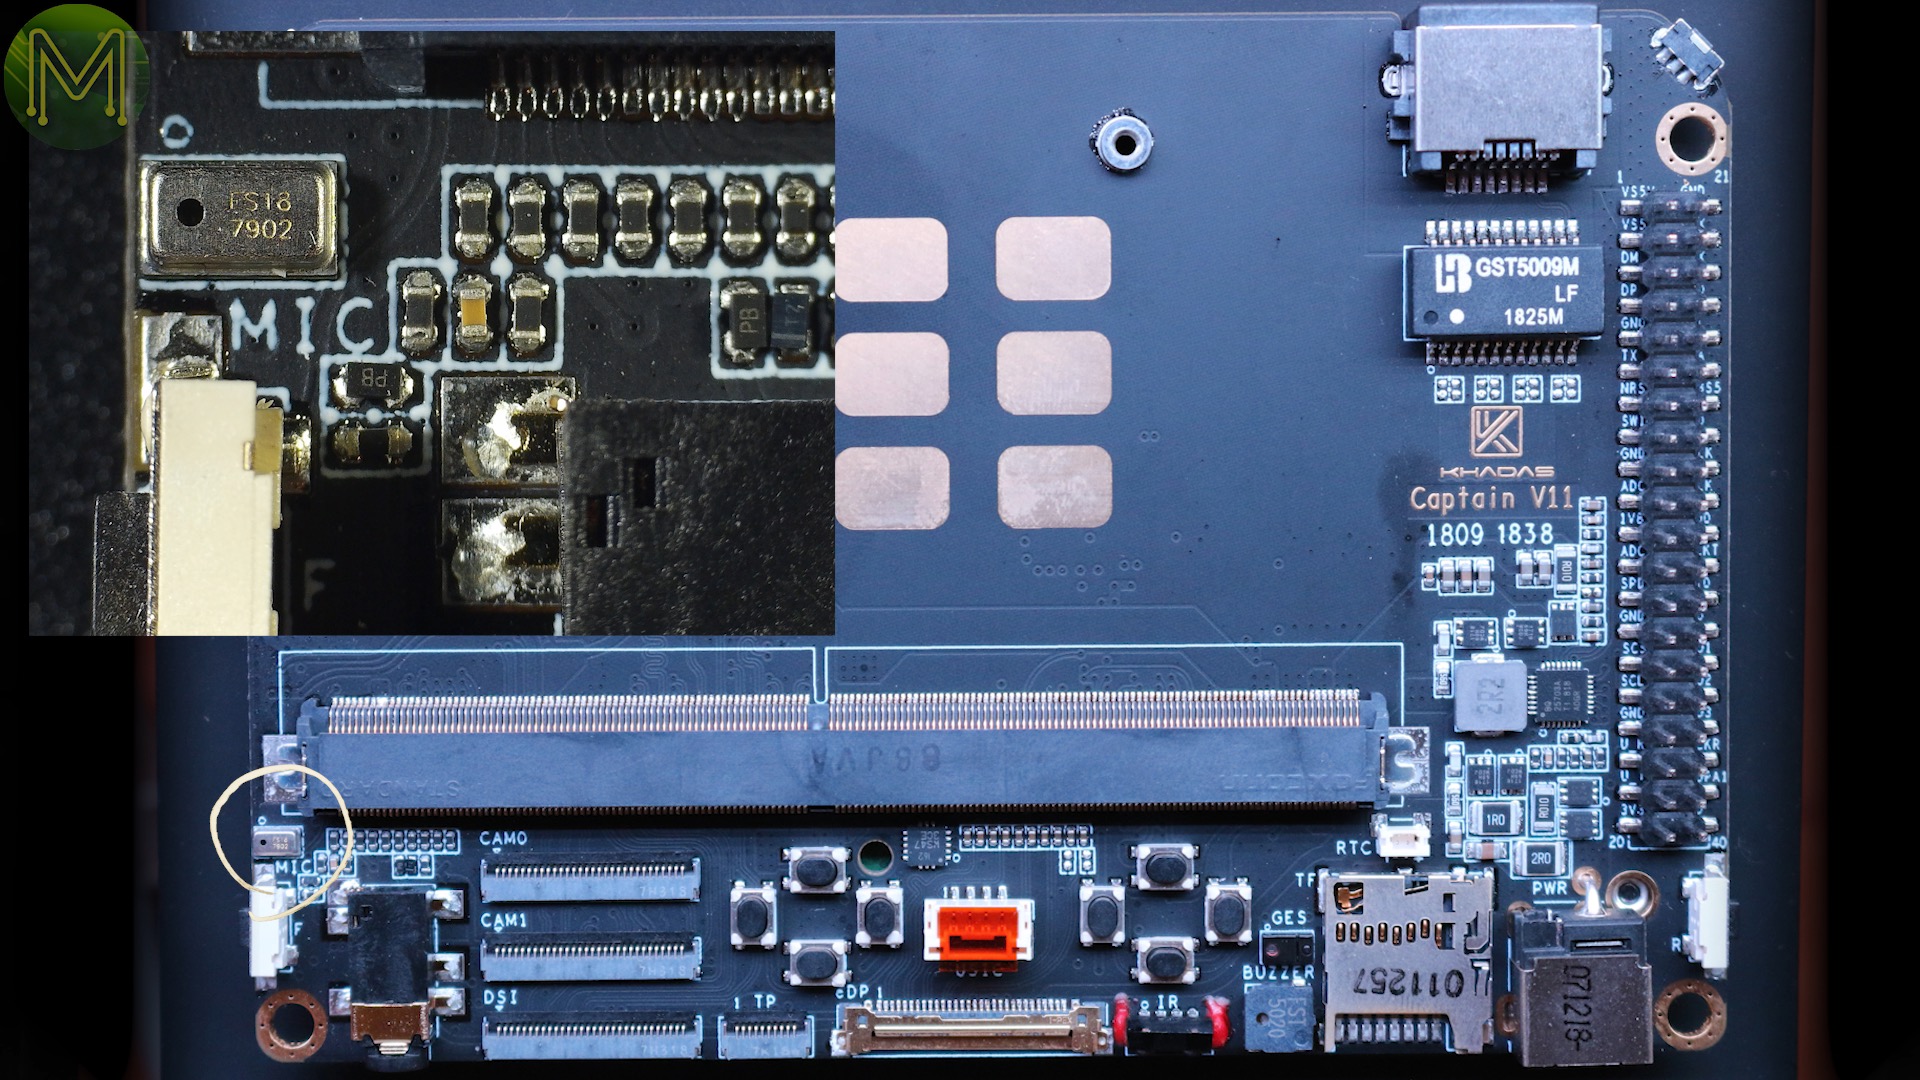
Then we have a Lithium Ion battery level gauge, (CW2013CASD), which is also visible on I2C.A bunch of MoSFETs.Buzzer, Infra-red and gesture sensor based on the popular APDS9960.A 6DOF IMU with gyro and accelerometer with I2C interface - ICM-20602MEMS style microphone based on the MIC3722, which I couldn’t find any datasheets on.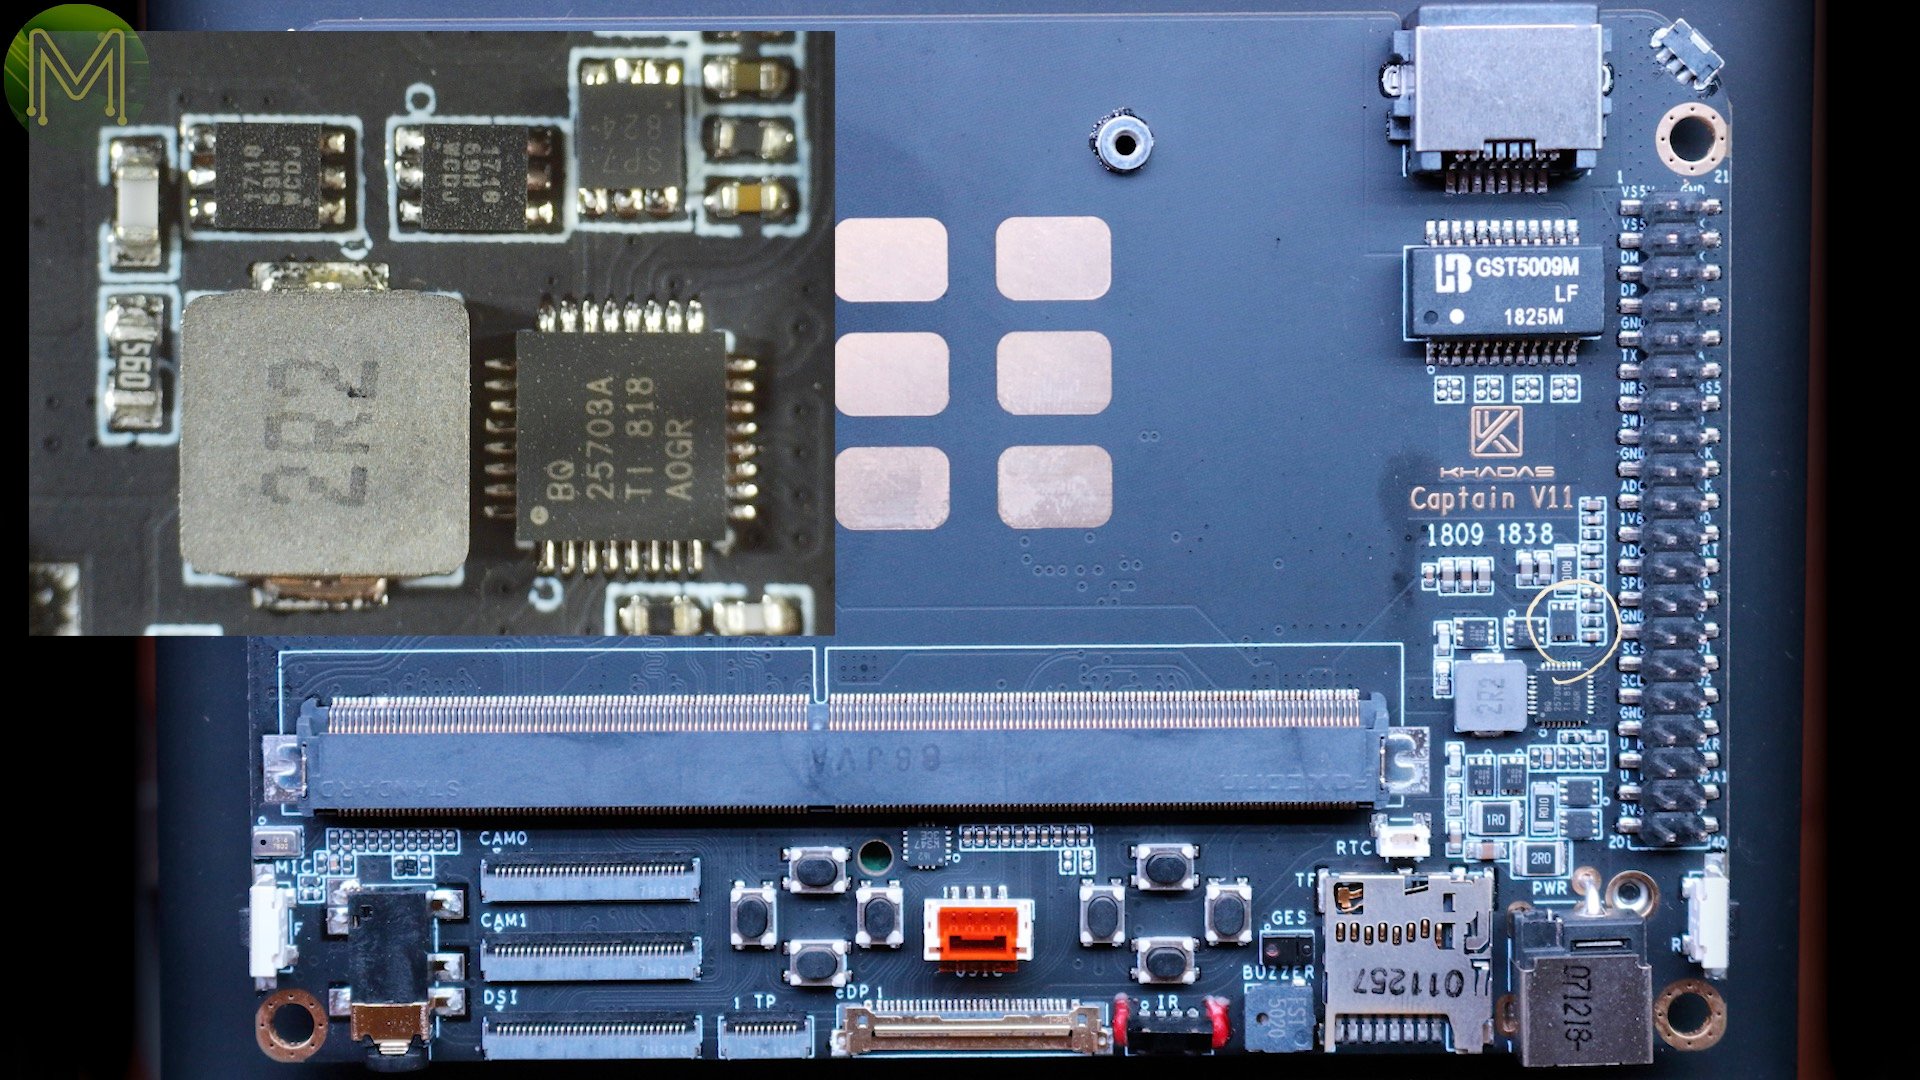


The Captain - dark side
Flipping over to the underside, we have
- An external speaker and MIC input connector.
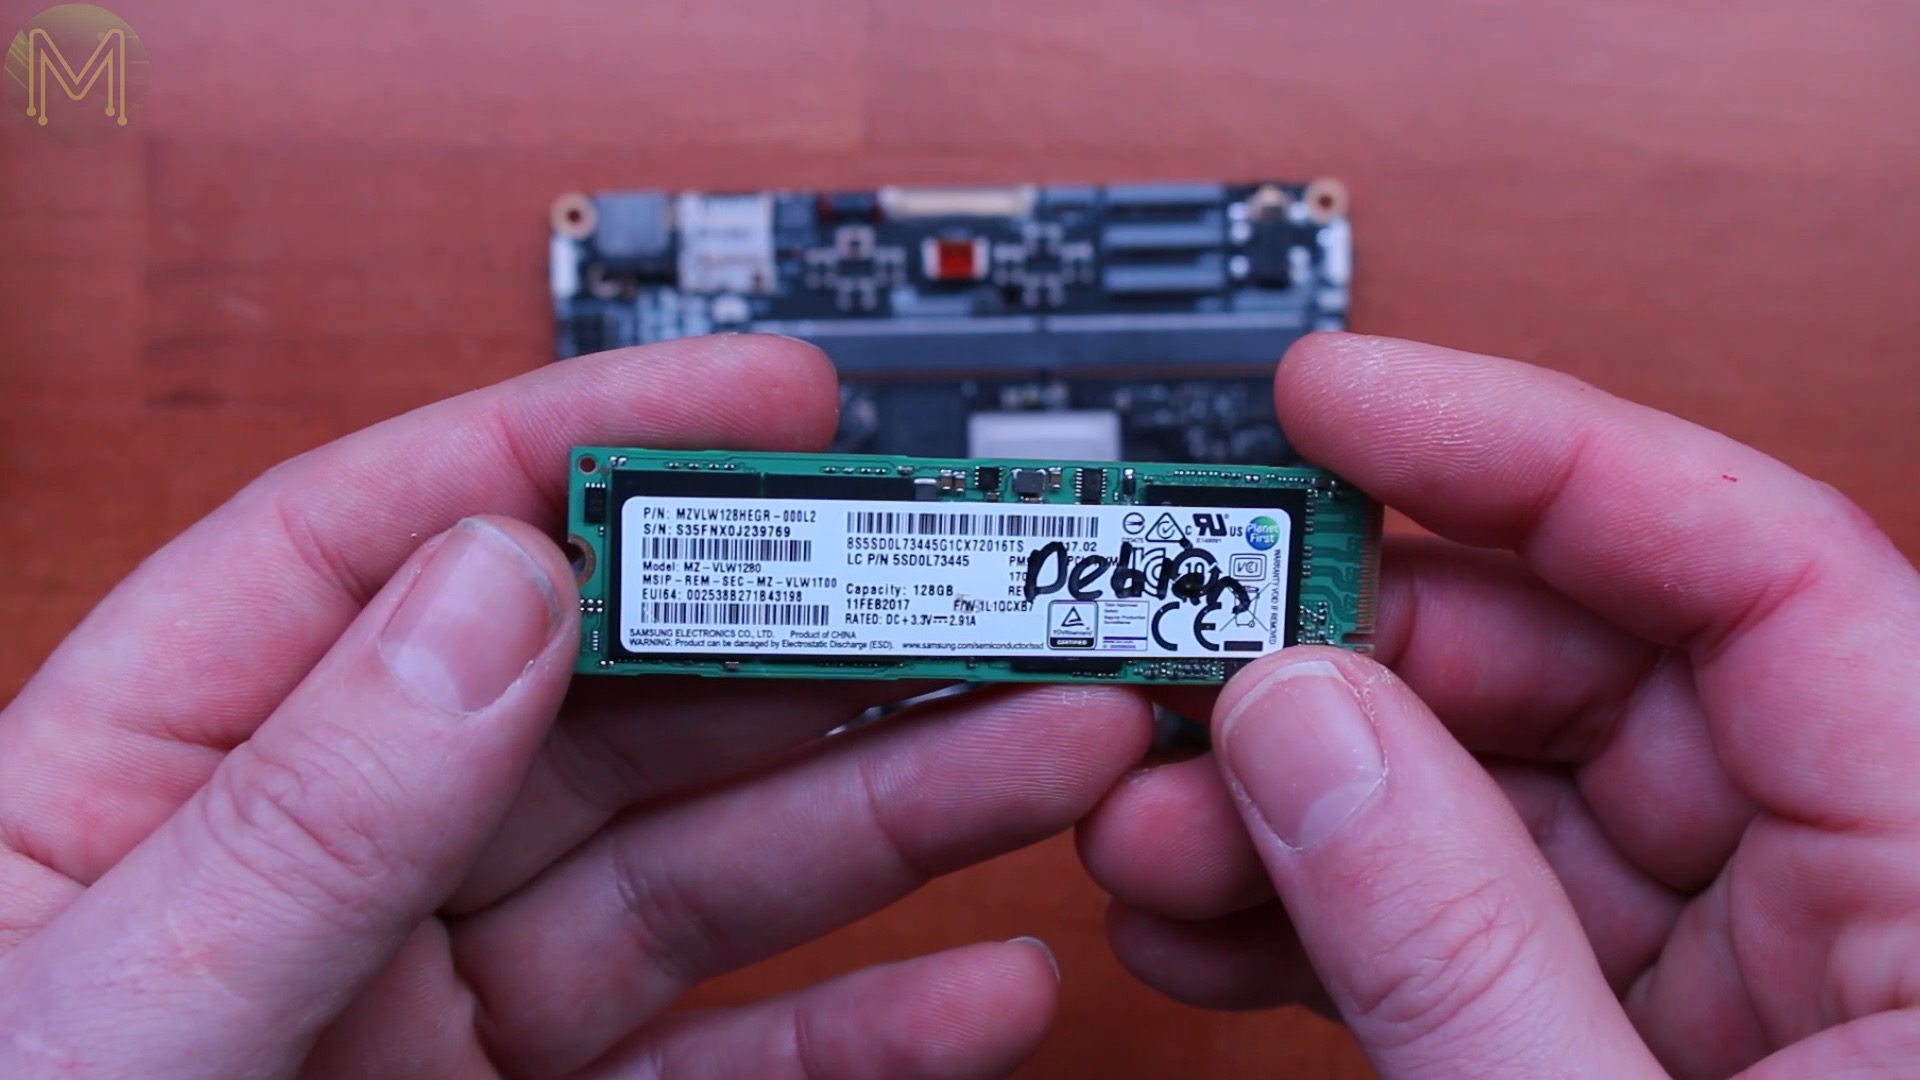
- A nice M.2 slot, which is starting to be critical on SBCs these days.
- And LiPo battery connector.
In terms of semis, we have:
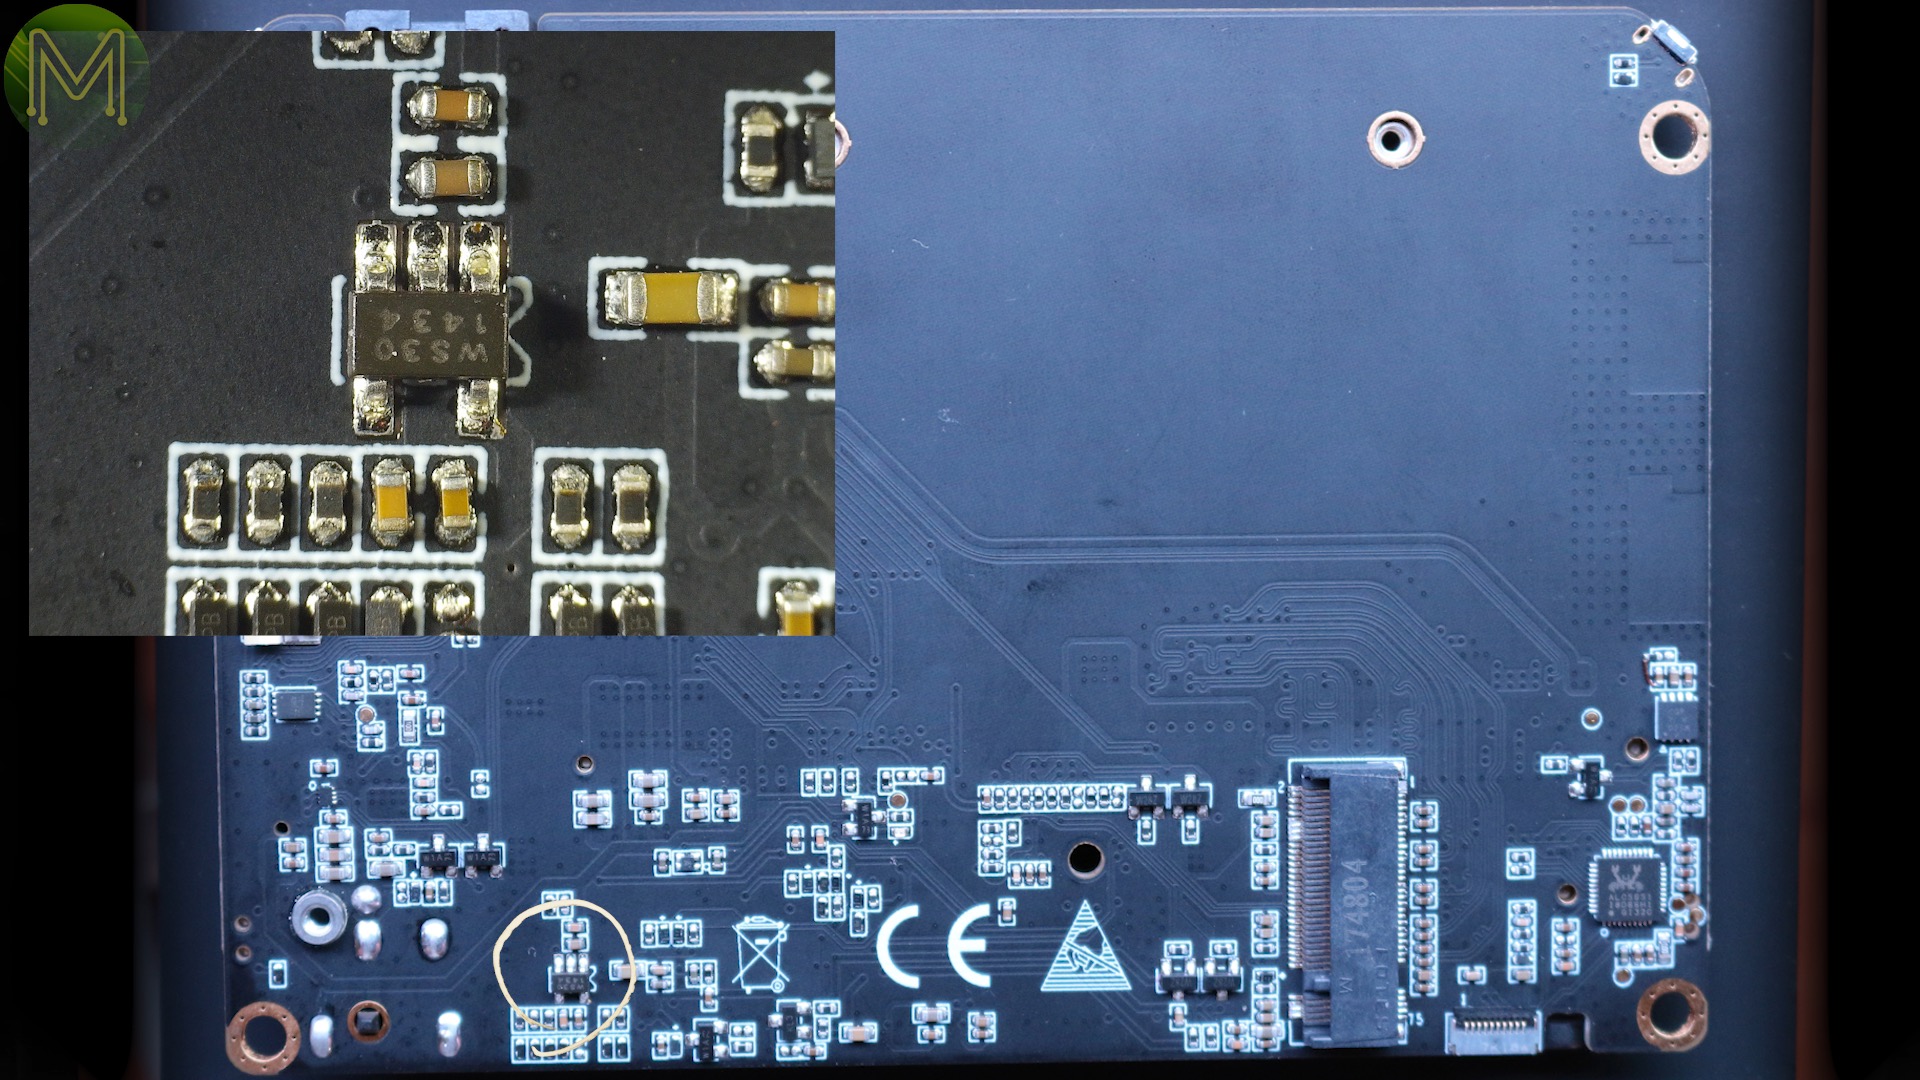
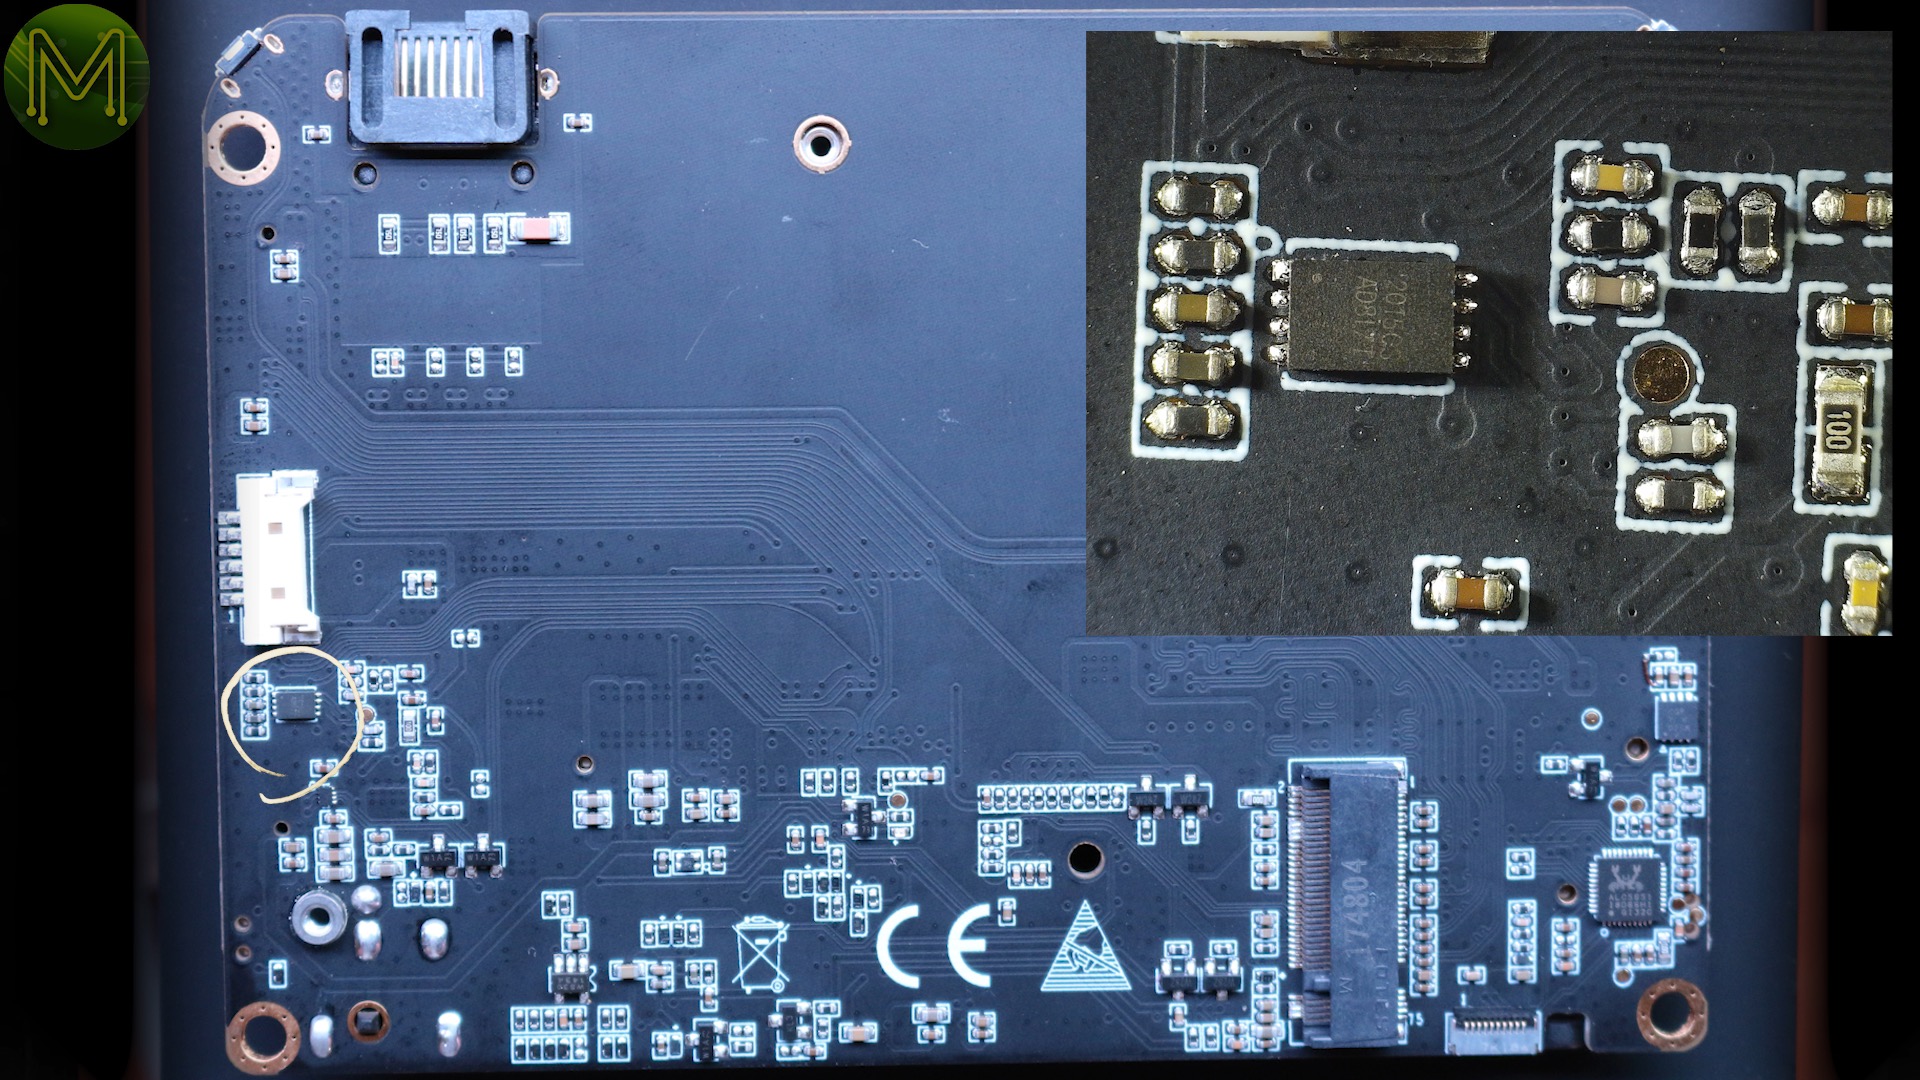
Auto-switching power mux, (TPS2115ADRBR), which is used to power up the board when receiving a WOL Ethernet packet and a bodge wire. I guess as far as bodge wires go, it’s pretty neat.Then we have another common part, the ALC5651 stereo audio CODEC providing record and playback of audio at 24bits and up to 192kHz.LDO, (WL2803E30), providing a steady 3.3v and up to 500mA which powers the SD card.Logic level converter for the DEBUG UART console - TXS0102DQEAnd pretty sure this is a plain old op-amp… I think… AD817


So, all up, it’s a pretty interesting SBC, but let’s see what it can actually do.
Booting
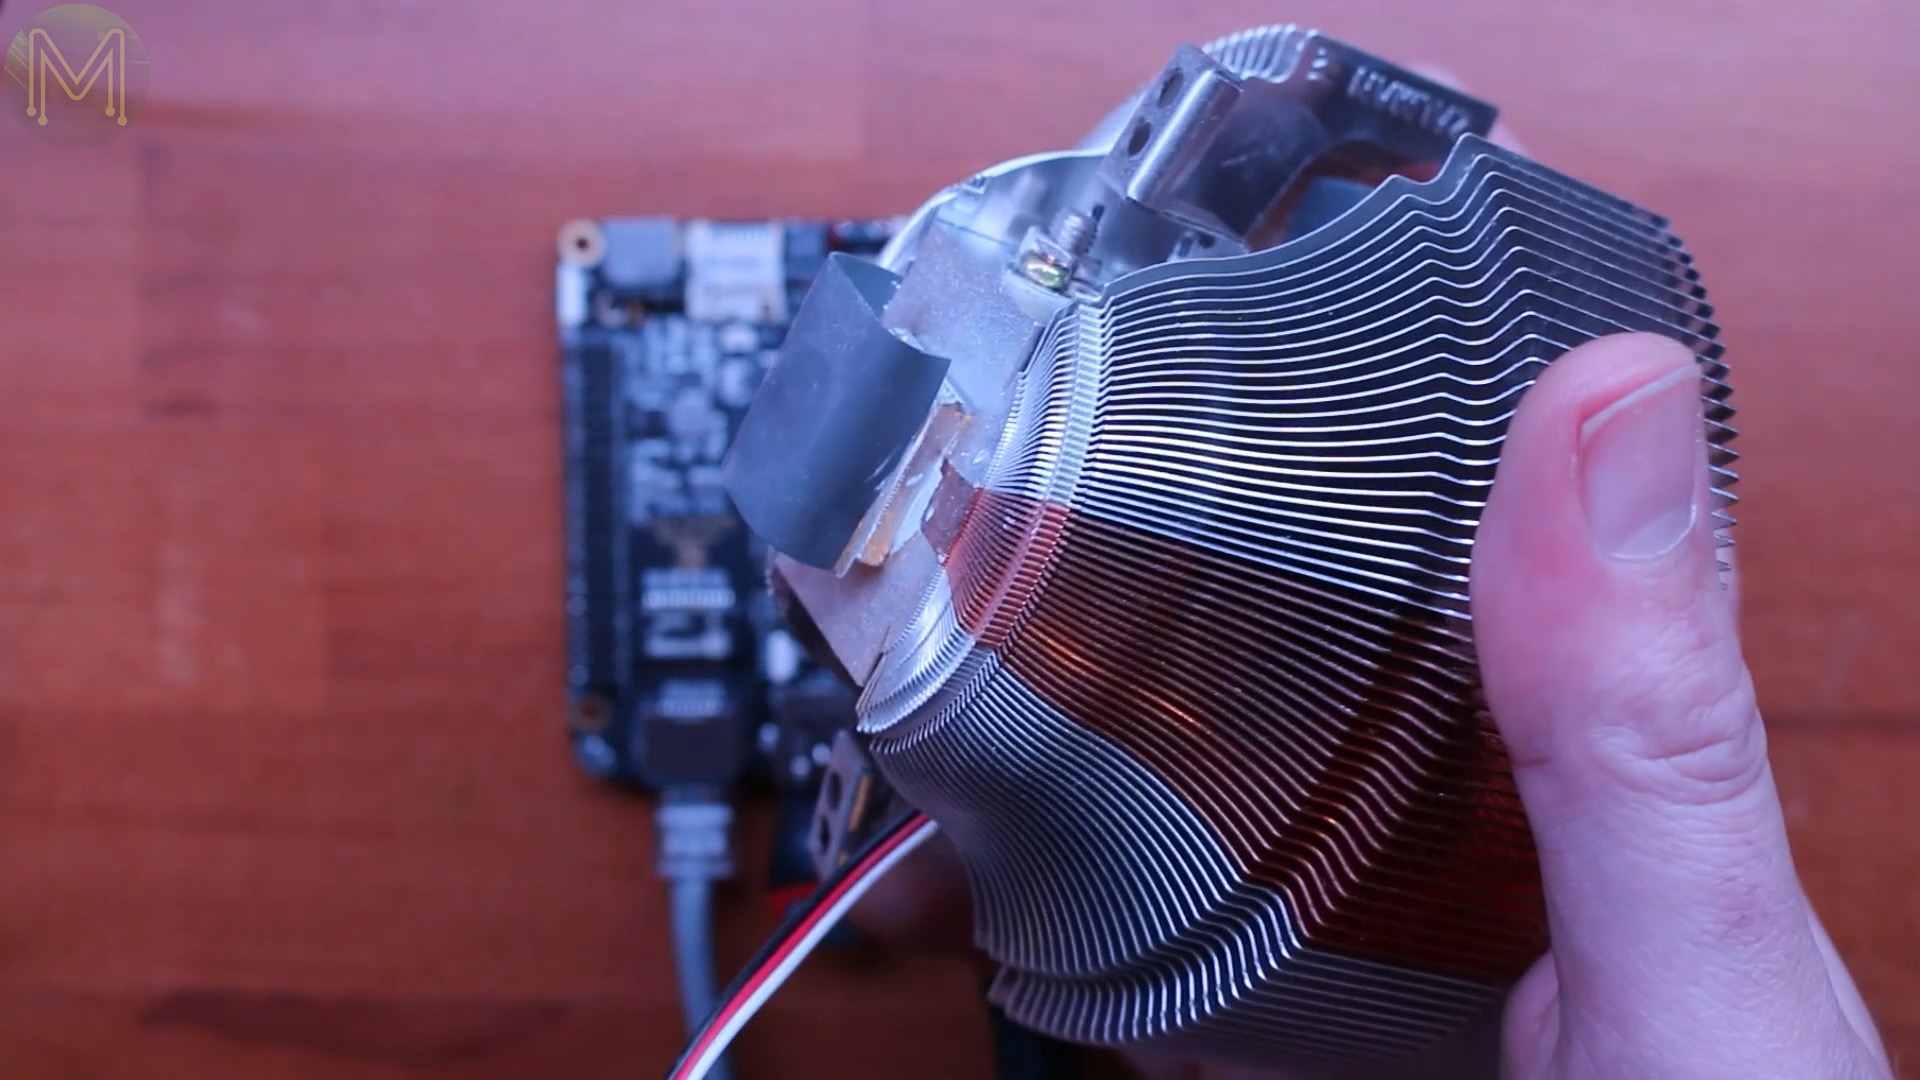
The RK3399 can get pretty hot under the collar when running all 6 cores, so a heat-sink is essential.
Unfortunately, Khadas sent me the wrong heat-sink,so I had to resort to my Uber heat-sink for thermal tests.Also, since we have an M.2 key slot, I’ll be using one of my NVME based SSDs for tests.
I’ll also be tracking power consumption using a handy power logger and also use a plain USB based SD card reader for some transfer tests.
Booting up was an interesting experience. Theoretically, I should be able to power the board from either of the USB ports or DC jack.
Unfortunately, I wasn’t able to get the board to power up using the DC jack. Once again, this is a pre-release SBC. So, I’ll investigate what the problem is and let Khadas know.
So, I’ll be powering the board from USB Type C instead.
Android tests
Once powered up, the Edge booted straight into Android from the onboard eMMC.
So, while I’m here I might as well check out the Android performance. The image came with the Antutu benchmark pre-installed, so I fired that up.As you can see, the results weren’t steller, placing towards the bottom of all devices with an Antutu benchmark score of 37,725. One of the reasons, was due to the fact that the CPU was being throttled a fair amount.

Using my laser thermal sensor, showed up that the CPU temperature was being kept around 52C with the hottest part being the GbE transceiver.
So, like all my other RK3399 based SBC reviews, you definitely need some active or passive cooling for this SoC. Time for my Uber heat-sink.
Re-running the benchmark came up with a better result of 97,229. This stopped the CPU throttling and brought the overall board temperature down a fair amount to a little over room temperature.
Upgrading to Linux
So, on to upgrading the SBC to Linux.
To re-flash the firmware you have to put the SBC into upgrade mode. There’s several ways of doing this.
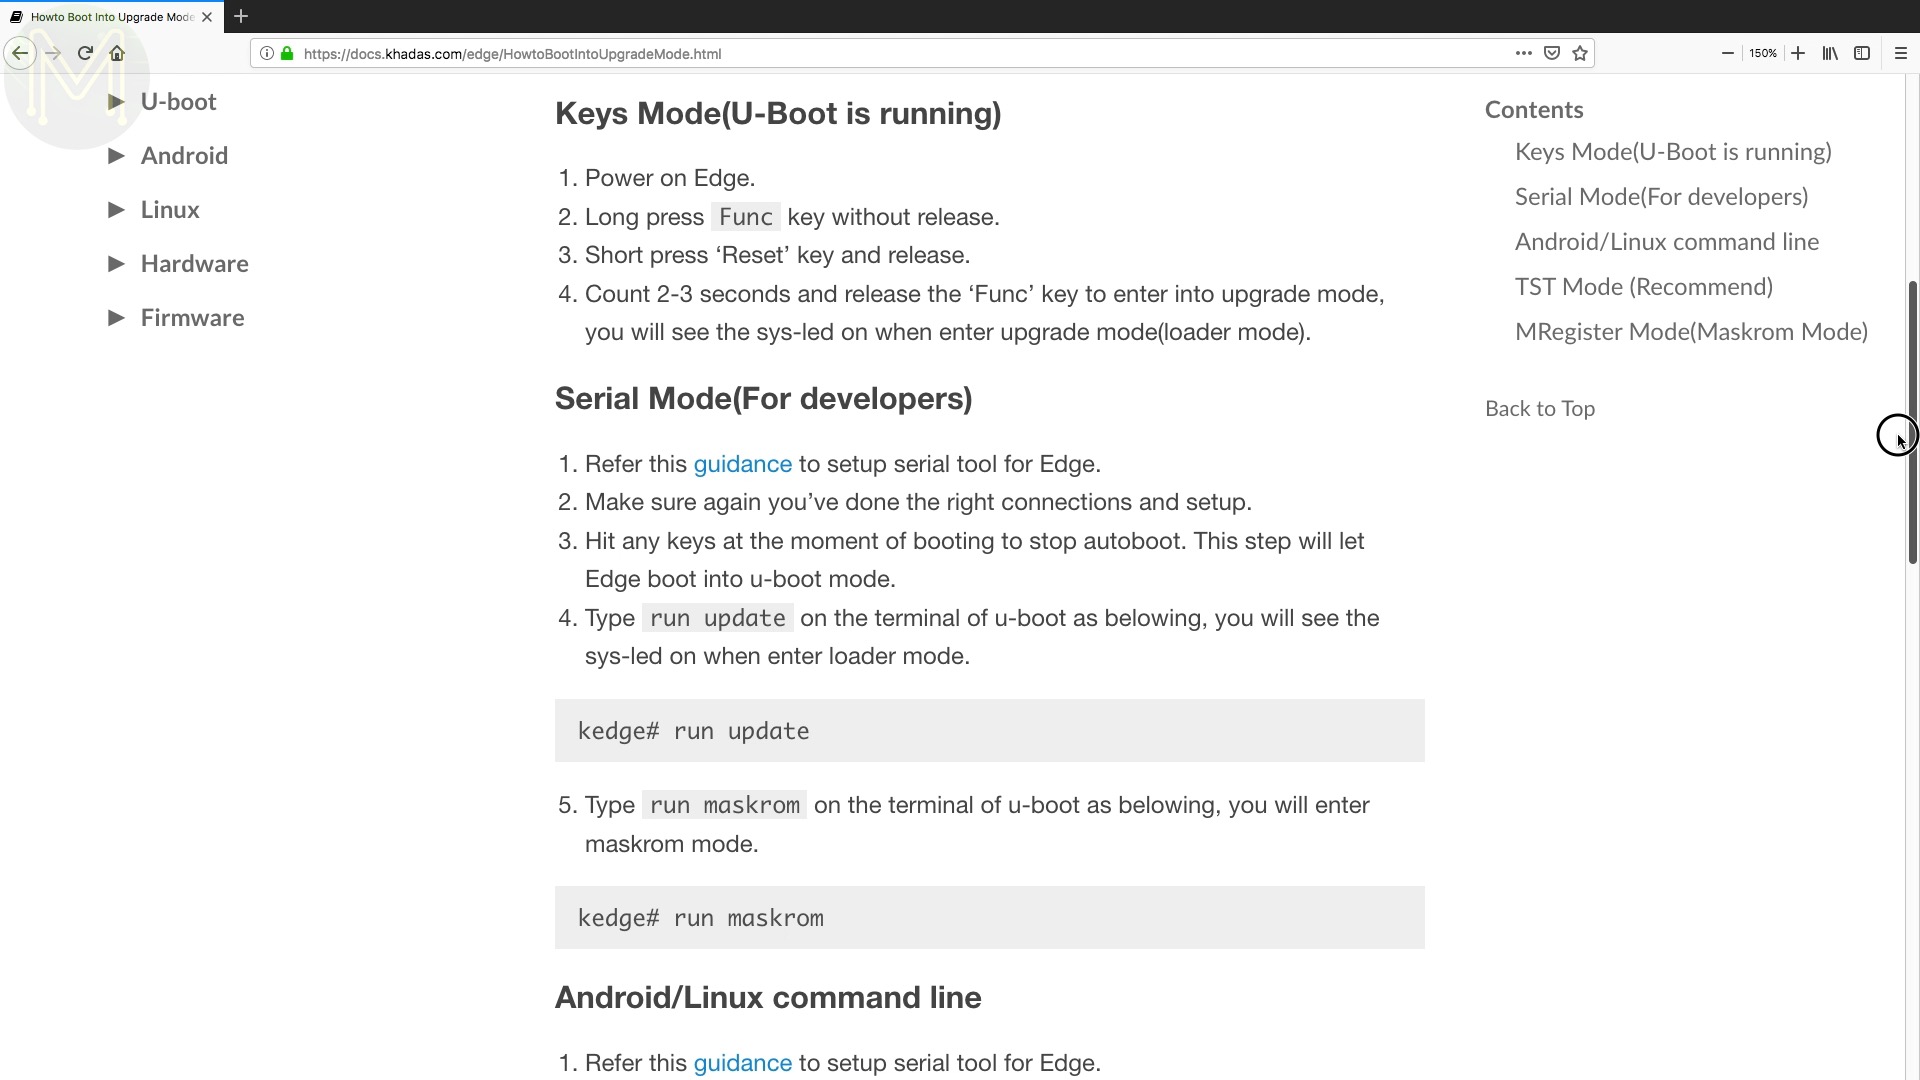
You can press and hold the function key while pressing the reset button.
Or via the debug serial port.
From the Linux command line.
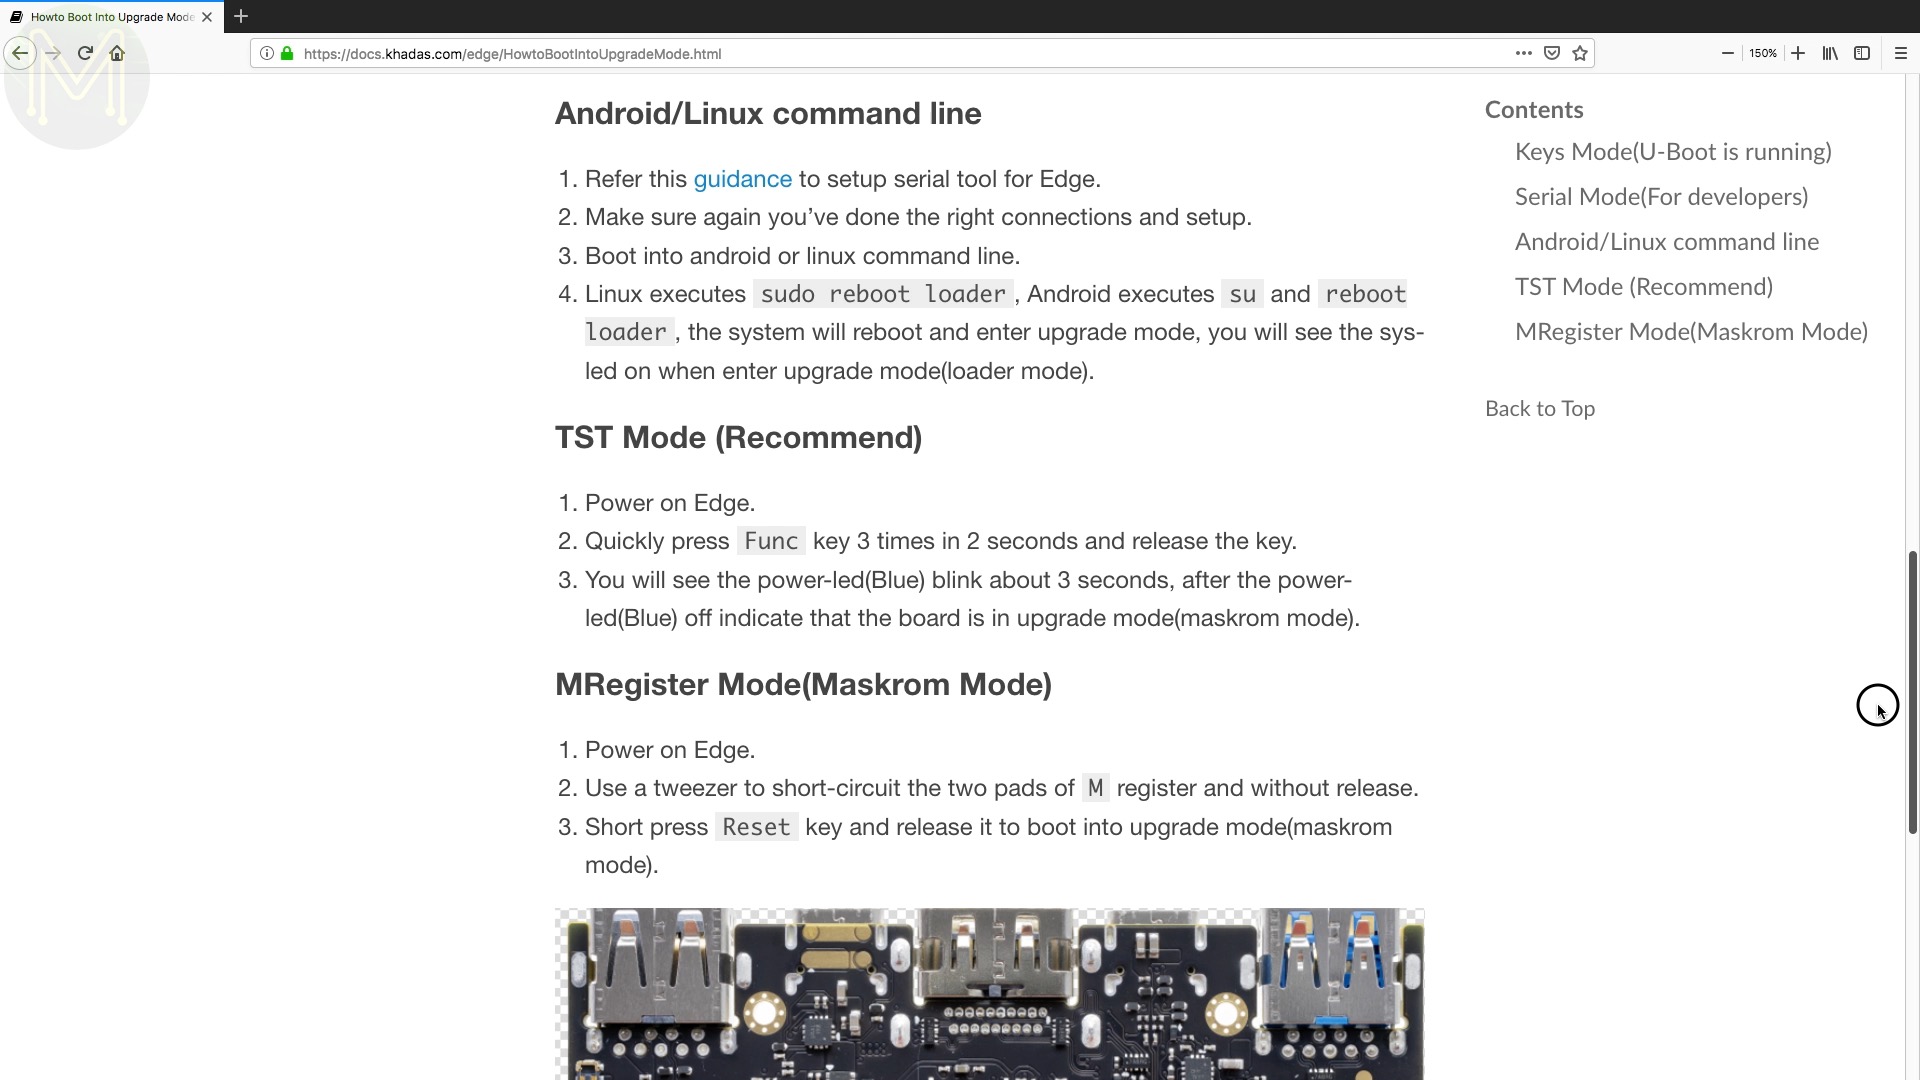
Pressing the Function button three times within 2 seconds of boot.
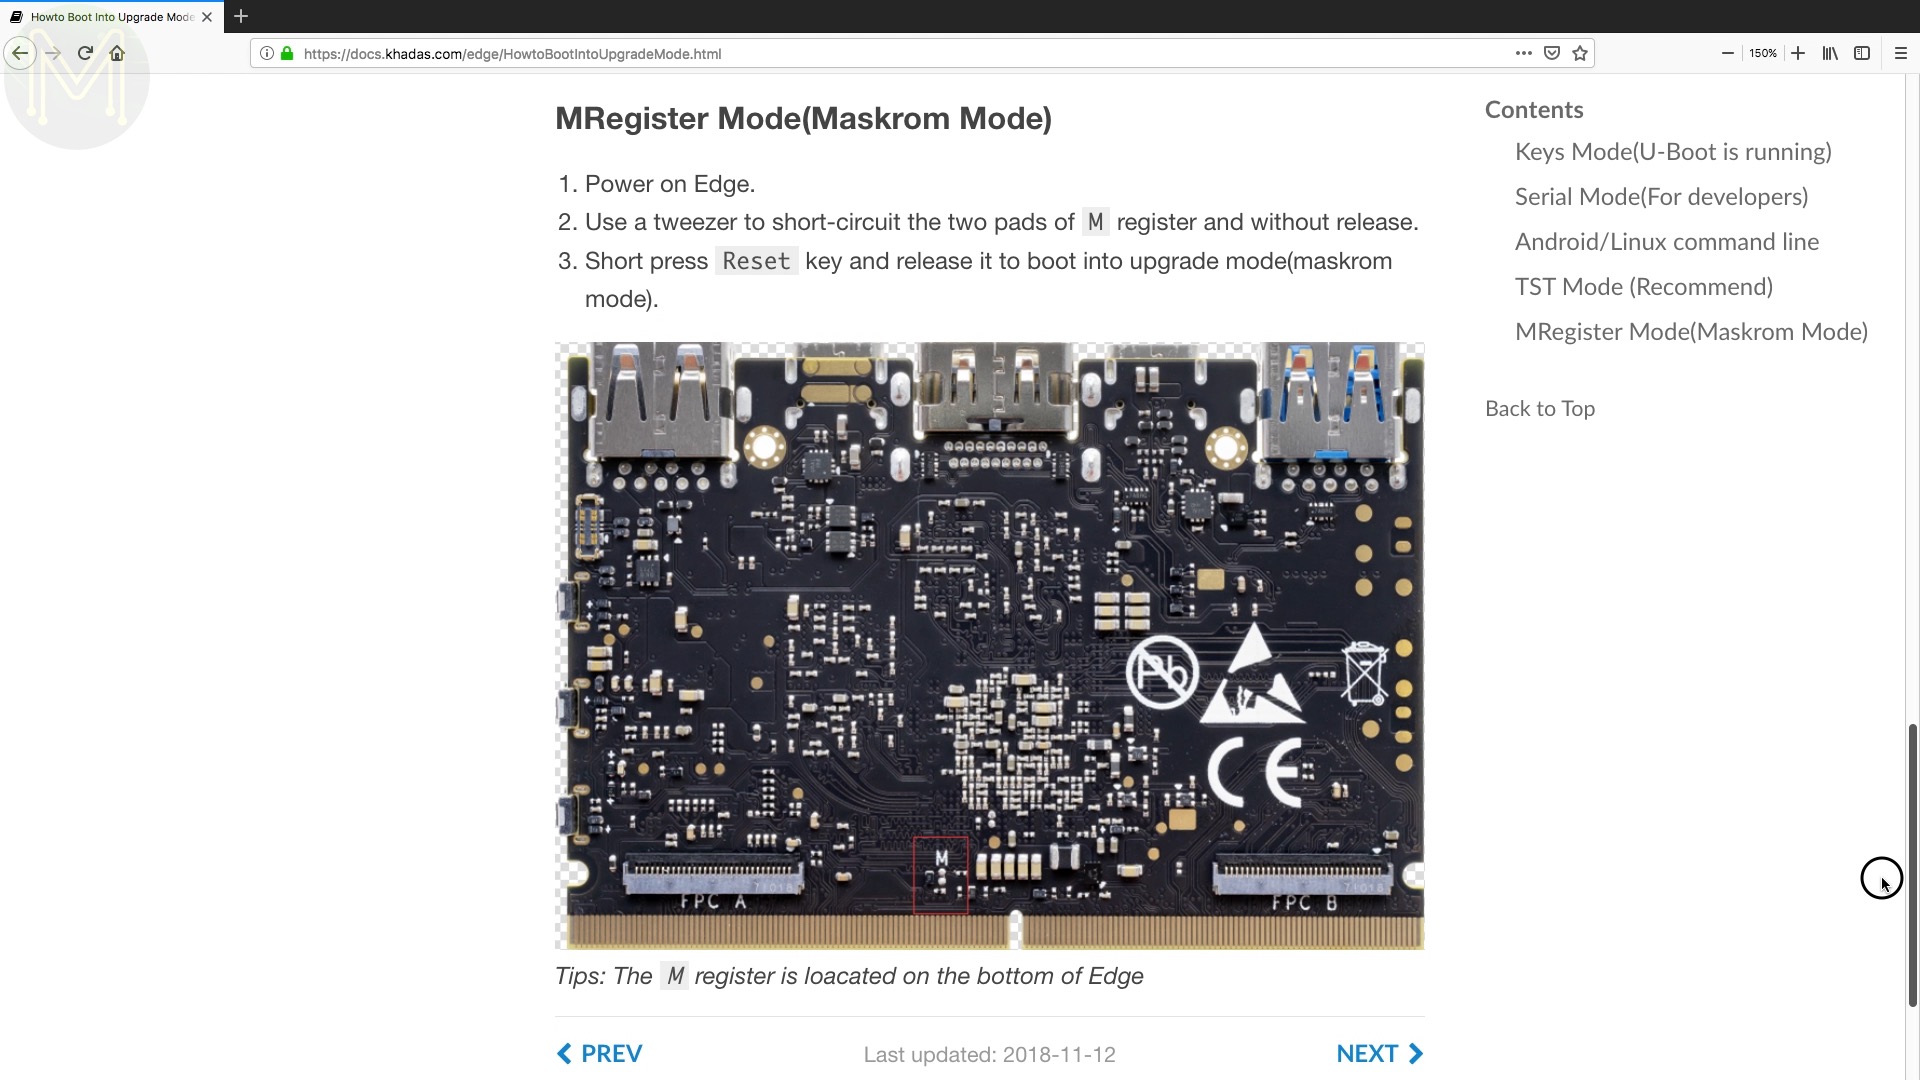
Or short-circuit two pads on the board while pressing the reset button.
Once you enter upgrade mode, the power light turns blue and starts to flash.
However, while the Edge was connected to the main board I never got the first method to work.
The second, third and fifth methods were also unavailable as you can only get to the M-register pads and serial port from underneath which you can’t get to when attached to the Captain.
The fourth method, (pressing the Function button three times within 2 seconds of boot), seemed to be the most reliable and you should see the upgrade screen appear.
Once you have it in upgrade mode, you can upgrade via SD card, or USB Type C.
I first tried to upgrade using the SD card method as this was the easiest. Khadas have some pretty decent documentation on how to do this.
However, I never managed to get the SD image creation tool working with several SD cards.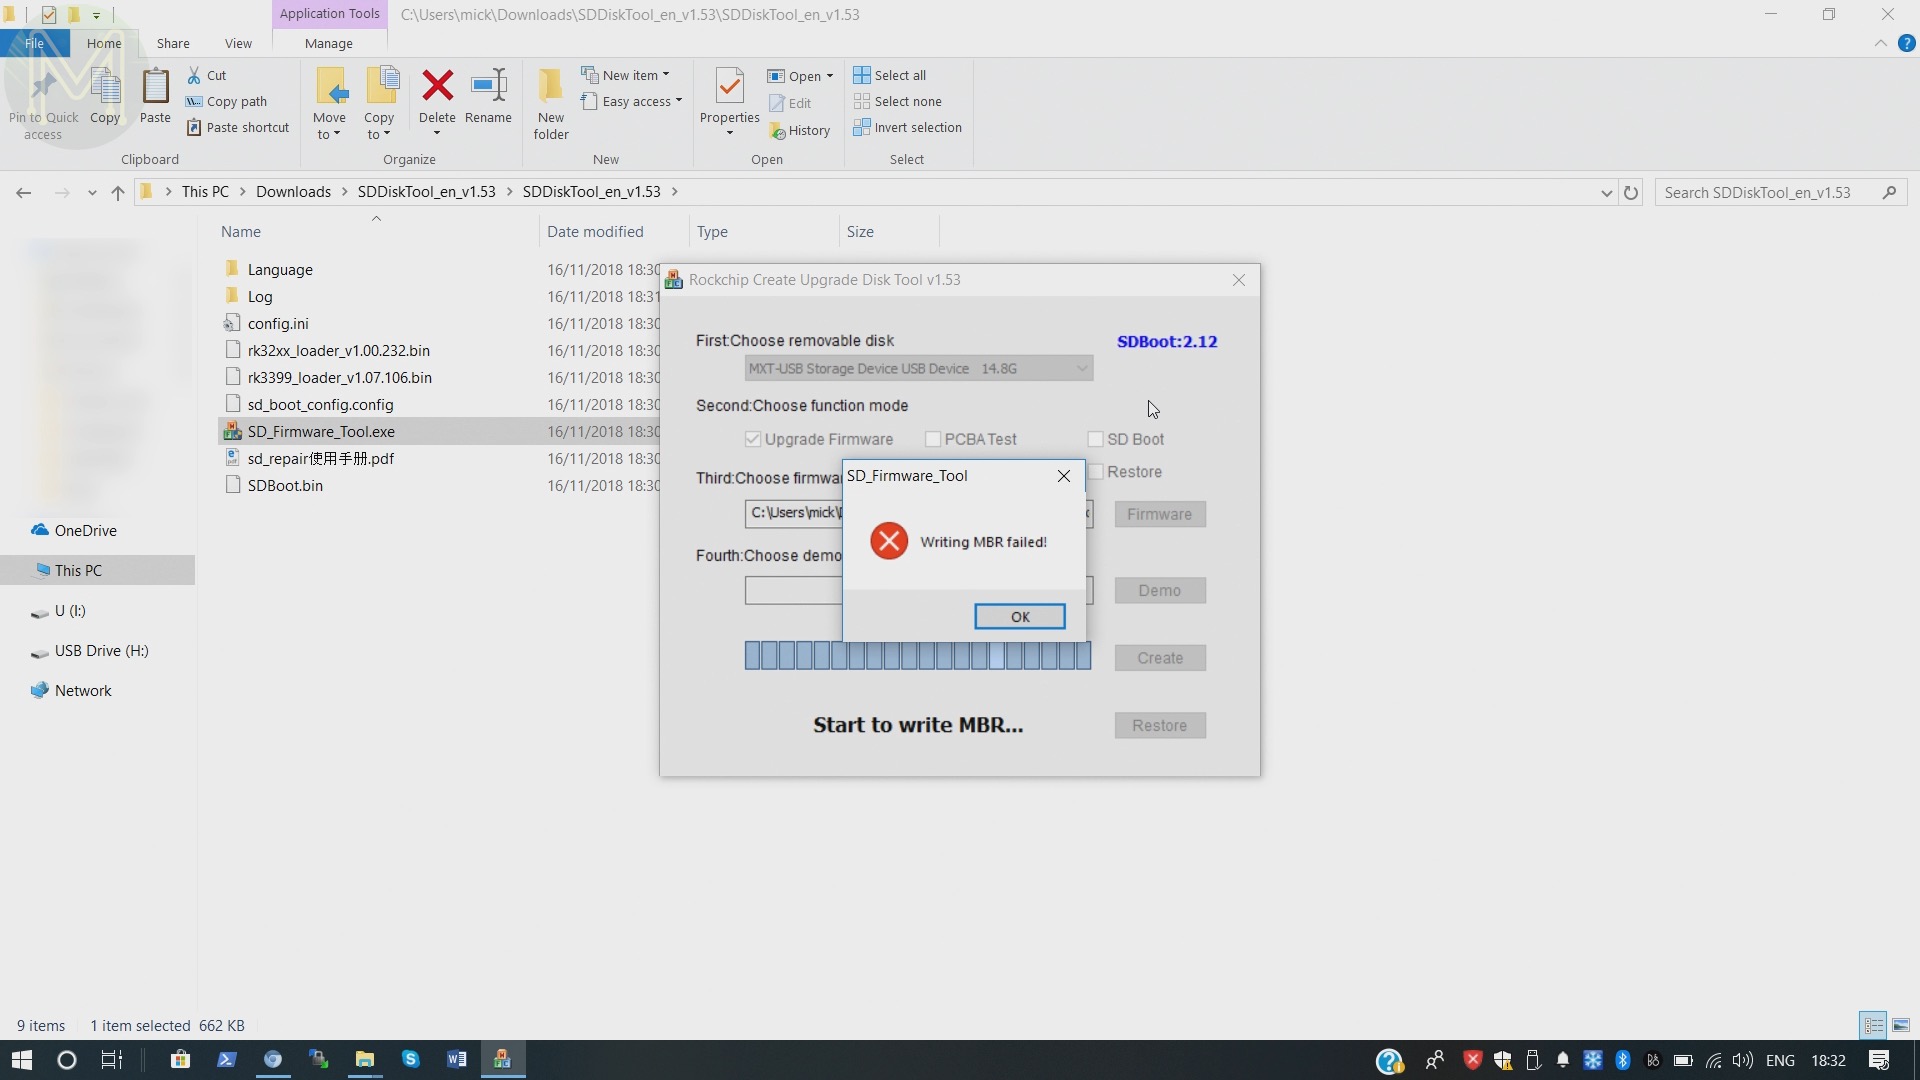
So, I decided to upgrade over USB Type C instead of SD card using a Linux notebook.
I pulled the git repo, and since I had Debian and not Ubuntu a bit of fiddling fixed the install script.
Once you have the image downloaded and the tool functioning, time to plug it into the notebook for upgrading, but this is where the magic smoke genie appeared.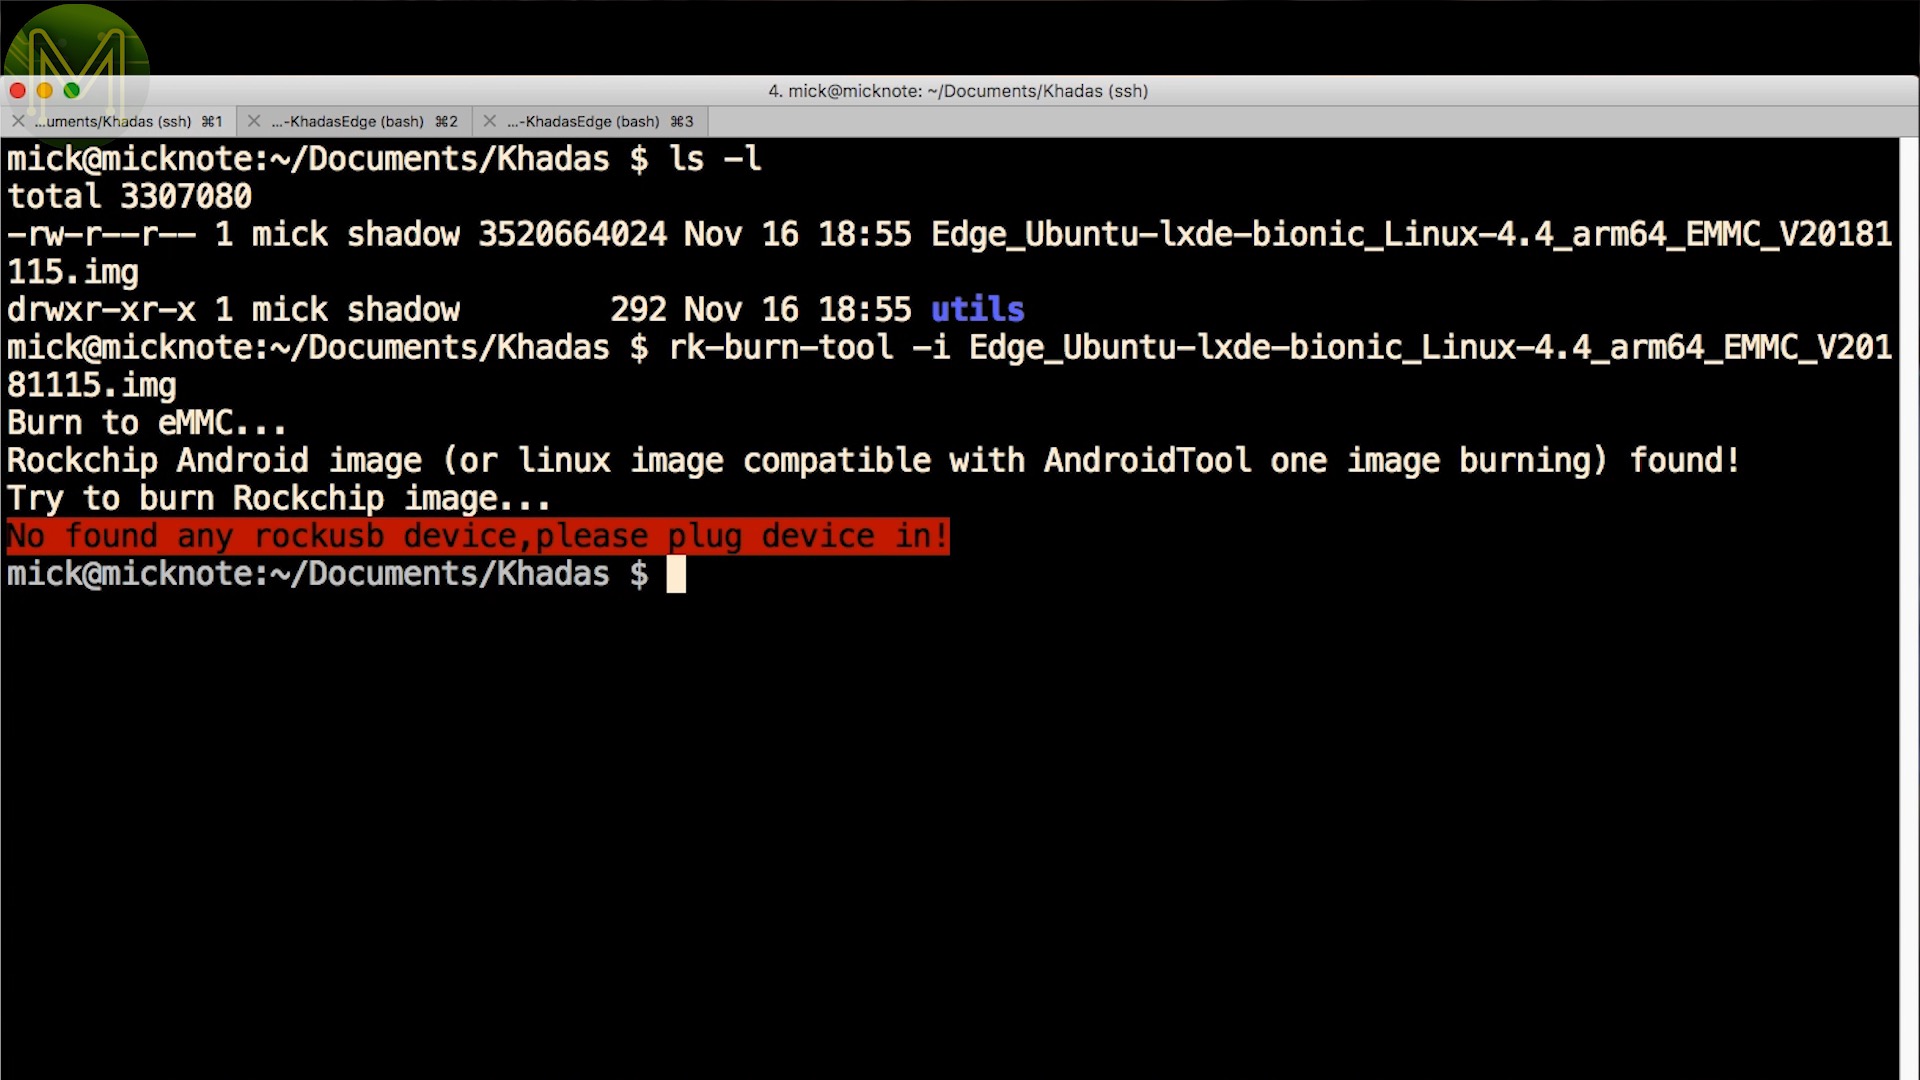
I used the LattePanda power pack to power the Edge via one of the USB Type C connectors but as soon as I plugged in the second Type C port to my notebook, the gentle sound of electronics frying could be heard.
I haven’t yet investigated why this happened. I know that the LattePanda power supply was providing 12v to the USB port, but theoretically that 12v shouldn’t be back fed onto the second port. So, I’ll dig around and provide an update.
Anyway, so I then disconnected the board from the LattePanda power supply and powered it directly from the USB port on a Windows notebook.
Followed the Khadas documentation, installed the software and burnt the Linux image to eMMC.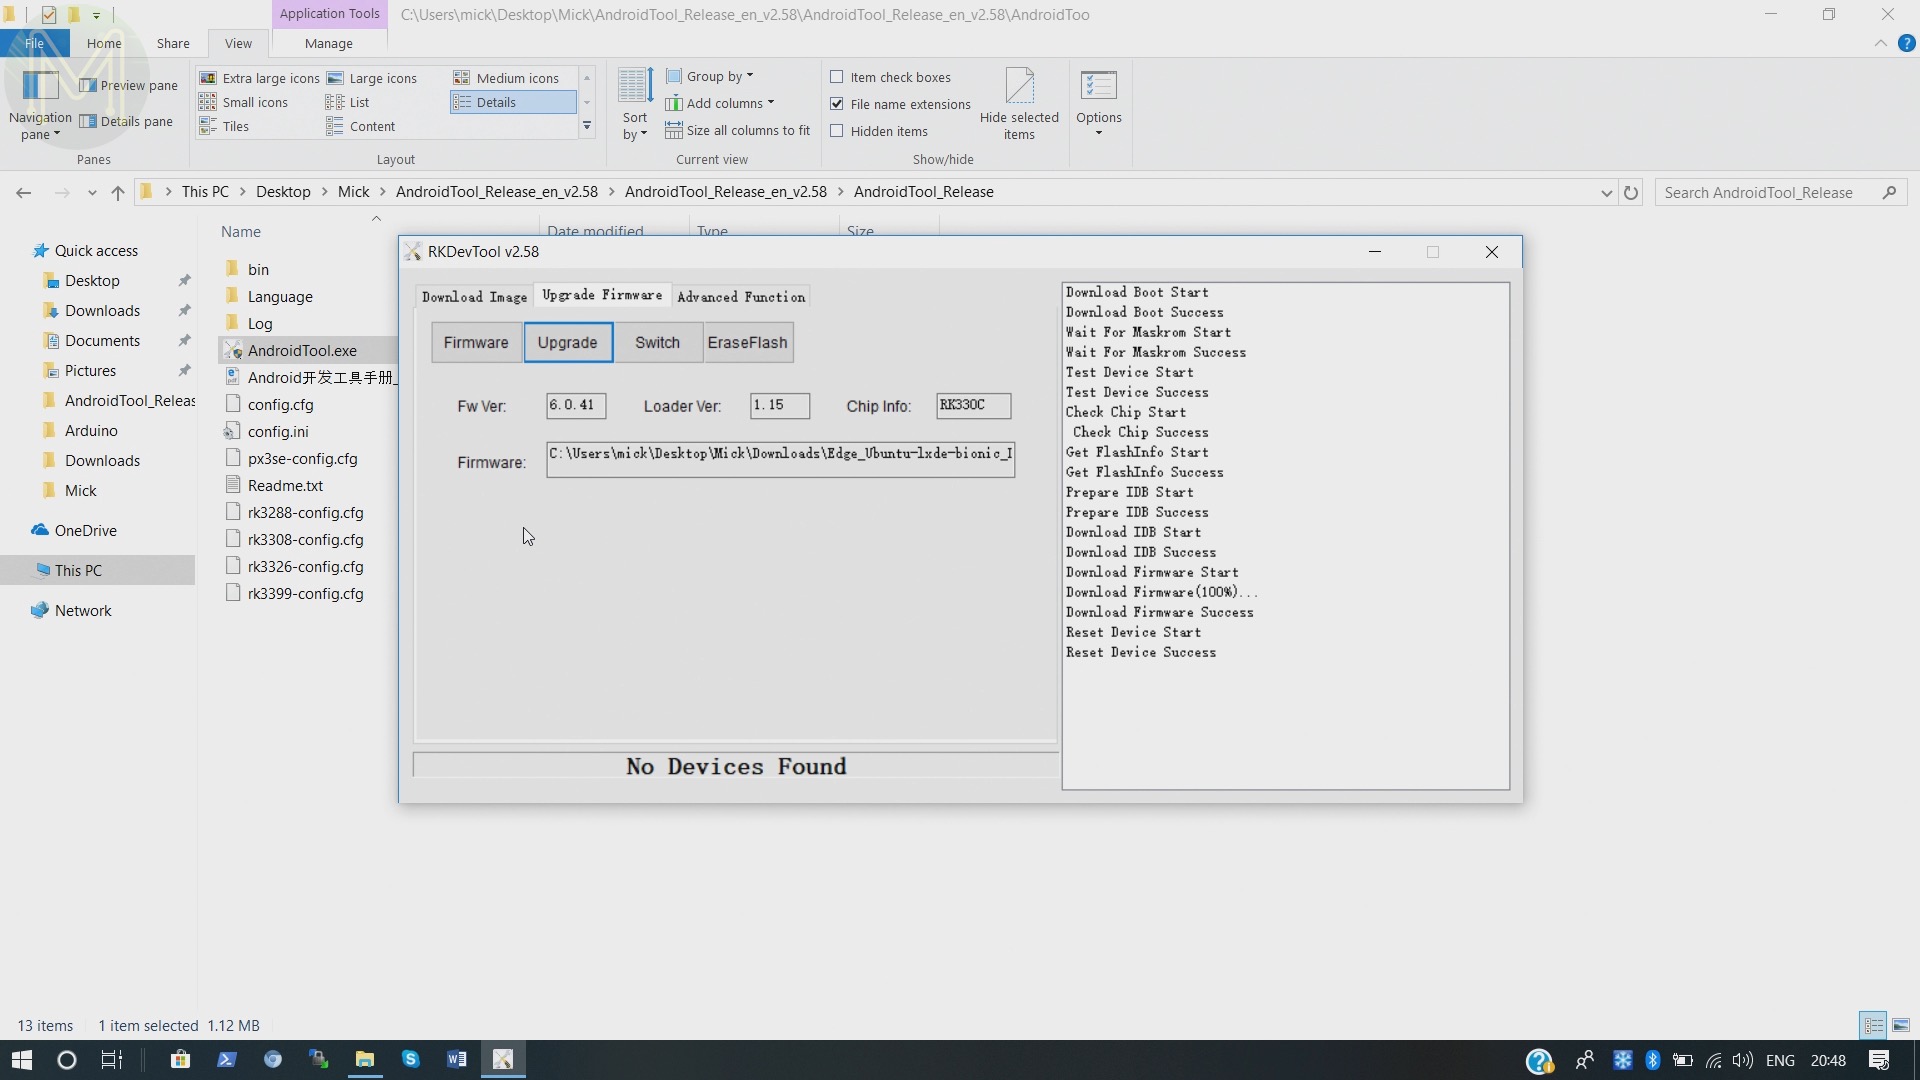
Linux tests
Once booted I started to poke around to see what was available on the default image.
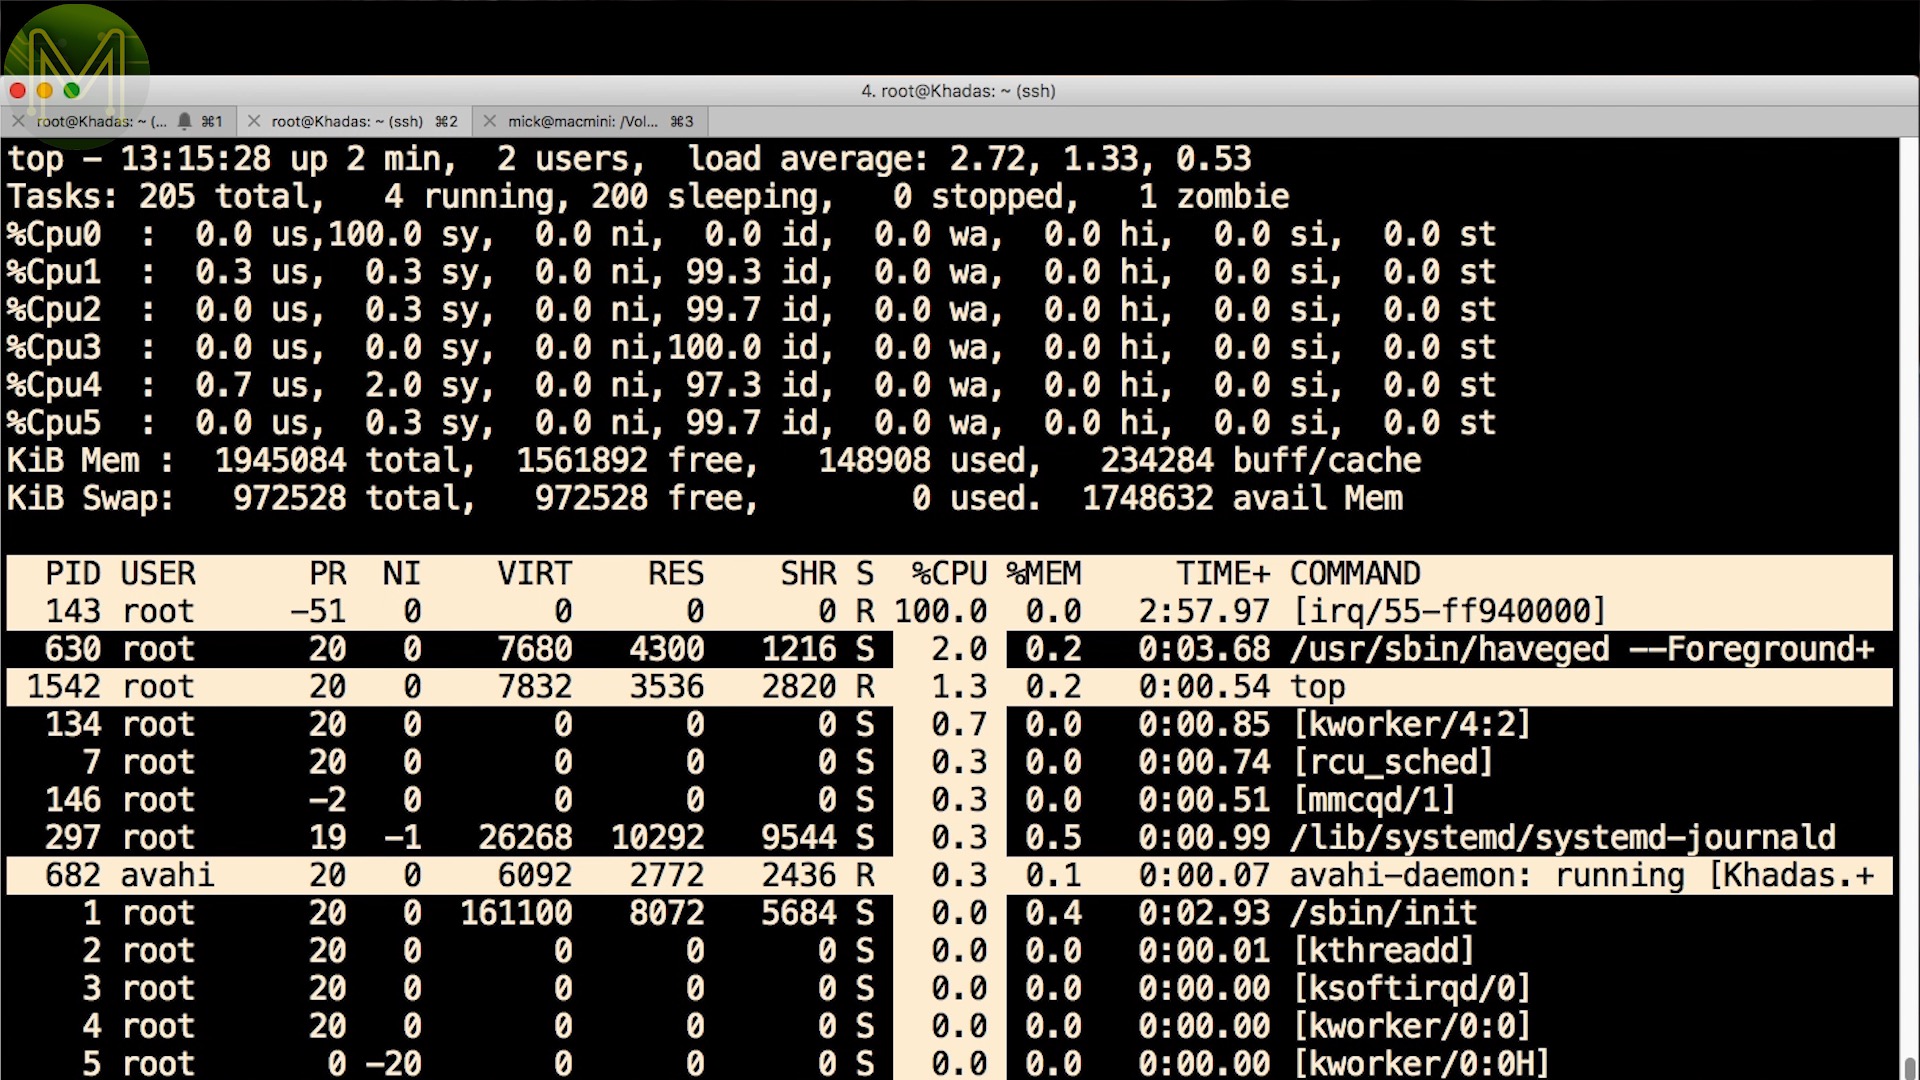
All 6 cores are there and no, SPI, but there’s I2C.GPIOs are there and you have access to CPU frequency and temperature.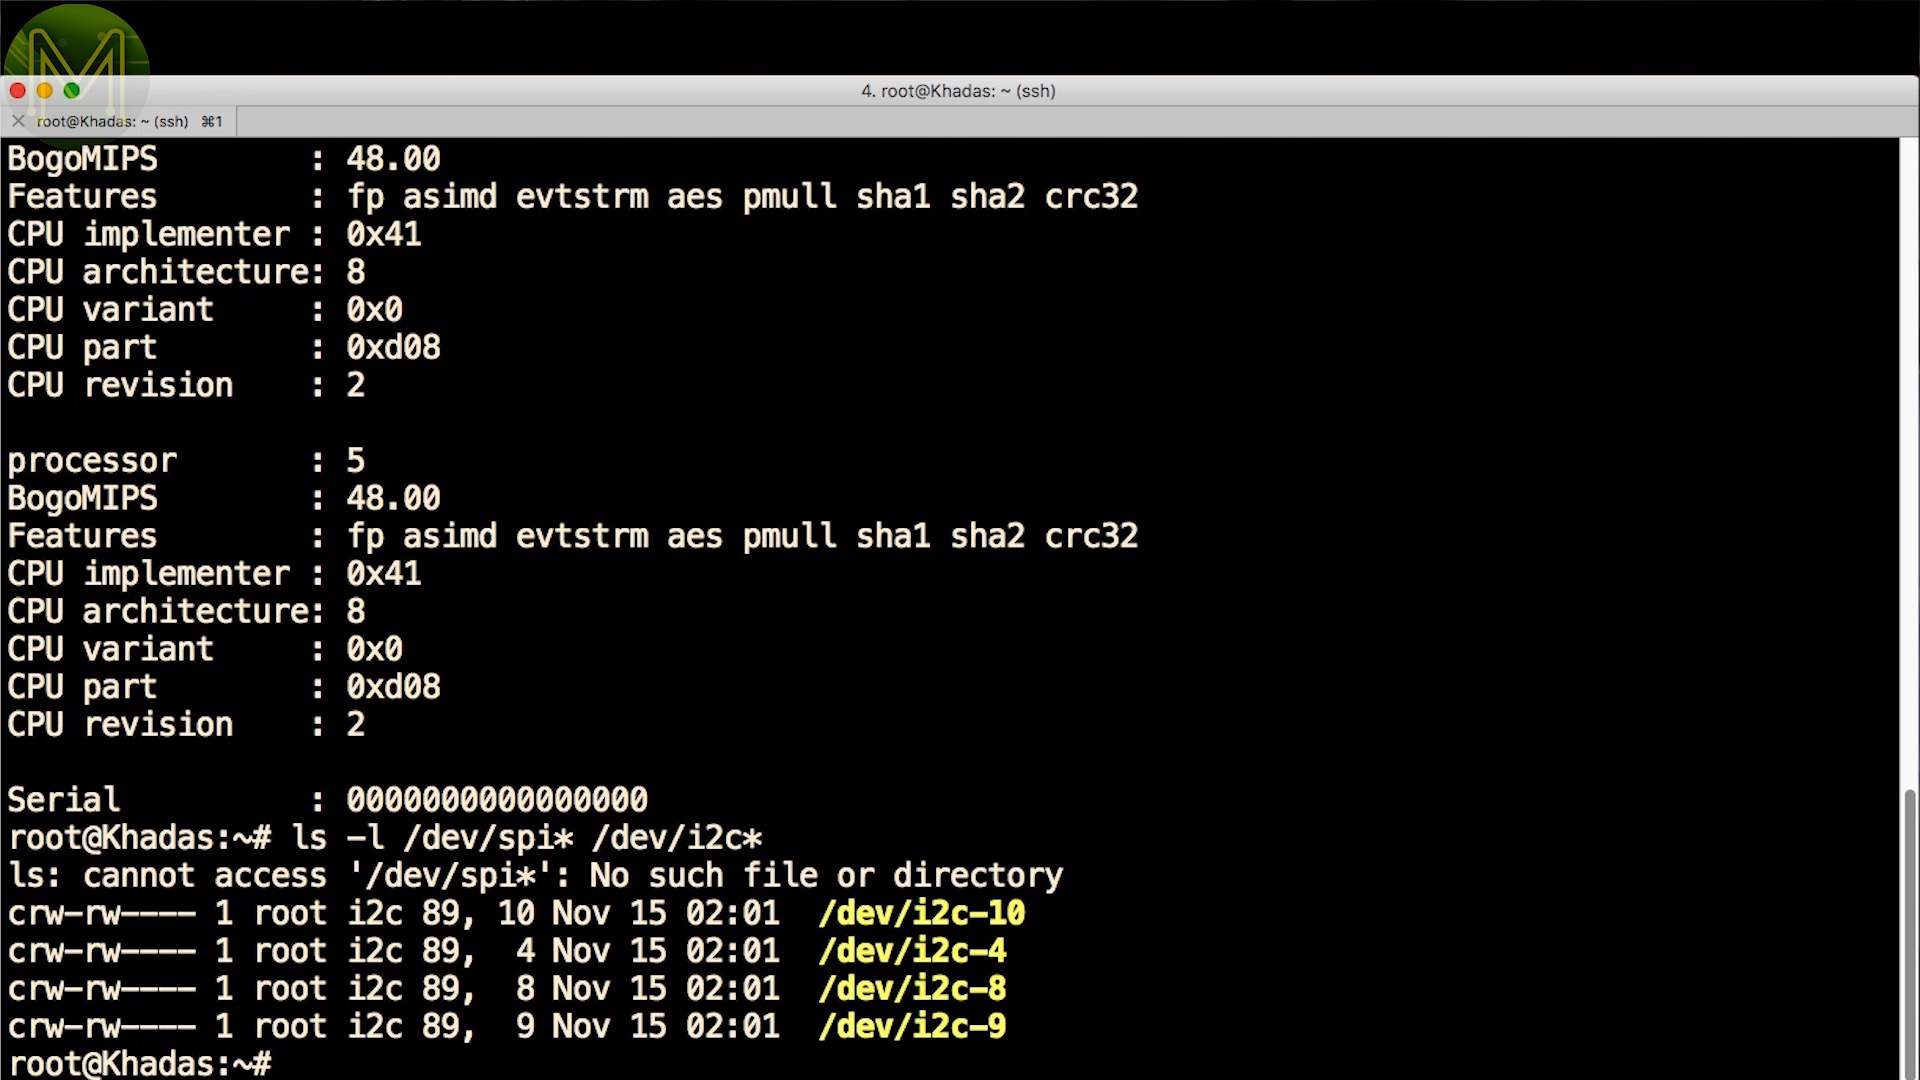

Like all my other SBC reviews I set the CPU scaling governor to performance mode.
The 128G NVME SSD was visible, along with the eMMC.
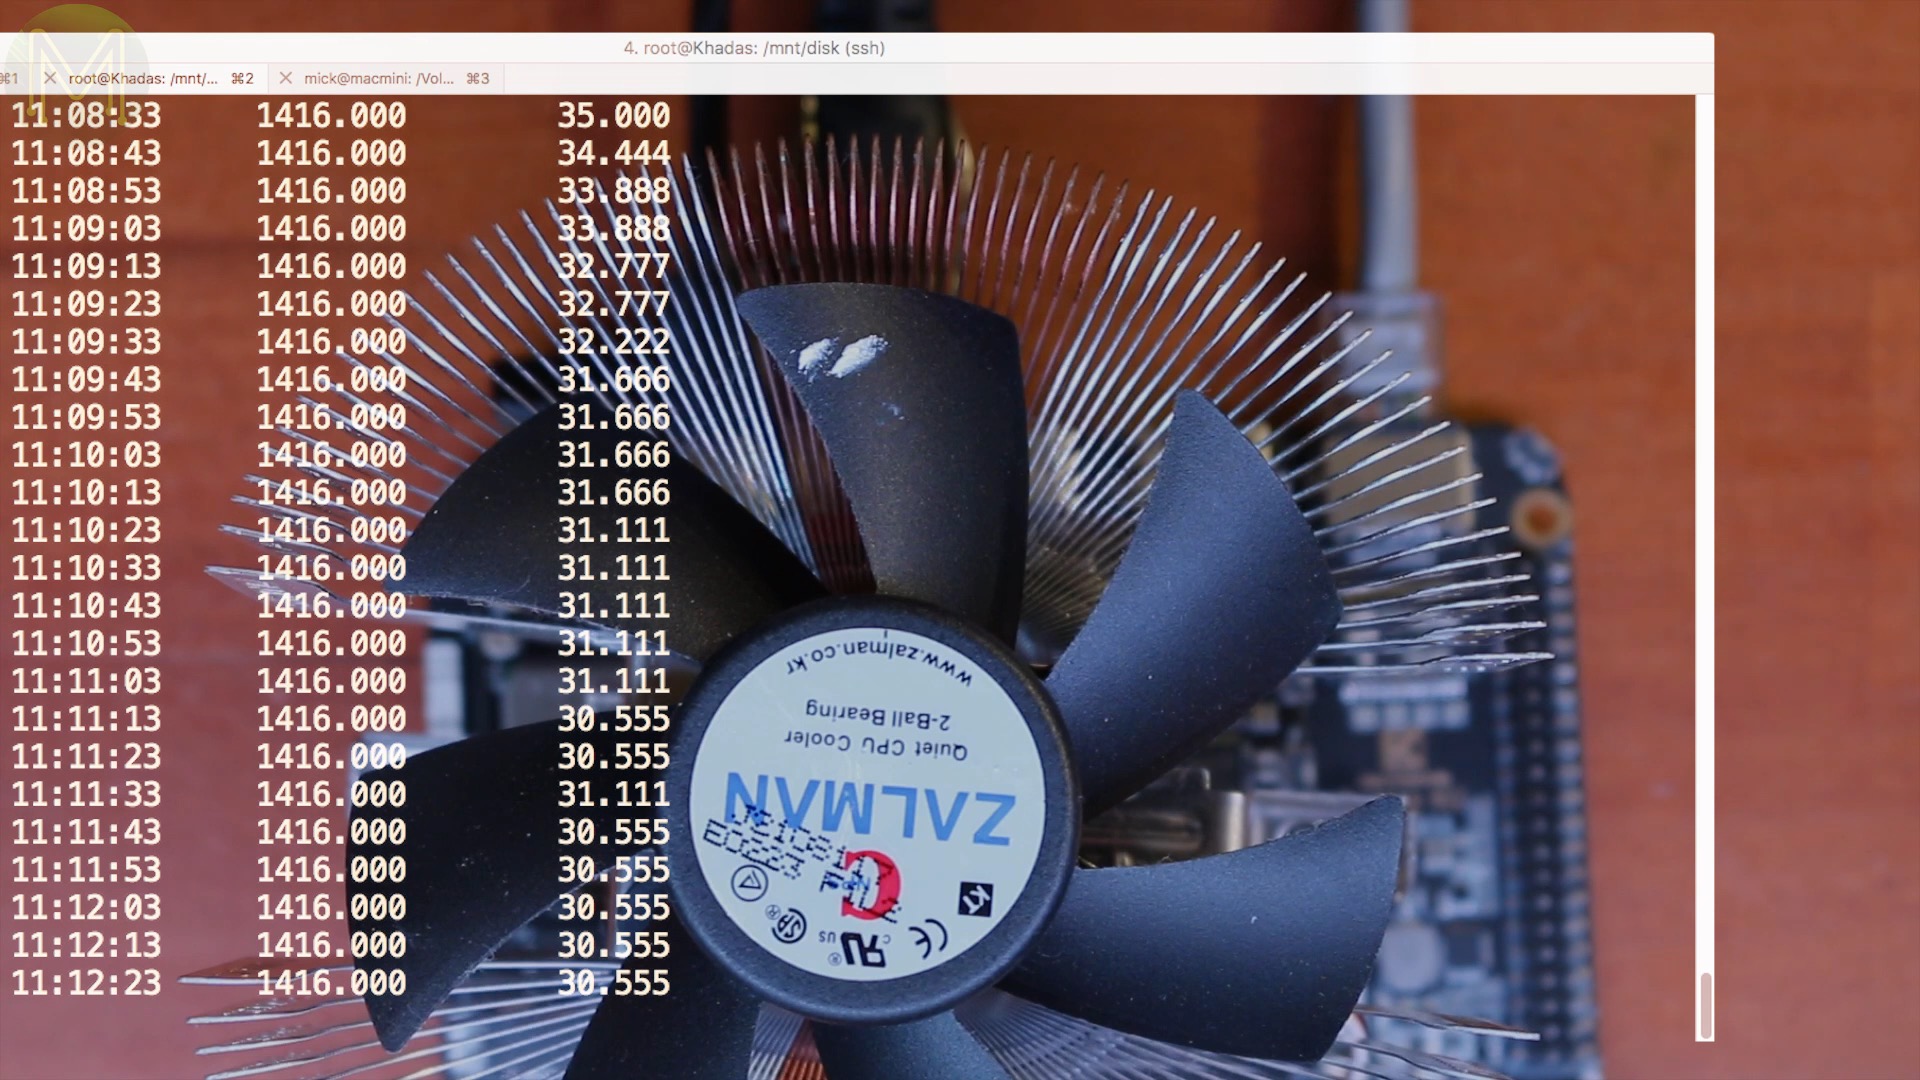
On the temperature side, I saw a very similar story. While idle, it was regularly hitting 70C,and adding my Uber heat-sink saw the temperature drop to 30C.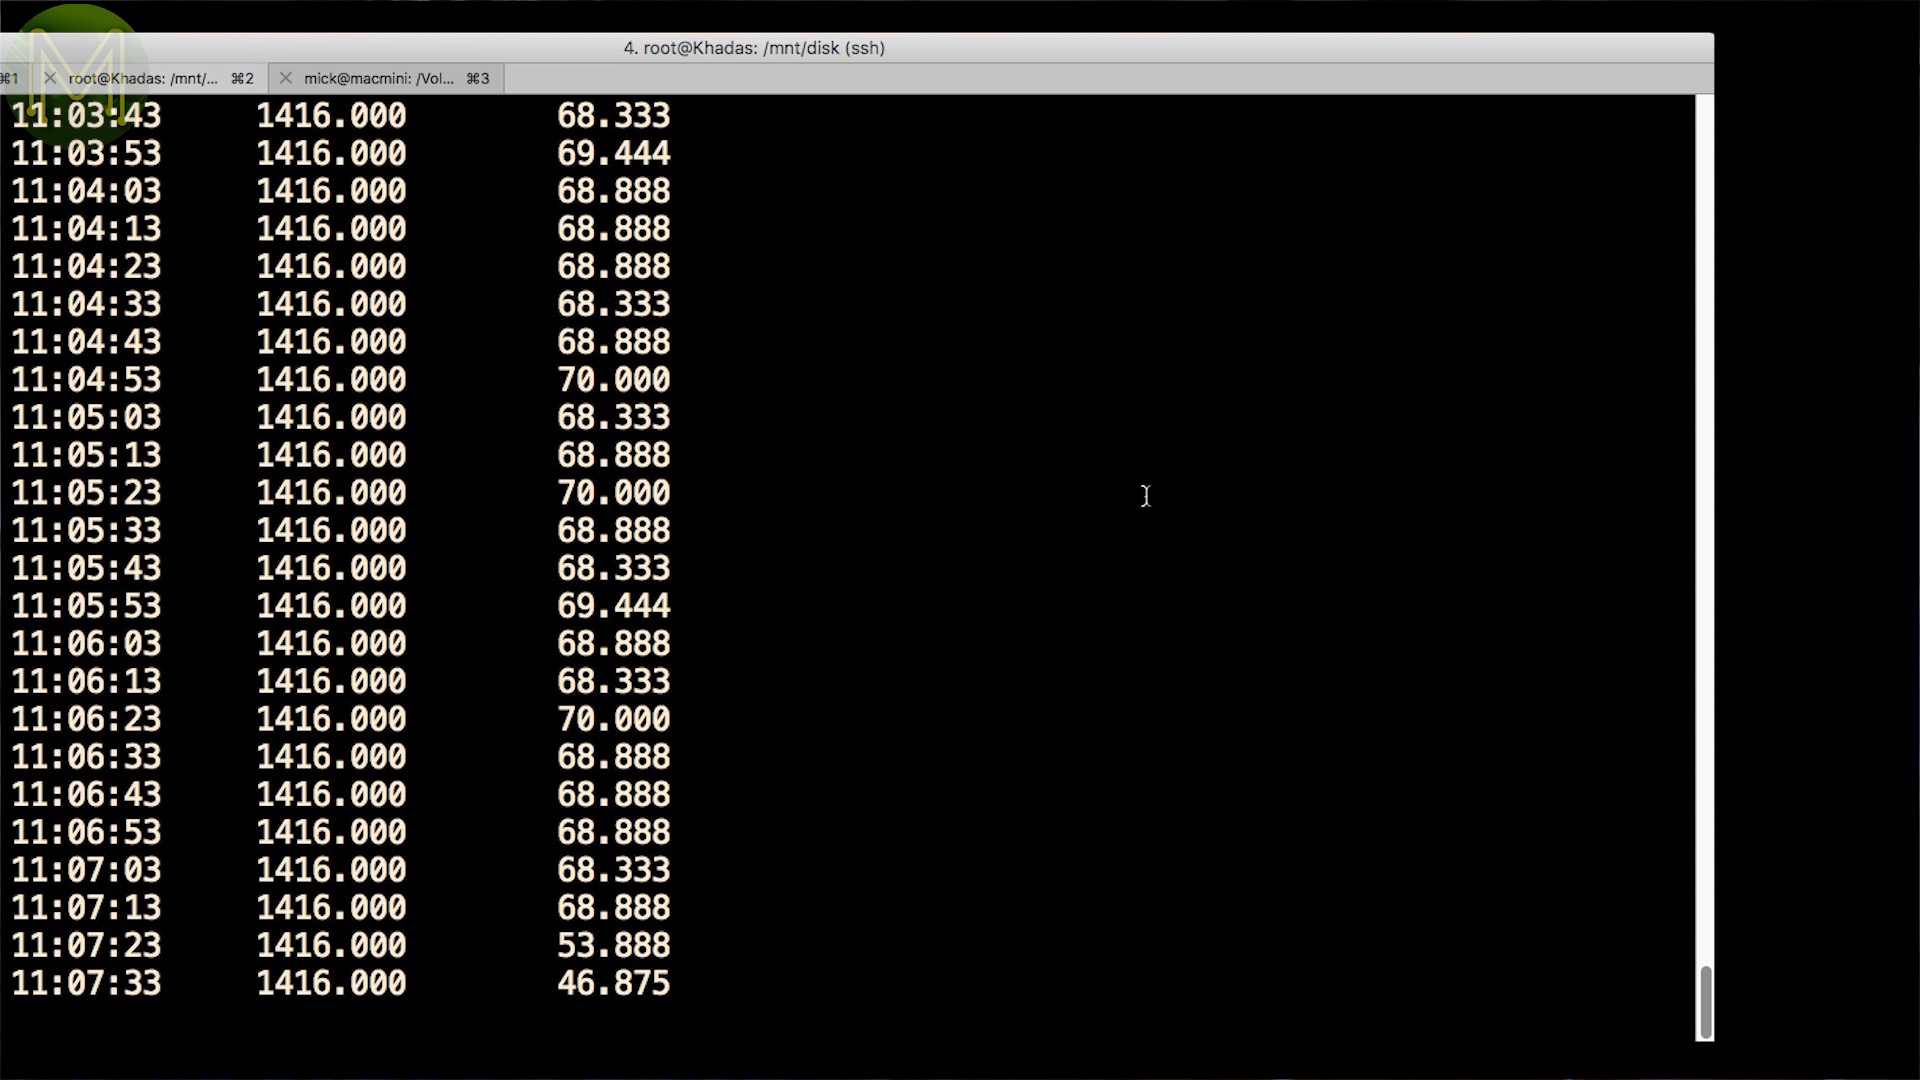
Linux GPIO tests
On to GPIO tests.
The default Linux image only has 4 I2C buses enabled with only a handful of device visible on the first two. I2C bus 9 is the HDMI port and bus 10 is the DP port. Don’t bother trying to query devices on this bus as it’ll lock up your board.During testing I’d often see the board slow down to a crawl. It runs out that sometimes the HDMI port starts to hammer the CPU with interrupts. Simply disconnecting HDMI and plugging back in fixes it.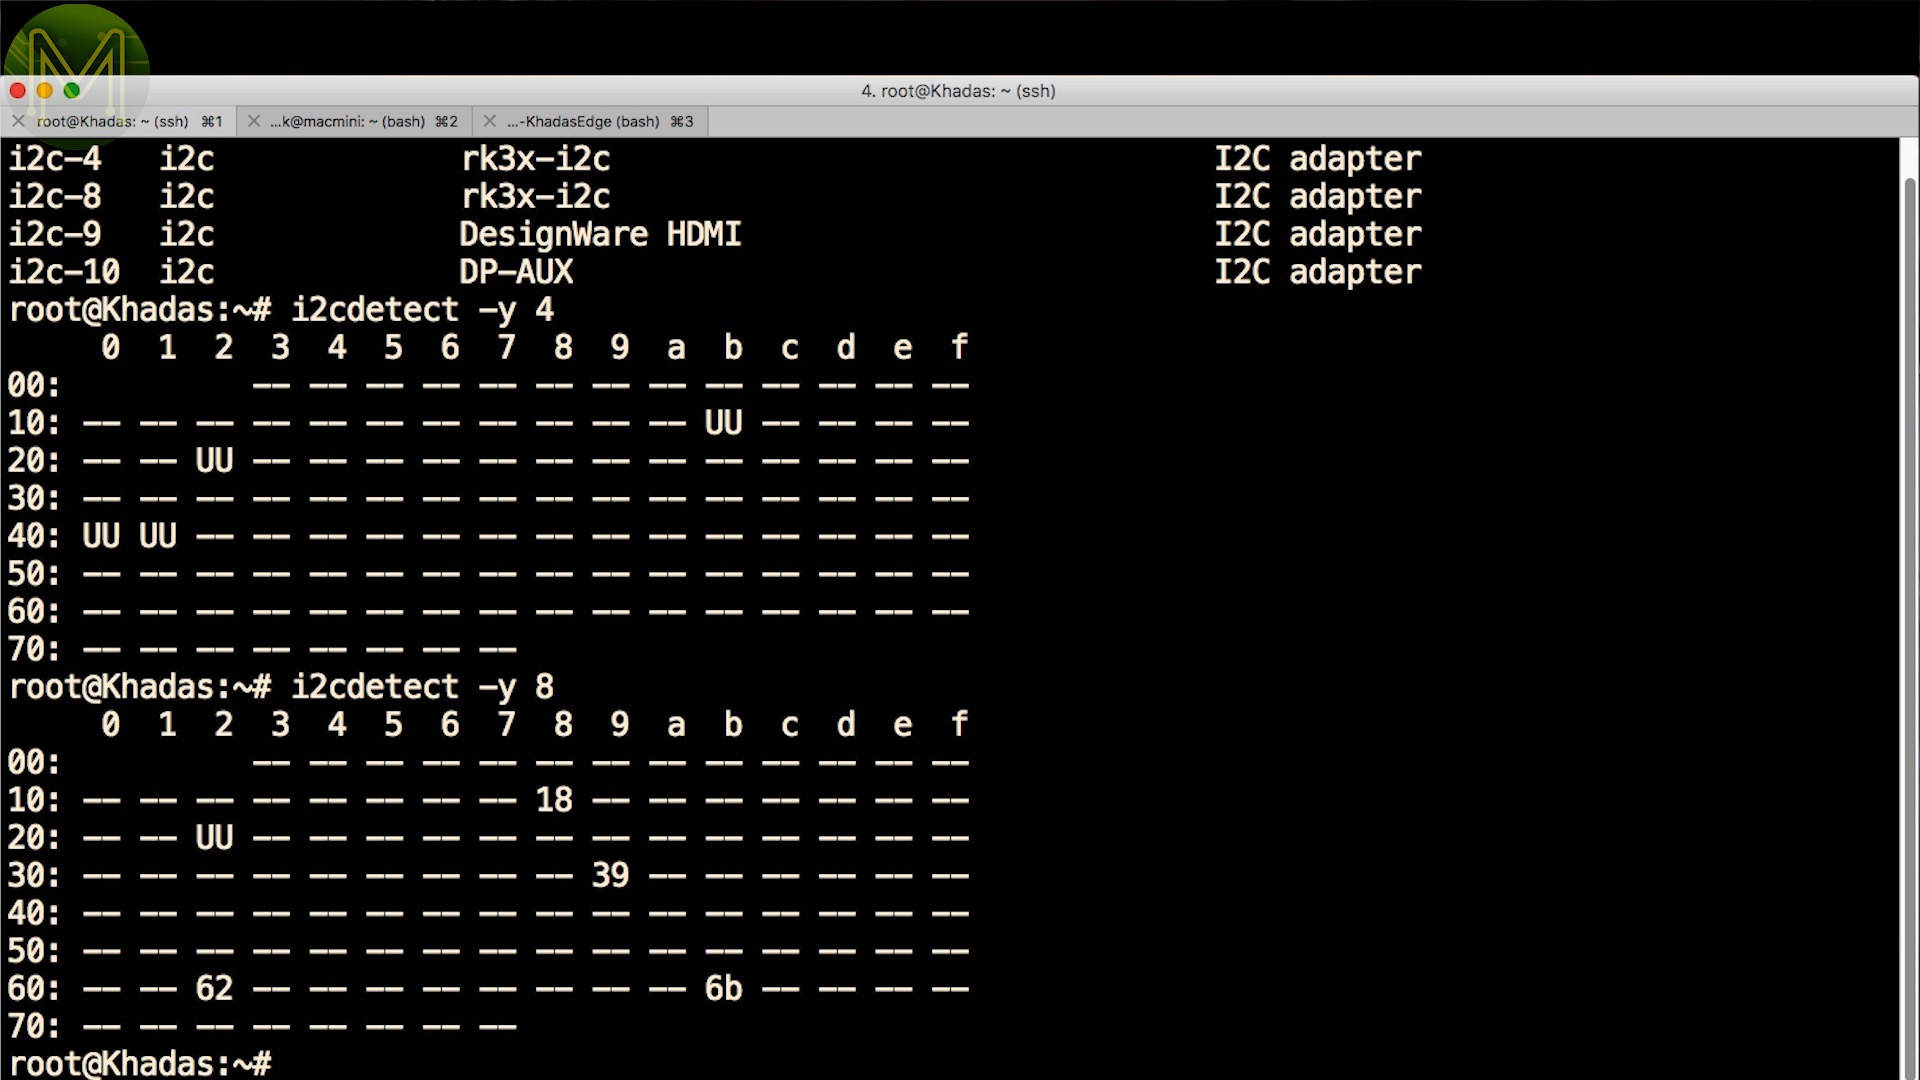
Looking at the schematic and probing around a bit I managed to figure out that the following I2C device map.
- I2C4 / I2C_SDA_PMIC (/i2c@ff3d0000)
        - 0x1B U - (/i2c@ff3d0000/pmic@1b)
        - 0x22 U - FUSB302B MPX (/i2c@ff3d0000/fusb30x@22)
        - 0x40 U - (/i2c@ff3d0000/syr827@40) U7
        - 0x41 U - (/i2c@ff3d0000/syr828@41) U8

- I2C8 (/i2c@ff3e0000)
        - 0x18 A - STM8S
        - 0x22 U - FUSB302B MPX (/i2c@ff3e0000/fusb30x@22)
        - 0x39 A - APDS9960
        - 0x62 A - CW2013CAS0
        - 0x6B A - BQ25703A

- I2C9 (/hdmi@ff940000/ports)

- I2C10 (/dp@fec00000/ports)
The ones marked ‘U’ are unavailable for the user and have a Linux kernel driver accessing them. Based on the schematic I’m missing two more I2C devices. The audio CODEC and IMU.
Since there are actually 9 I2C buses on this SoC. I enabled a couple that I guessed were the right ones using the Device Tree Compiler.
- I2C0 (/i2c@ff3c0000)
        - disabled

- I2C1 (/i2c@ff110000)
        - 0x1A A - ALC5651 (Enable I2C)

- I2C2 (/i2c@ff120000)
        - disabled

- I2C3 (/i2c@ff130000)
        - disabled

- I2C4 / I2C_SDA_PMIC (/i2c@ff3d0000)
        - 0x1B U - (/i2c@ff3d0000/pmic@1b)
        - 0x22 U - FUSB302B MPX (/i2c@ff3d0000/fusb30x@22)
        - 0x40 U - (/i2c@ff3d0000/syr827@40) U7
        - 0x41 U - (/i2c@ff3d0000/syr828@41) U8

- I2C5 (/i2c@ff140000)
        - disabled

- I2C6 (/i2c@ff150000)
        - disabled

- I2C7 (/i2c@ff160000)
        - 0x68 A - ICM-20602 (Enable I2C)

- I2C8 (/i2c@ff3e0000)
        - 0x18 A - STM8S
        - 0x22 U - FUSB302B MPX (/i2c@ff3e0000/fusb30x@22)
        - 0x39 A - APDS9960
        - 0x62 A - CW2013CAS0
        - 0x6B A - BQ25703A

- I2C9 (/hdmi@ff940000/ports)

- I2C10 (/dp@fec00000/ports)
And now bus 1 and 7 have the two remaining devices.
Looking at the datasheet for both, I quickly found that the audio CODEC was on bus 1 and the IMU on bus 7.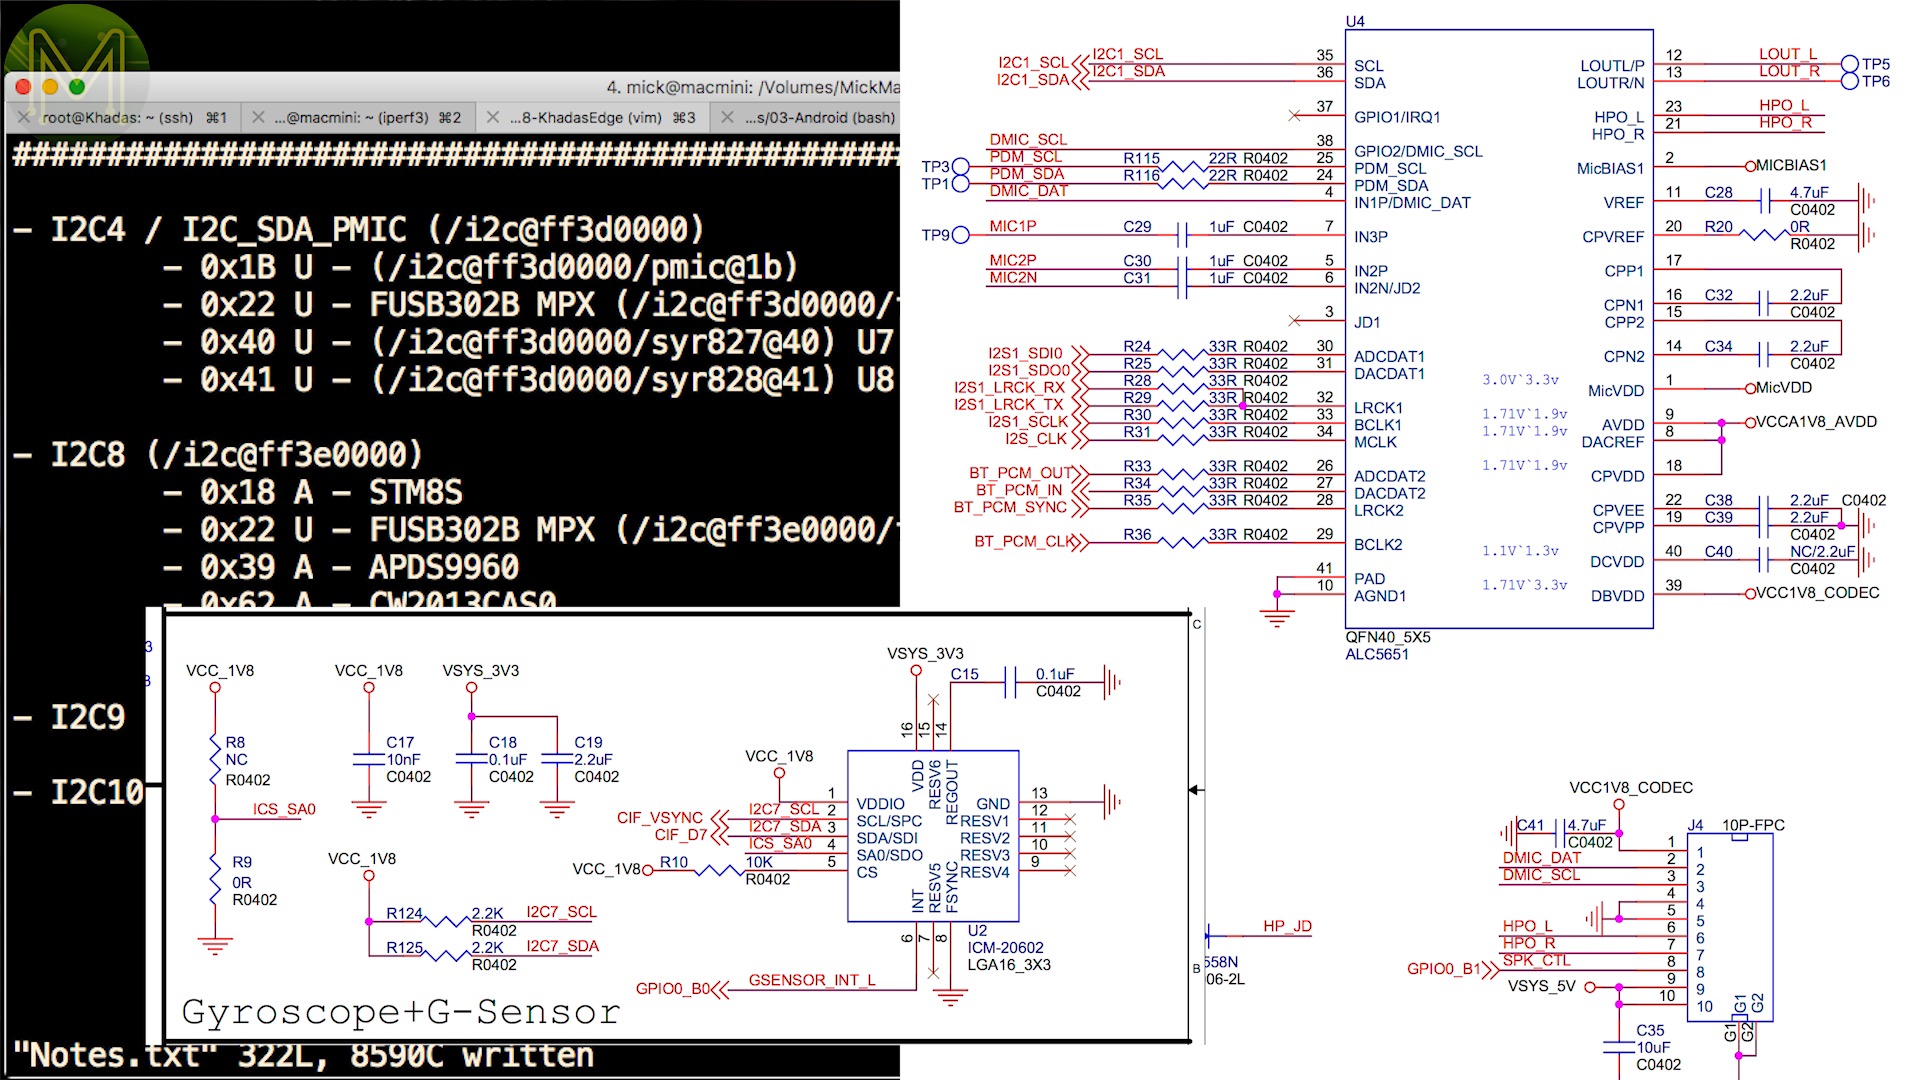
i2cdetect -y 7
i2cdump -y 7 0x68
i2cset -y 7 0x68 0x6b 0
i2cget -y 7 0x68 0x6b
i2cdump -y 7 0x68

while true
do
    (i2cget -y 7 0x68 0x41 b; i2cget -y 7 0x68 0x42 b) | /root/h2d
    echo
    sleep 1
done
I set a few registers to enable the IMU and was able to query the temperature fairly easily.
And cooling the sensor down responds without issue.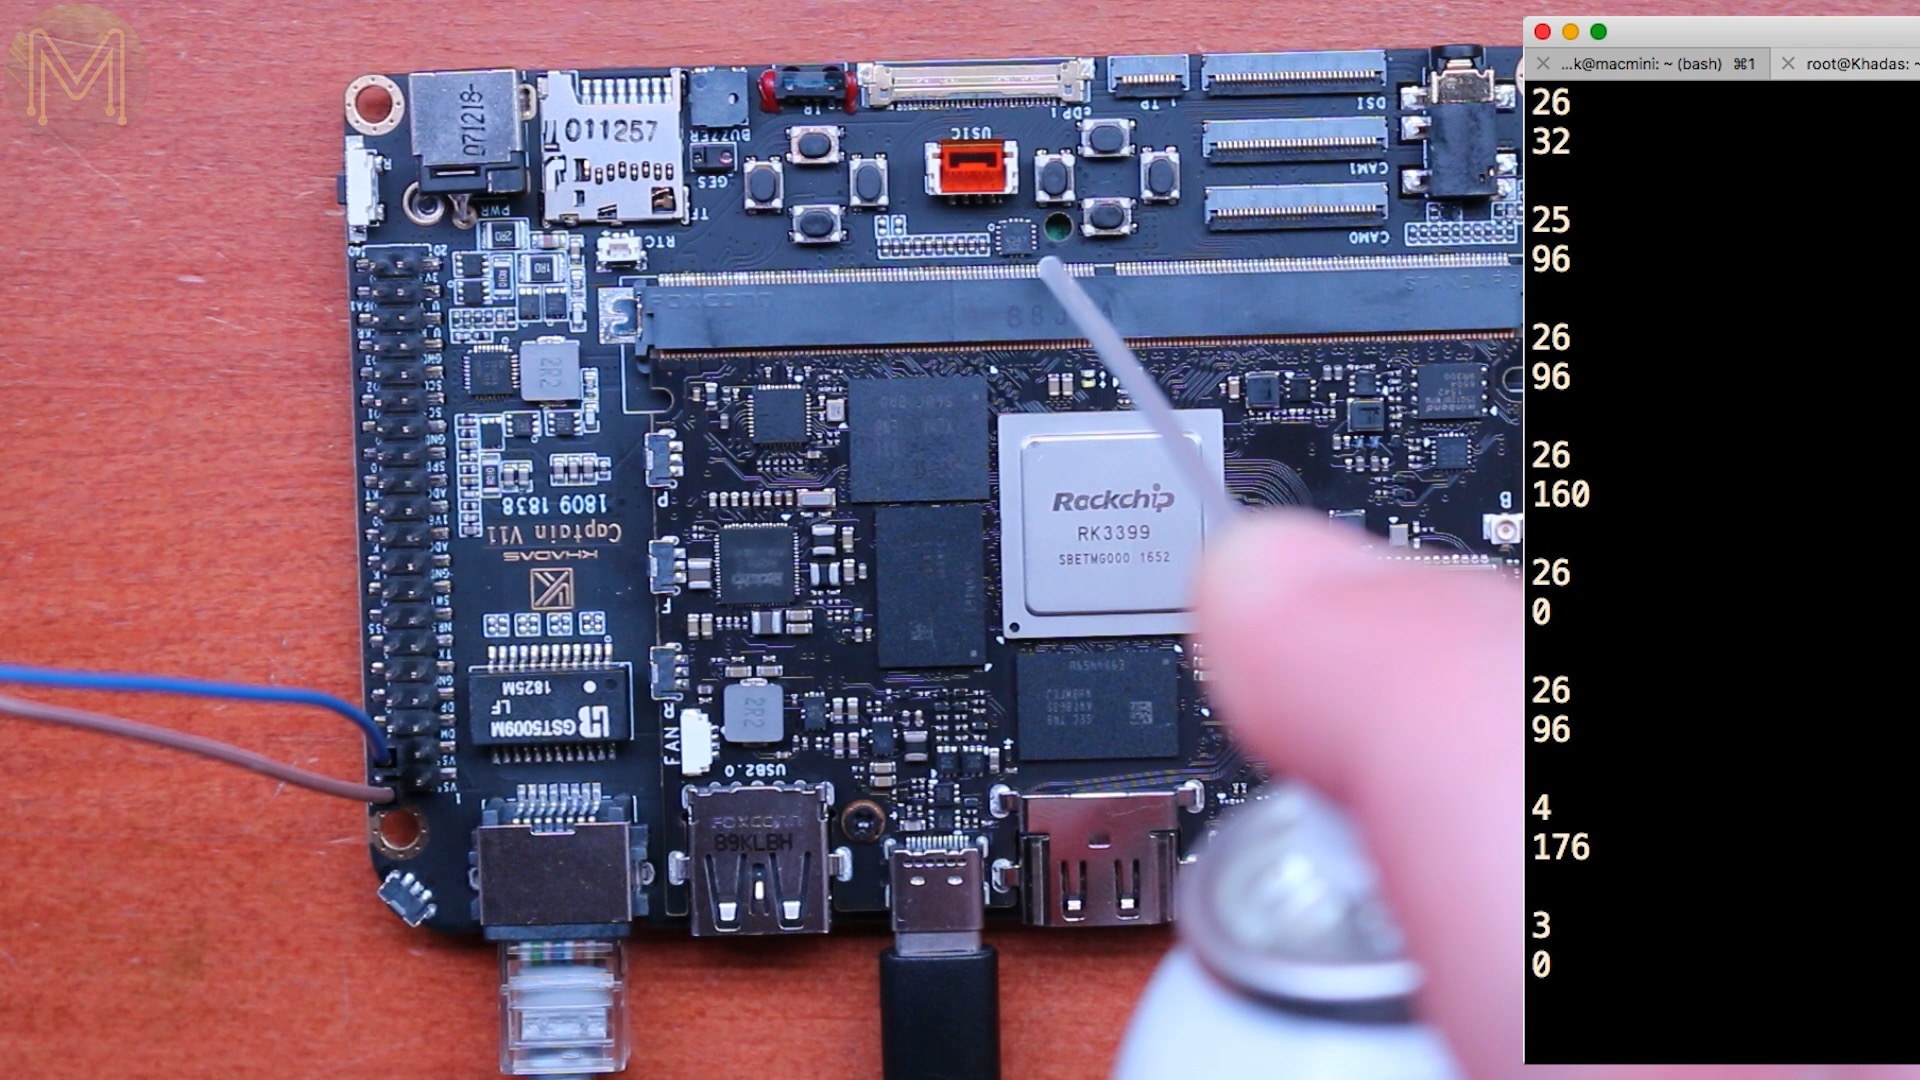
GPIO tests were also successful and the GPIOs run at 3.3v. I’m not sure if they are 5v tolerant though. I wasn’t able to test out the infra-red as there’s currently no documentation on how to get to it.
Also, note that this SoC has GPIOs that can perform many functions, so you often get clashes based on how the device tree is configured. If you want SPI, then you’ll miss out on some of the UARTs, so there’s always a bit of a trade off.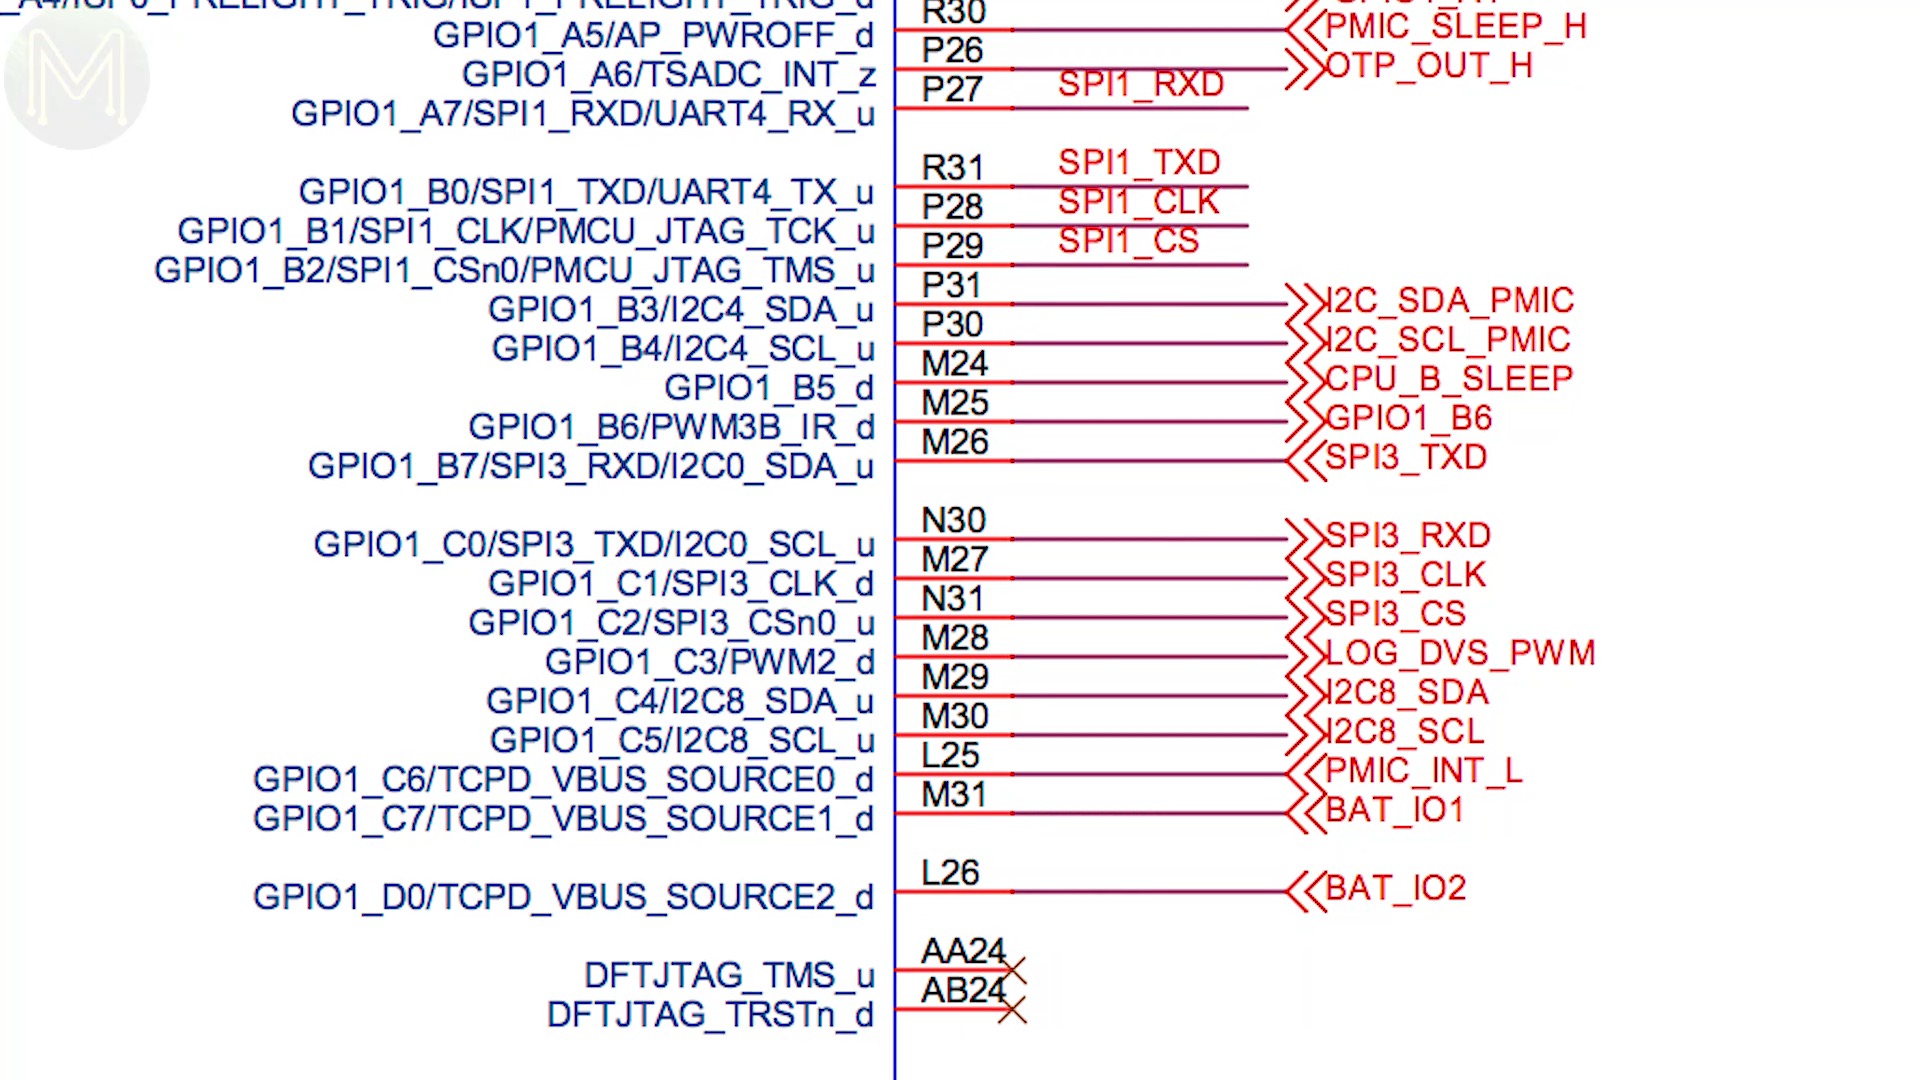
As expected, Ethernet speeds were pretty decent with 937 Mbit/s on TCP throughput and .430 mS UDP jitter.
Unfortunately, I wasn’t able to test any further because of the magic smoke genie escaping from my notebook and only just started to install all the software for the Phoronix tests.
However, I did notice that the old issue of Ethernet lockups is still occurring with the RK3399 kernel driver. This just causes the board to crash with a kernel dump.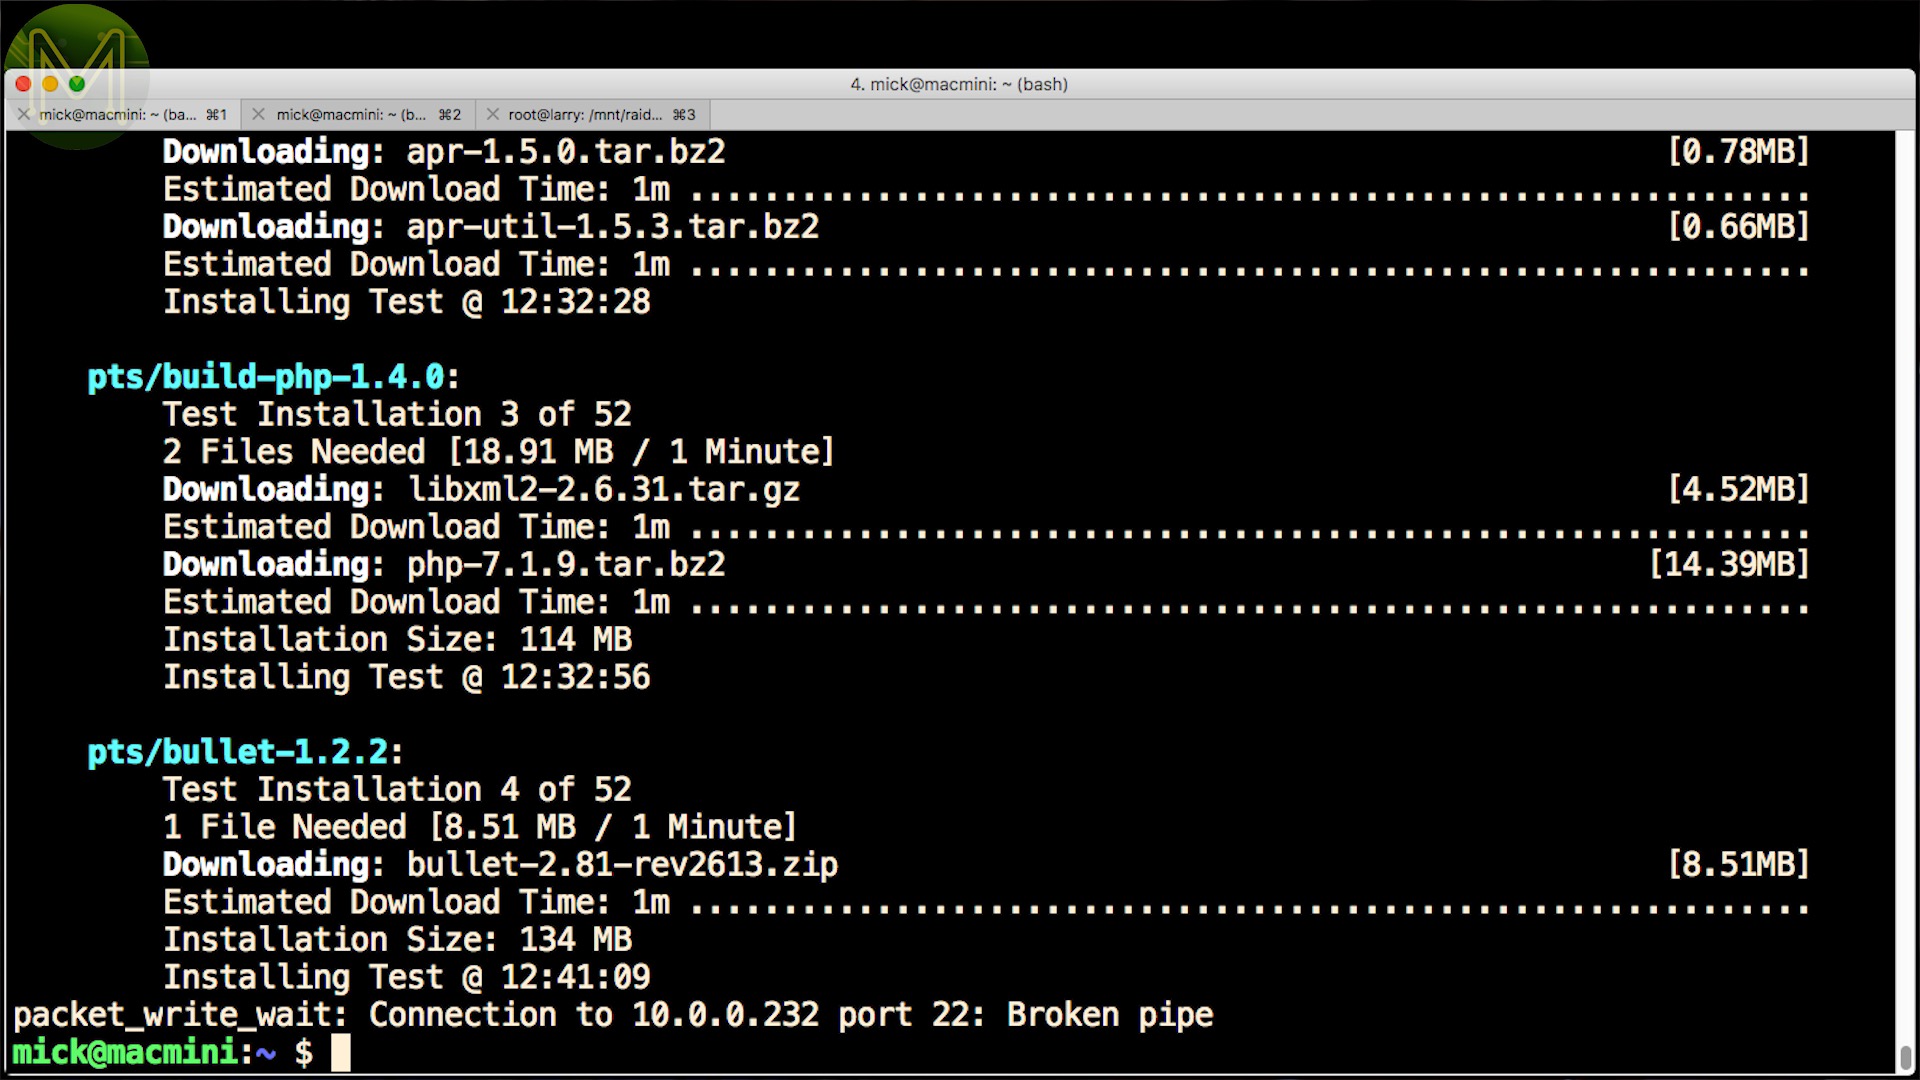
Summary
So, what do I think of the new Khadas Edge and Captain?
If you are worried about whether the product actually exists or not on the IndieGoGo campaign, well I can say it… does.
It’s still early days, but from what I’ve seen so far, they’re set to make a pretty decent product.
If you get the correct heat-sink, then both the Edge and Edge-V come in a fairly small package.
It’s good to see that they have designed in some decent power management, which was one of my suggestions I made to them. USB Type C is very quickly being adopted and will solve all the power related issues we have been seeing in SBCs so far. Even though it’s slightly more complex to implement, it gives you a more stable DC supply.
So, to SBC manufacturers reading. Start using USB Type C for power.