LattePanda Alpha: The big mistake? // Review
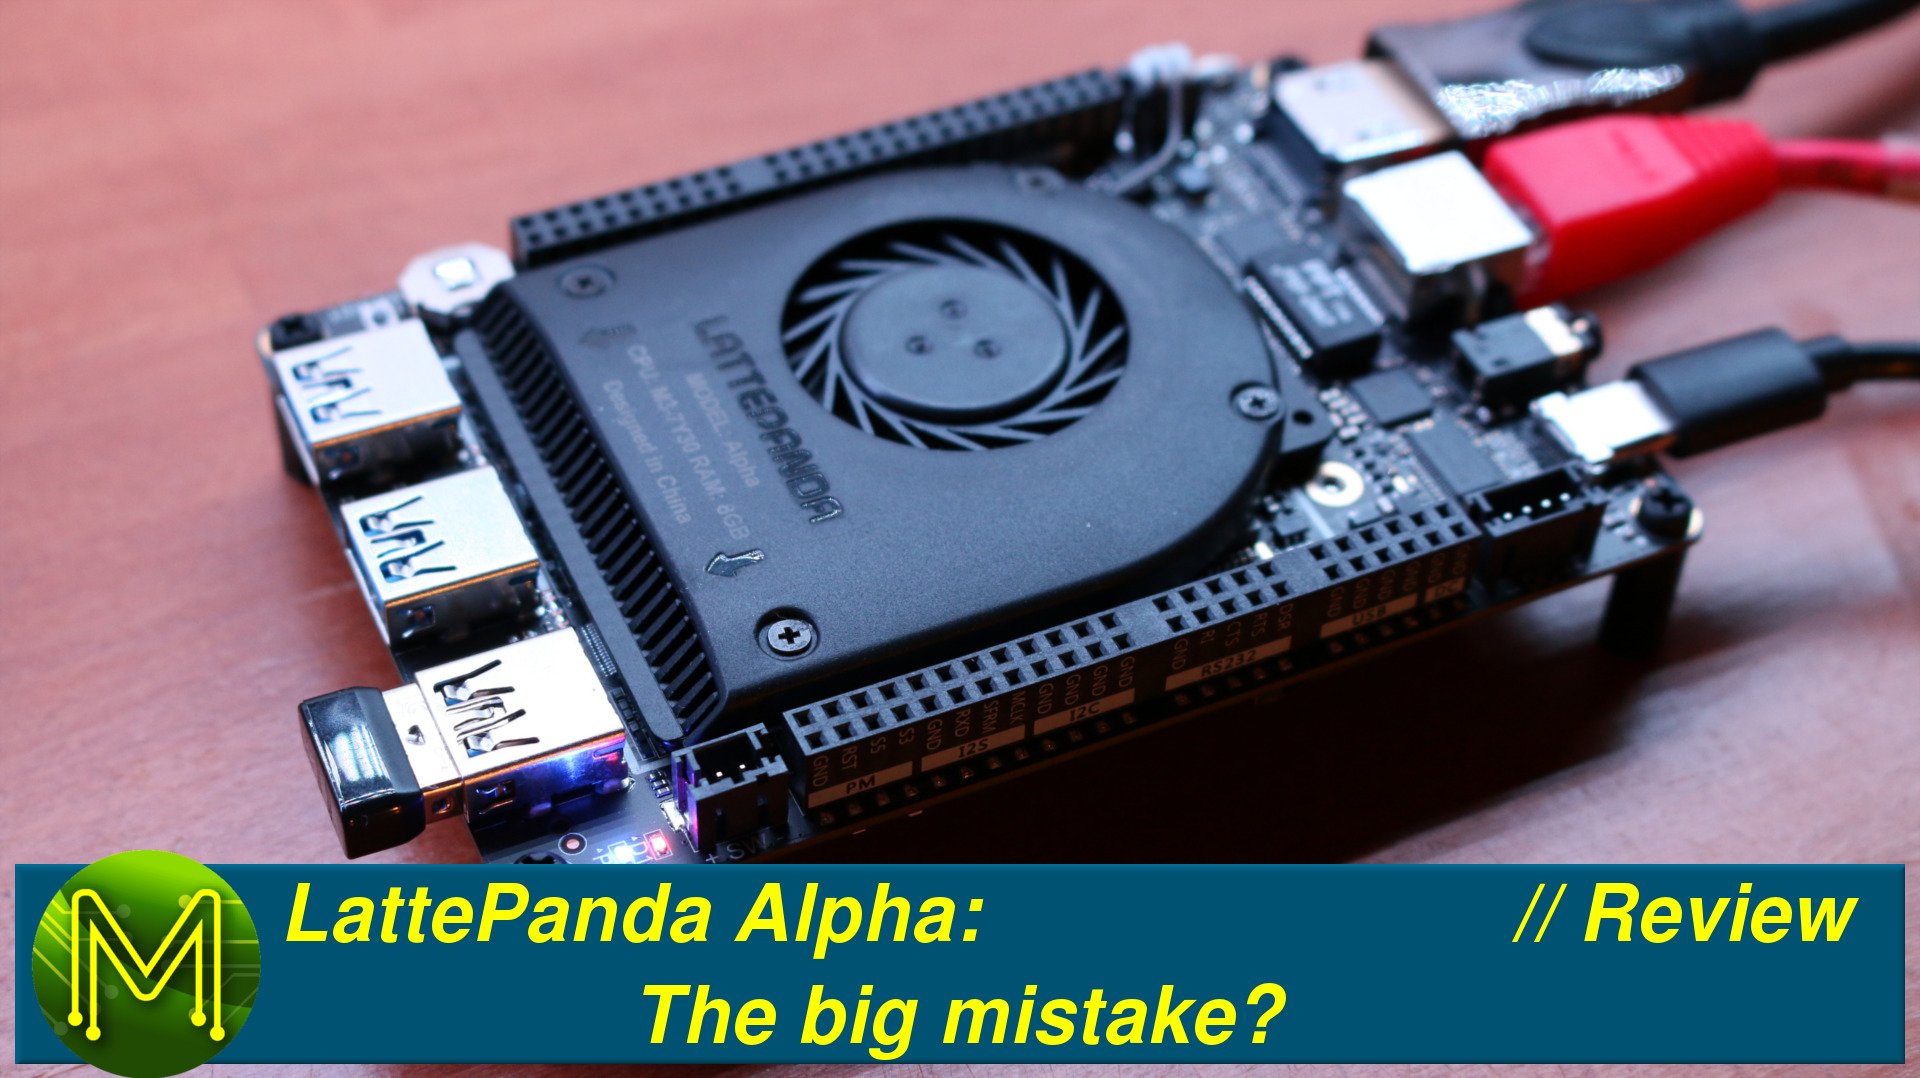
The LattePanda Alpha SBC is a bit of a beast not only in horse power, but in price. In this video I look at benchmarks on Windows, Linux and OSX and give my perspective on why LattePanda made a big mistake.
Unboxing
So, why do I think the LattePanda Alpha is a big mistake? Well, let’s first have a look what you get on this SBC and then run a few performance benchmarks.
The LattePanda Alpha is a pretty expensive SBC. The Alpha 800 sells for US$300 while the Alpha 864 will set you back US$360. For people living down-under and with the current exchange rate, the Alpha 864 will set you back 500 kangaroo bucks. That’s a pretty hefty price tag.
Fortunately, for me I bought this unit in US dollars.
PCB top - connectivity
So, what do you get for your hard earned money? Starting from the top right working clockwise.
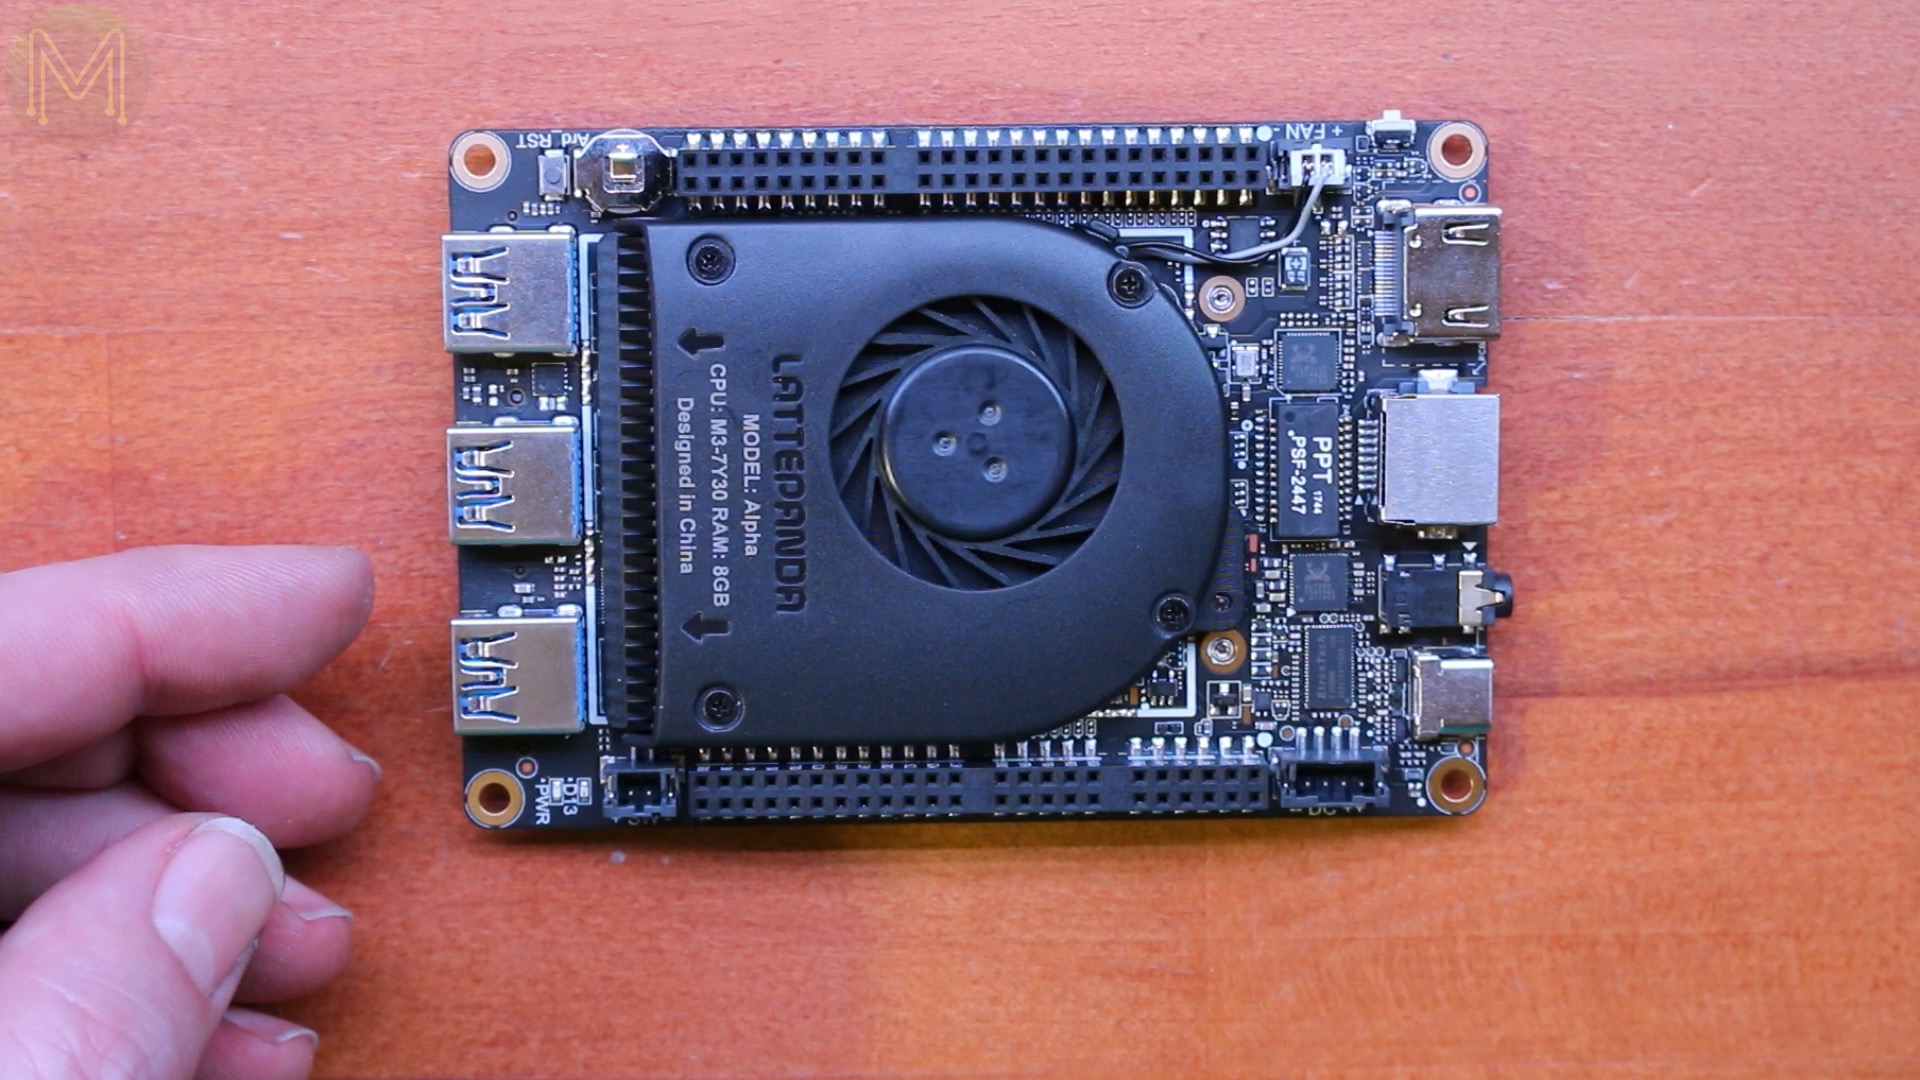
- HDMI capable of 4K @ 60FPS
- GbE
- Audio jack
- USB Type C - both for power and eDP
- 12v DC header - supporting a wide 10 to 15v. So you could theoretically power this directly from your vehicle’s battery.
- 50 pin GPIO header - and you get two of them.
- Power button header.
- User controlled LED via an Arduino.
- Power LED.
- 3 USB 3.0 ports.
- Arduino reset button.
- RTC battery.
- PWM fan header.
- And power button.
PCB bottom - connectivity
On the flip side we have
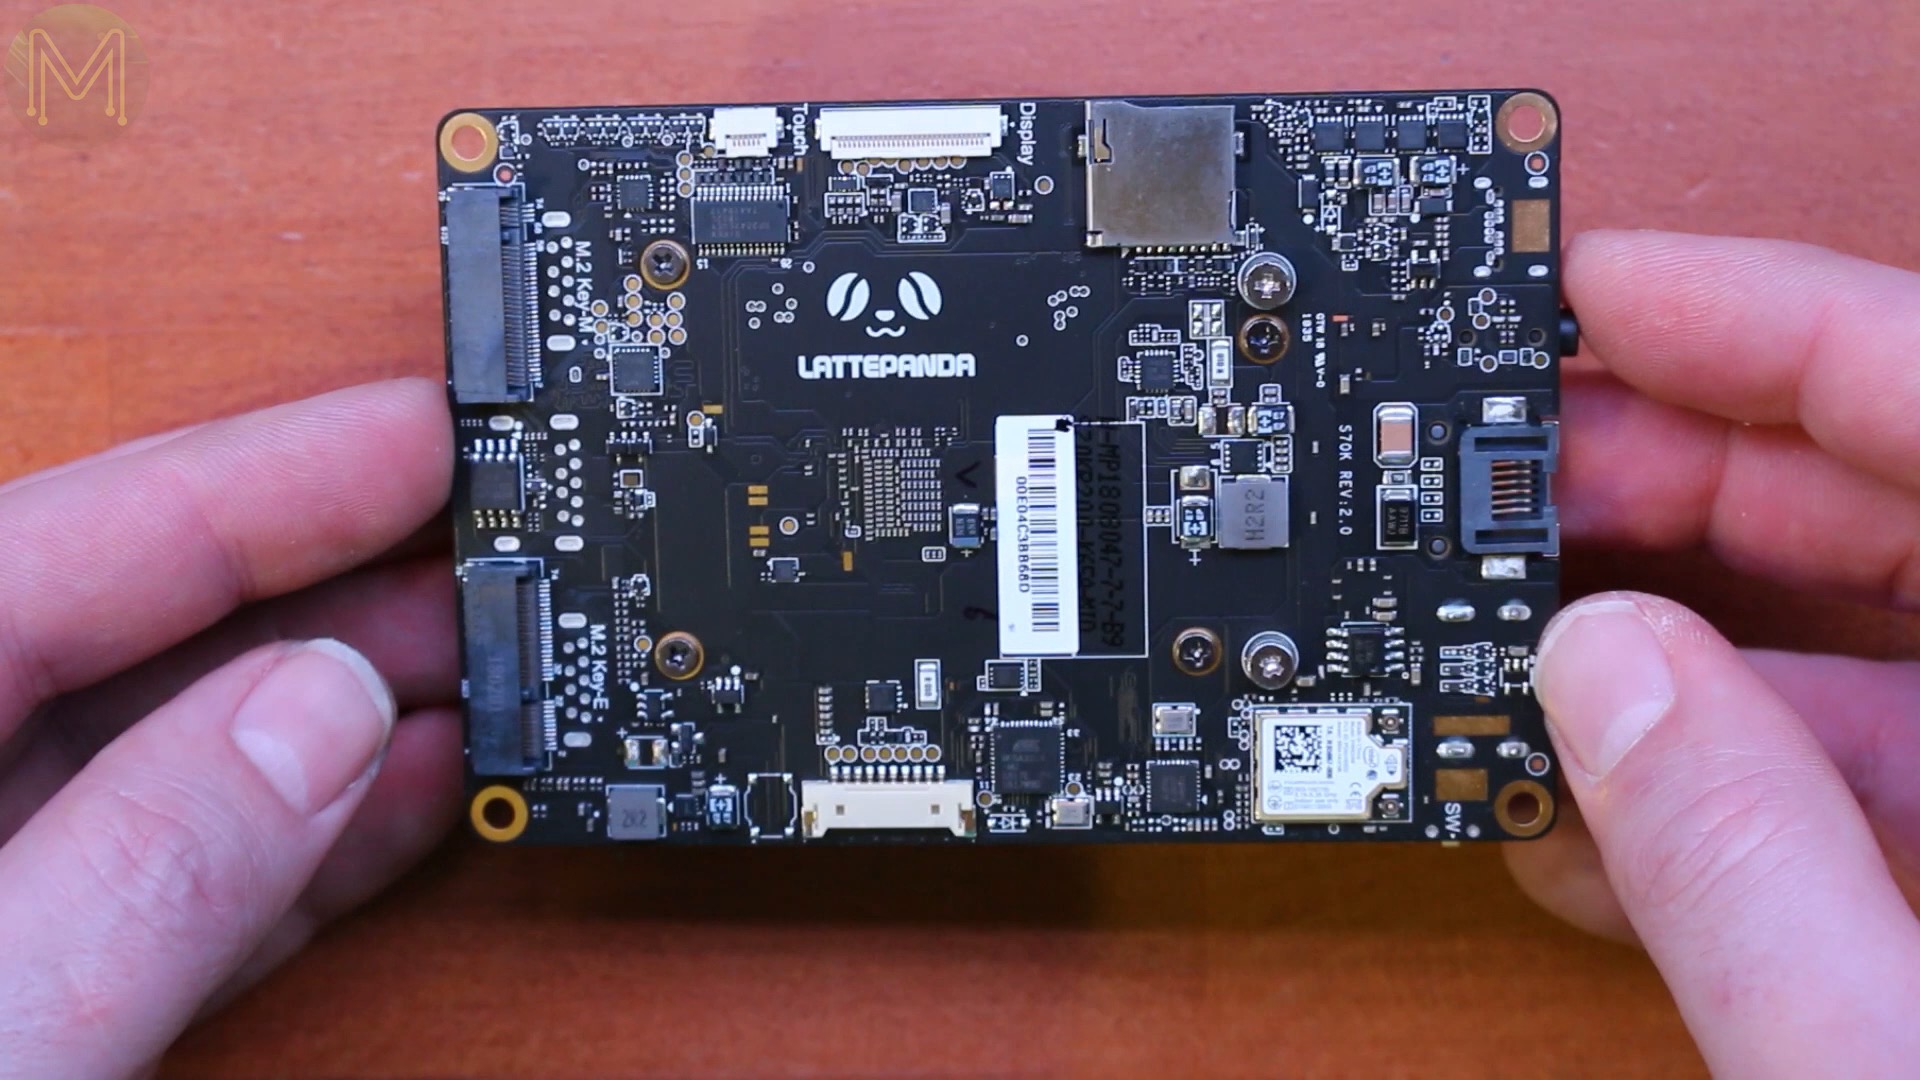
- Some connector I haven’t figured out yet.
- M.2 Key-E
- M.2 Key-M
- Touch panel interface
- eDP ribbon connector
- SD slot.
The board I have varies slightly from all online documentation. So I’m guessing that it’s a more recent version. So, you may see this on the bottom side.
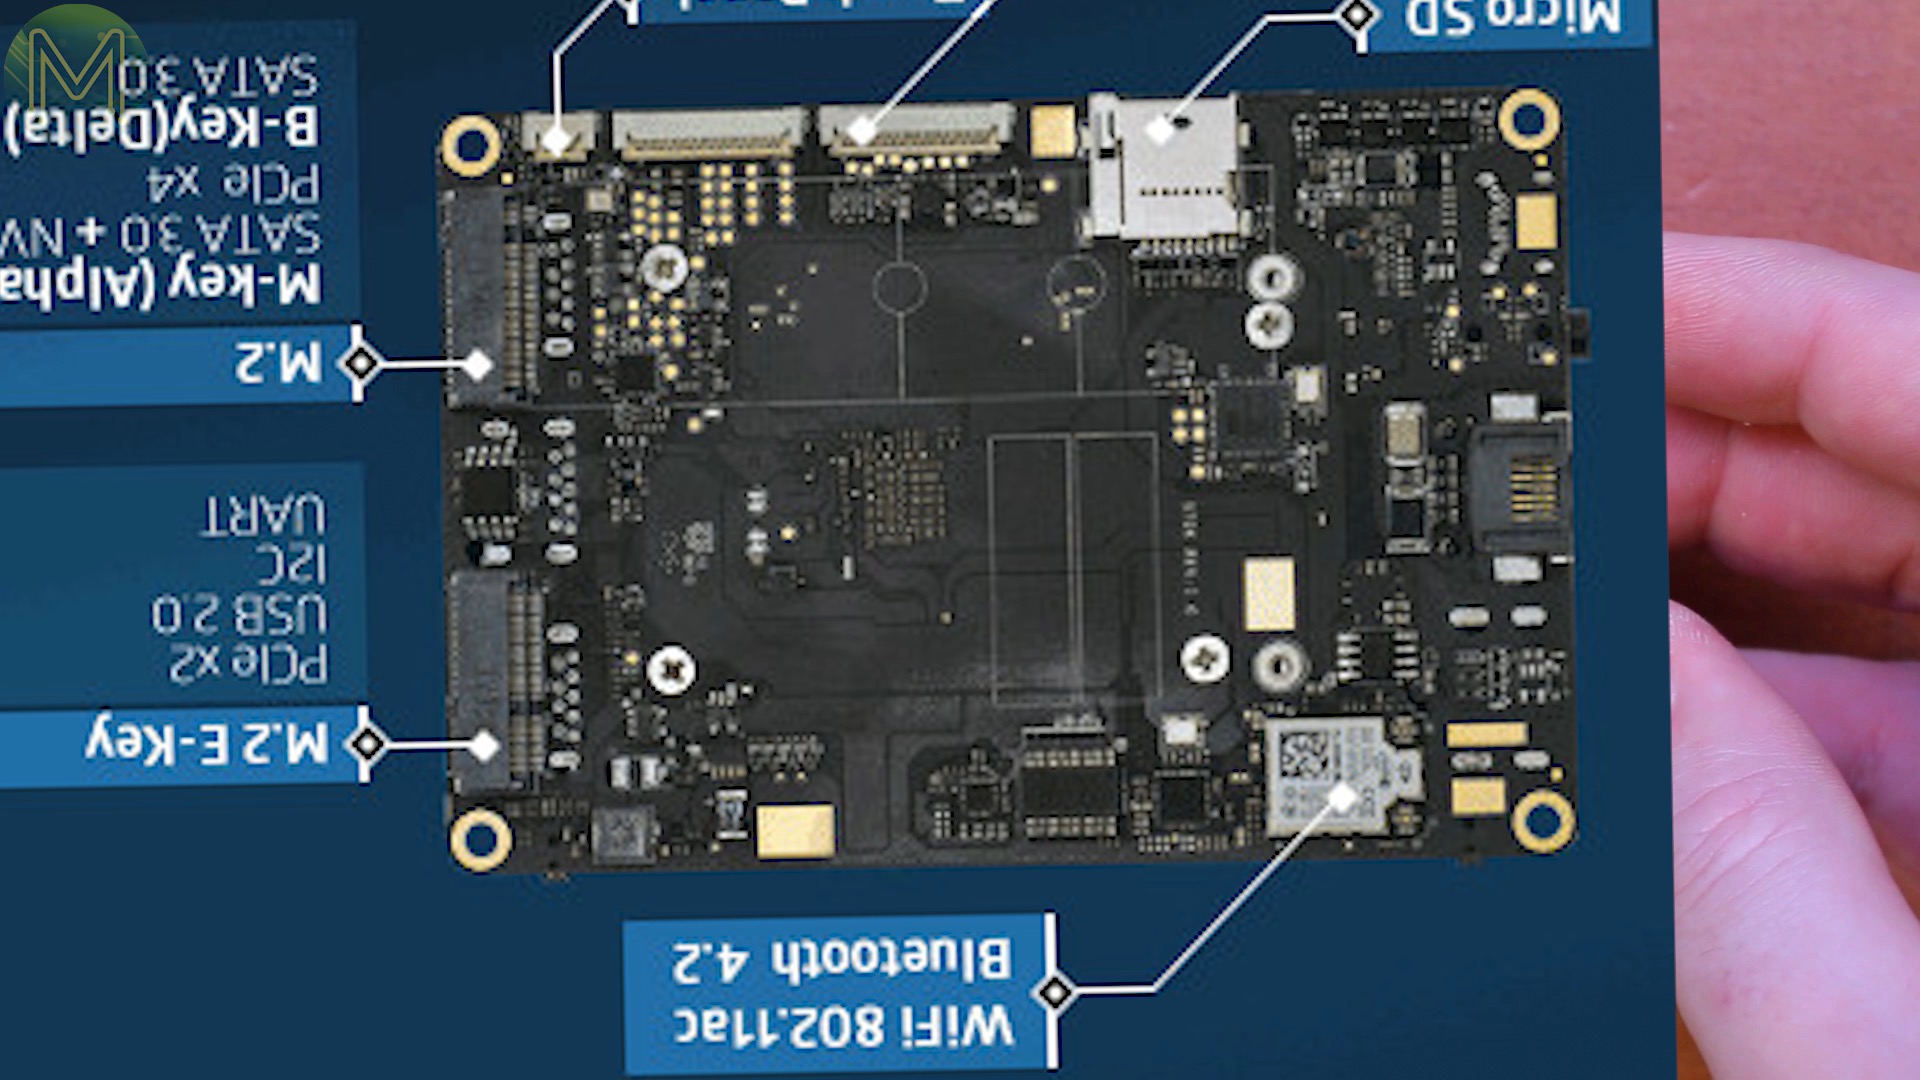
PCB bottom - ICs
Moving on to chipsets. LattePanda haven’t released any schematics for these SBCs, but we can poke around a bit on the PCB.
Starting from the top right we have:
[caption id=“attachment_6054” align=“aligncenter” width=“640”]
MDV3605URH - P-channel MosFETs[/caption]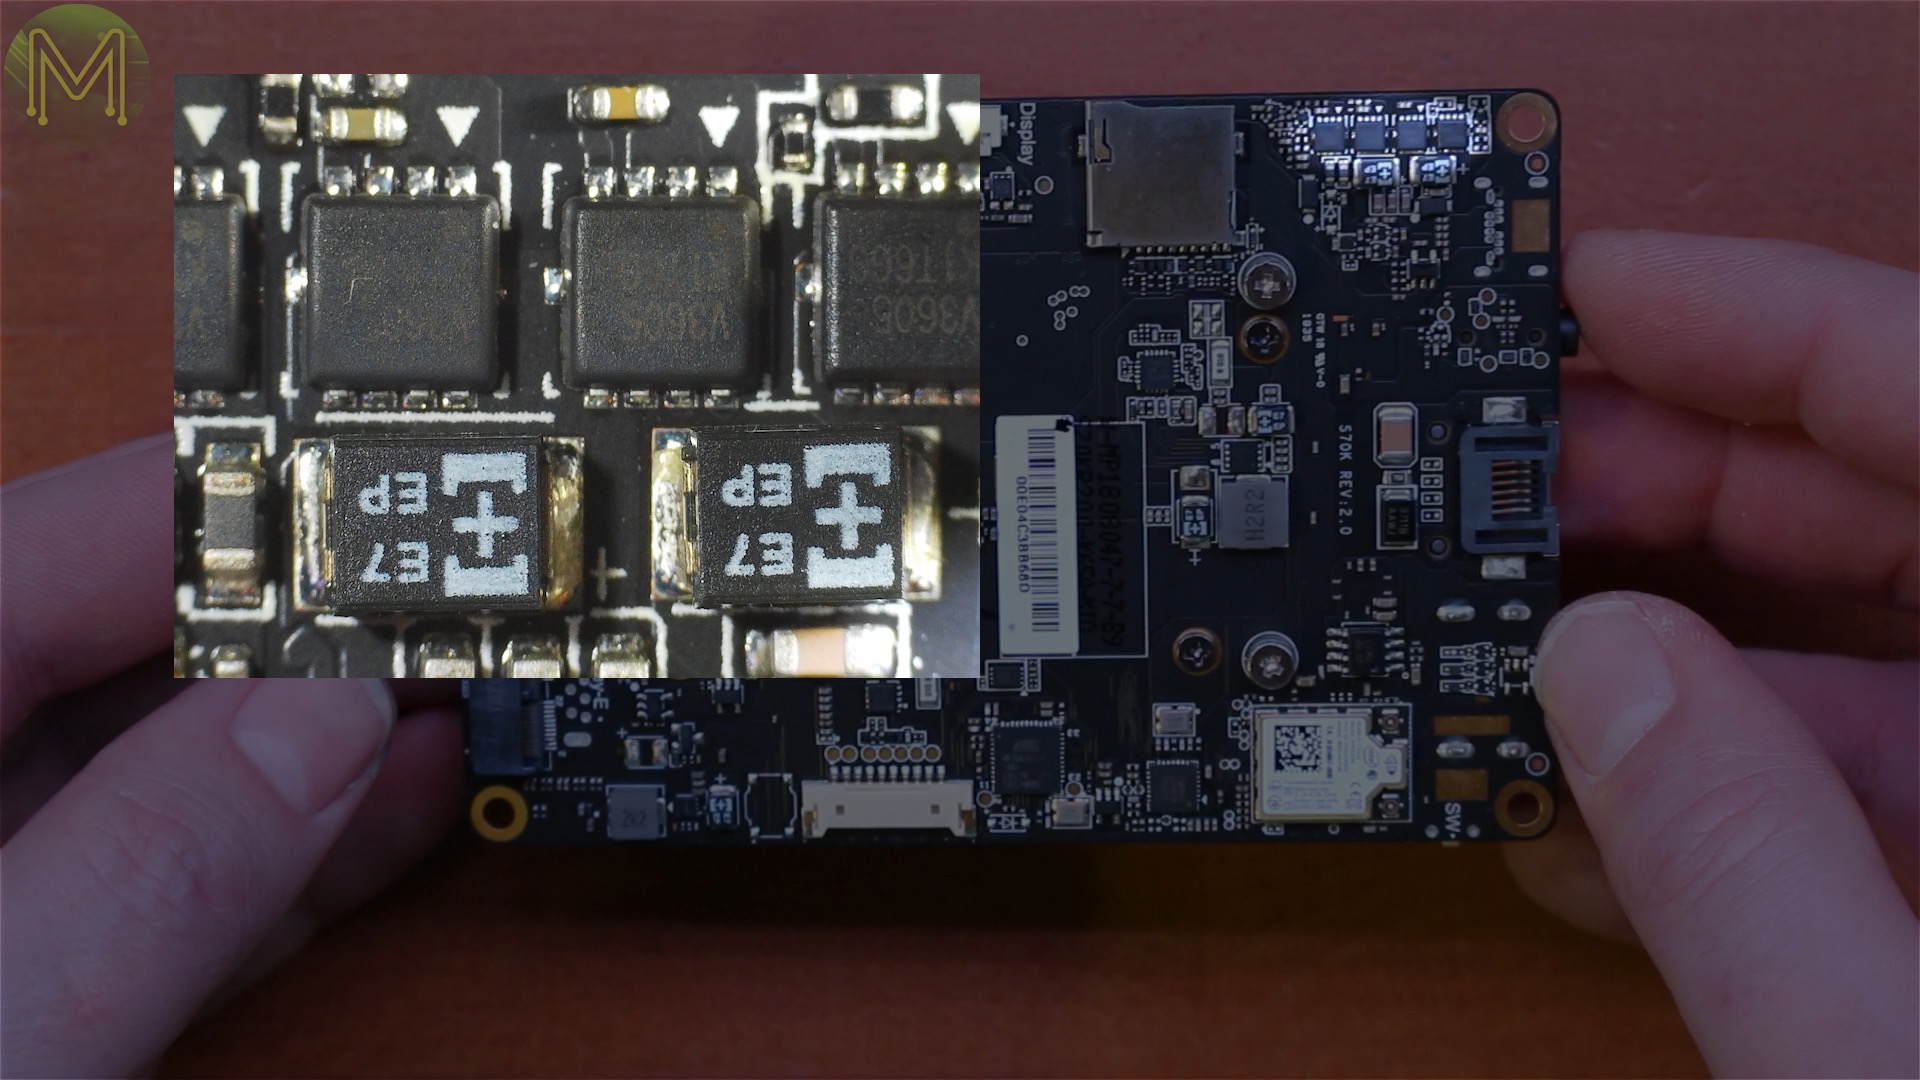
[caption id=“attachment_6055” align=“aligncenter” width=“640”]
Unknown semi, but possibly something to do with power control.[/caption]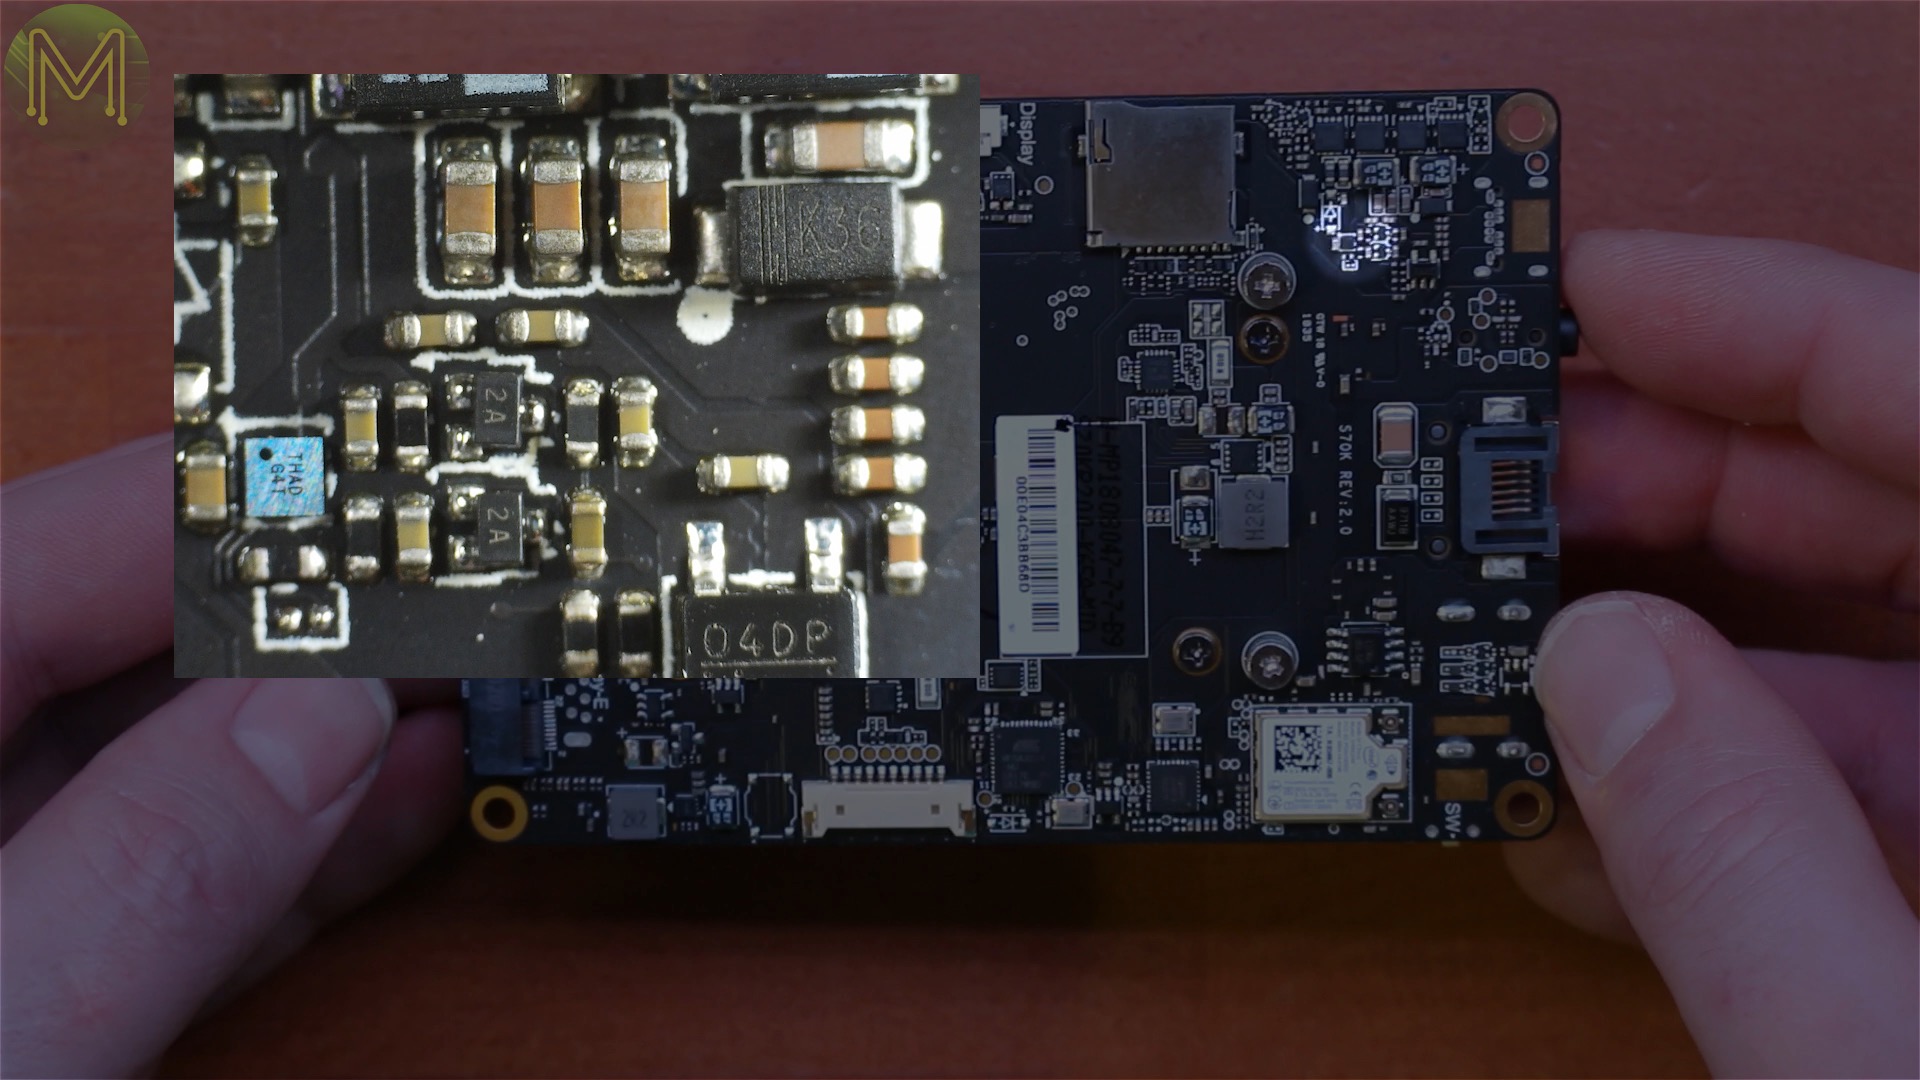
[caption id=“attachment_6056” align=“aligncenter” width=“640”]
uP0109P - LDO regulator, capable of sourcing up to 2A[/caption]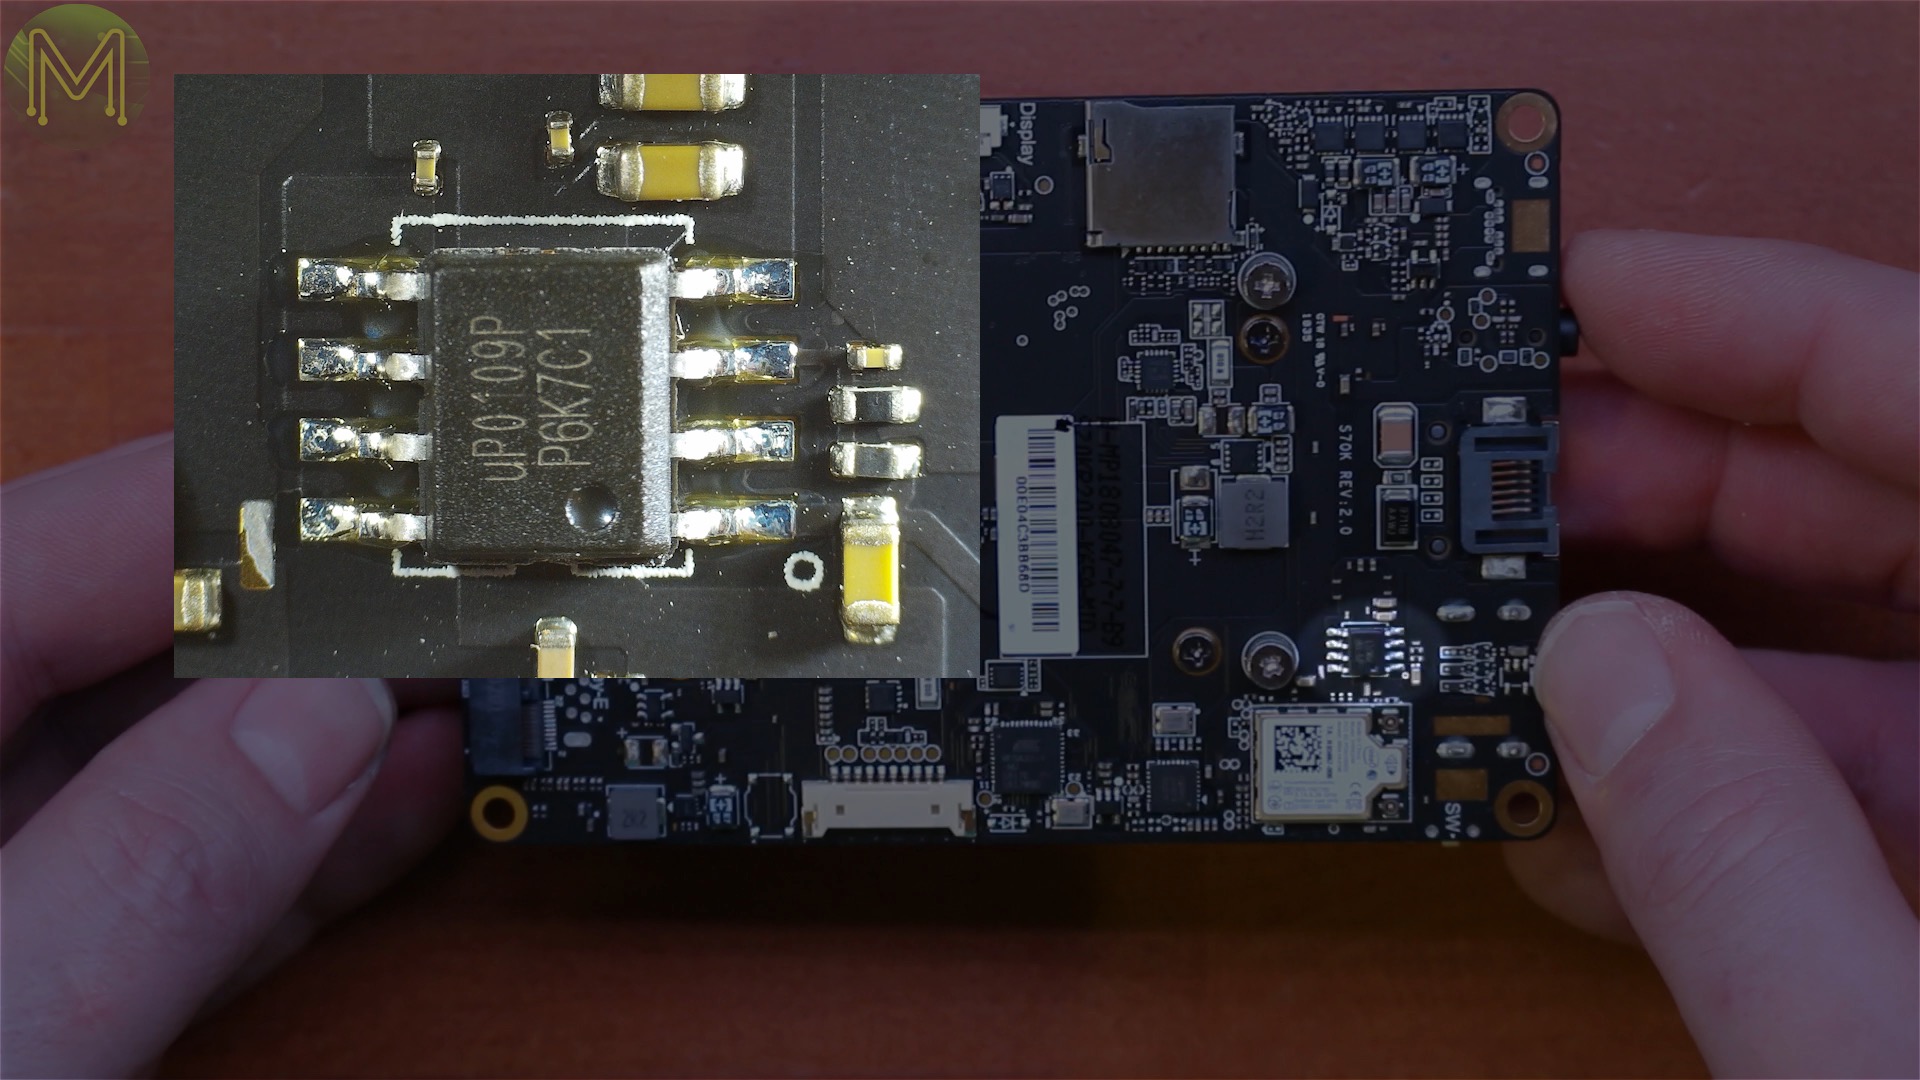
[caption id=“attachment_6057” align=“aligncenter” width=“640”]
ESD protection[/caption]
[caption id=“attachment_6058” align=“aligncenter” width=“640”]
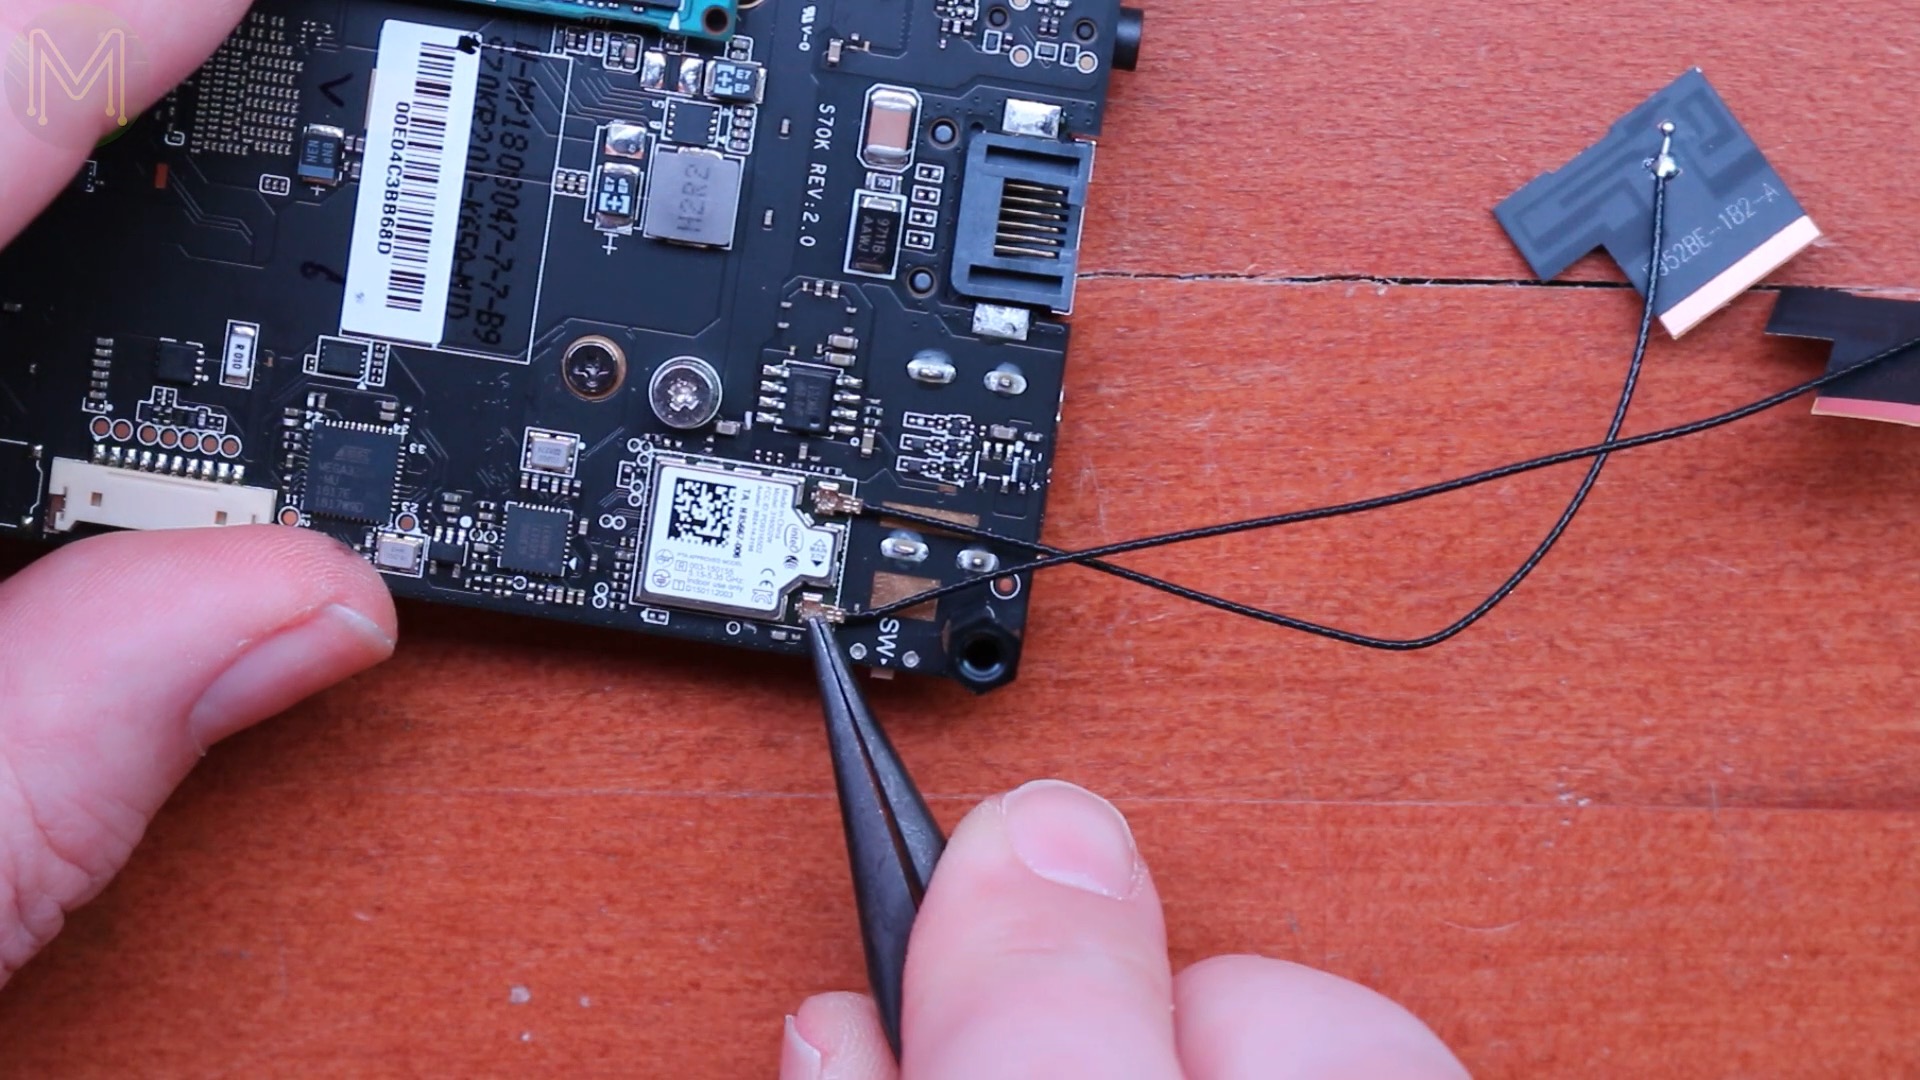
Intel 3165D2W - WiFi & Bluetooth module[/caption]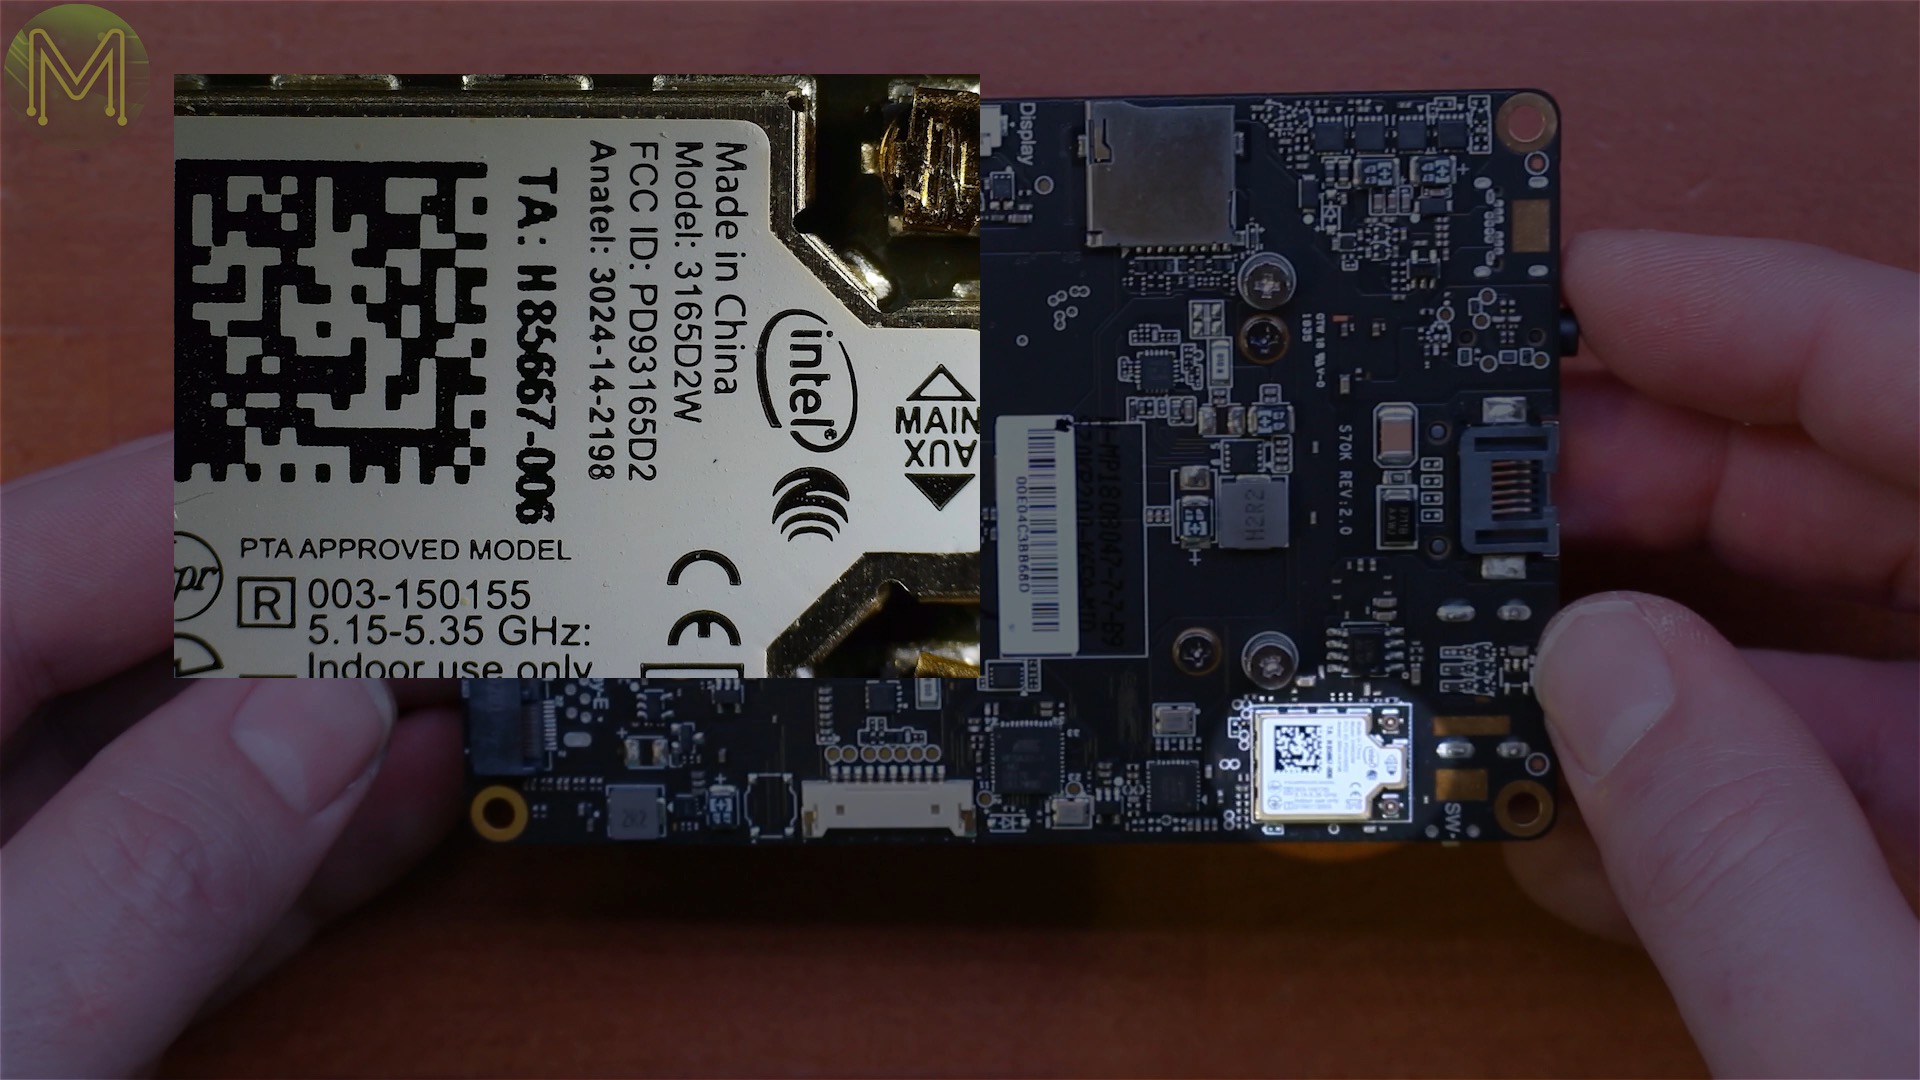
[caption id=“attachment_6059” align=“aligncenter” width=“640”]
GL850G - USB 2.0 hub controller[/caption]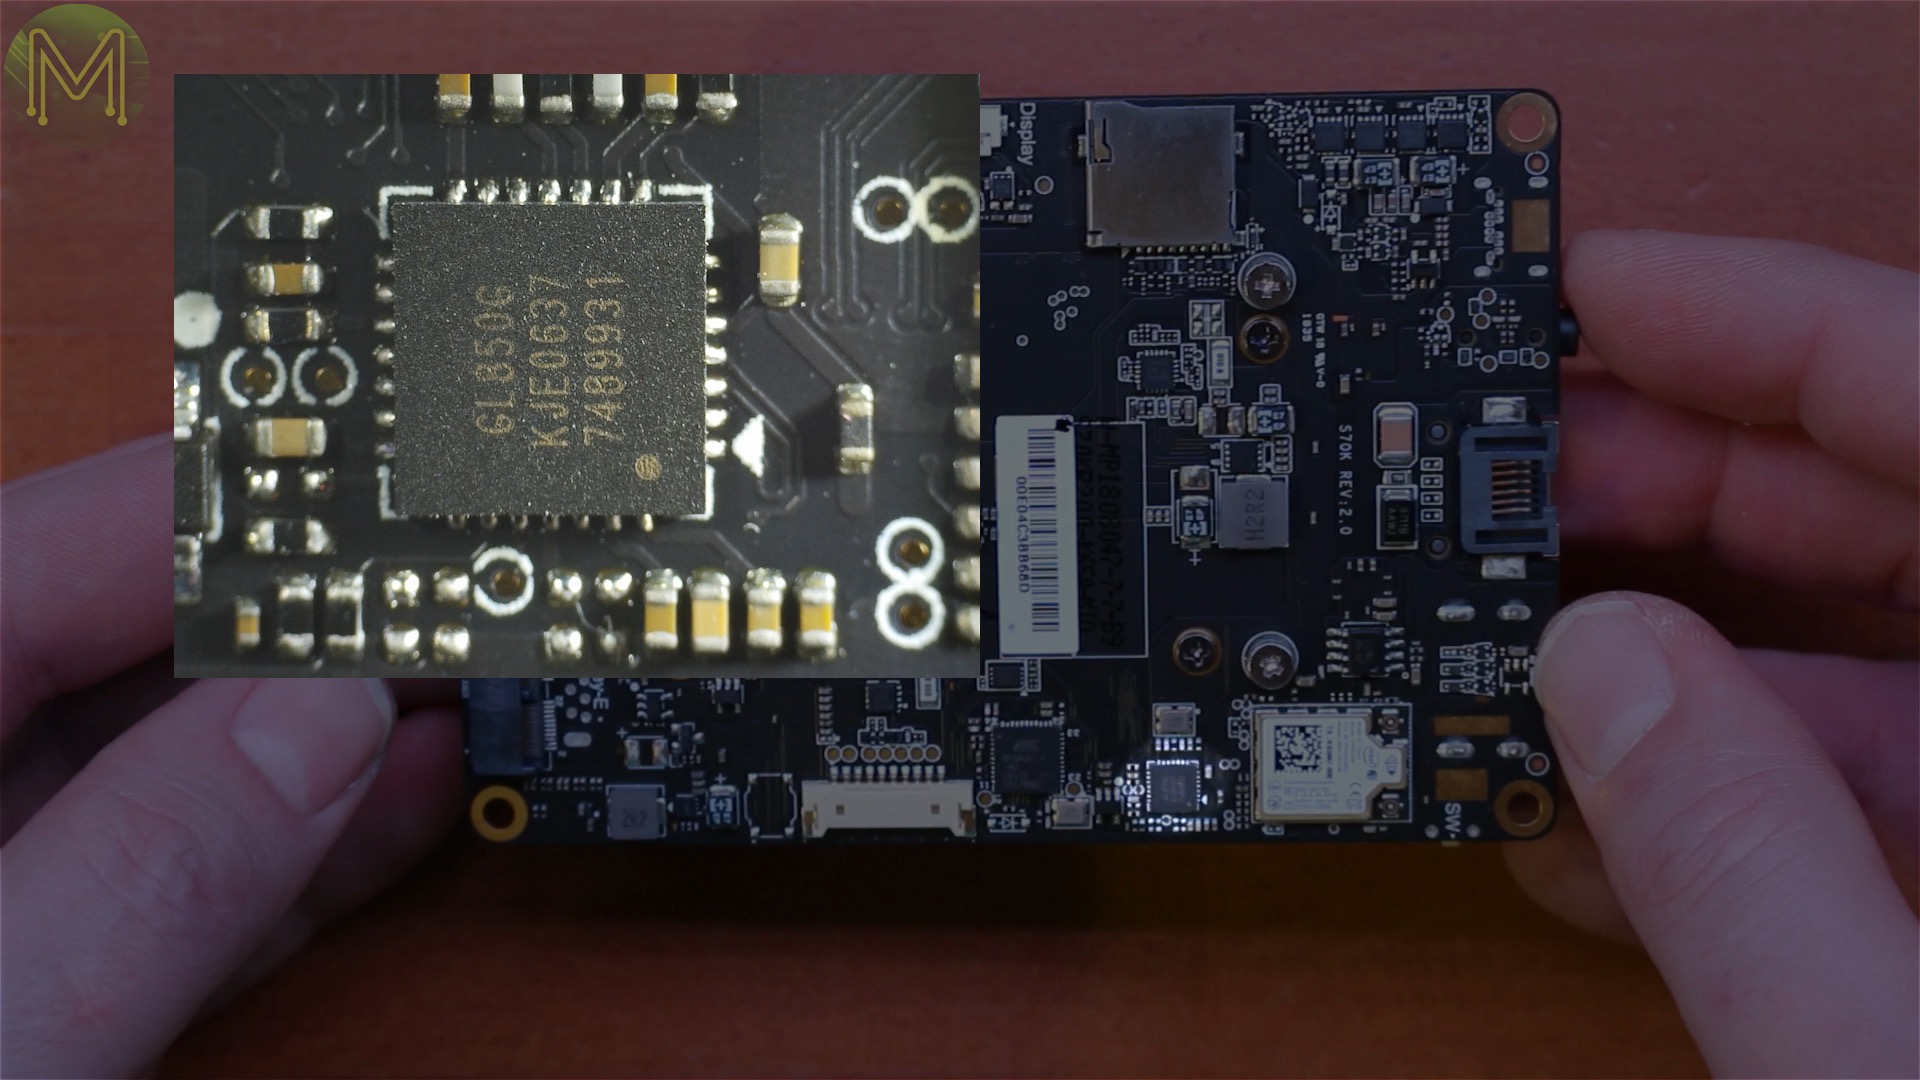
[caption id=“attachment_6060” align=“aligncenter” width=“640”]
12MHz xtal[/caption]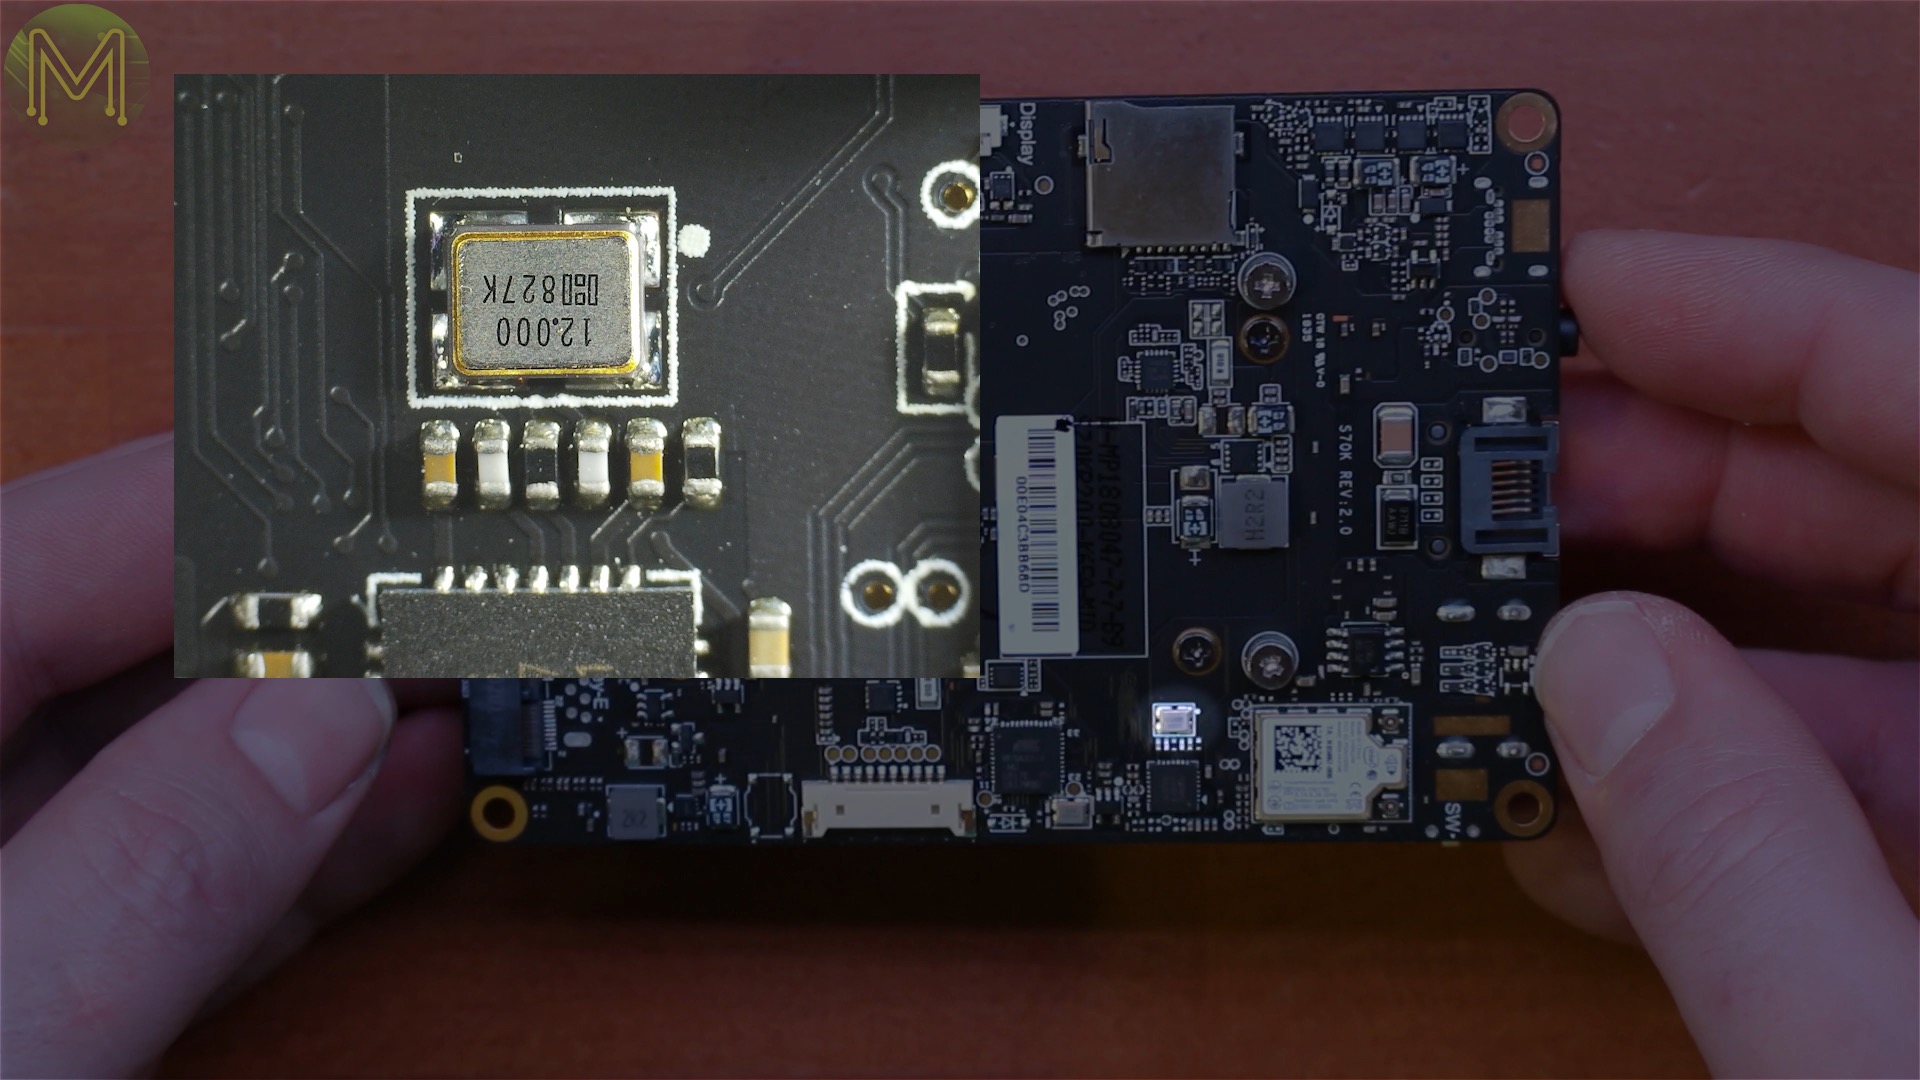
[caption id=“attachment_6061” align=“aligncenter” width=“640”]
ATmega32U4 - MCU with a 16MHz crystal[/caption]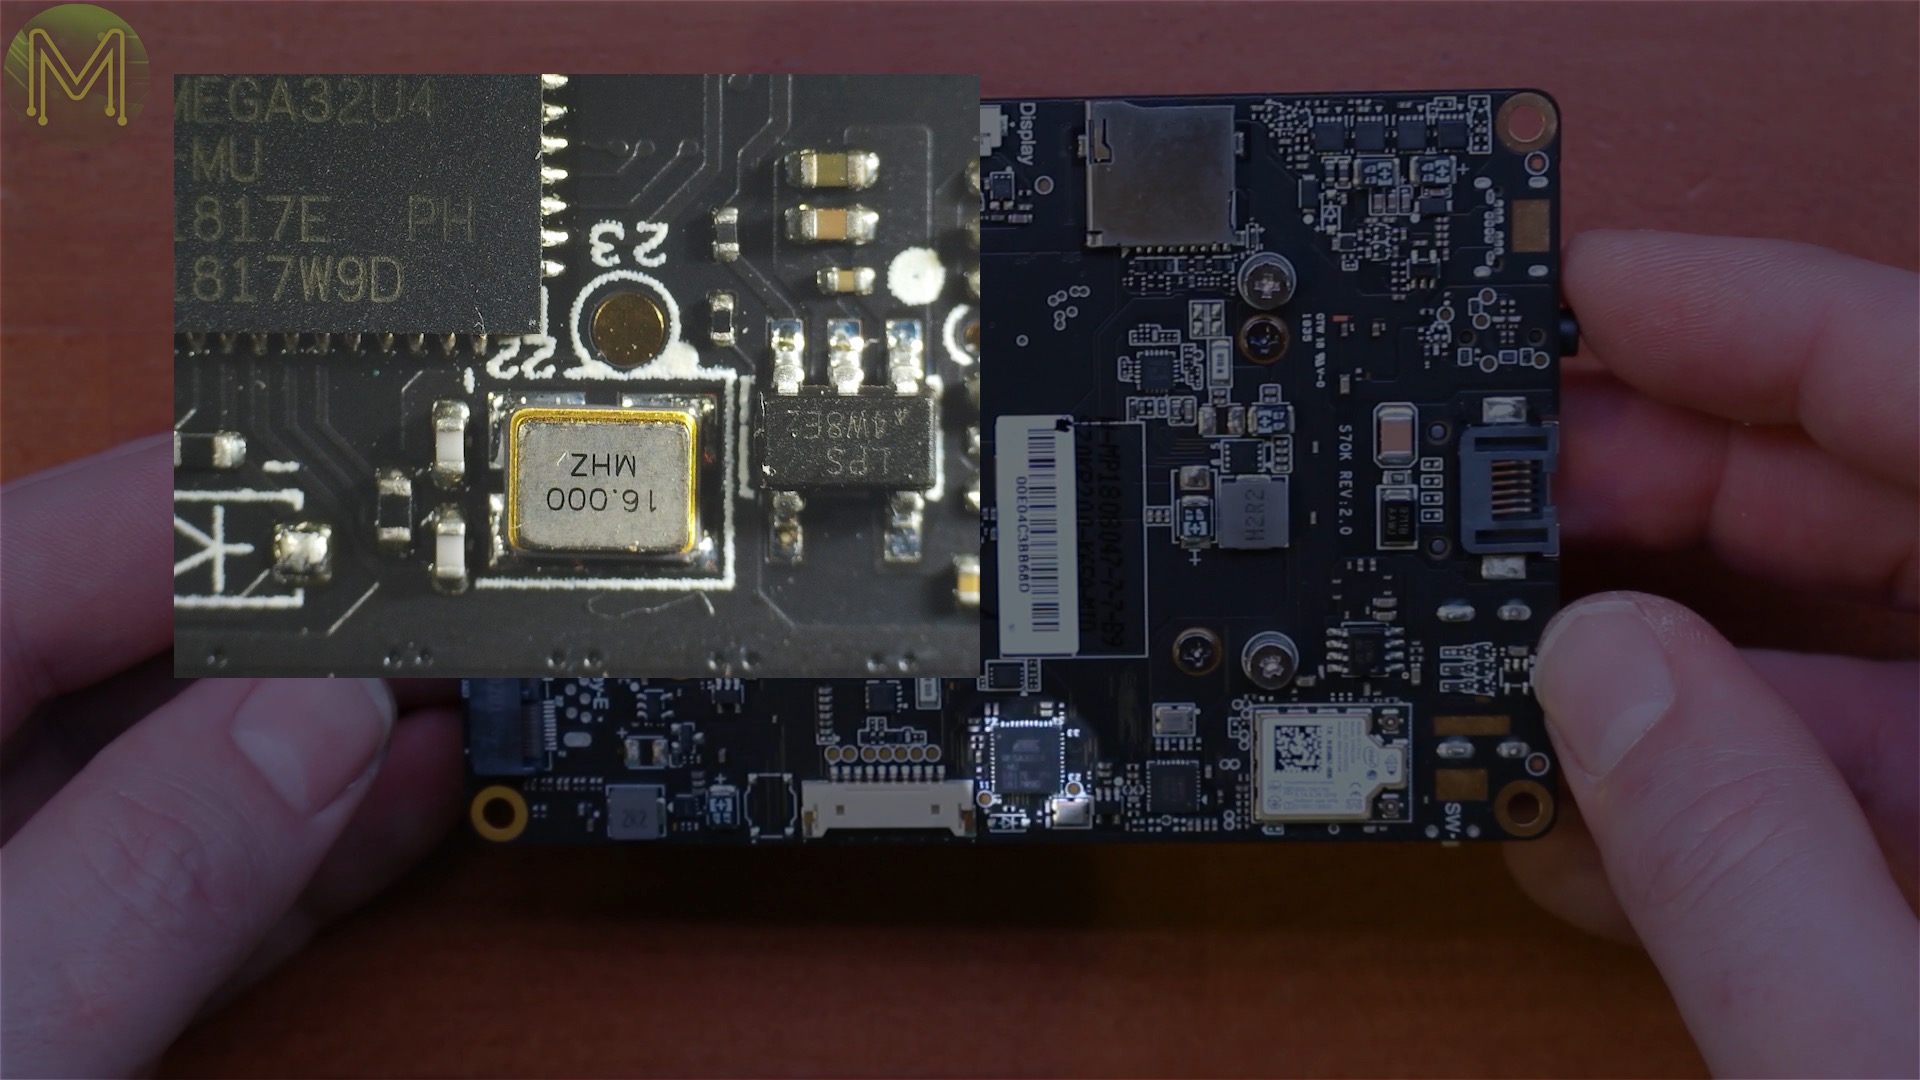
[caption id=“attachment_6062” align=“aligncenter” width=“640”]
P-channel MosFET[/caption]
[caption id=“attachment_6063” align=“aligncenter” width=“640”]
Yet another P-channel MoSFET[/caption]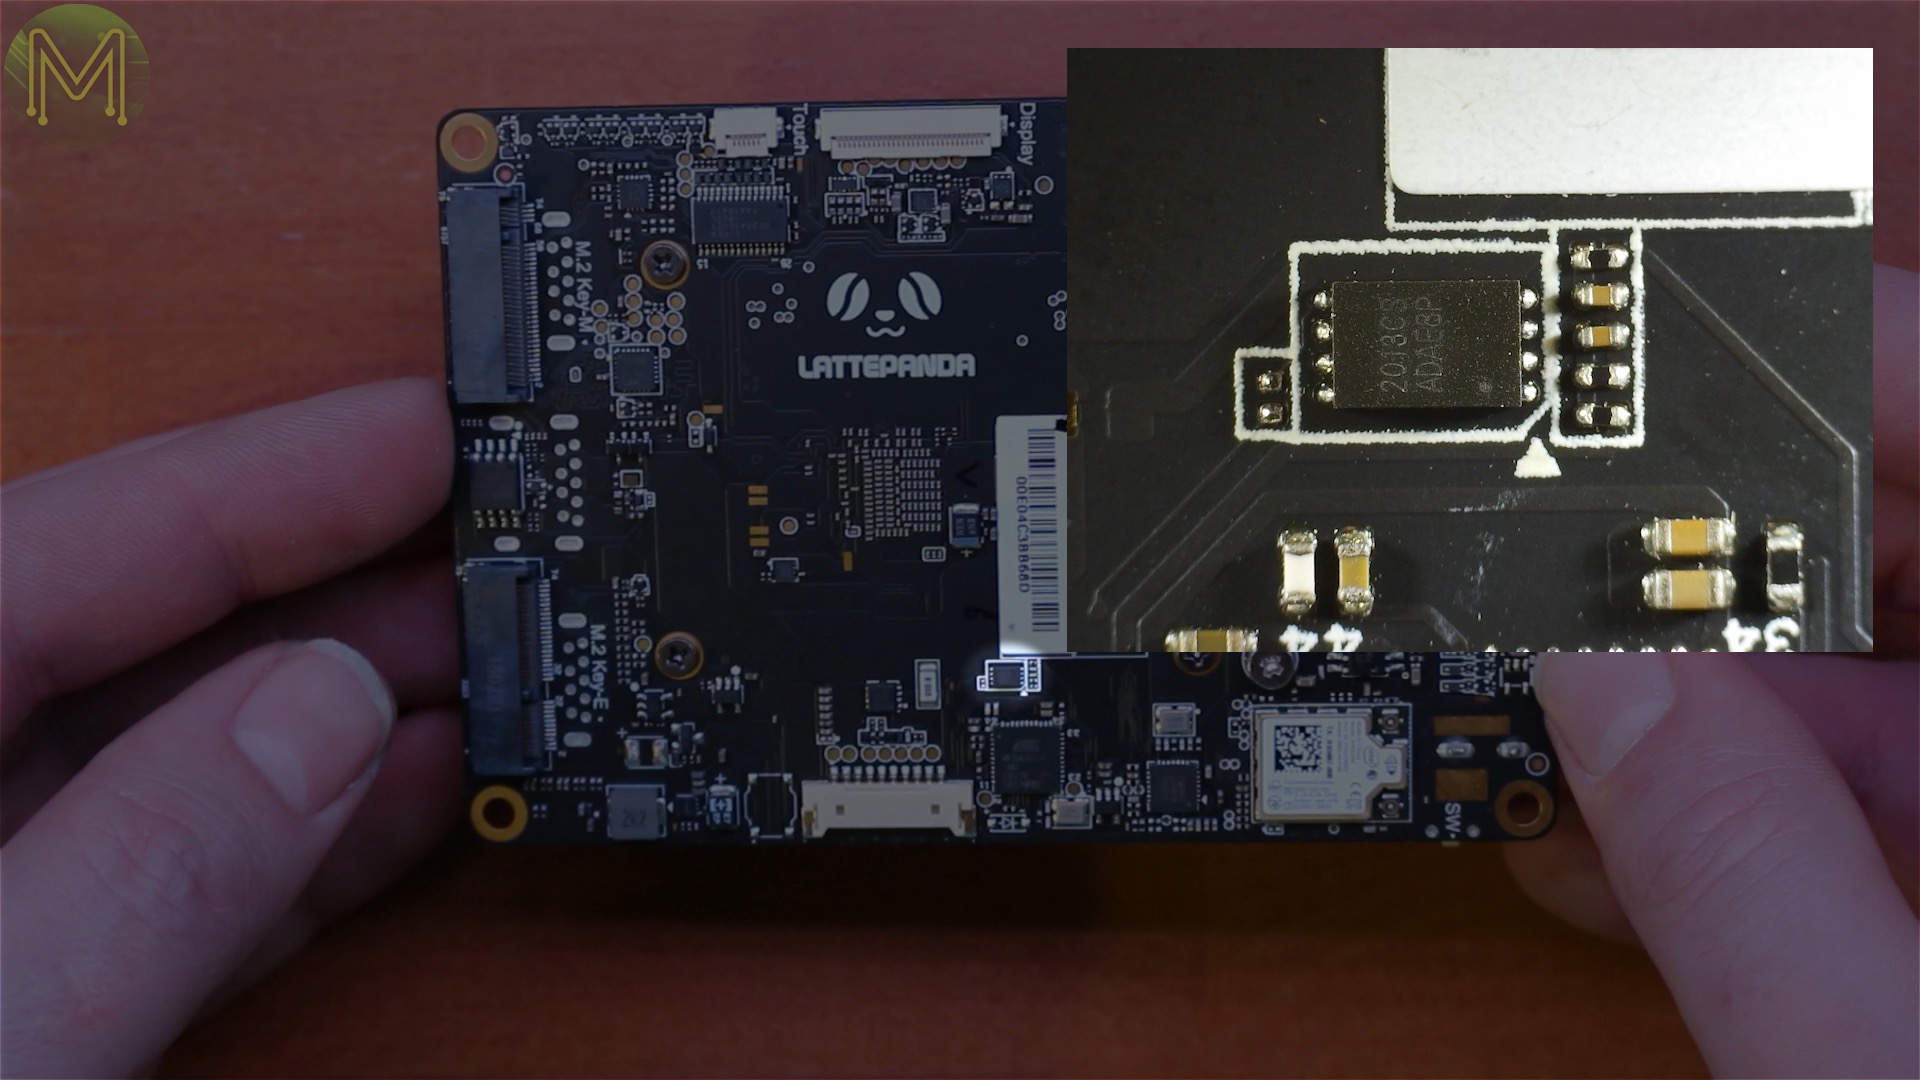
[caption id=“attachment_6064” align=“aligncenter” width=“640”]
2013CS - DC buck converter[/caption]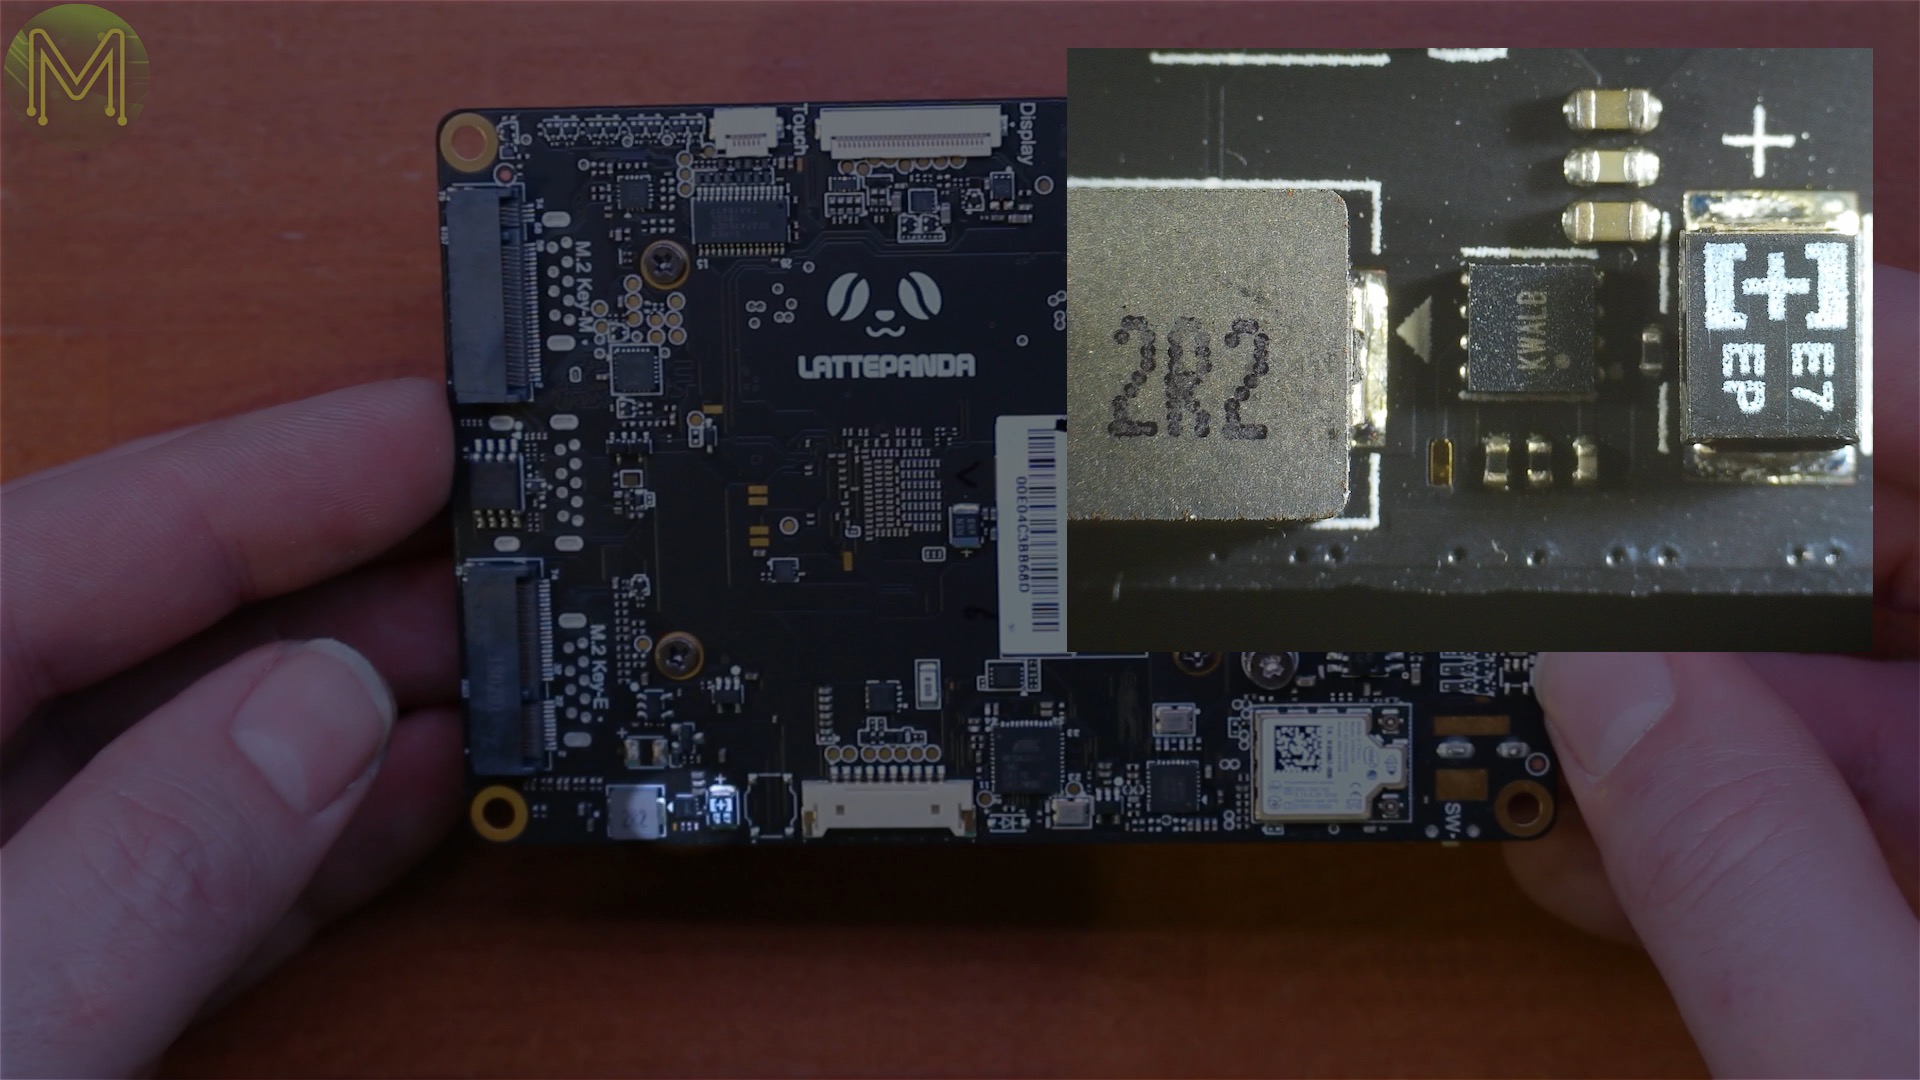
[caption id=“attachment_6065” align=“aligncenter” width=“640”]
More ESD protection[/caption]
[caption id=“attachment_6066” align=“aligncenter” width=“640”]
25q64jvs1q - Winbond 256Mbit SPI flash[/caption]
[caption id=“attachment_6067” align=“aligncenter” width=“640”]
yl518e / ts3a27518e - 6 channel demuxer[/caption]
[caption id=“attachment_6068” align=“aligncenter” width=“640”]
Another MoSFET[/caption]
[caption id=“attachment_6069” align=“aligncenter” width=“640”]
SP3242EUEY - RS232 transceiver, supporting 3 Tx and 5 Rx.[/caption]
[caption id=“attachment_6070” align=“aligncenter” width=“640”]
XR21V1410 - USB UART bridge[/caption]
I’m gathering that the Arduino is connected to the main board via the RS232 transceiver, USB UART bridge and USB 2.0 hub.
EDIT: The Arduino is actually directly connected to the USB 2.0 hub.
PCB top - ICs
Flipping over to the front again, we have:
[caption id=“attachment_6071” align=“aligncenter” width=“640”]
EtronTech EJ898 - USB Power Delivery 2.0.[/caption]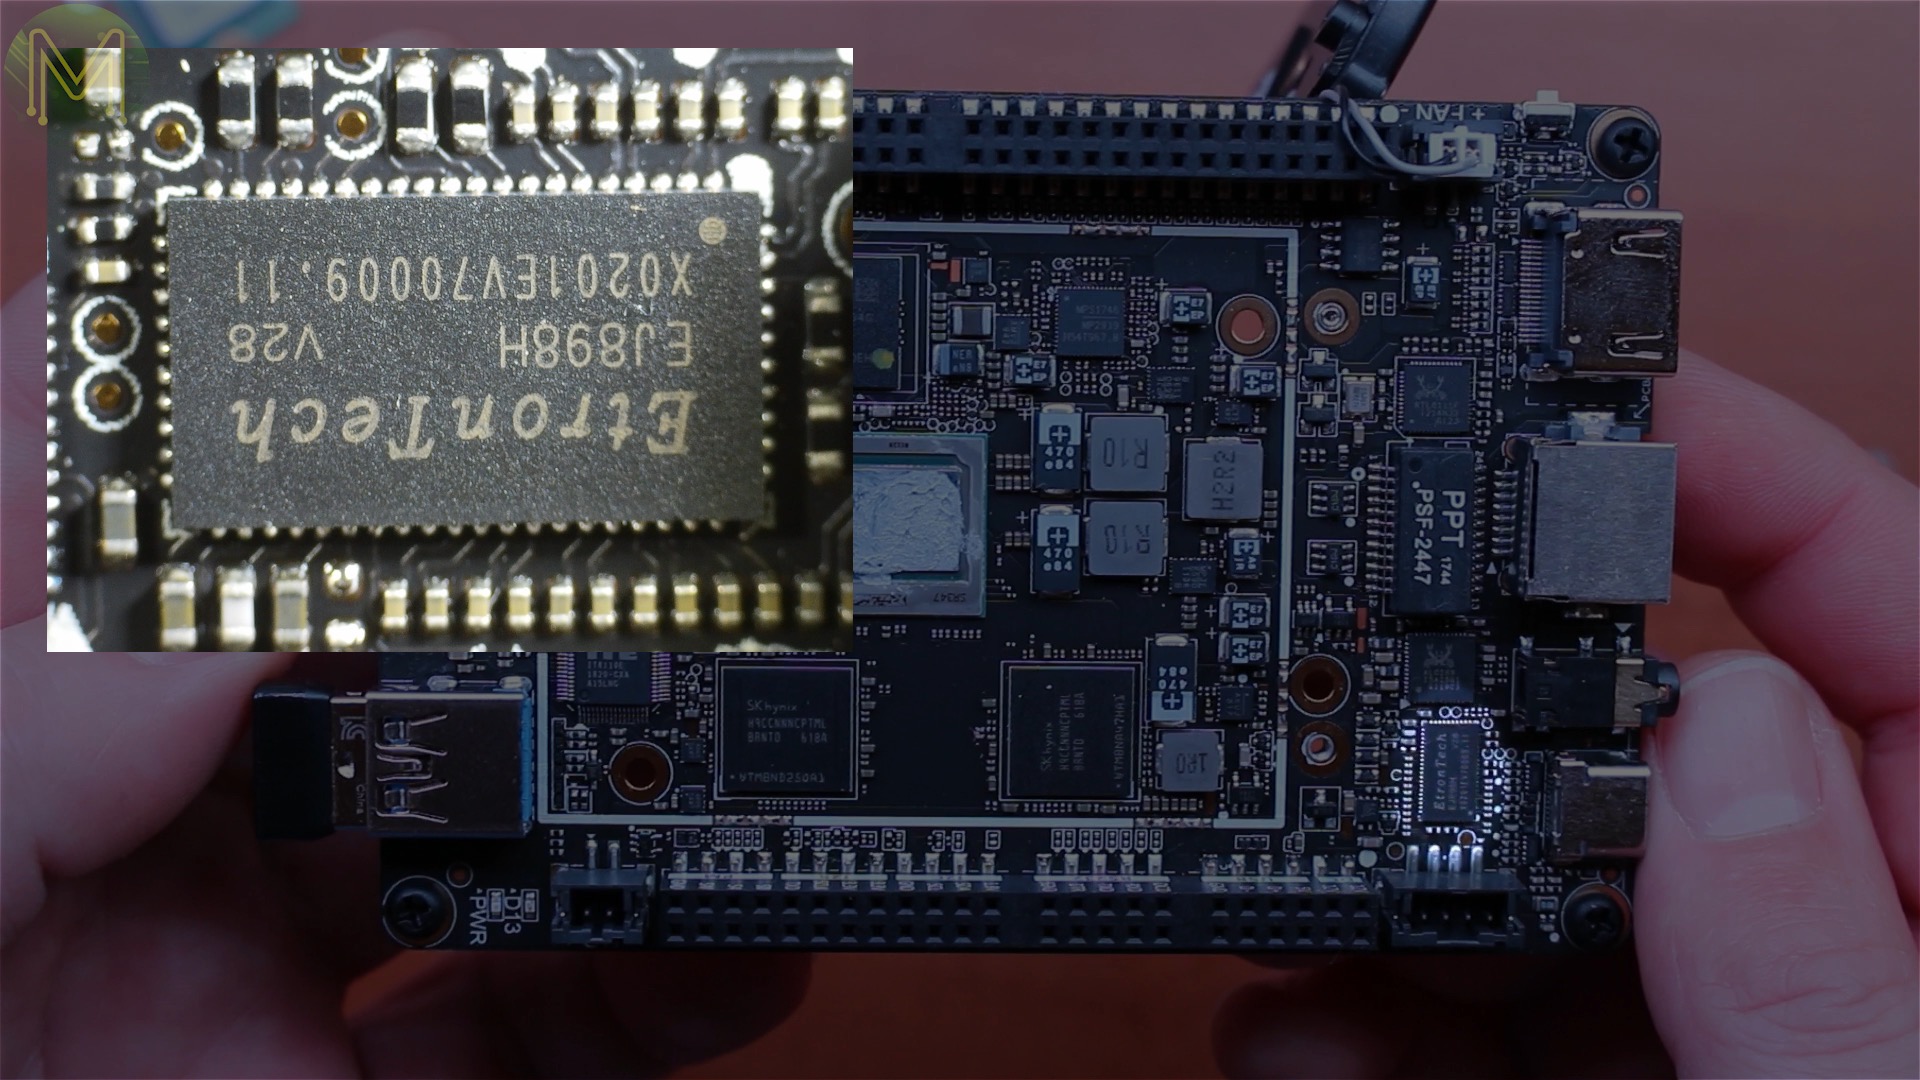
A USB Type C power IC, which manages power distribution from the USB Type C connector. Supporting up to 5A @ 20V.
[caption id=“attachment_6072” align=“aligncenter” width=“640”]
Realtek ALC269 - HD Audio CODEC and speaker amplifier.[/caption]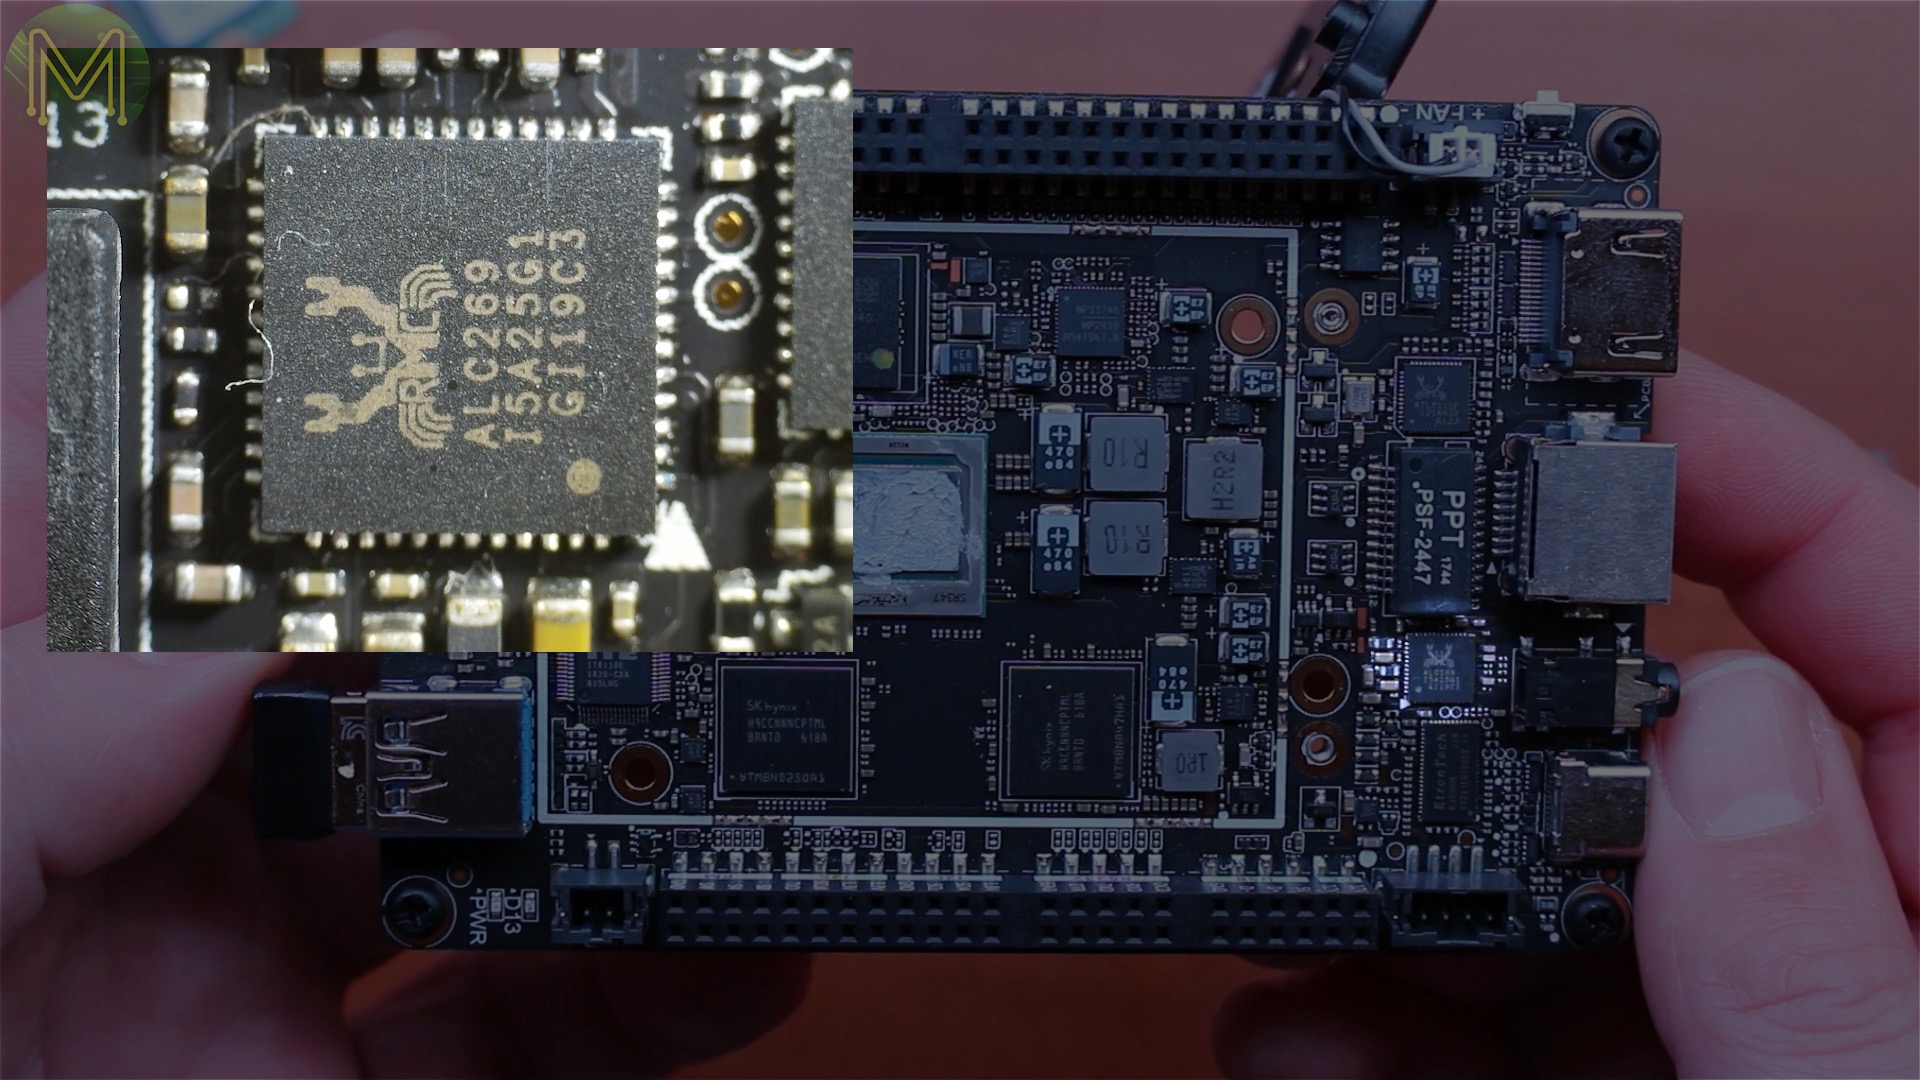
[caption id=“attachment_6073” align=“aligncenter” width=“640”]
PSF-2447 - Dual port GbE coils[/caption]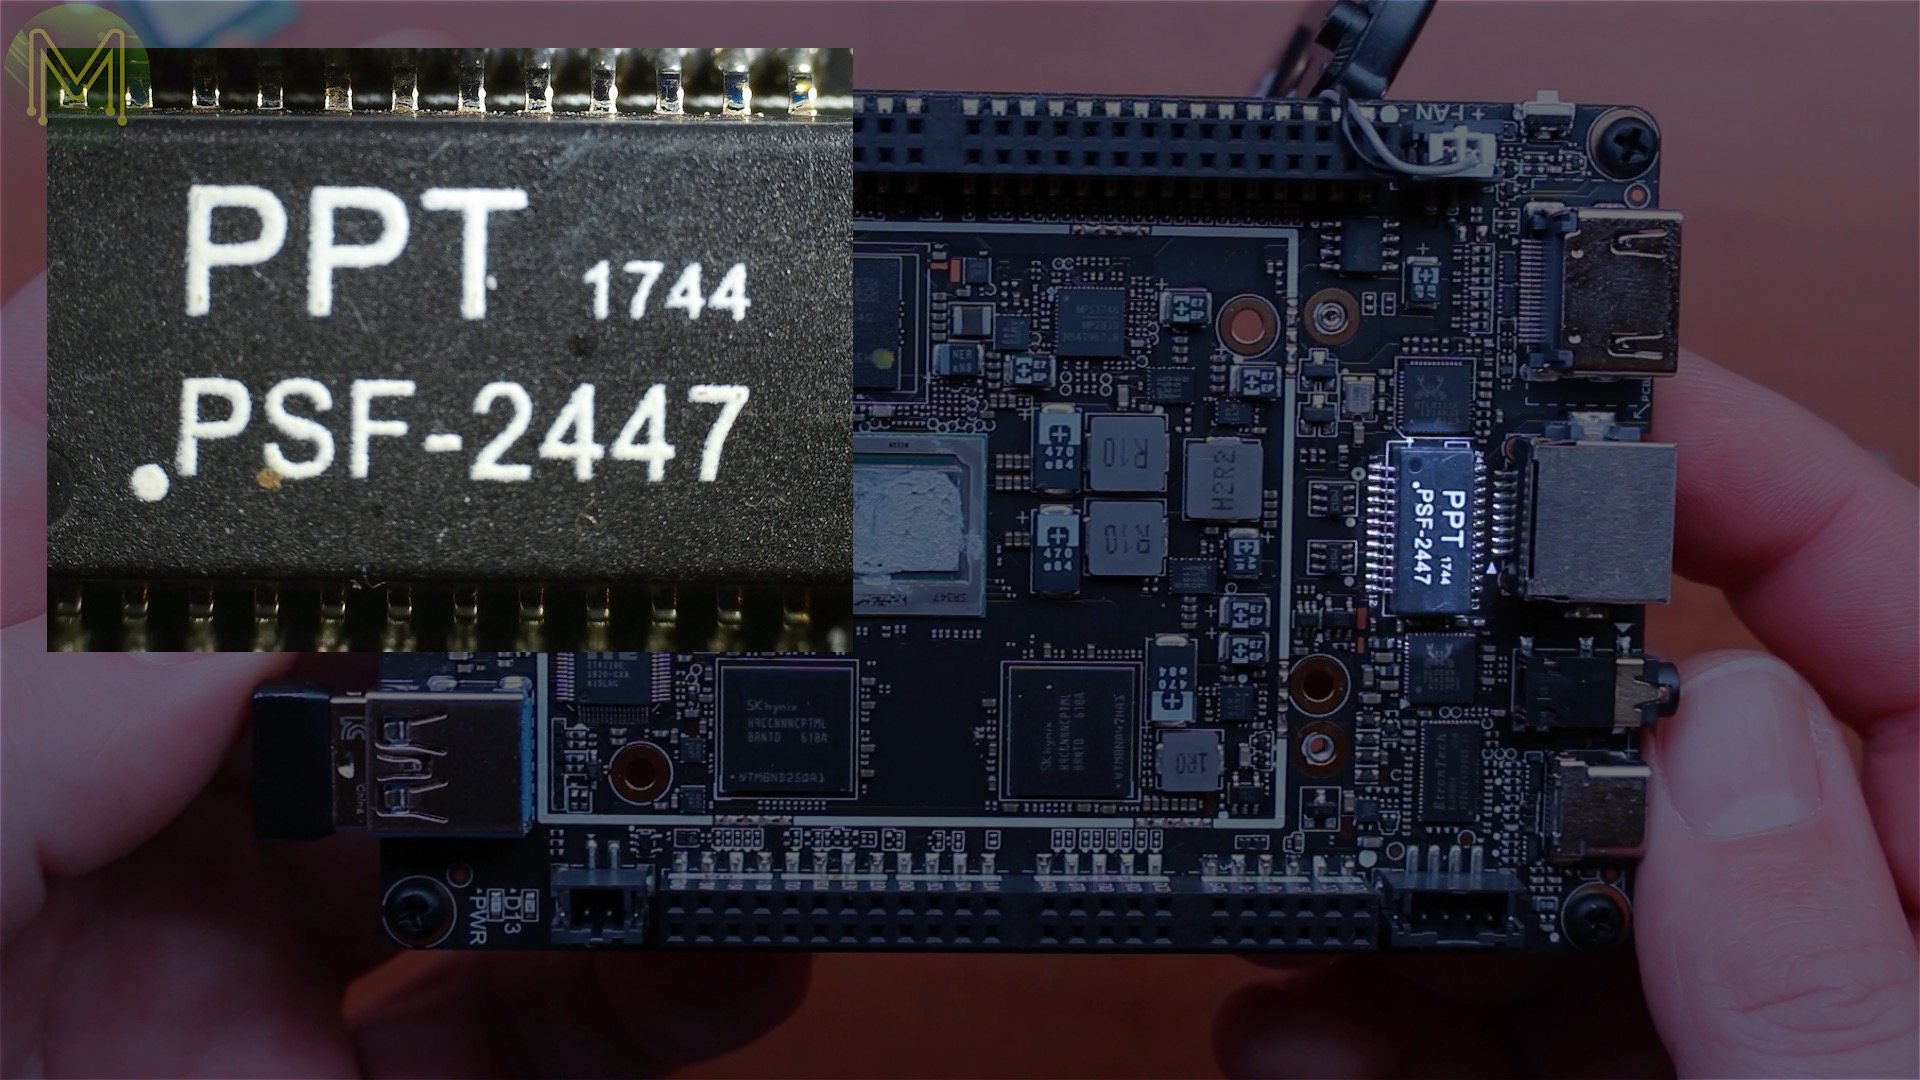
[caption id=“attachment_6074” align=“aligncenter” width=“640”]
Unknown IC[/caption]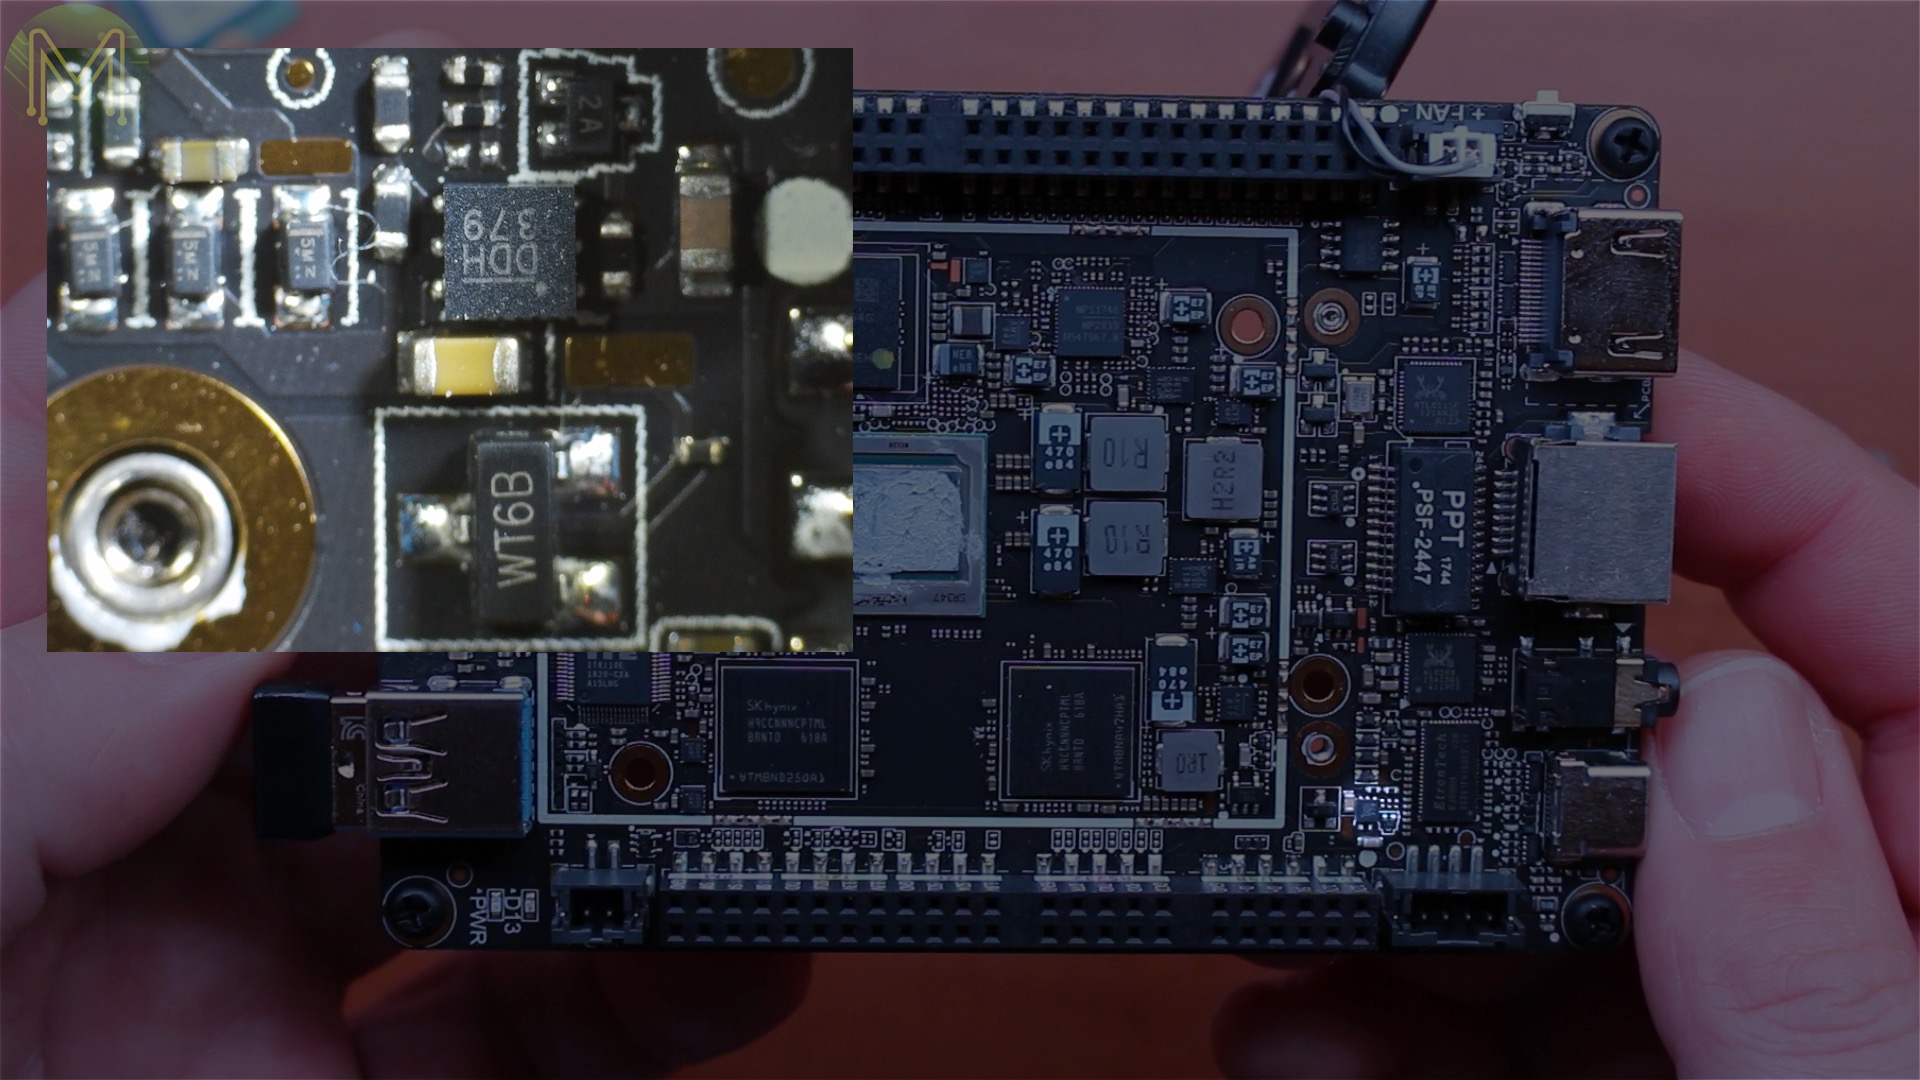
[caption id=“attachment_6075” align=“aligncenter” width=“640”]
STD1805 - NPN power transistor[/caption]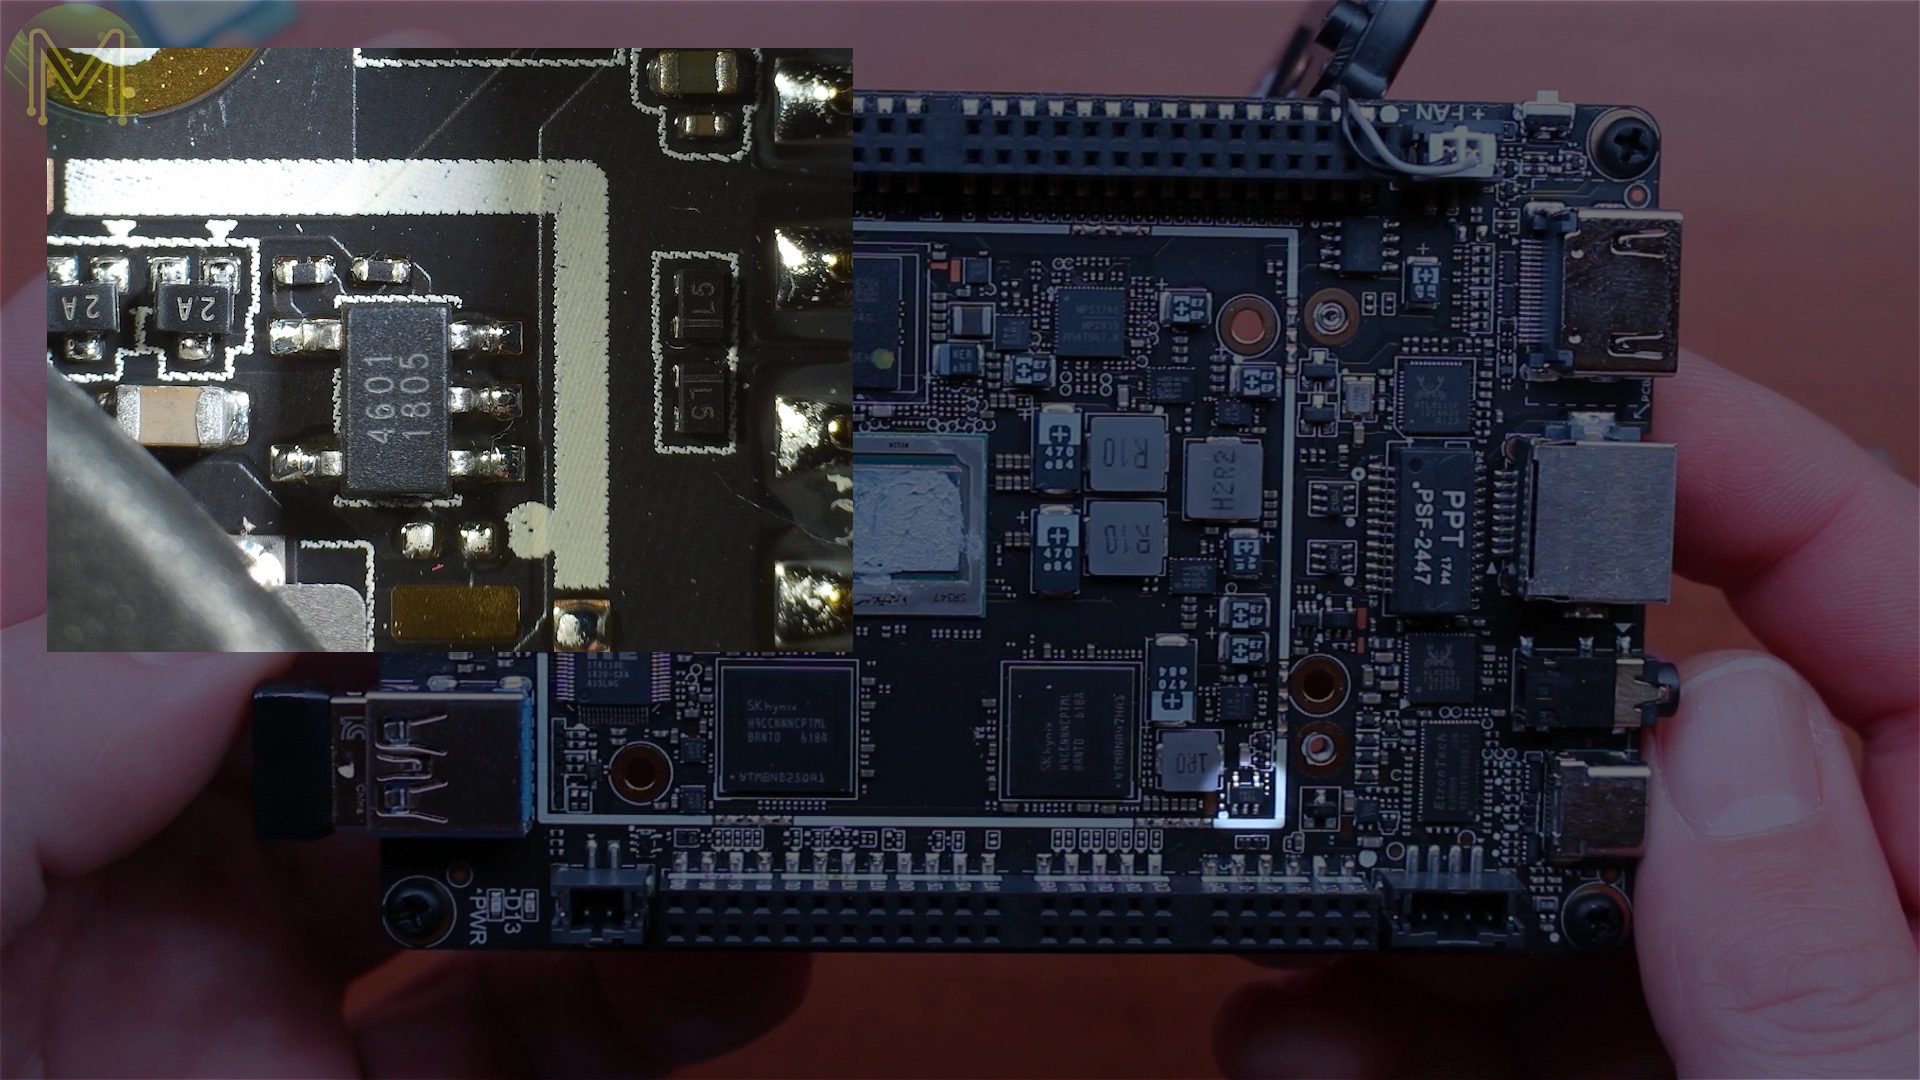
[caption id=“attachment_6076” align=“aligncenter” width=“640”]
RTL8111F - GbE transceiver with PCiE support[/caption]
[caption id=“attachment_6077” align=“aligncenter” width=“640”]
MDS3652 - P-channel MosFET[/caption]
[caption id=“attachment_6078” align=“aligncenter” width=“640”]
FDMC510P - P-channel MoSFET[/caption]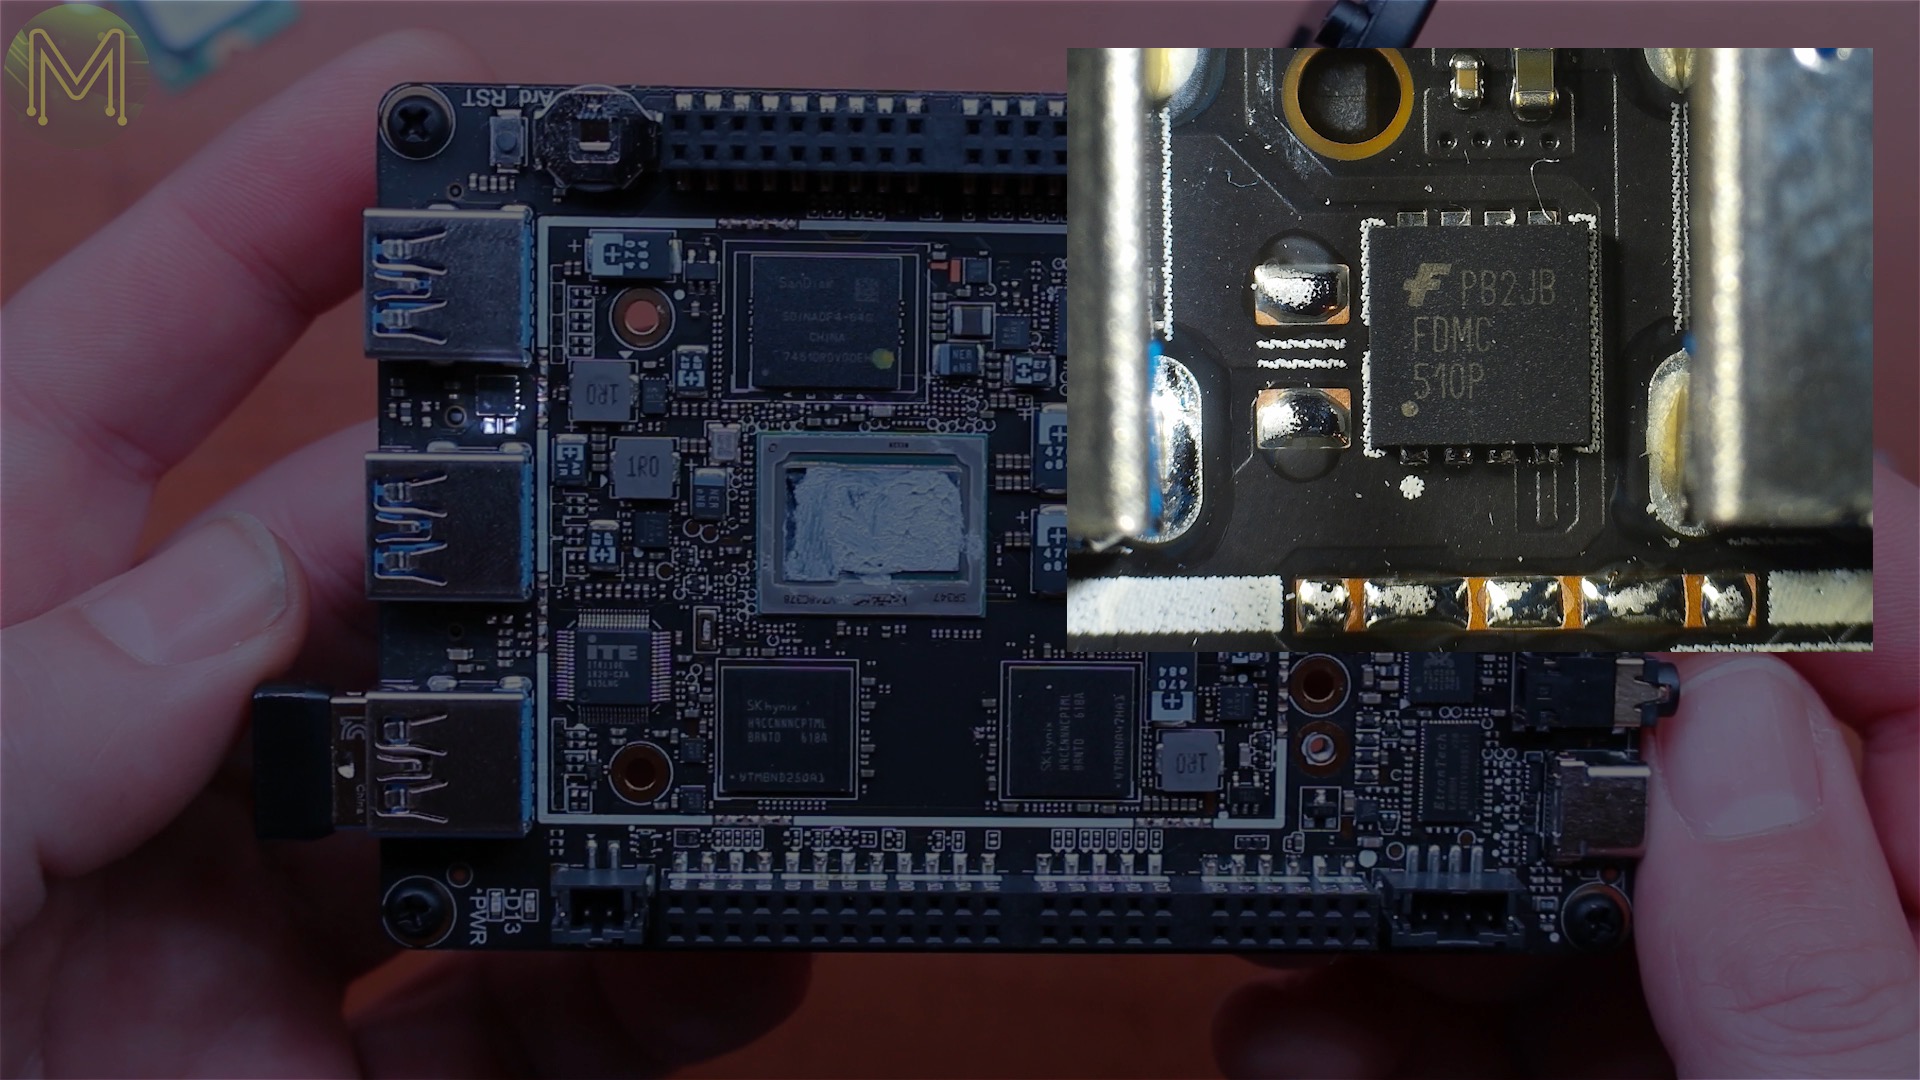
[caption id=“attachment_6079” align=“aligncenter” width=“640”]
MDS3652 - P-channel MosFET[/caption]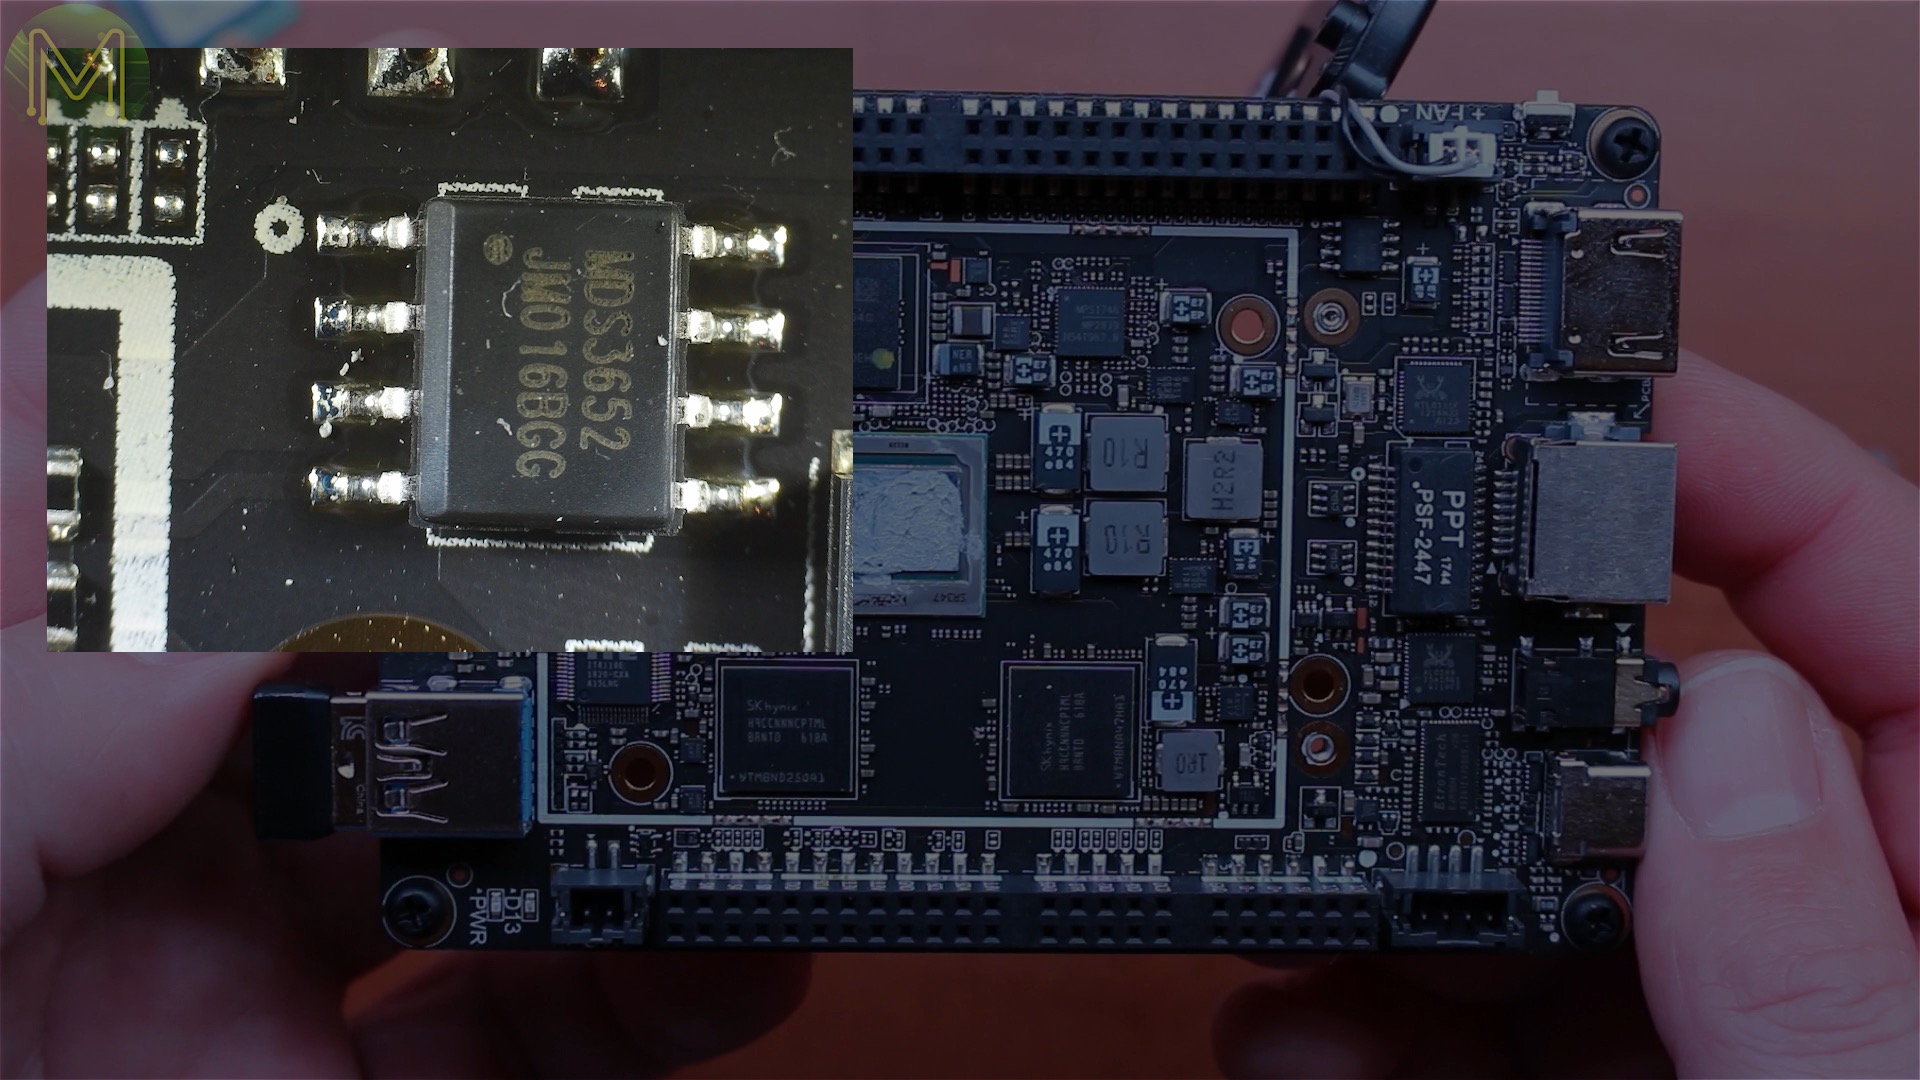
[caption id=“attachment_6080” align=“aligncenter” width=“640”]
MP2939 - DC buck converter[/caption]
But here’s a 3.3v/8mA DC buck converter, designed for CPUs.
[caption id=“attachment_6081” align=“aligncenter” width=“640”]
Unknown[/caption]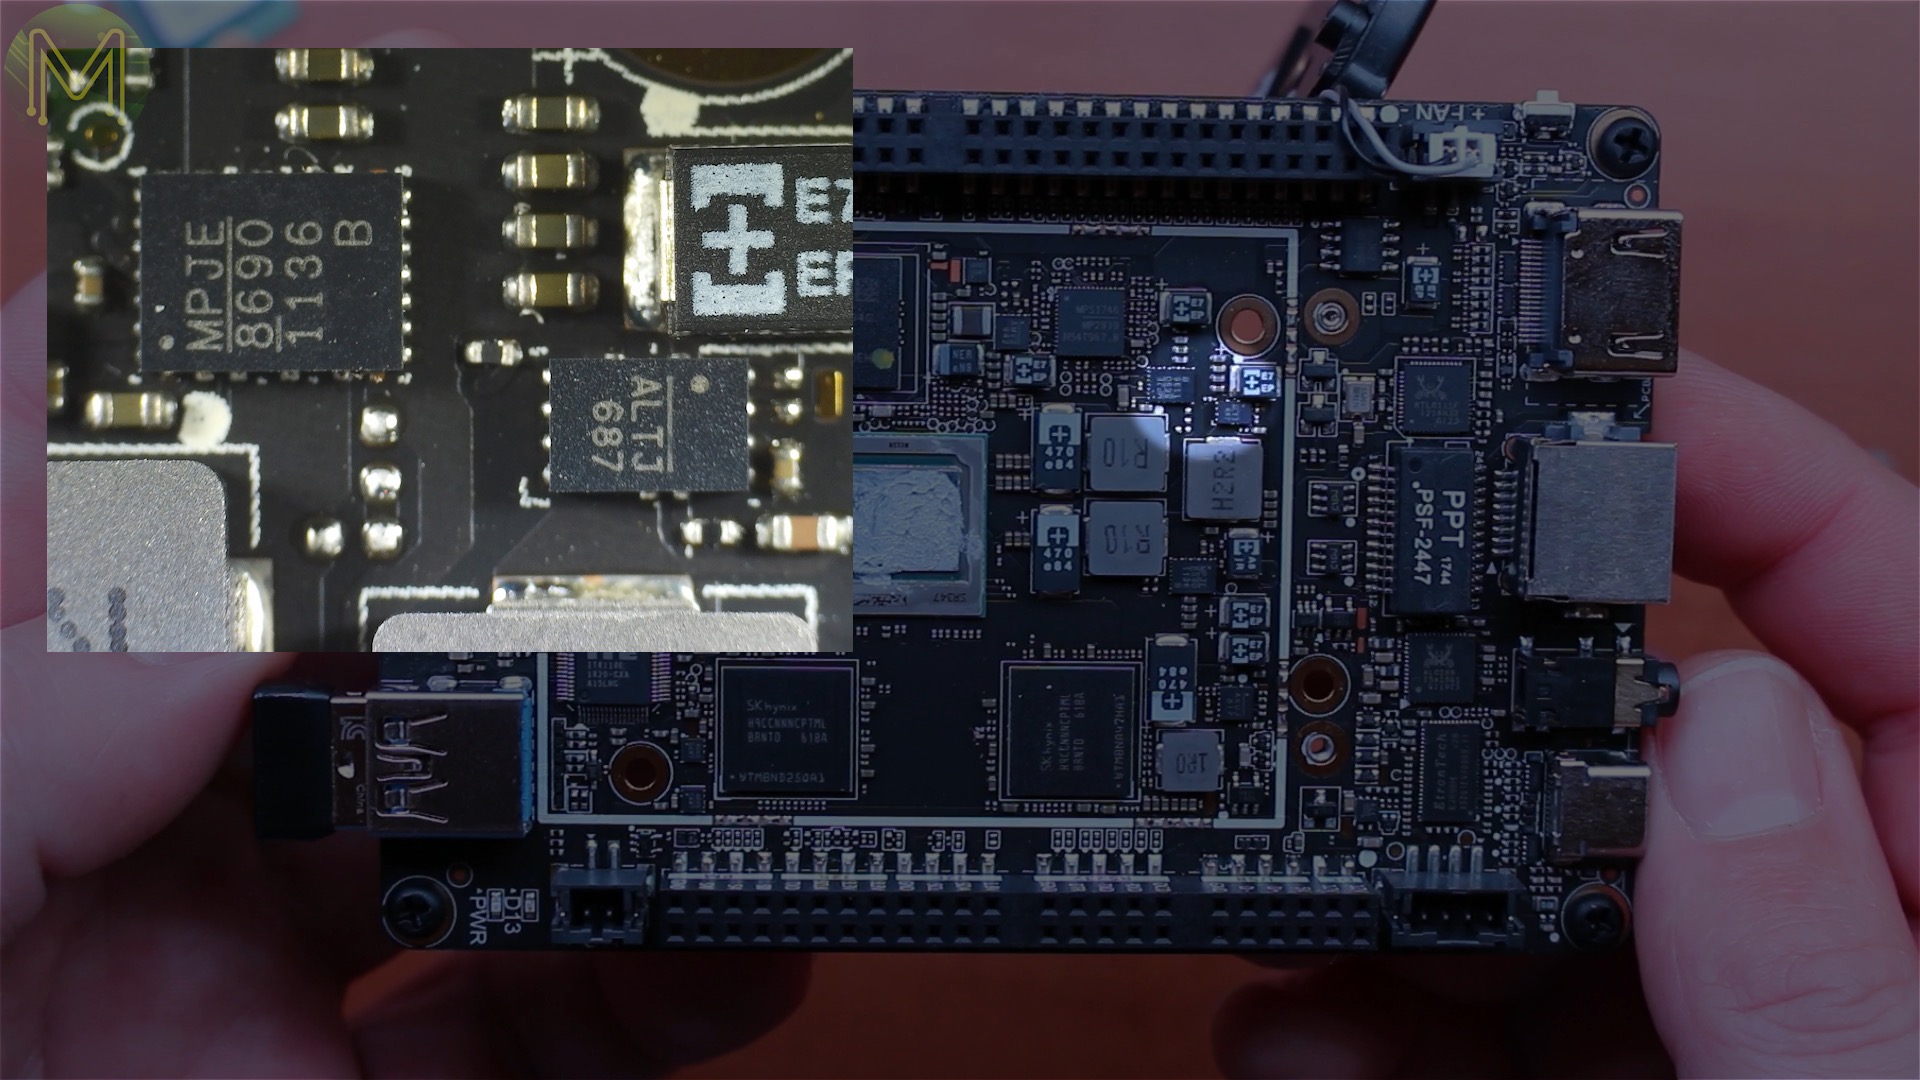
And a couple more unknowns.
[caption id=“attachment_6082” align=“aligncenter” width=“640”]
Unknown[/caption]
[caption id=“attachment_6083” align=“aligncenter” width=“640”]
Unknown[/caption]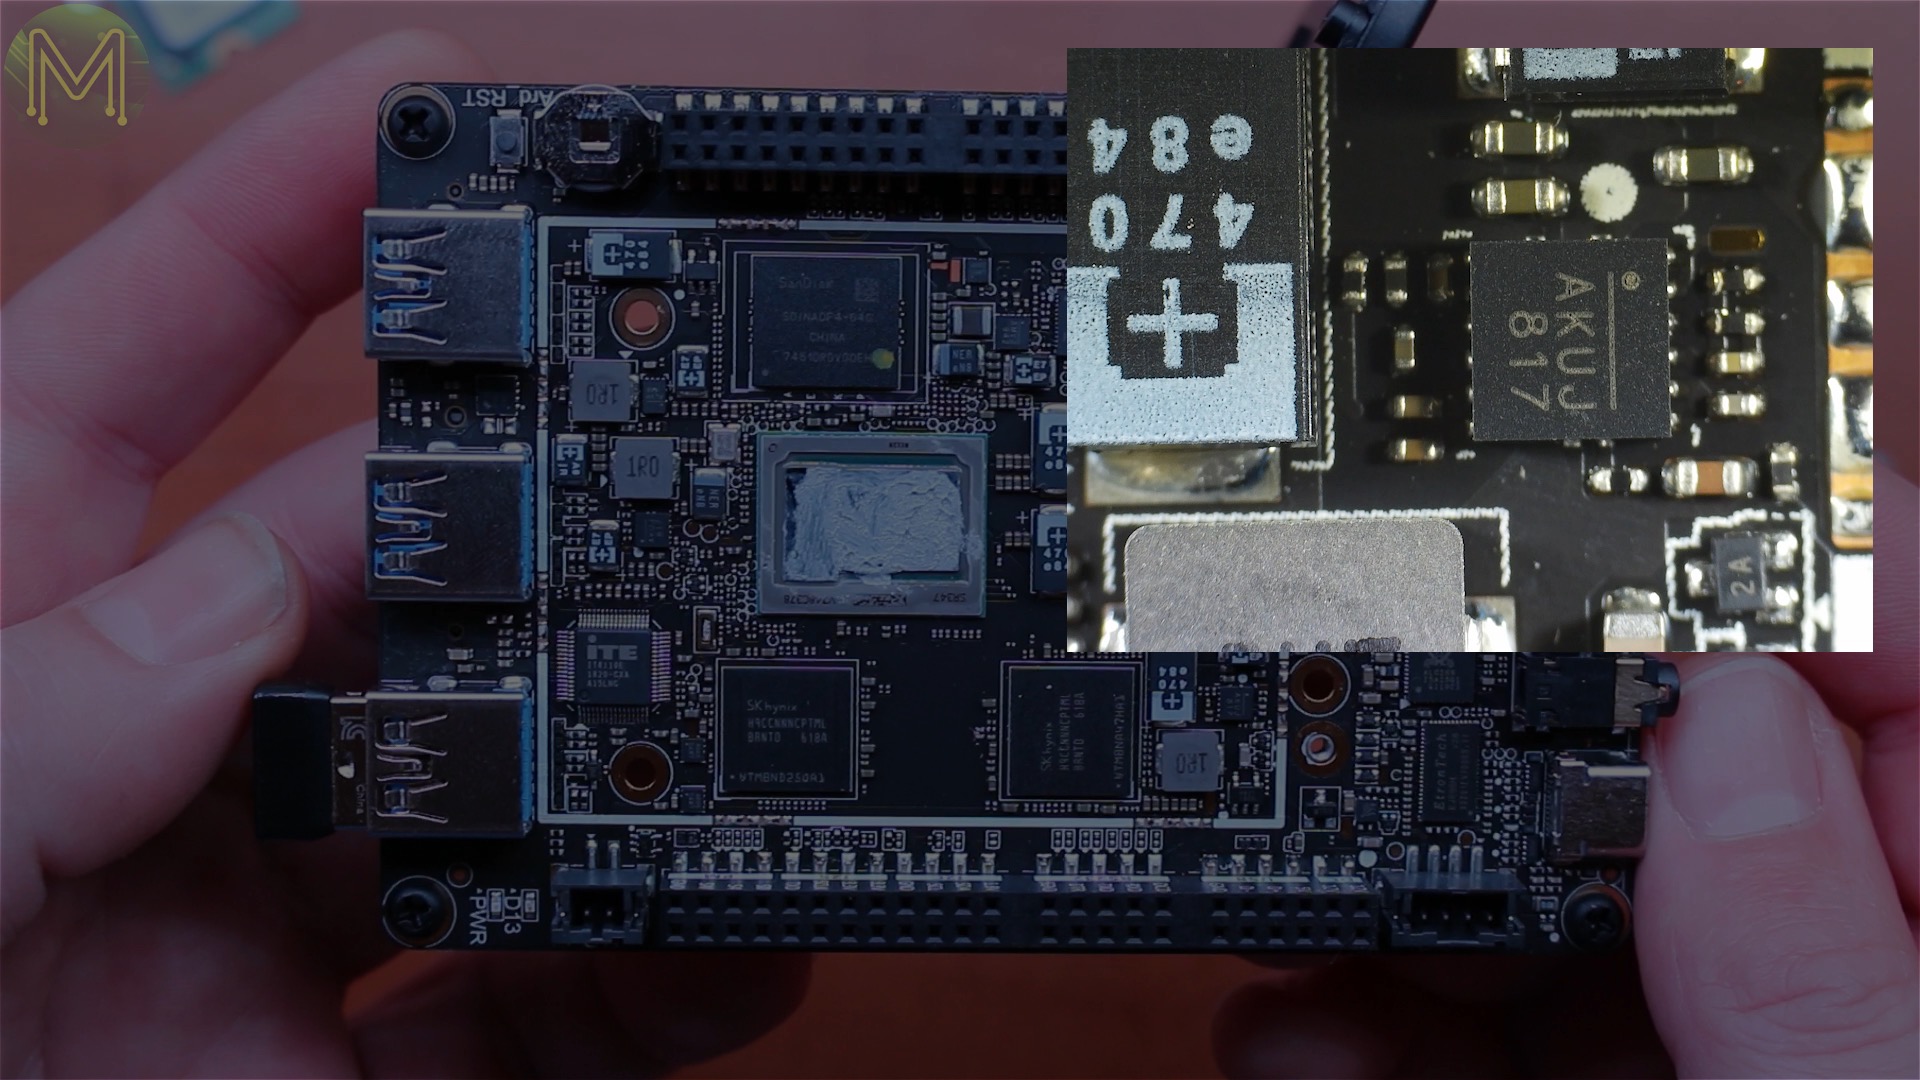
[caption id=“attachment_6084” align=“aligncenter” width=“640”]
IT8110E - PC control IC[/caption]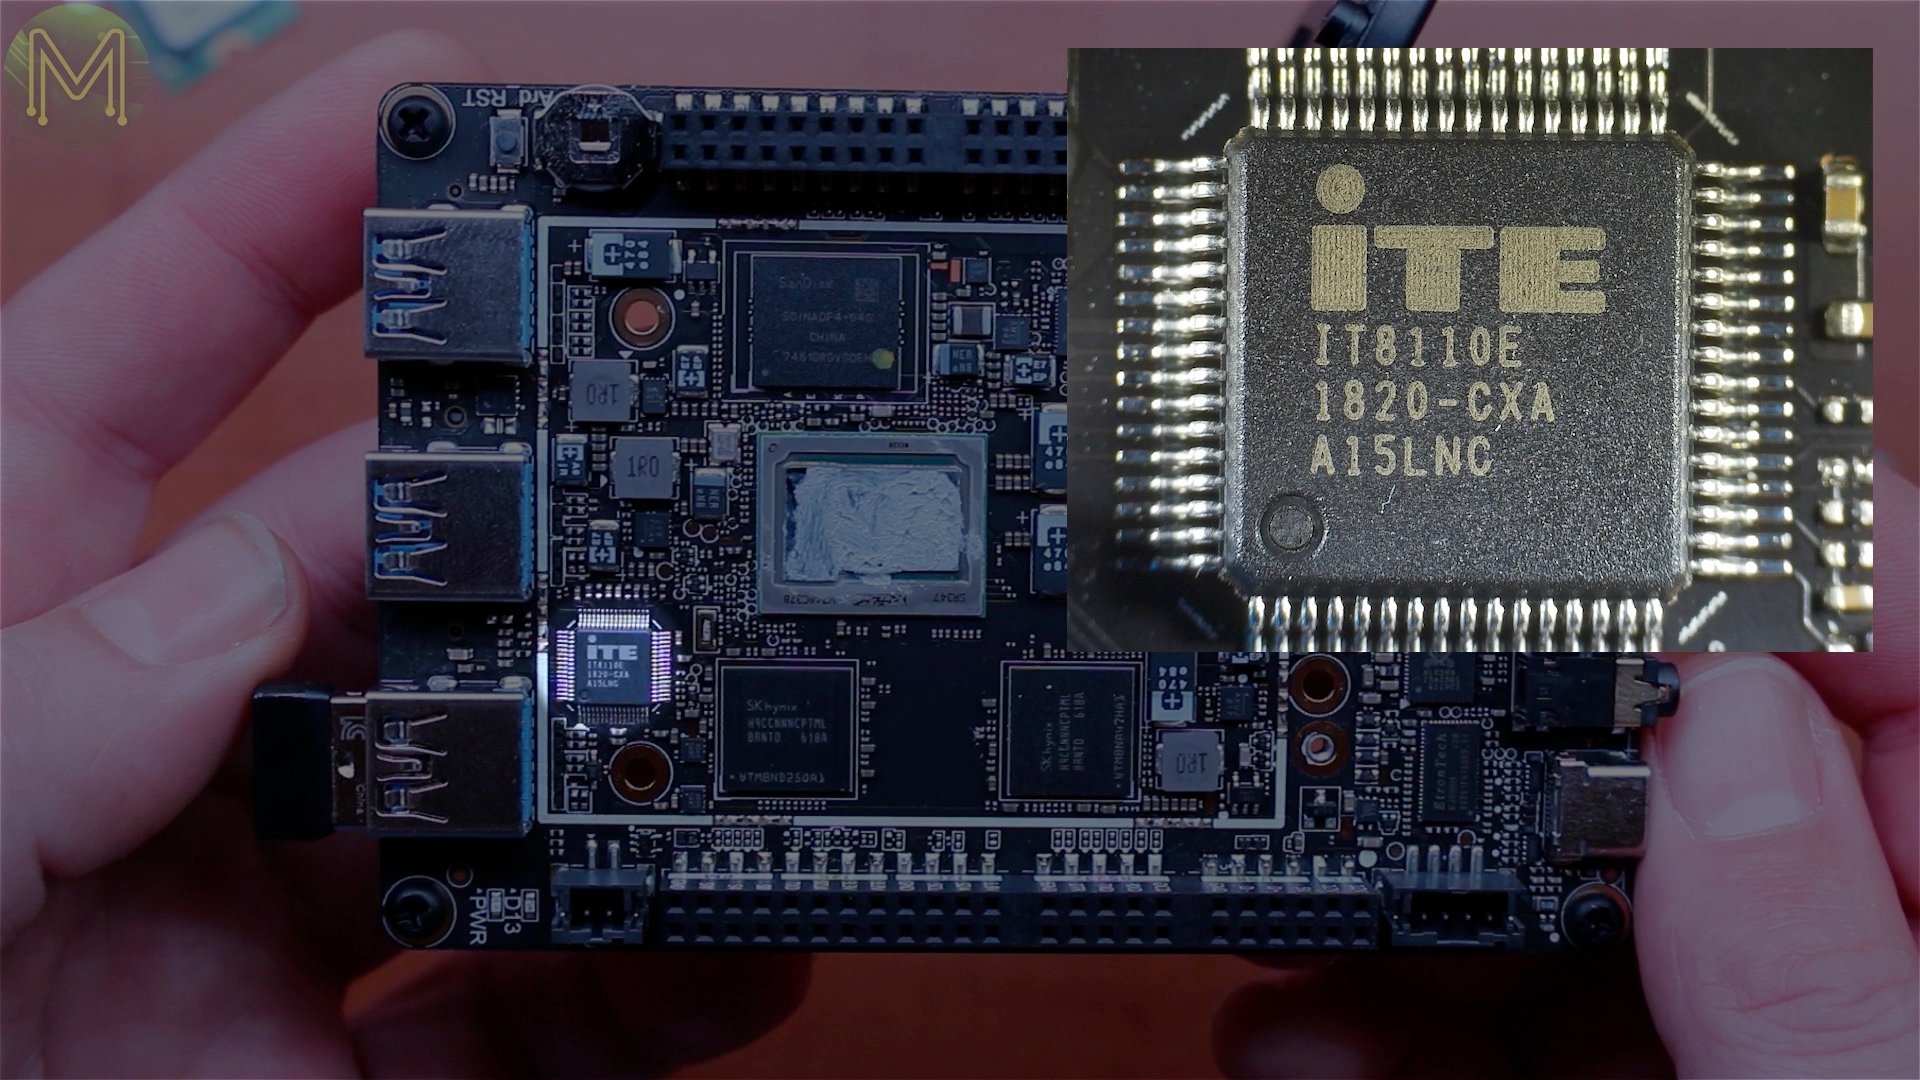
And a semi that is a blast from the past, something that you see on almost all desktops. This is the IC that provides UARTs, SMBus and ACPI control, BIOS and other goodies. Running an 8032 MCU.
[caption id=“attachment_6085” align=“aligncenter” width=“640”]
64GB flash[/caption]
There’s also the 64GB flash
[caption id=“attachment_6086” align=“aligncenter” width=“640”]
8GB RAM[/caption]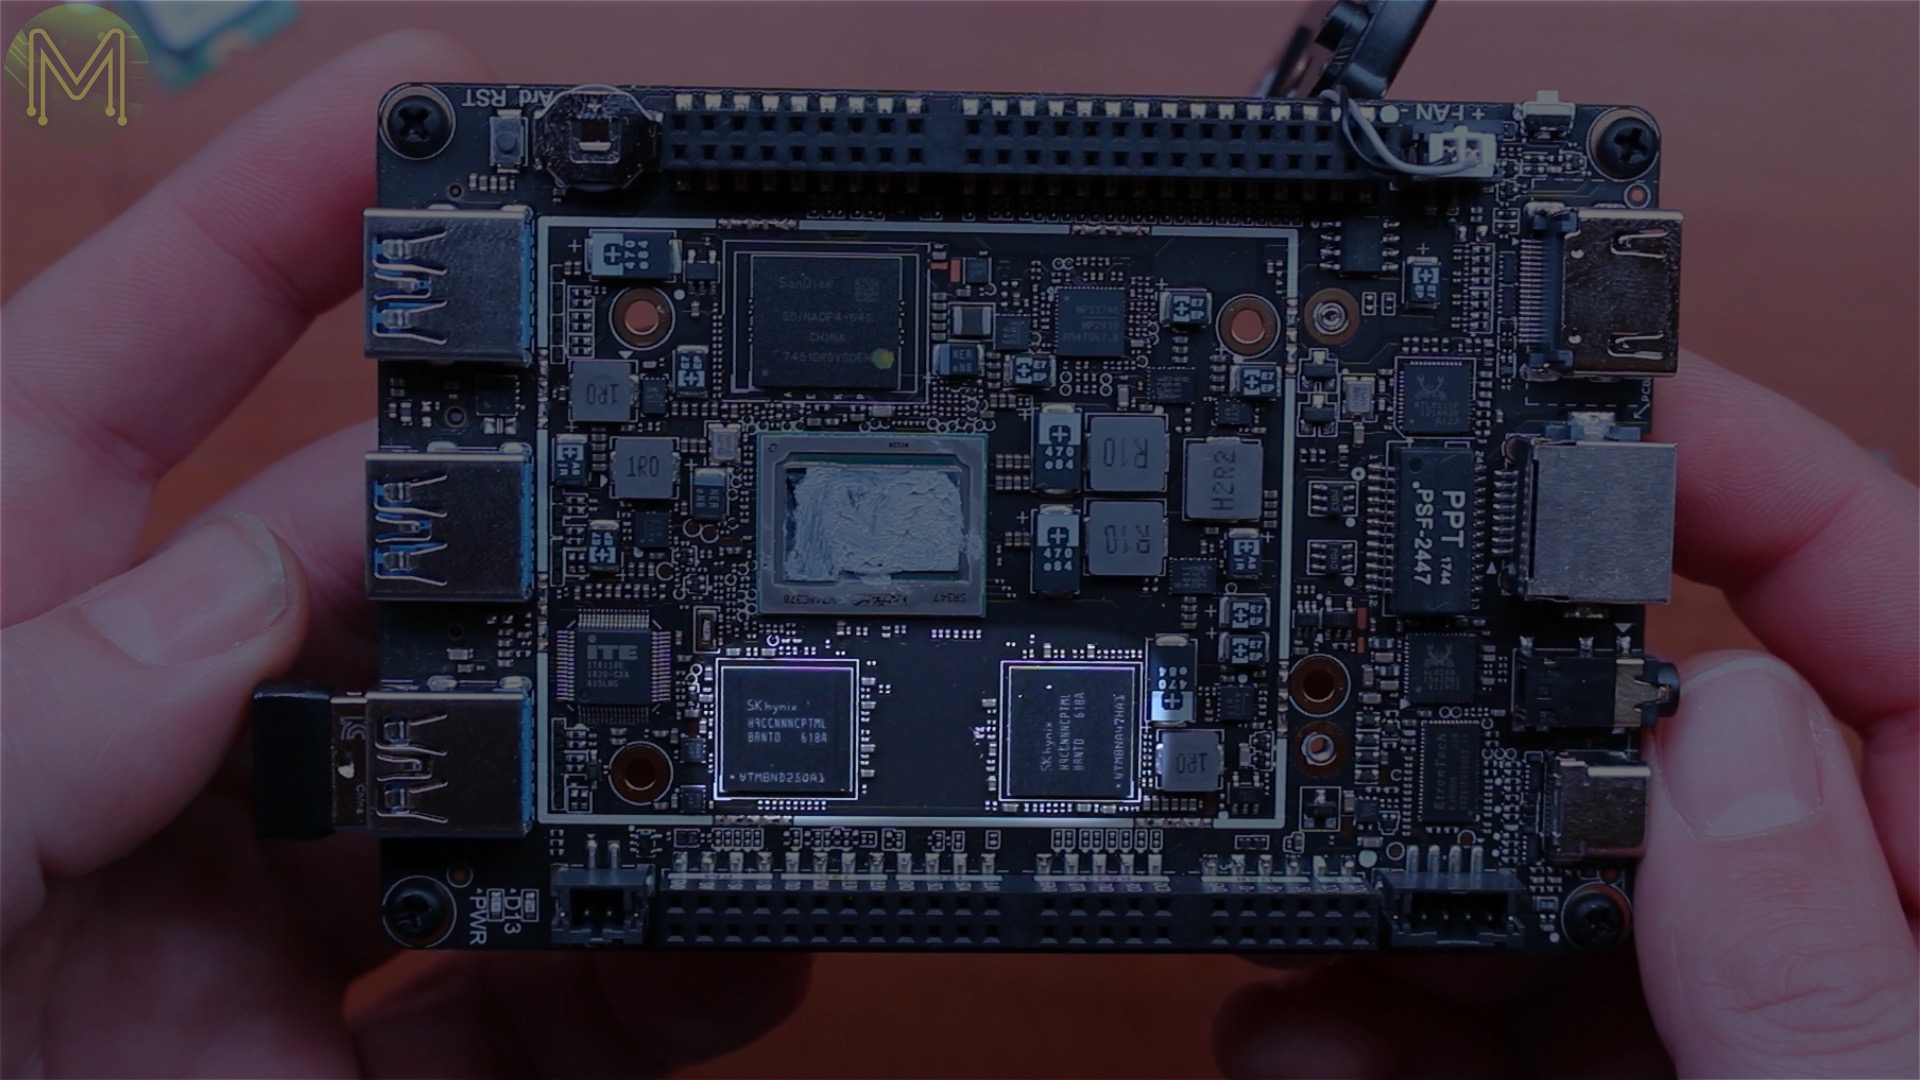
8GB RAM
[caption id=“attachment_6087” align=“aligncenter” width=“640”]
Intel SoC[/caption]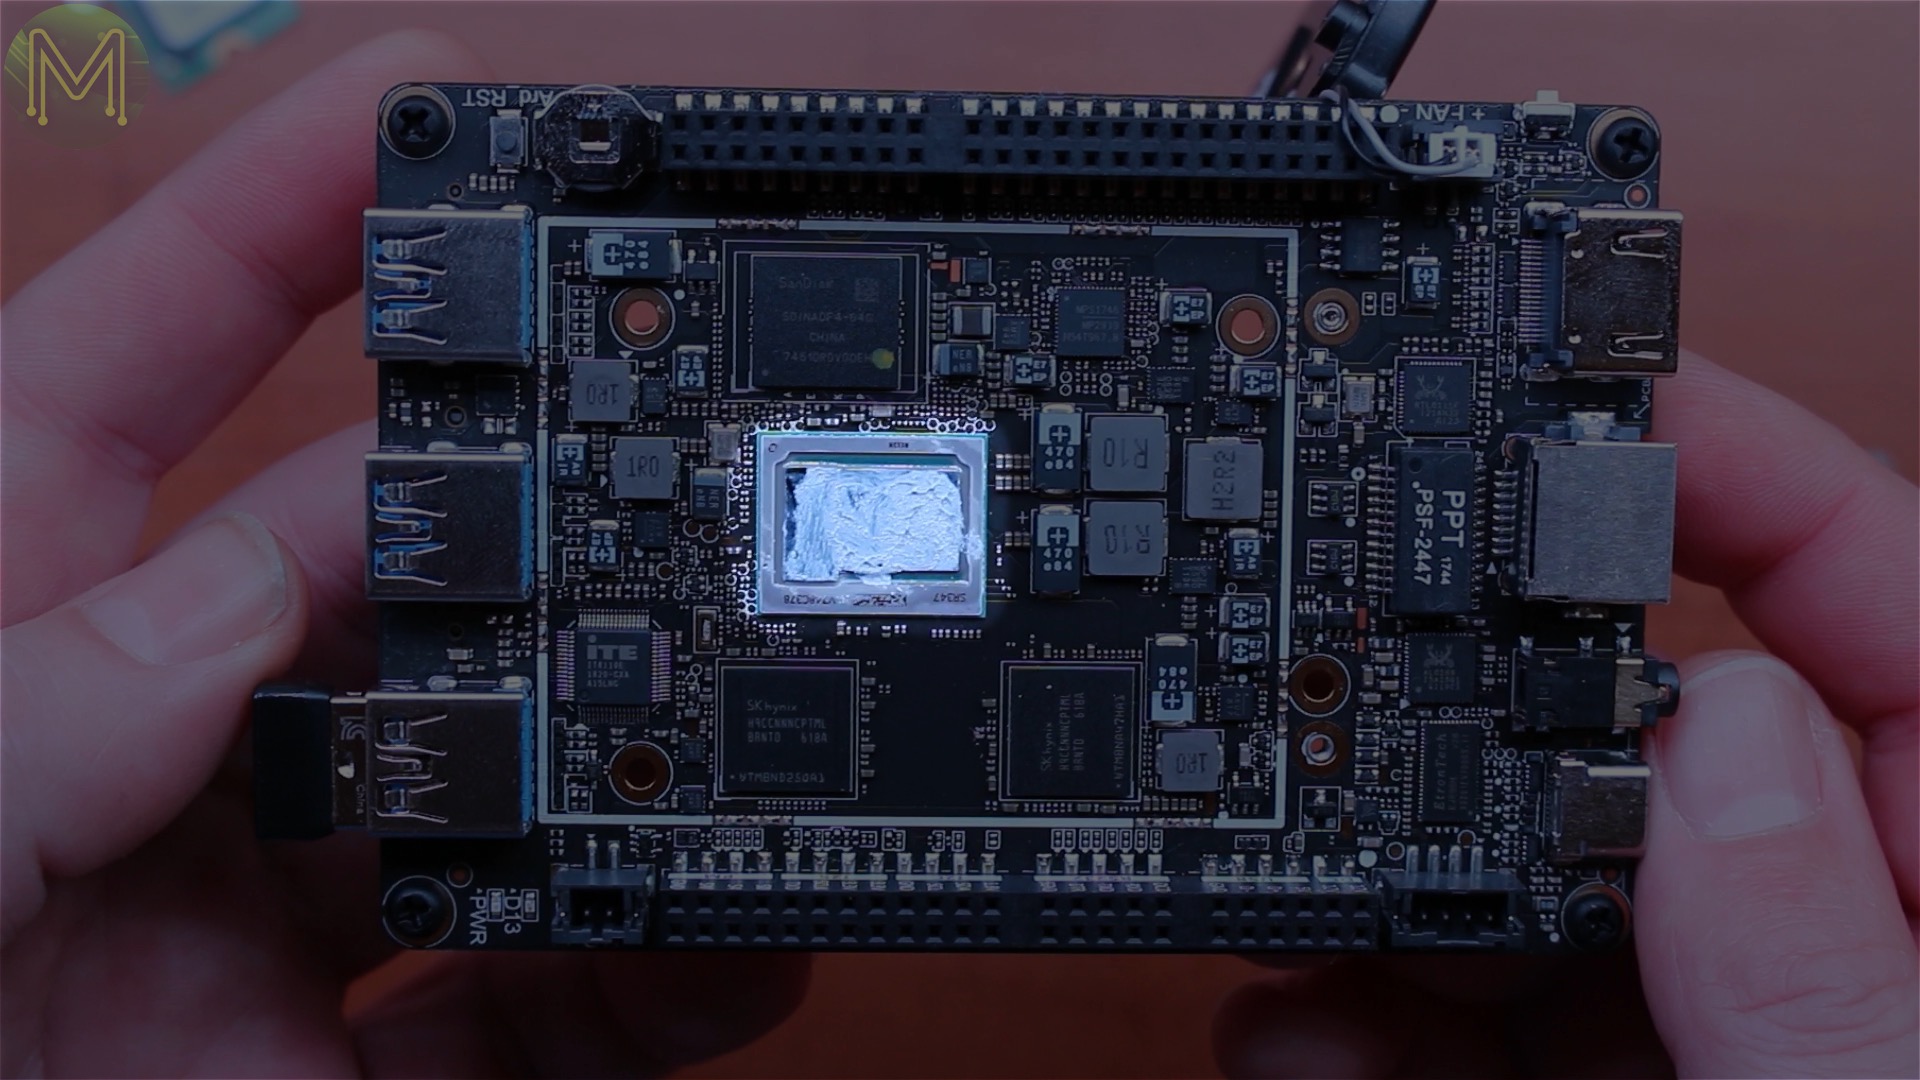
and the mighty Intel CPU.
For my tests I used two 512G M.2 SSDs.
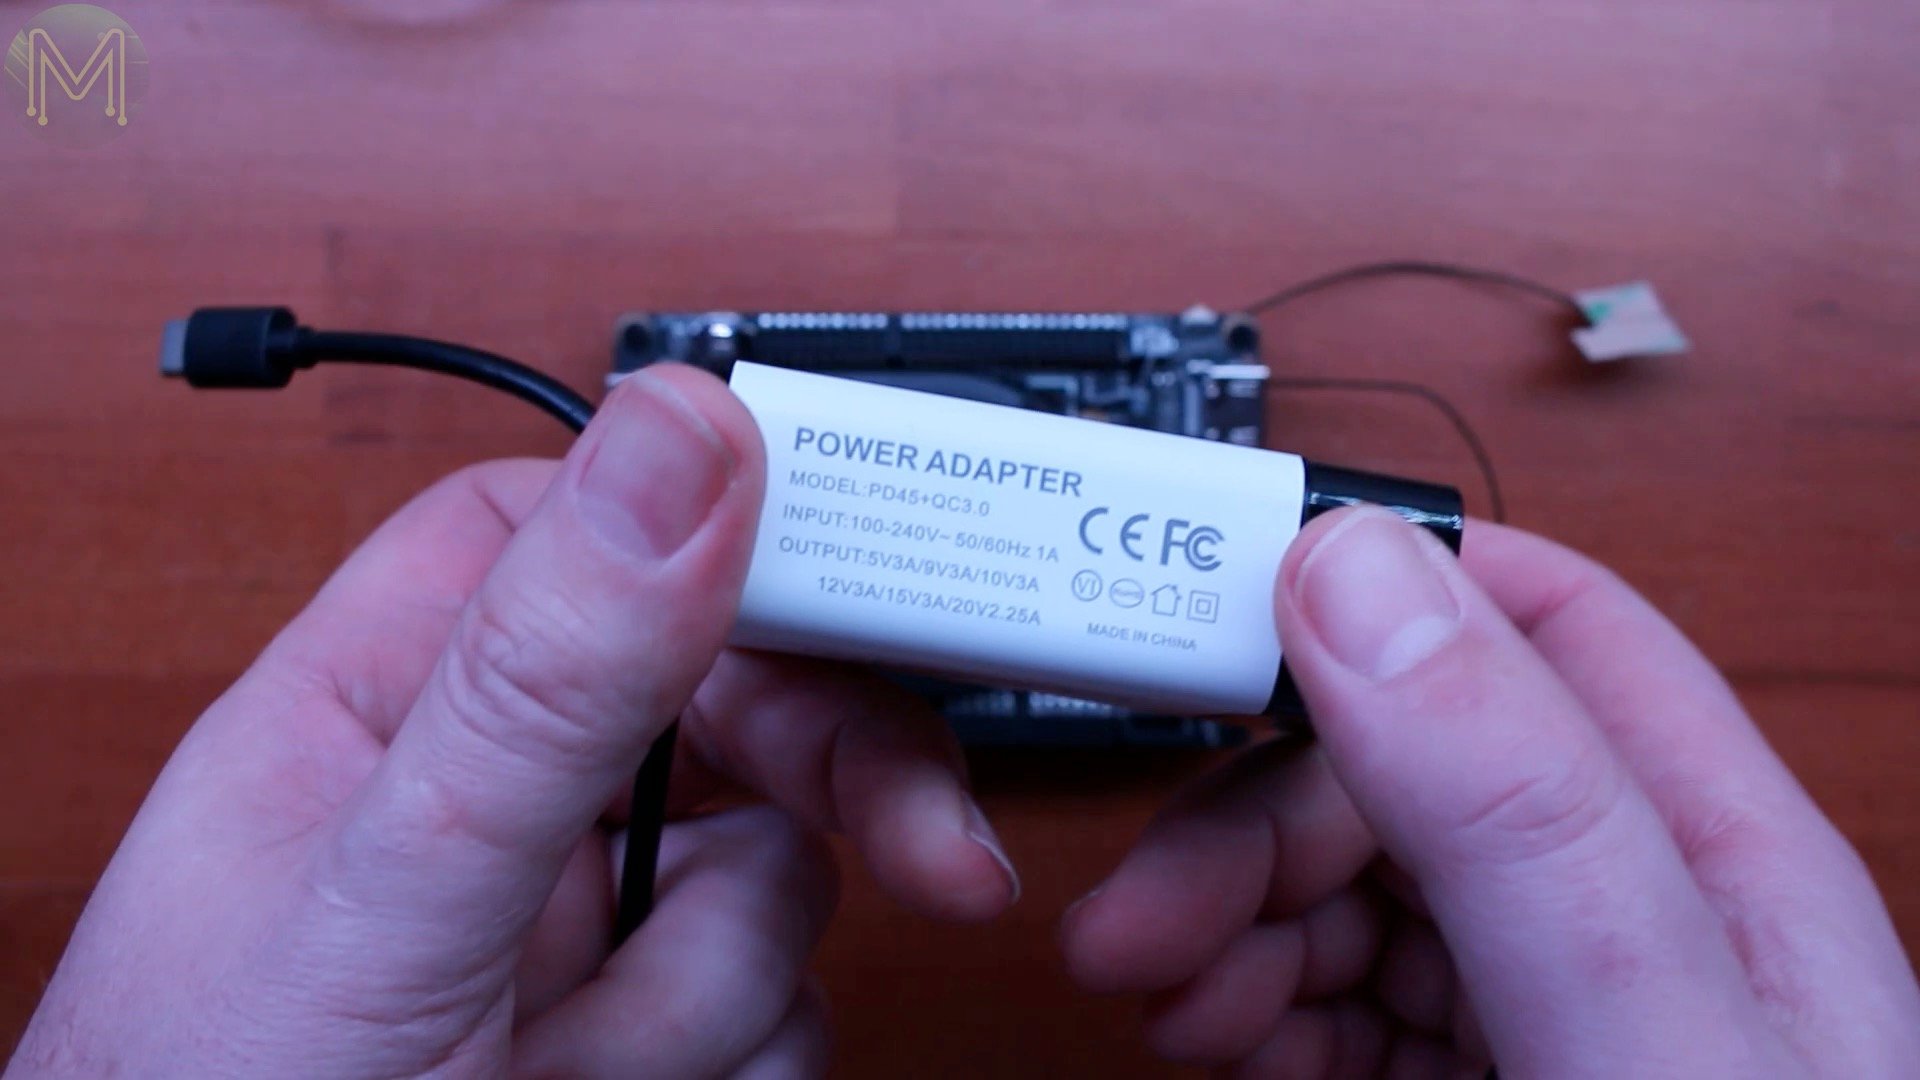
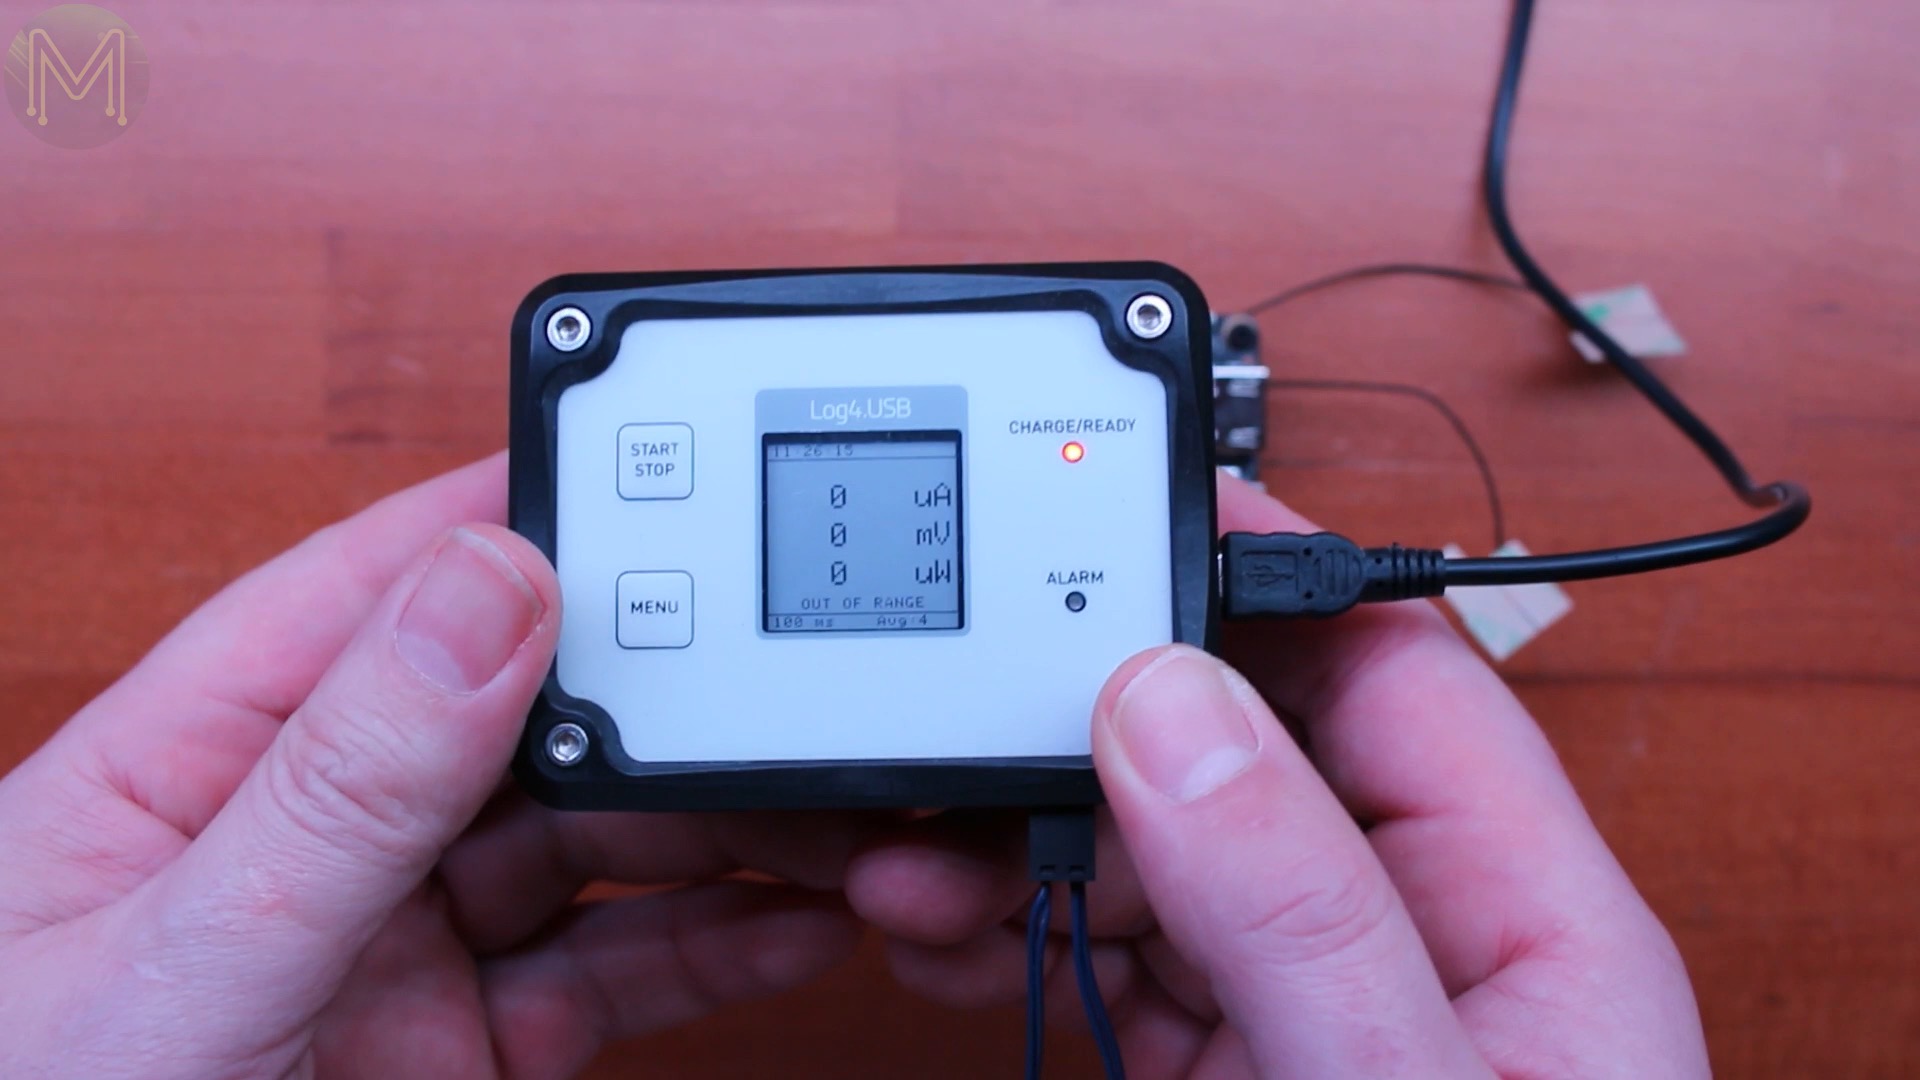
One running Linux and another Mac OSX.Chucking the small antennas on is always a bugger.The LattePanda Alpha is also a pretty power hungry SBC requiring a 12v 4A USB Type C power pack.But since I wanted to log the power consumption during all my tests, I used a power logger attached to the DC input header which was attached to my bench power supply.
Windows Testing
Windows GPIO tests
Like the original LattePanda, the Alpha doesn’t boot automatically. So you have to hold down the power button for a couple of seconds, but after that you will see a Windows desktop appear after about 15 seconds. Nice.
You have full control over power off and sleep from Windows, and interestingly, the SBC will shutdown to only 40mA current draw, which is the lowest of all the SBCs I’ve seen.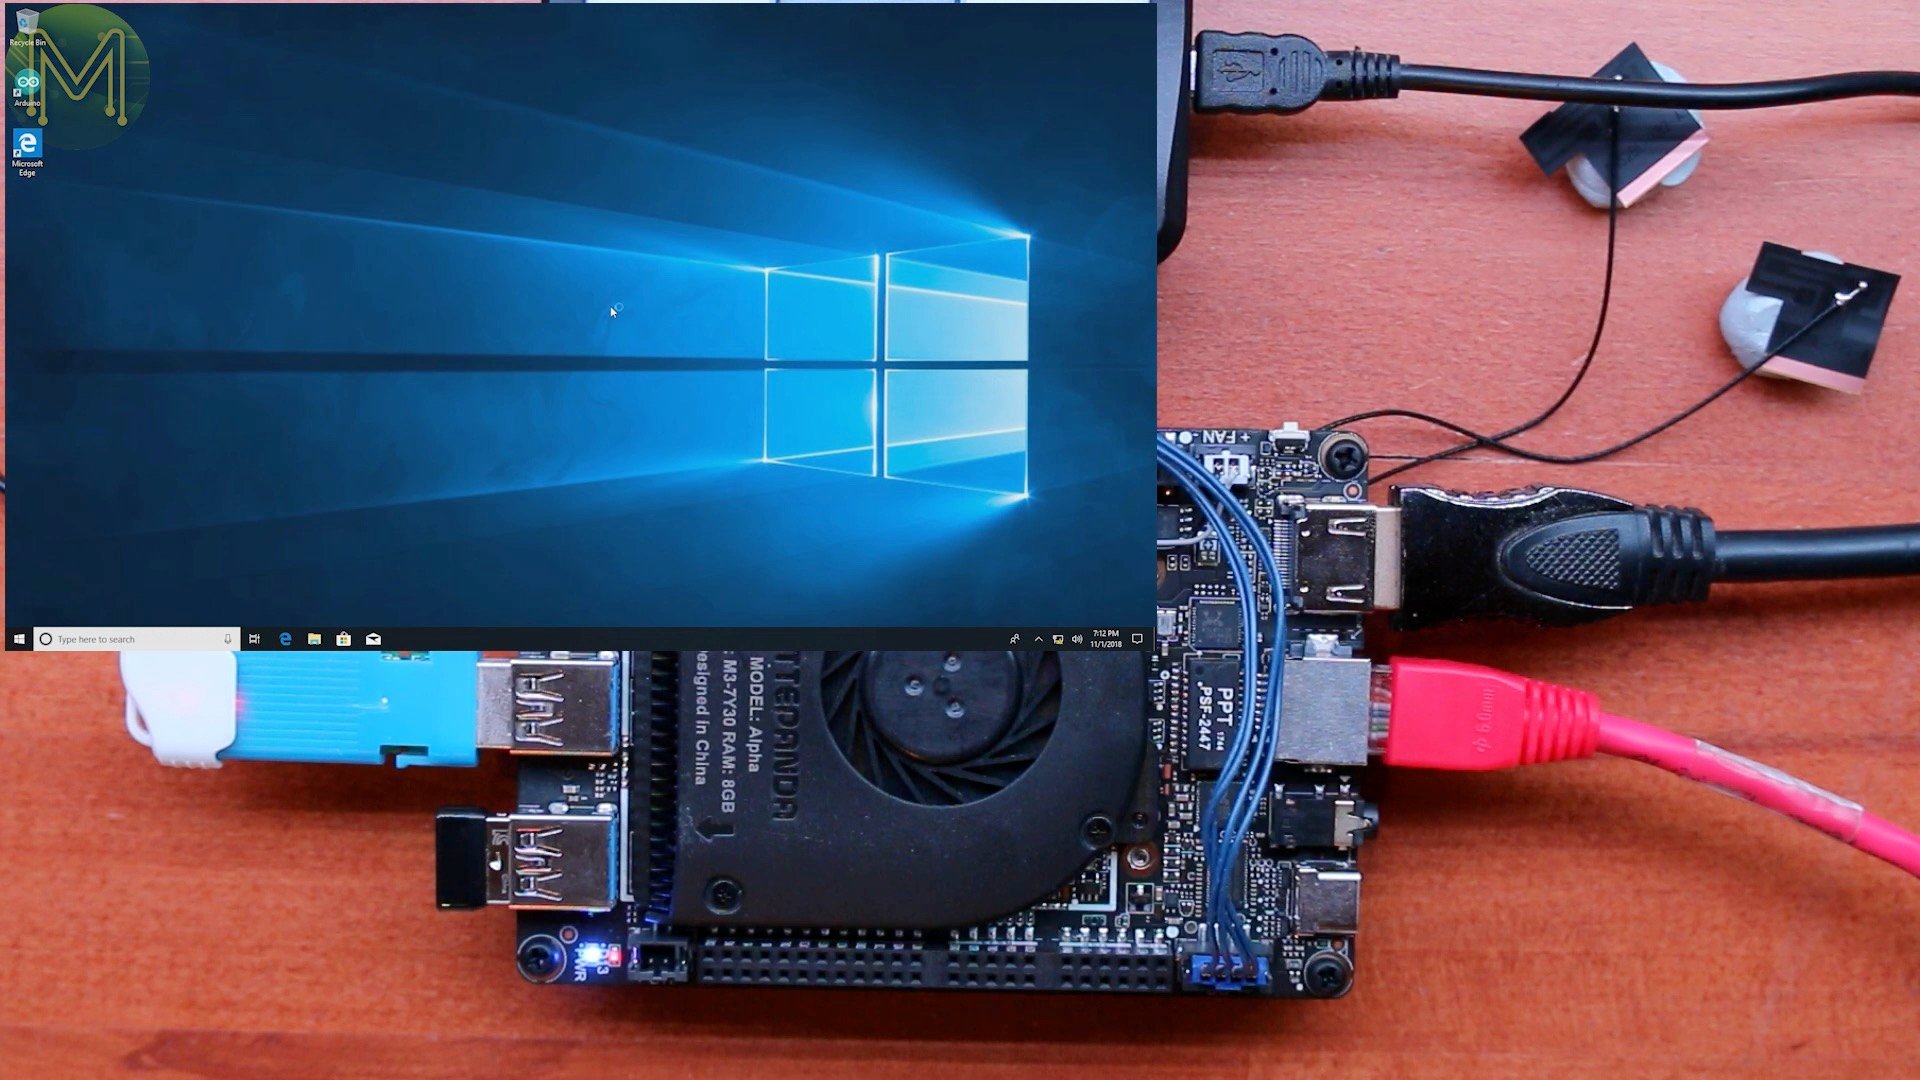
So, right out of the gate. Can you actually use the Arduino from Windows without any fiddling?
Yup, runs the Arduino LED blinky example without issue, and also the Arduino LED fade example.
What about I2C? Using an MCP9808 temperature sensor.
OK. A little bit off, but you can read values without issue.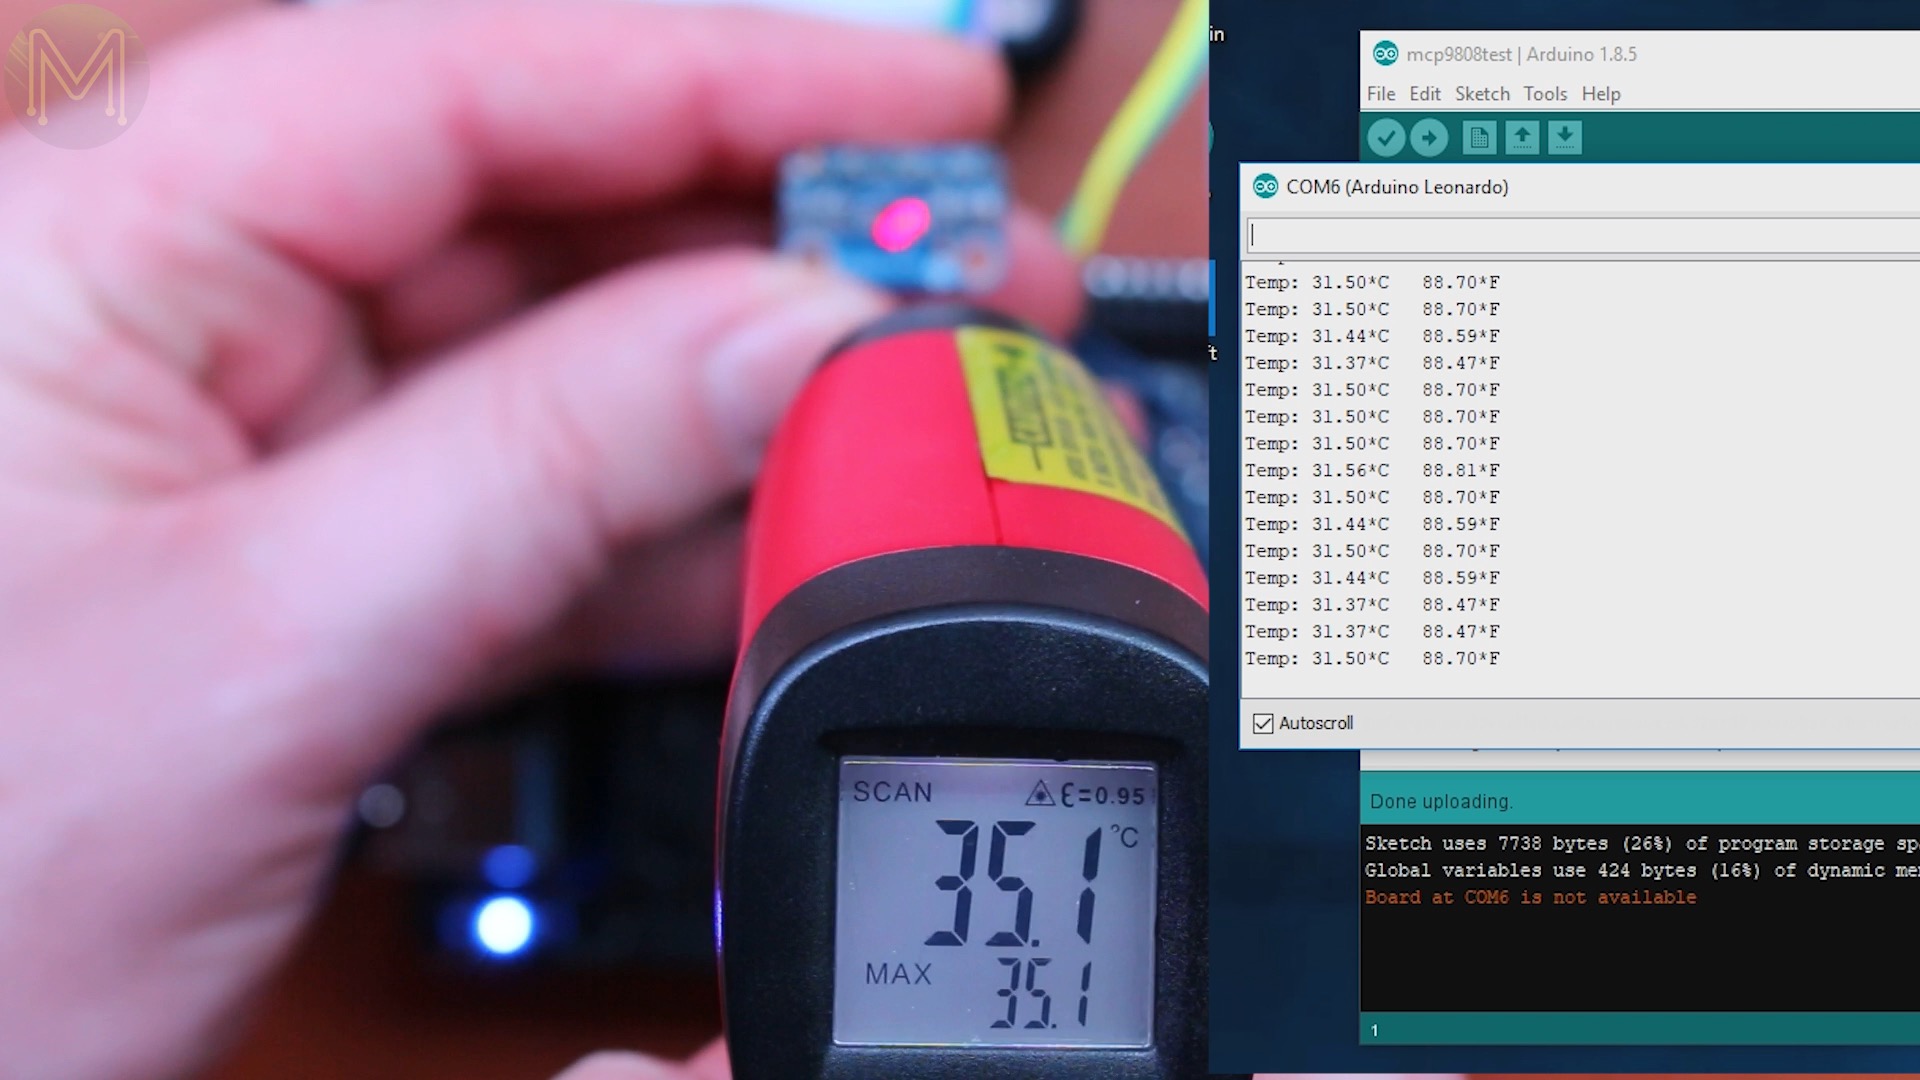
So, out of the box. Everything works as advertised. Nice to see.
Windows Graphics tests
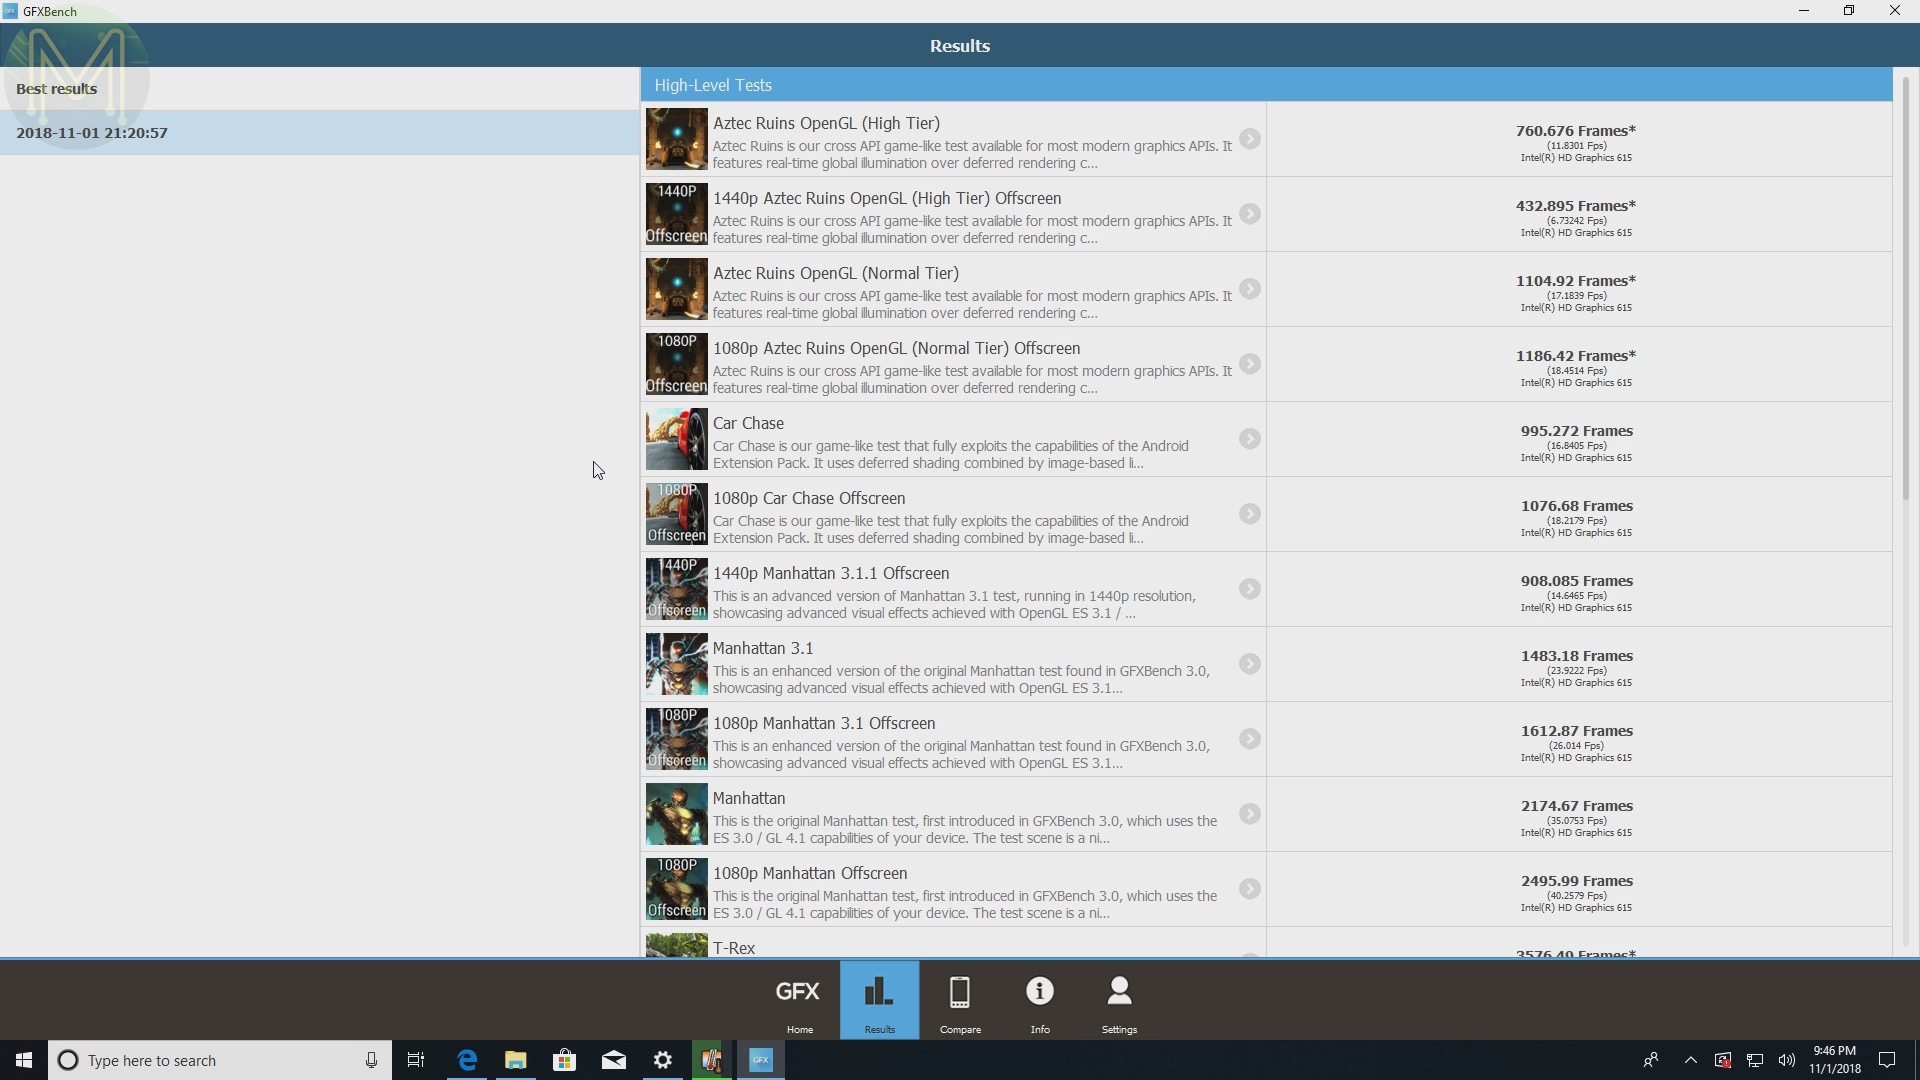
Moving on to graphics performance. What does the onboard Intel HD 615 graphics give us?Running the Time Spy 3Dmark benchmark, shows a pretty abysmal 2 FPS, but you can’t expect it to perform like an Uber gamer’s rig.However, the IceStorm benchmark was pretty smooth. Often reaching 200FPS with an average of 100FPS.Moving on to GFXBench showed it, once again, to be pretty smooth.The final FPS scores were… well… decent enough, with the lowest being 12 FPS and the highest 64 FPS. Not surprisingly, this places it alongside an Apple MacBook Pro, which runs the same CPU as the Alpha.


Windows Power and Temperature
During the tests I logged both power and temperature.
With an ambient room temperature of 33C, the max temperature I saw was 86C with an average of 68 and a minimum of 58. The board does get a little toasty, however, and externally I was measuring a max of 52.7C on top, with a max of 57.1C near the CPU underneath.On the power side, it drew a max of 2.4A, an average of 818mA and a minimum of 40mA. Bear in mind that this is at 12v which is similar to the NanoPC-T4. So, not a low power SBC.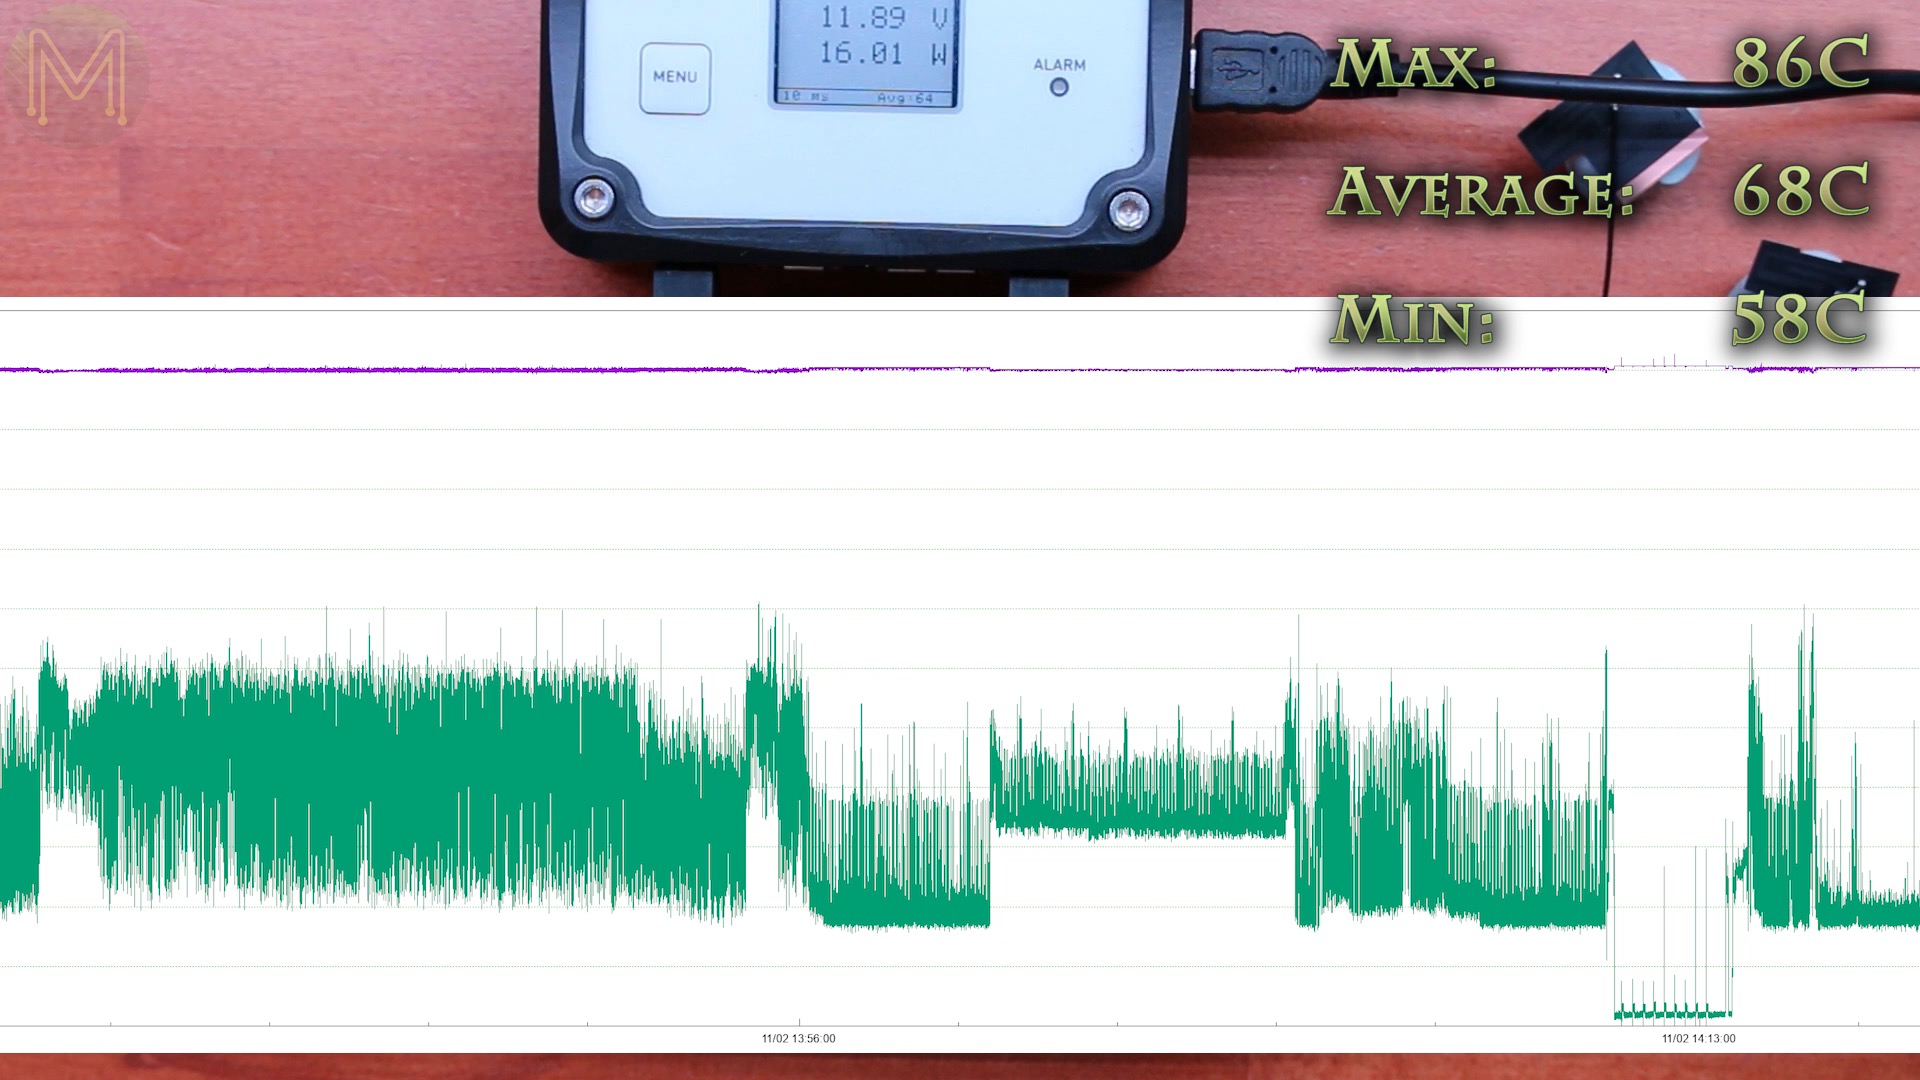

Linux Testing
Enough of Windows testing, let’s move on to Linux. I’ll be using the latest stock Debian install media for my Linux tests. I burnt this to a USB flash drive using Etcher, and chucked that into one of the USB ports.
Getting into the BIOS is as simple as pressing the DEL key many times after you press the power button. Like any decent BIOS there’s a fair amount of options.
But, we want to boot from the USB flash drive, and then progress on with the usual Debian install. Really, there was nothing odd or unusual with the install. It behaved like any other desktop or notebook install with well supported hardware.Once installed and rebooted you’ll get a desktop in around 12 seconds and the speed of upgrading and installing extra packages on the O/S shows that we’re not dealing with an ordinary SBC here.Linux could see the onboard Arduino without issue, but I’m not going to rehash those tests.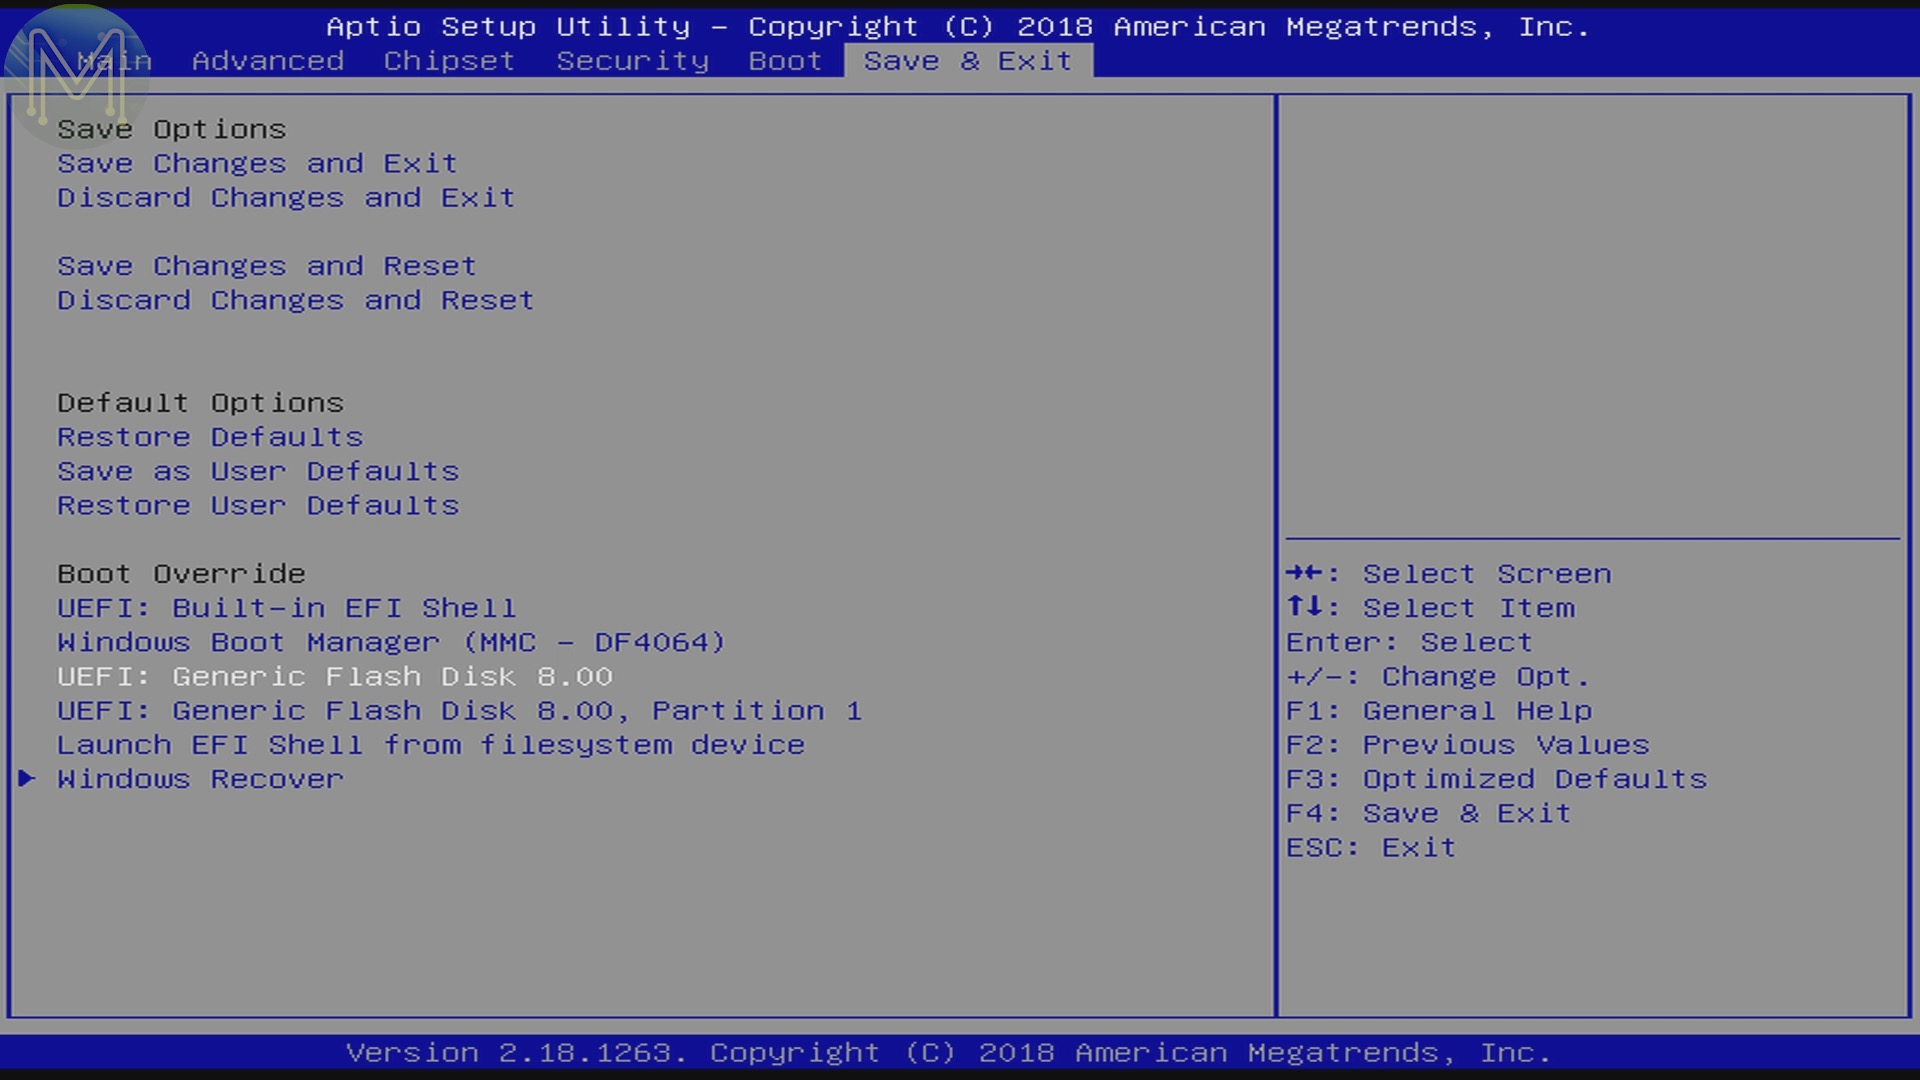


Linux Graphics tests
So, first on to some graphics tests. I used the Superposition benchmark from Unigine, which… ah… was a little slow.
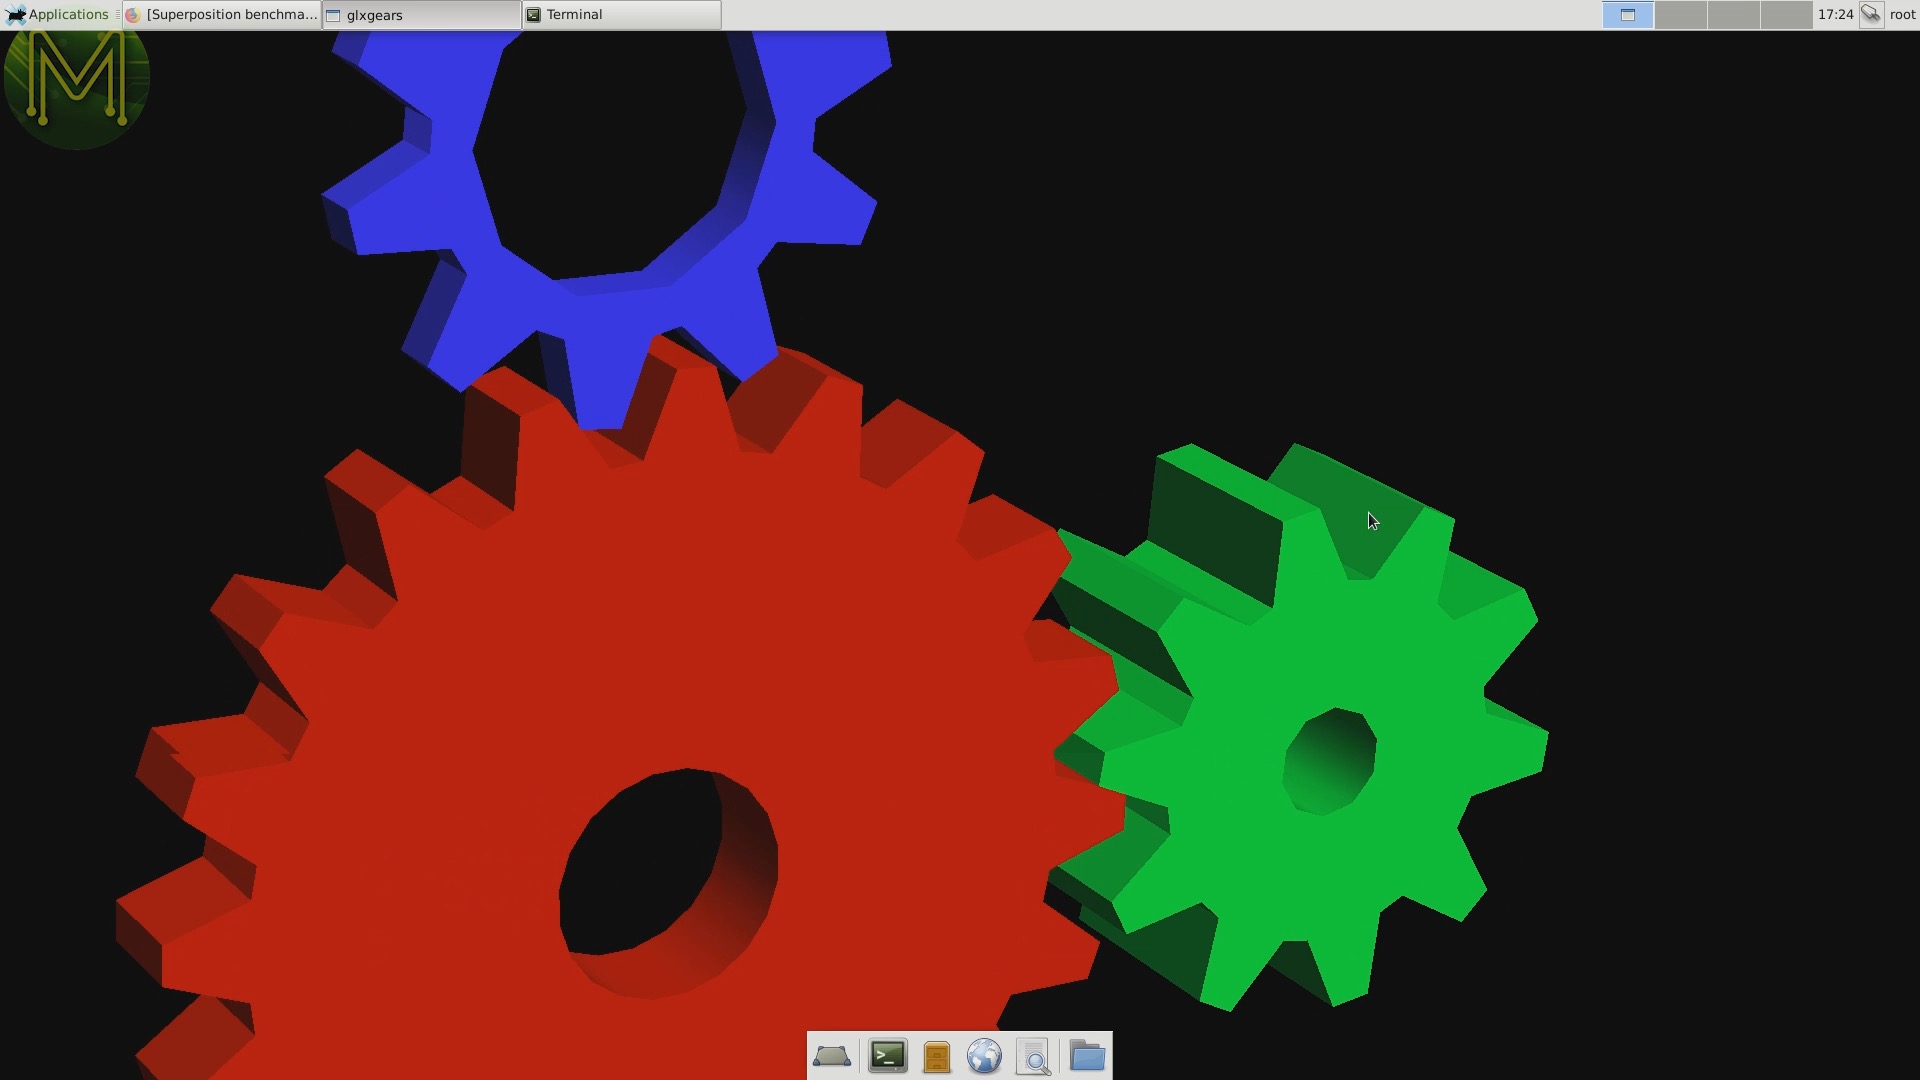
Spitting out at the end a measly 4 FPS max. Note that this was with the stock Debian install with no additional graphics driver hacks used. I’ll have to publish a later video with updates to these tests.glxgears came up with 490 FPS, which was good to see.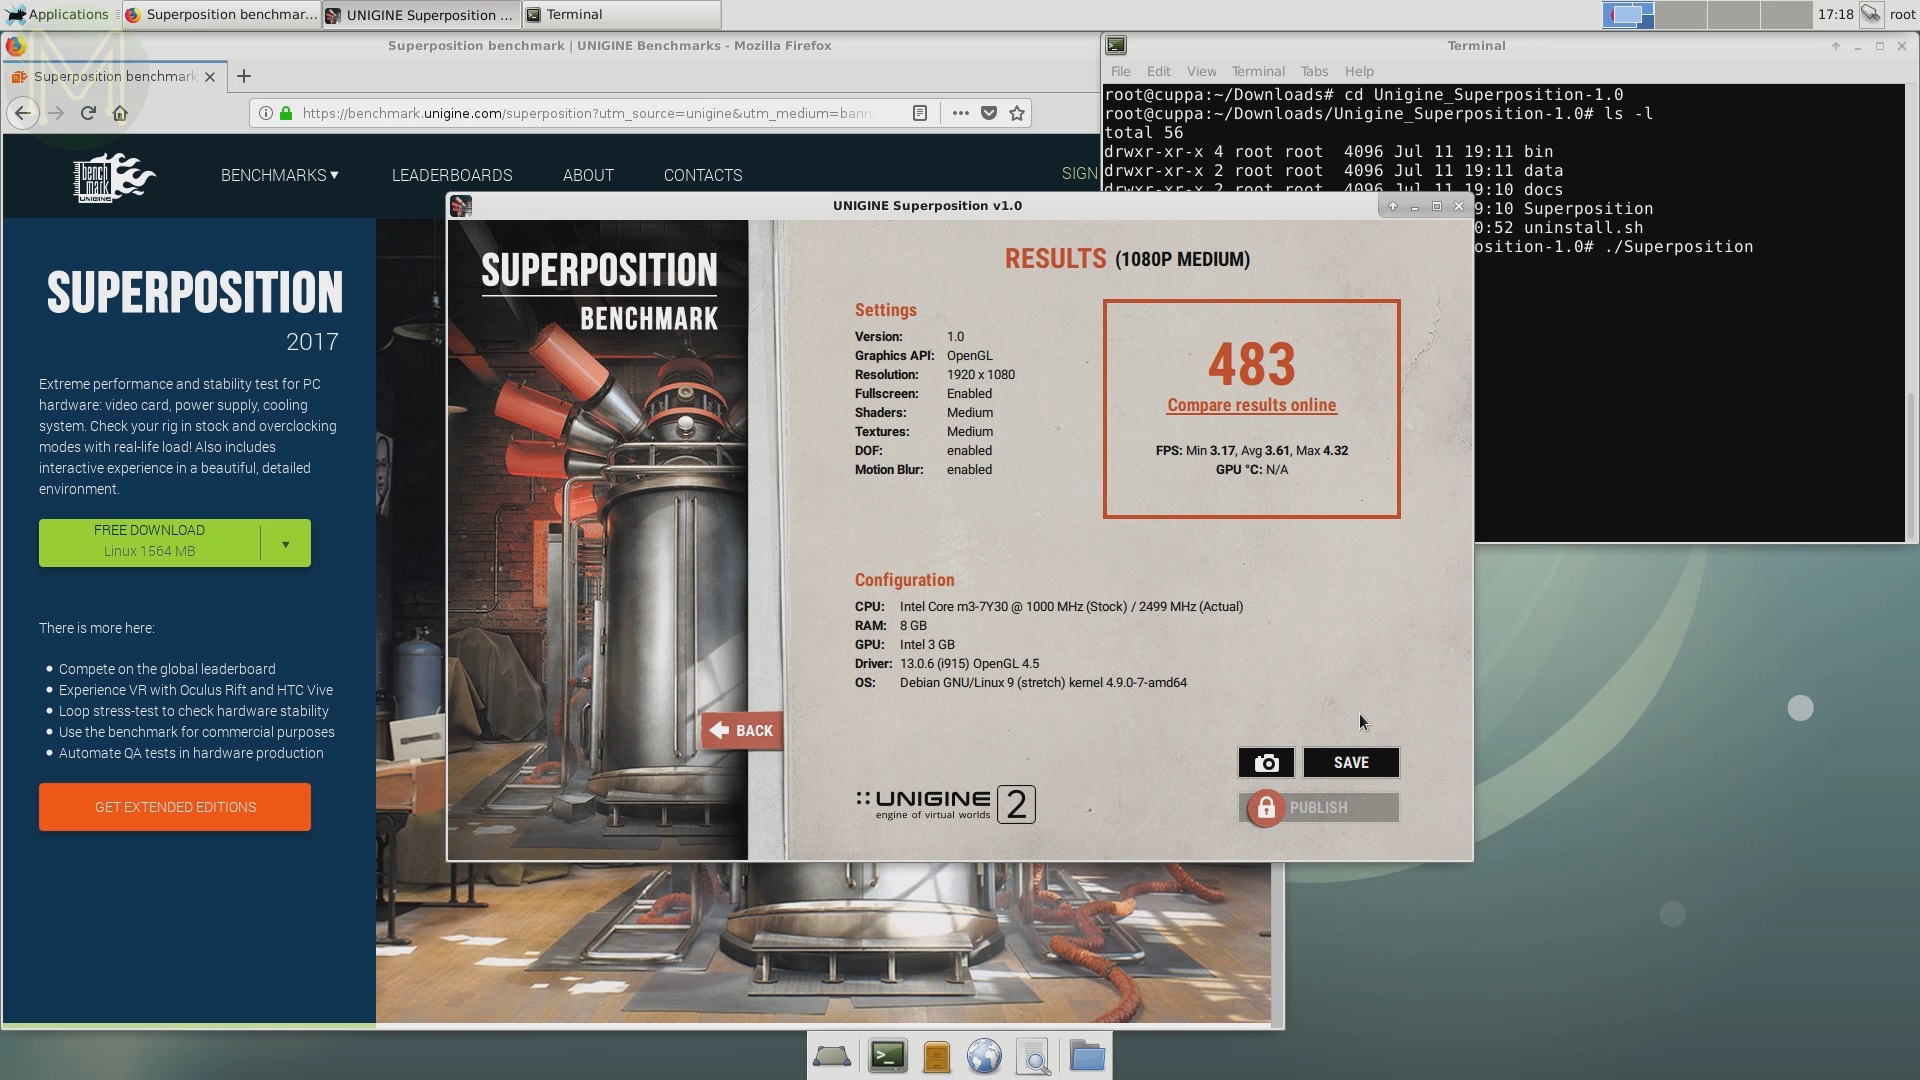
And the geeks3d tests were fairly interesting. Tests ranged in performance:
- 6 FPS
- 1 FPS
- 4 FPS
- 96 FPS
- 496 FPS
Playing my YouTube intro video at 1080p had no lag or stuttering,
but playing a 4K video on a 1080p display showed up a fair amount of stuttering, which is to be expected with non-optimized graphics drivers.
Network speeds were, of course, lightning fast @ 944 Mbits/s. Apart from graphics, there’s not a heck of a lot you can pin on this SBC.
Linux GPIO tests
On the GPIO side you, of course, can’t see any SPI or I2C as this is provided by the Arduino, but you can see the Arduino USB to UART bridge and additional serial interface.
You also have access to CPU temperature and frequency control.
Linux Power and Temperature
Over these initial tests I saw a maximum current draw of 2.4A, with an average of 705mA and a minimum of 21mA.
On the temperature side I saw a maximum of 80C, with an average of 65 and minimum of 58.
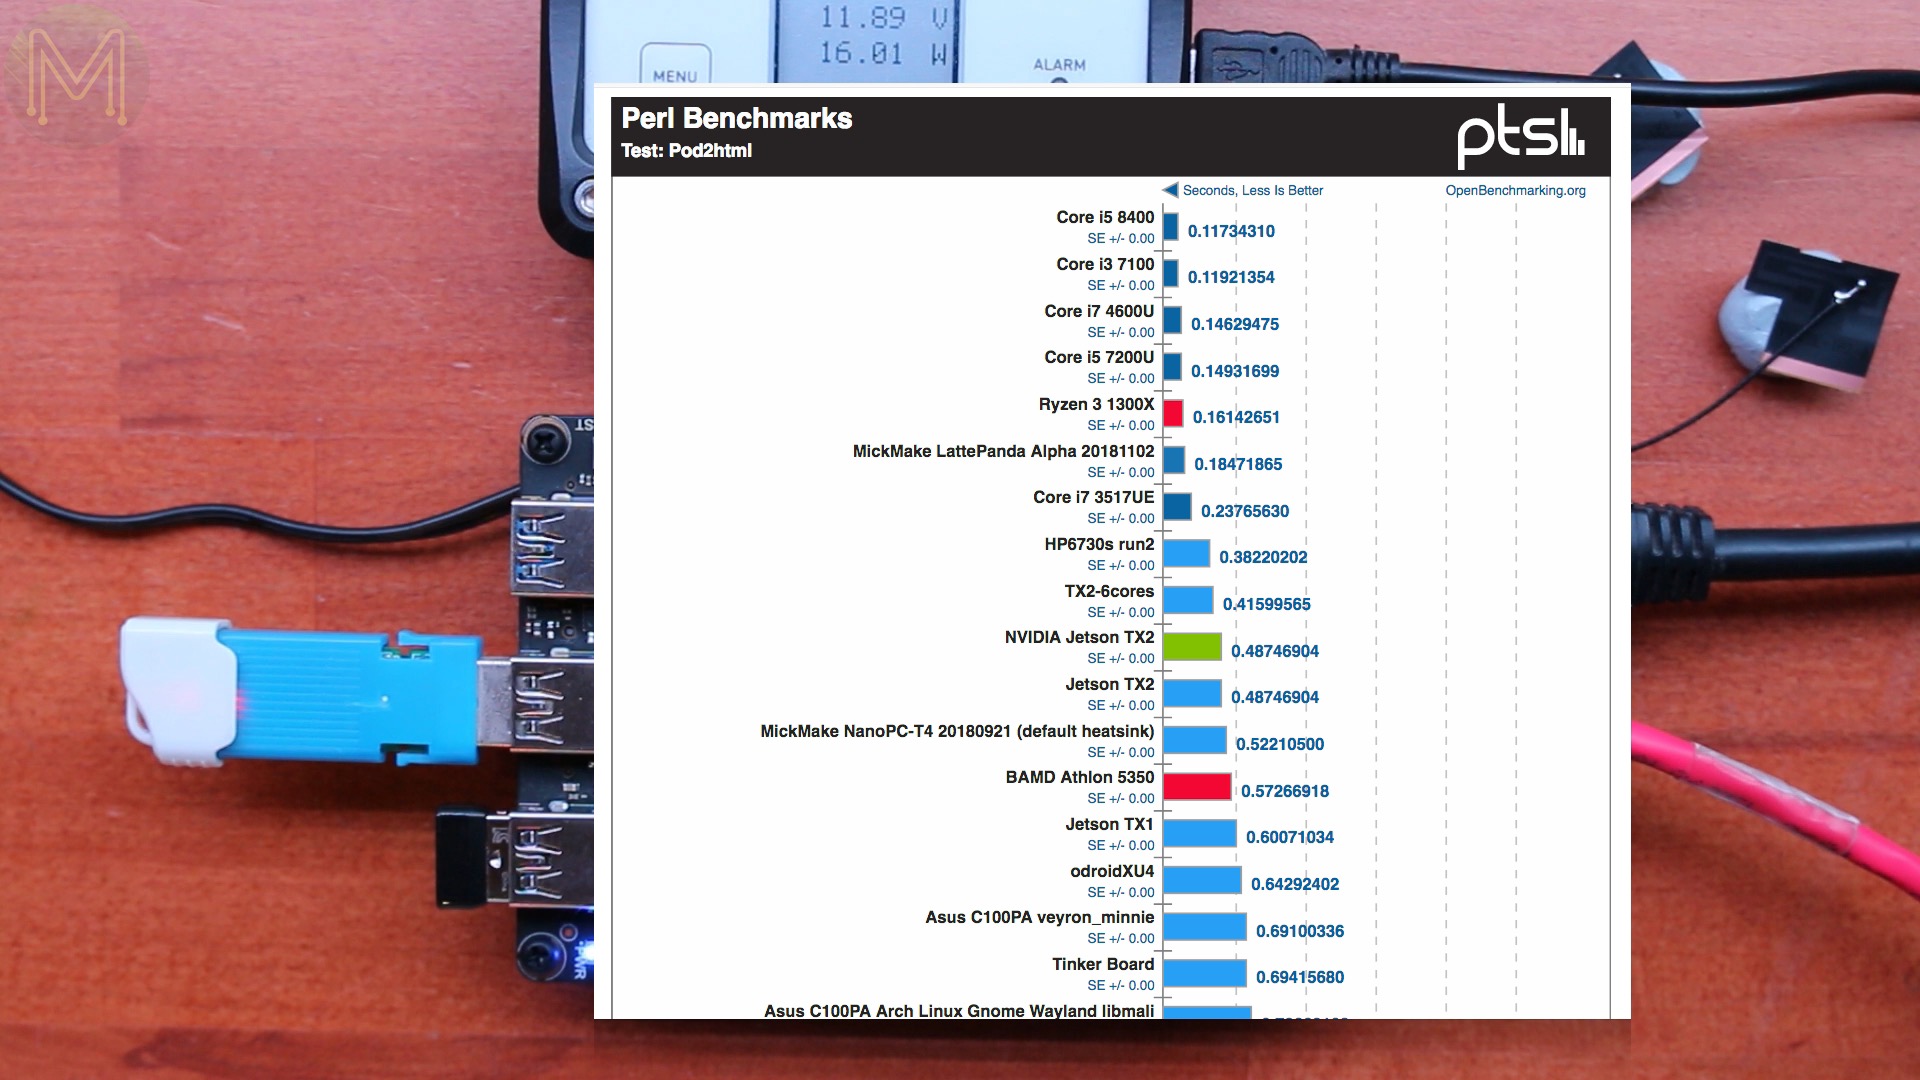
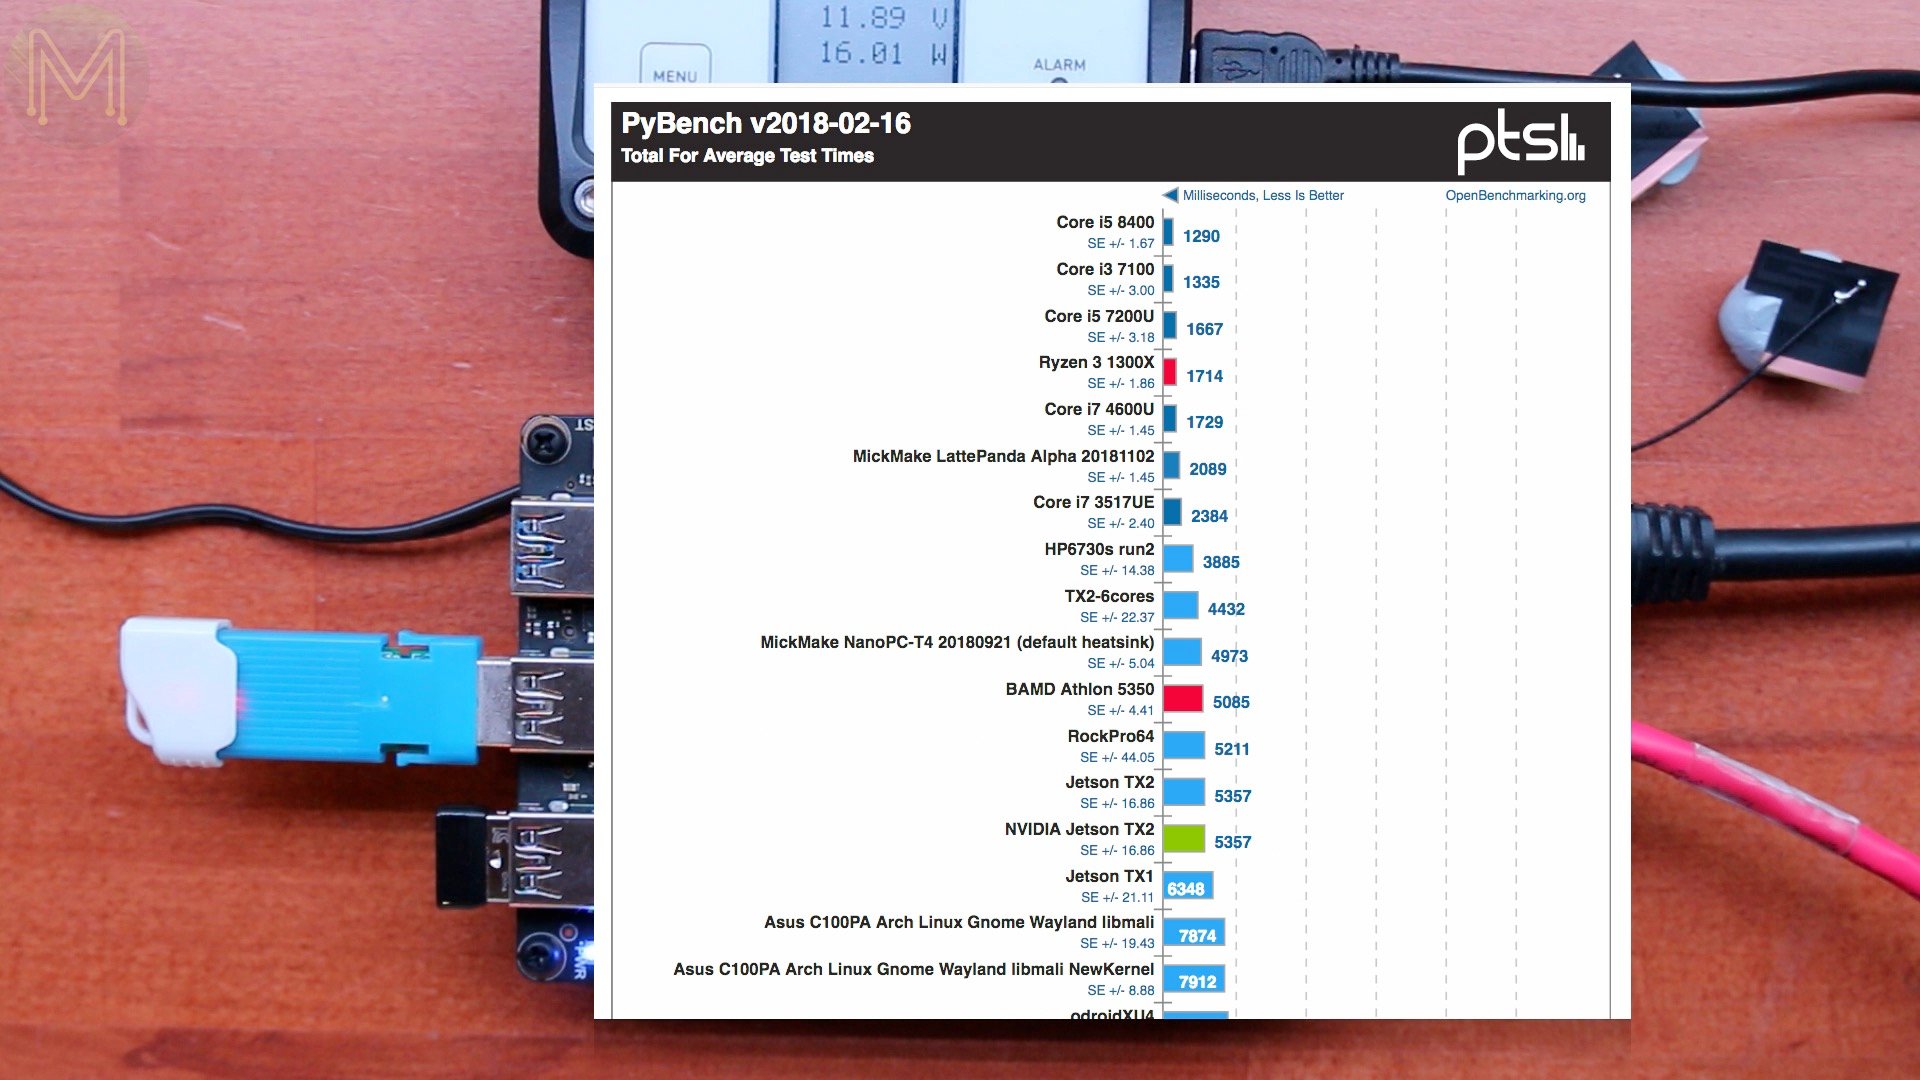
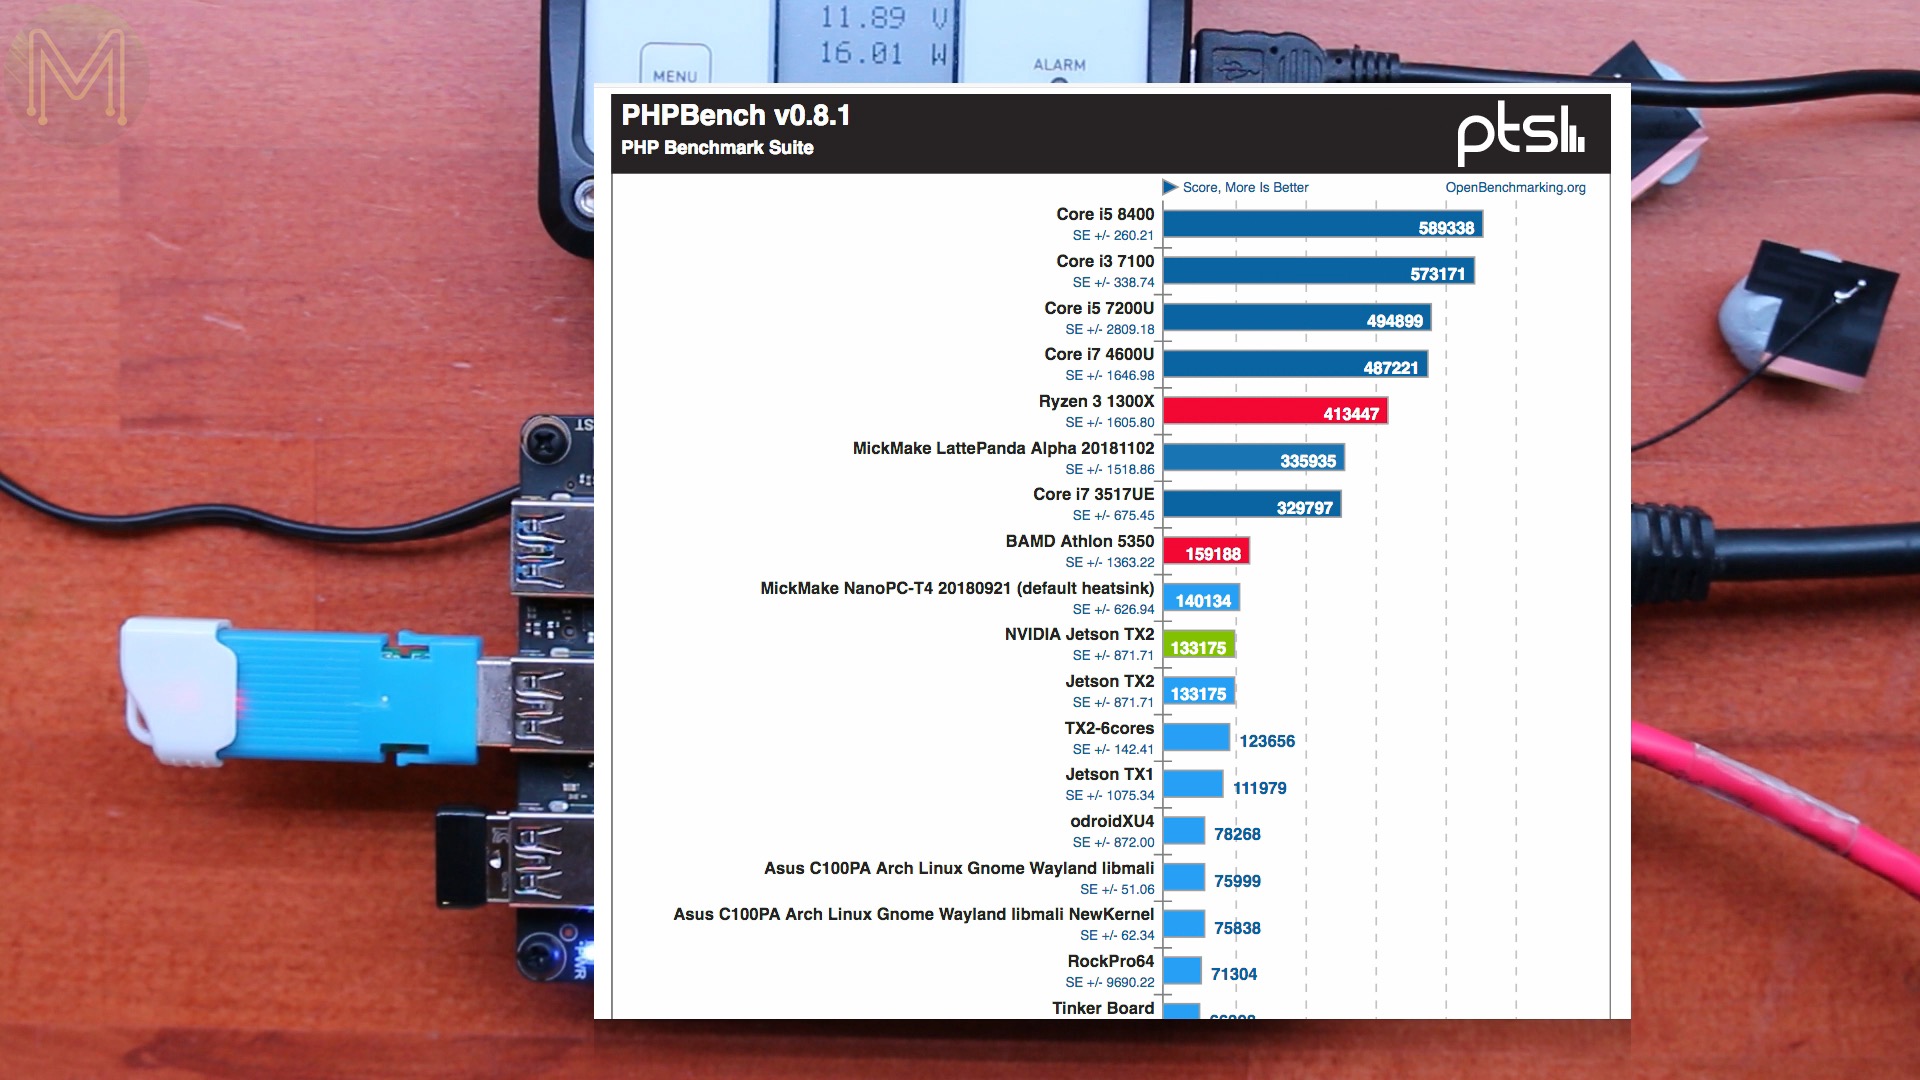
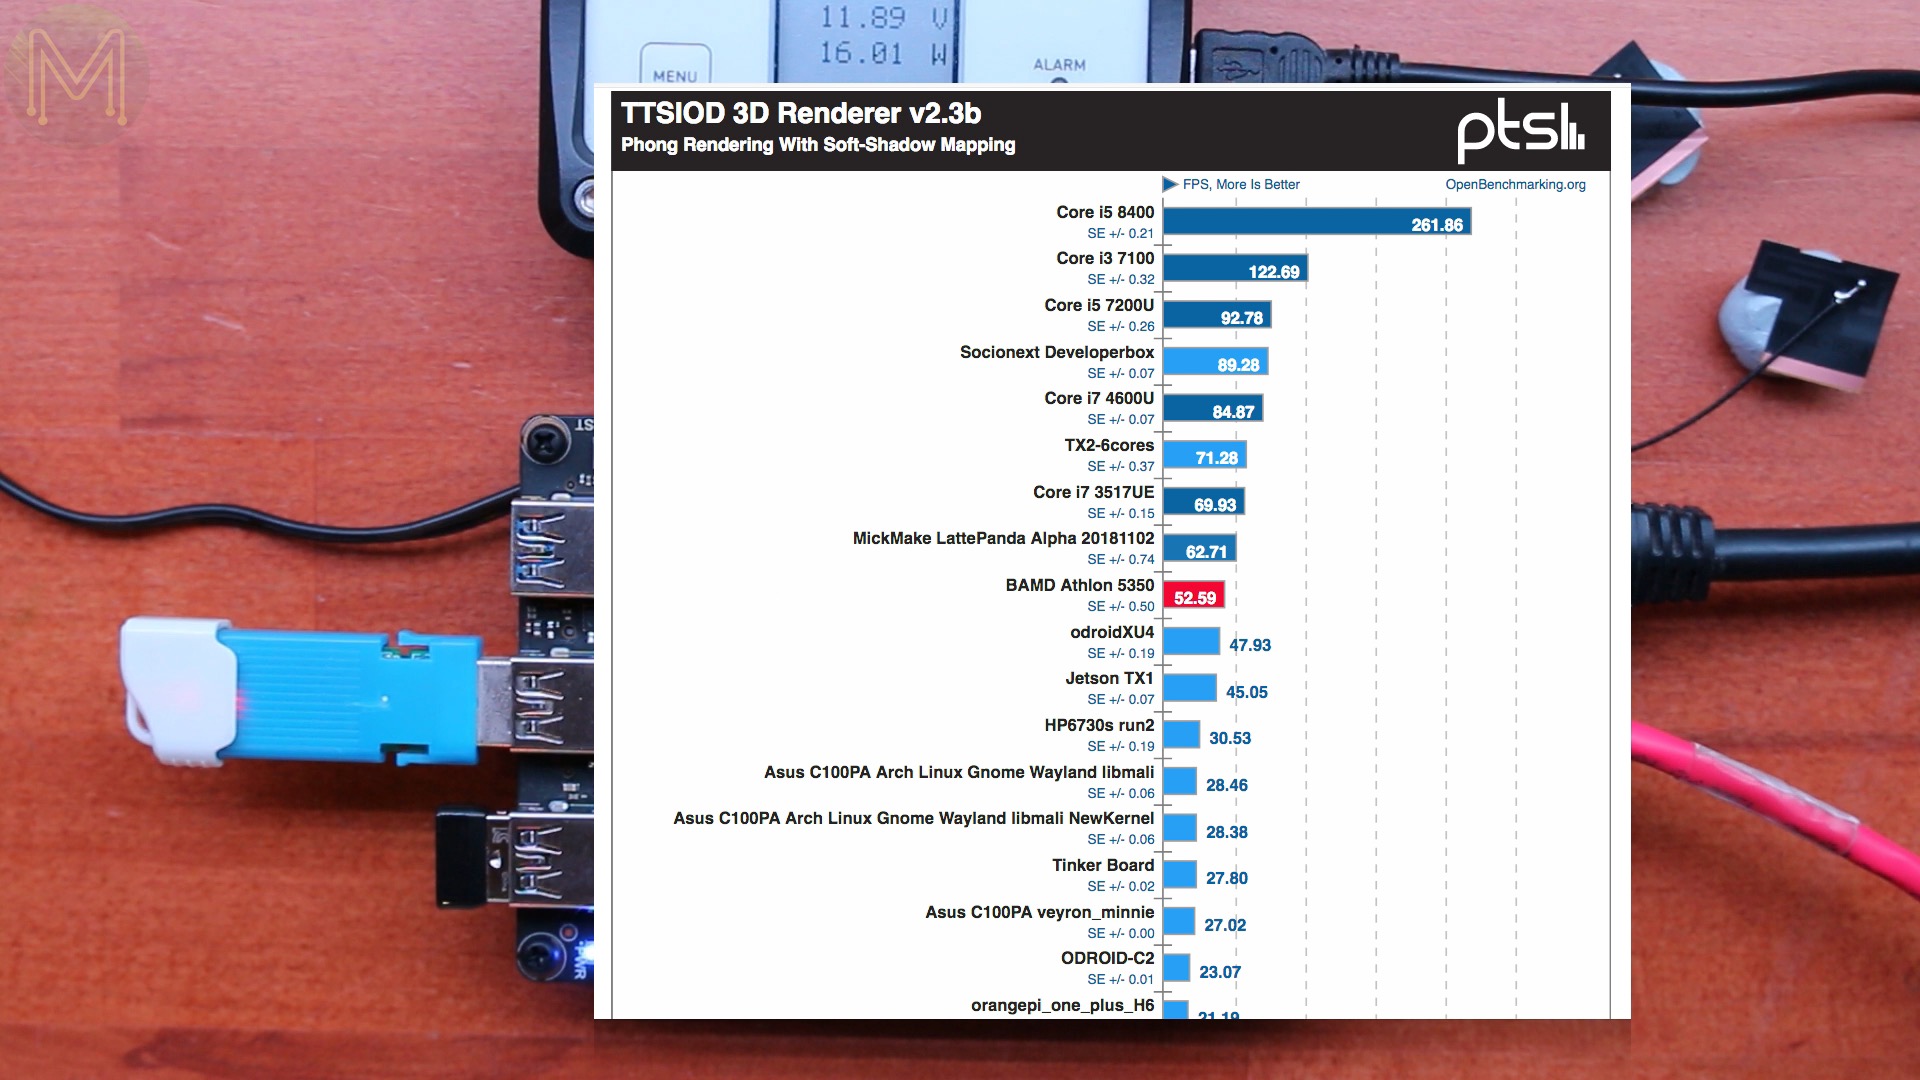
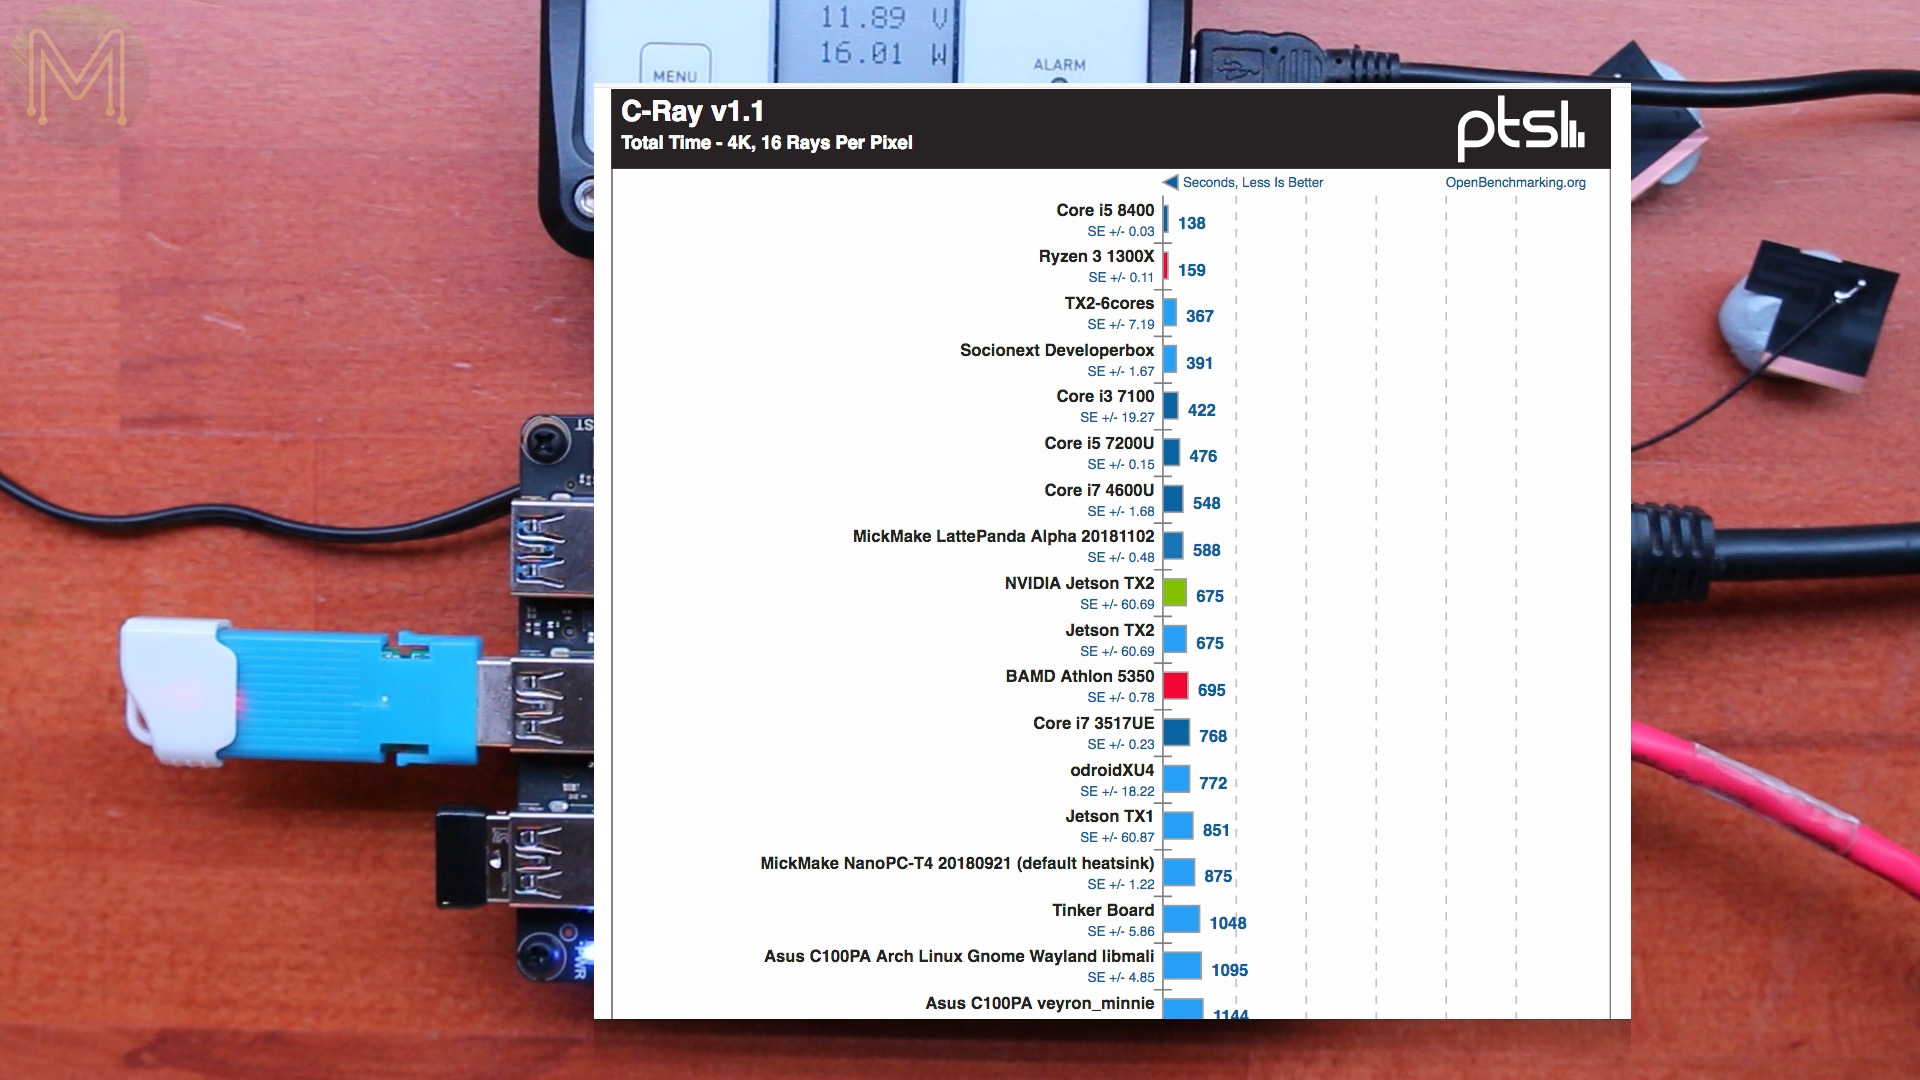
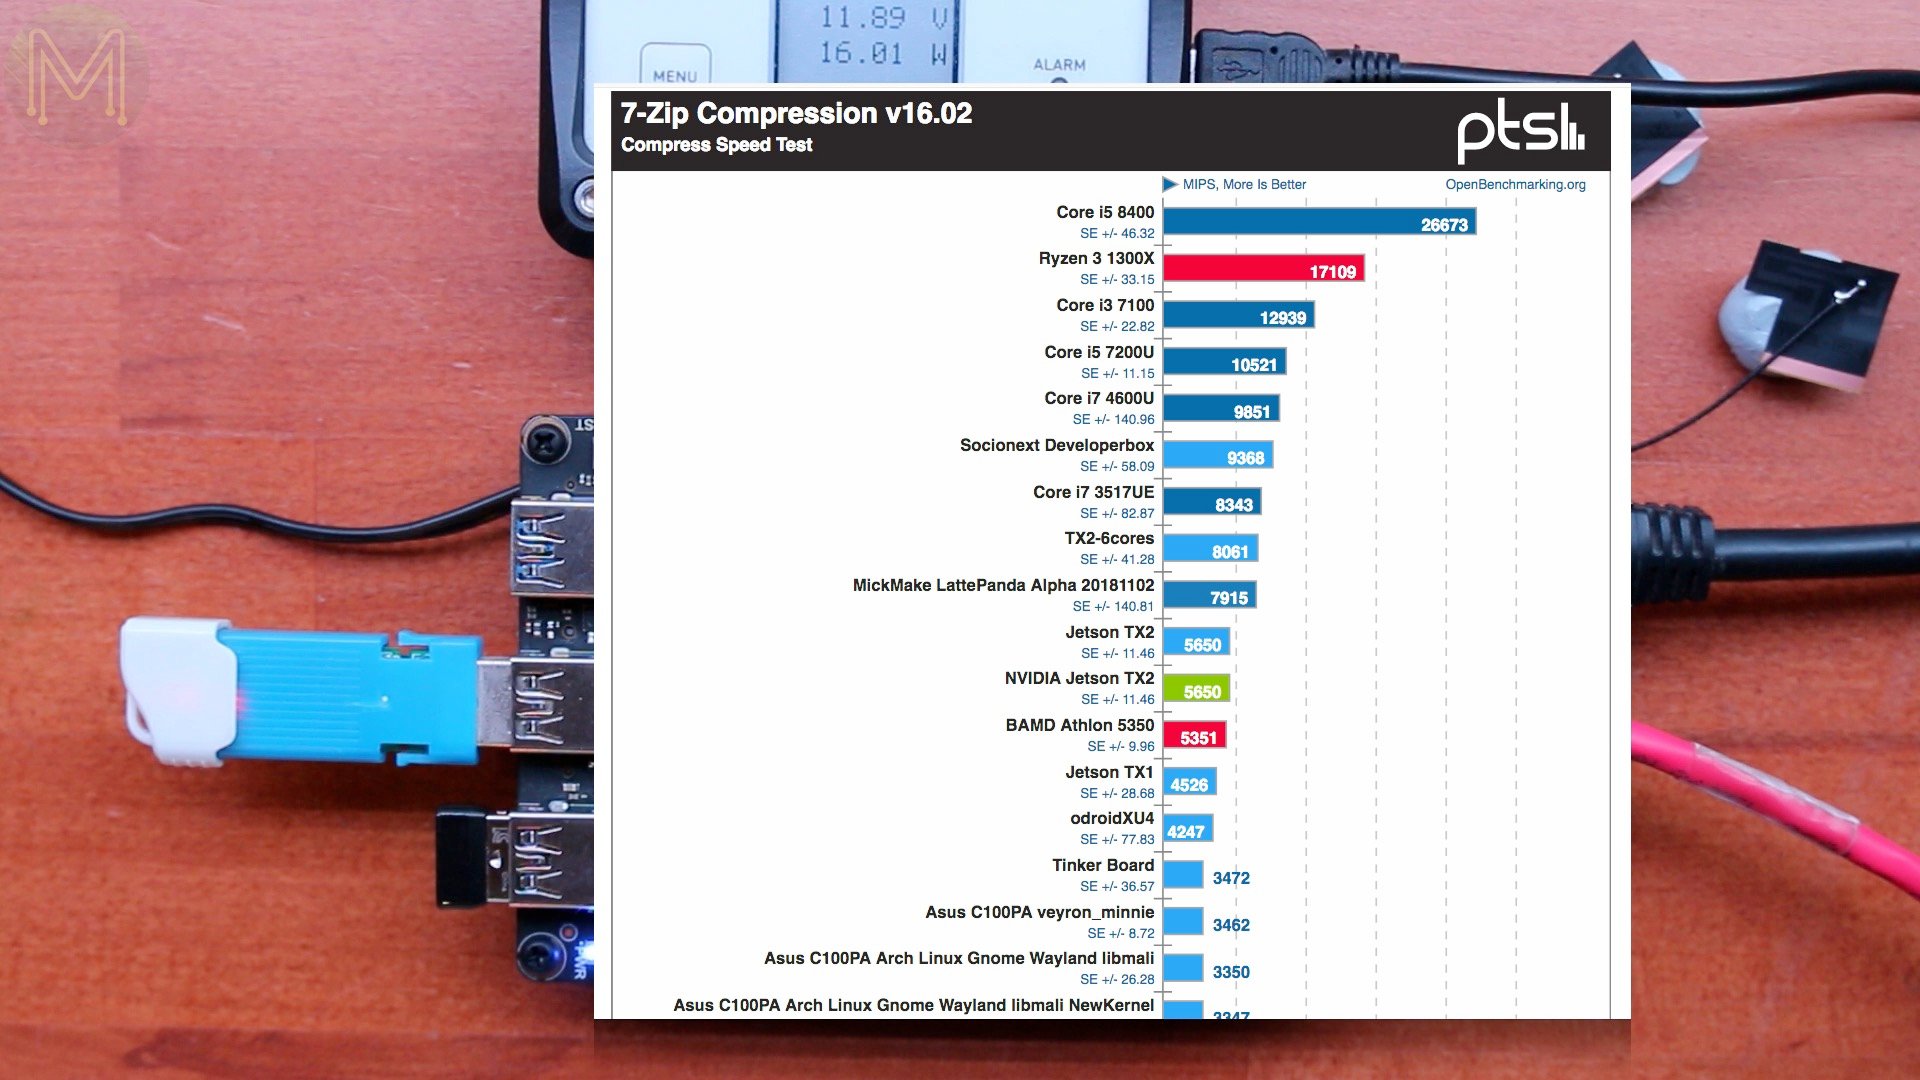
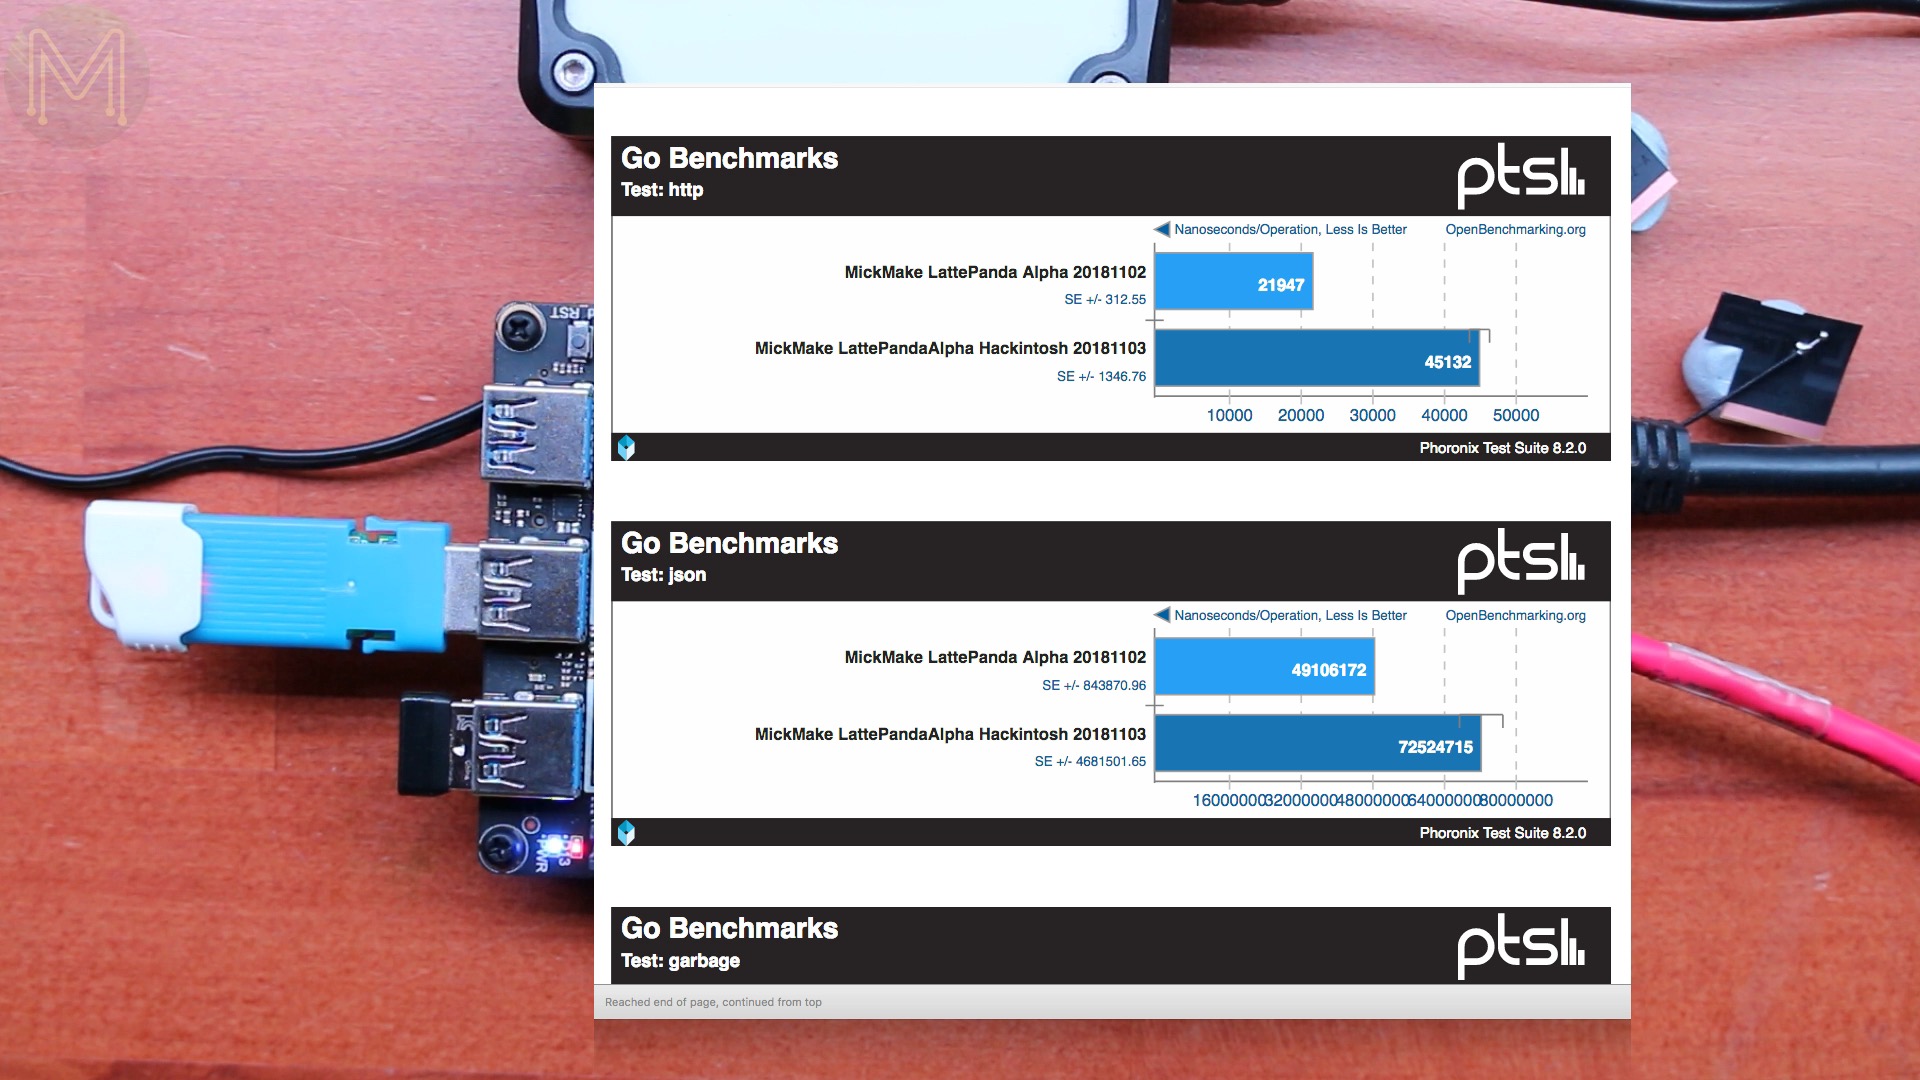
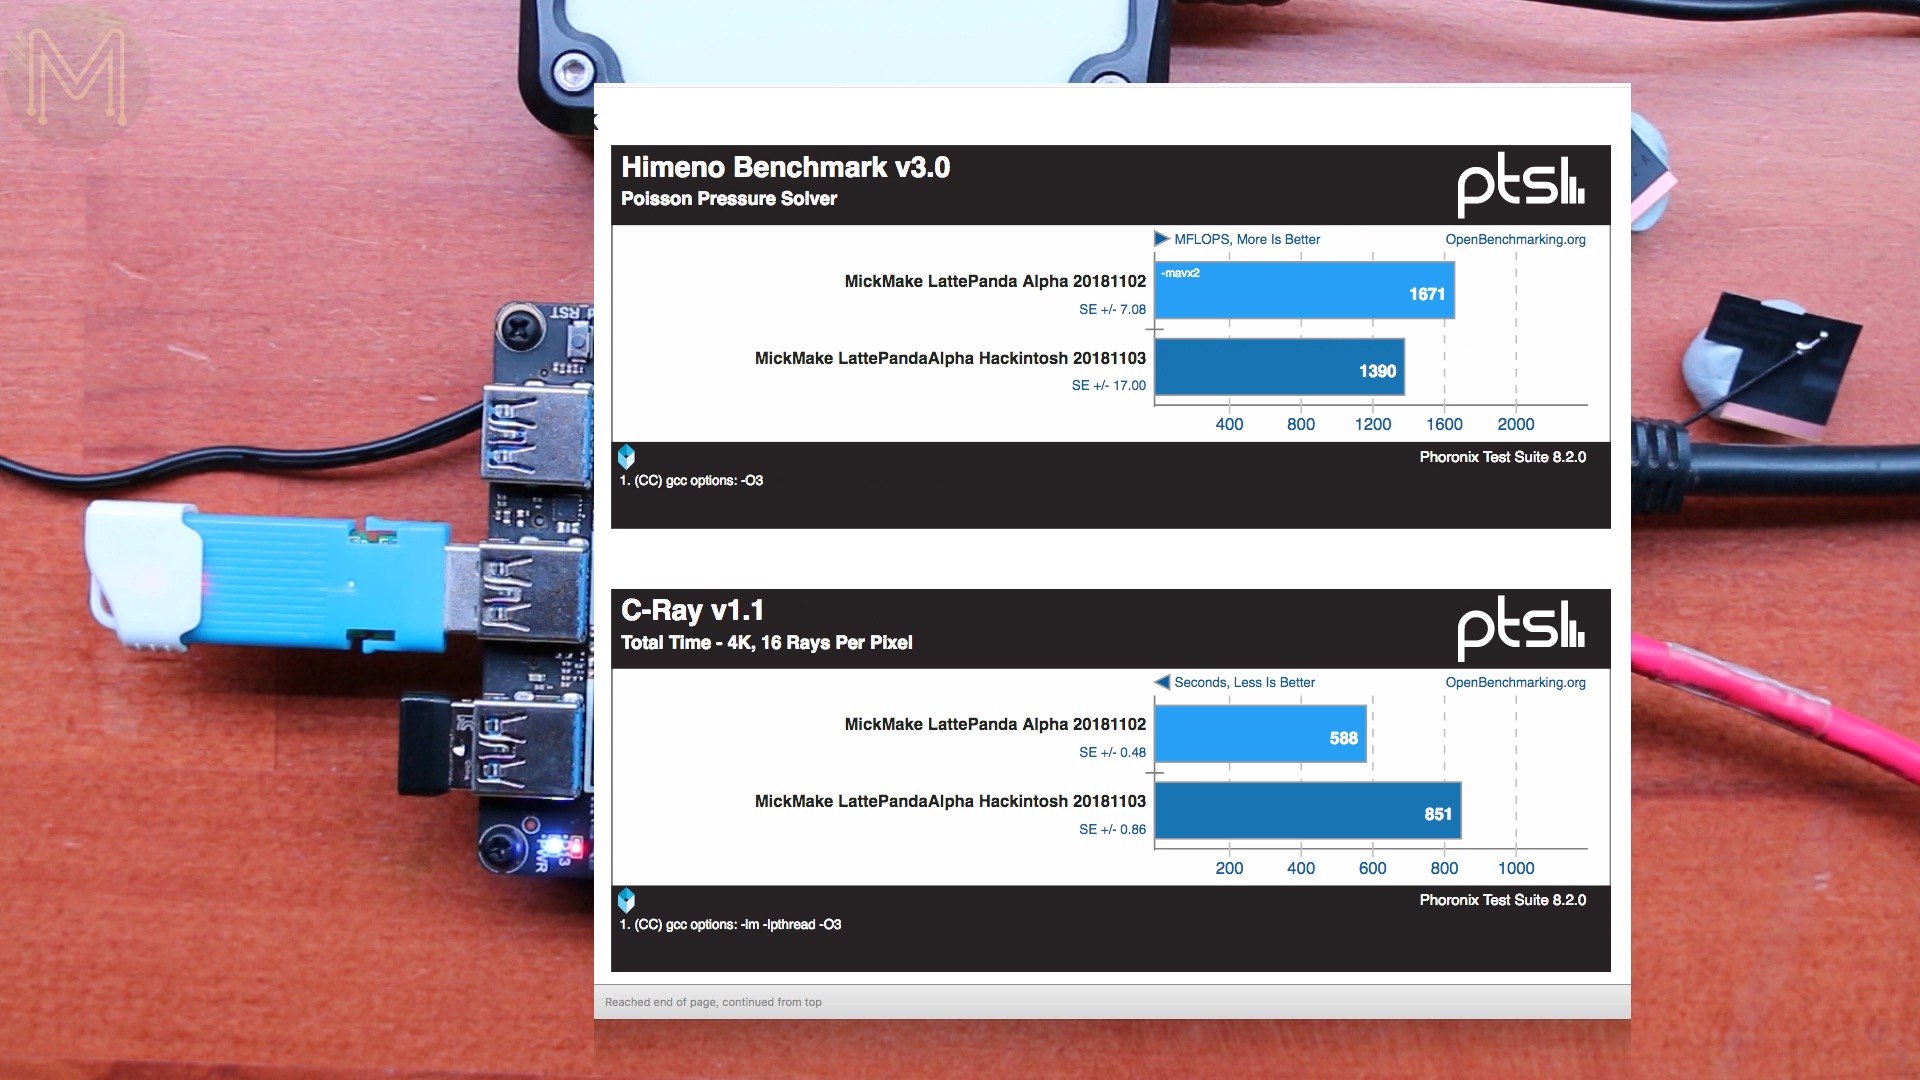
Linux Phoronix tests
So, on to Phoronix tests. I ran my usual battery of benchmarks over a couple of days and what were the results?
Throughout pretty much all the benchmarks, the LattePanda Alpha came out on top, beating everything else, by a substantial margin.
Almost 3x faster than the NanoPC-T4 for RAM speed.
940Mbit/s ethernet throughput.
Lightning fast on Go, Perl, Python and PHP, out-stripping even the Jetson boards.
Beating the ODROID-XU4 on 3D rendering.
Almost every benchmark, it was beating the current reigning Jetson SBCs by a fair amount.
The only tests where it lost to the Jetson was the tinymembench.
During all these benchmarks I saw a pretty similar current draw with a maximum of 2.4A, average of 939mA and minimum of 443mA.And temperature was fairly stable as well, coming in at a slightly lower max temperature of 81.5, average of 69 and minimum of 58.

One thing I did notice is that the 12v rail was pretty stable throughout all my tests, with only a 250mV variance and is one of the reasons for the decent stability of this SBC.
So, next on to Mac OSX tests.
OSX Testing
One of the main reasons why I wanted this SBC is… well… not only publish a review on it, but also to use it as backup Premiere Pro editing desktop, and I plan to edit my next video using the LattePanda just to see how it goes.
So, I need to install OSX.
I was going to publish a brief video on how to install OSX on the LattePanda Alpha, but really just head on over to Don’s channel, NovaSpirit Tech, to find his excellent step by step guide.Once everything was installed, it came up with a fully functioning Mac OSX, with the only issues being drivers for WiFi, audio, CPU temperature and frequency scaling.The Arduino Leonardo serial port was visible. Which worked without issue. I’d be surprised if it didn’t work.

OSX Phoronix tests
So, I then ran a bunch of Phoronix tests on OSX to see how it differed with Linux.
SQLite had a pretty huge difference, but this was due to the fact that I used a different slower SSD for Linux than Mac OSX. Linux was, overall, slightly faster in benchmarks from then on, which was due to the fact that OSX runs a lot of extra processes consuming CPU time.
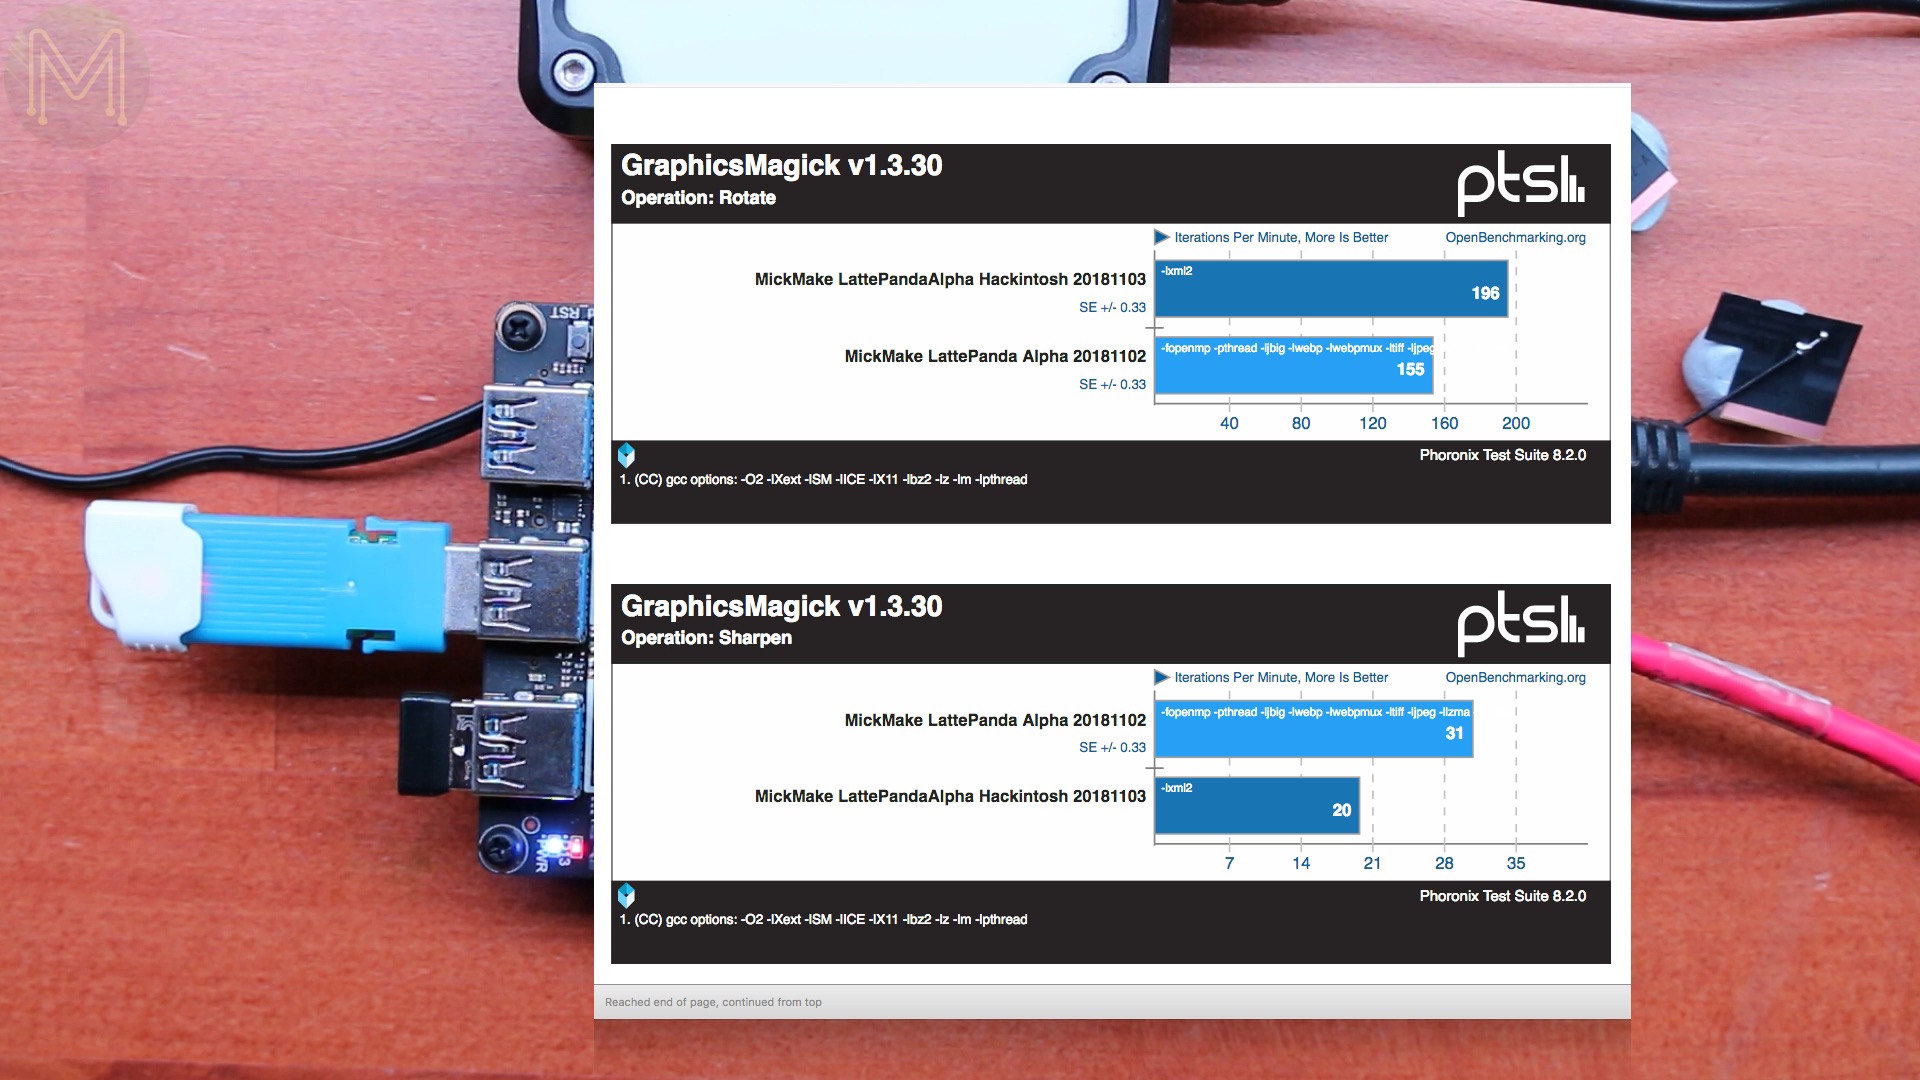
Overall, it was pretty well matched to Linux, which was to be expected.
OSX Power and Temperature
The same could be said for power consumption.
During install it pulled 2.4A with an average of 921mA.
While running Phoronix tests, it hit a peak of 2.3A, with an average of 544mA.
Summary
So, for such a great performing SBC, why do I still think it’s a big mistake?
It’s actually not the price, because even though it’s expensive, bang for your buck is pretty good.
It’s not the design of the board - you can power it from a wide 10 to 15v making it suitable for in vehicle use and shuts down to a 40mA quiescent current.
Surprisingly it comes down to the embedded side.
Sure, the Arduino is easily accessible on all O/S platforms, you have access to all the GPIOs and it can run even with the main CPU powered down, but they used a piddly small ATmega32U4. What they should have done is use a much faster, more modern MCU. Any one of the ATSAM series, like the SAMD21 or SAMD51, or STM32 series would have been a much better option.
The way it stands, it looks like the Arduino side of things was just an afterthought that was designed in at the last minute.
Another thing they should have done is not have the Arduino as part of the base PCB, but an add-on. This way they could upgrade the MCU used without experiencing the Intel Curie disaster that happened with the original LattePanda.
I’m also pretty certain that most people who buy this board won’t ever use the Arduino.
Anyway, that about wraps up this review.
Like the NanoPC-T4 review, I’ll need to publish a Part 2 followup video, where I go into 4K multi-head tests and other performance tests.