UP Board: The Raspberry Pi killer? // Review
Will the new UpBoard be a true Raspberry Pi killer? What is this new board like and how does it help the Maker?
Find out in this review.
Unboxing
My kickstarter package was fairly basic with just an HDMI cable and UpBoard. I was fairly impressed with the “getting started” page, and as I found out later it was trivial to get going.
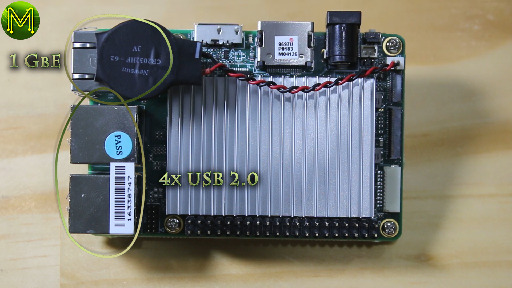
The Up comes in three different flavours with 1G, 2G and 4G RAM and a range of eMMC storage options. From the last time I checked the Up store. They only had two models with 2G RAM and either 16G or 32G eMMC storage.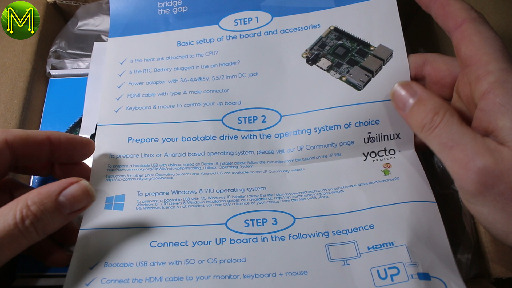

What do you get
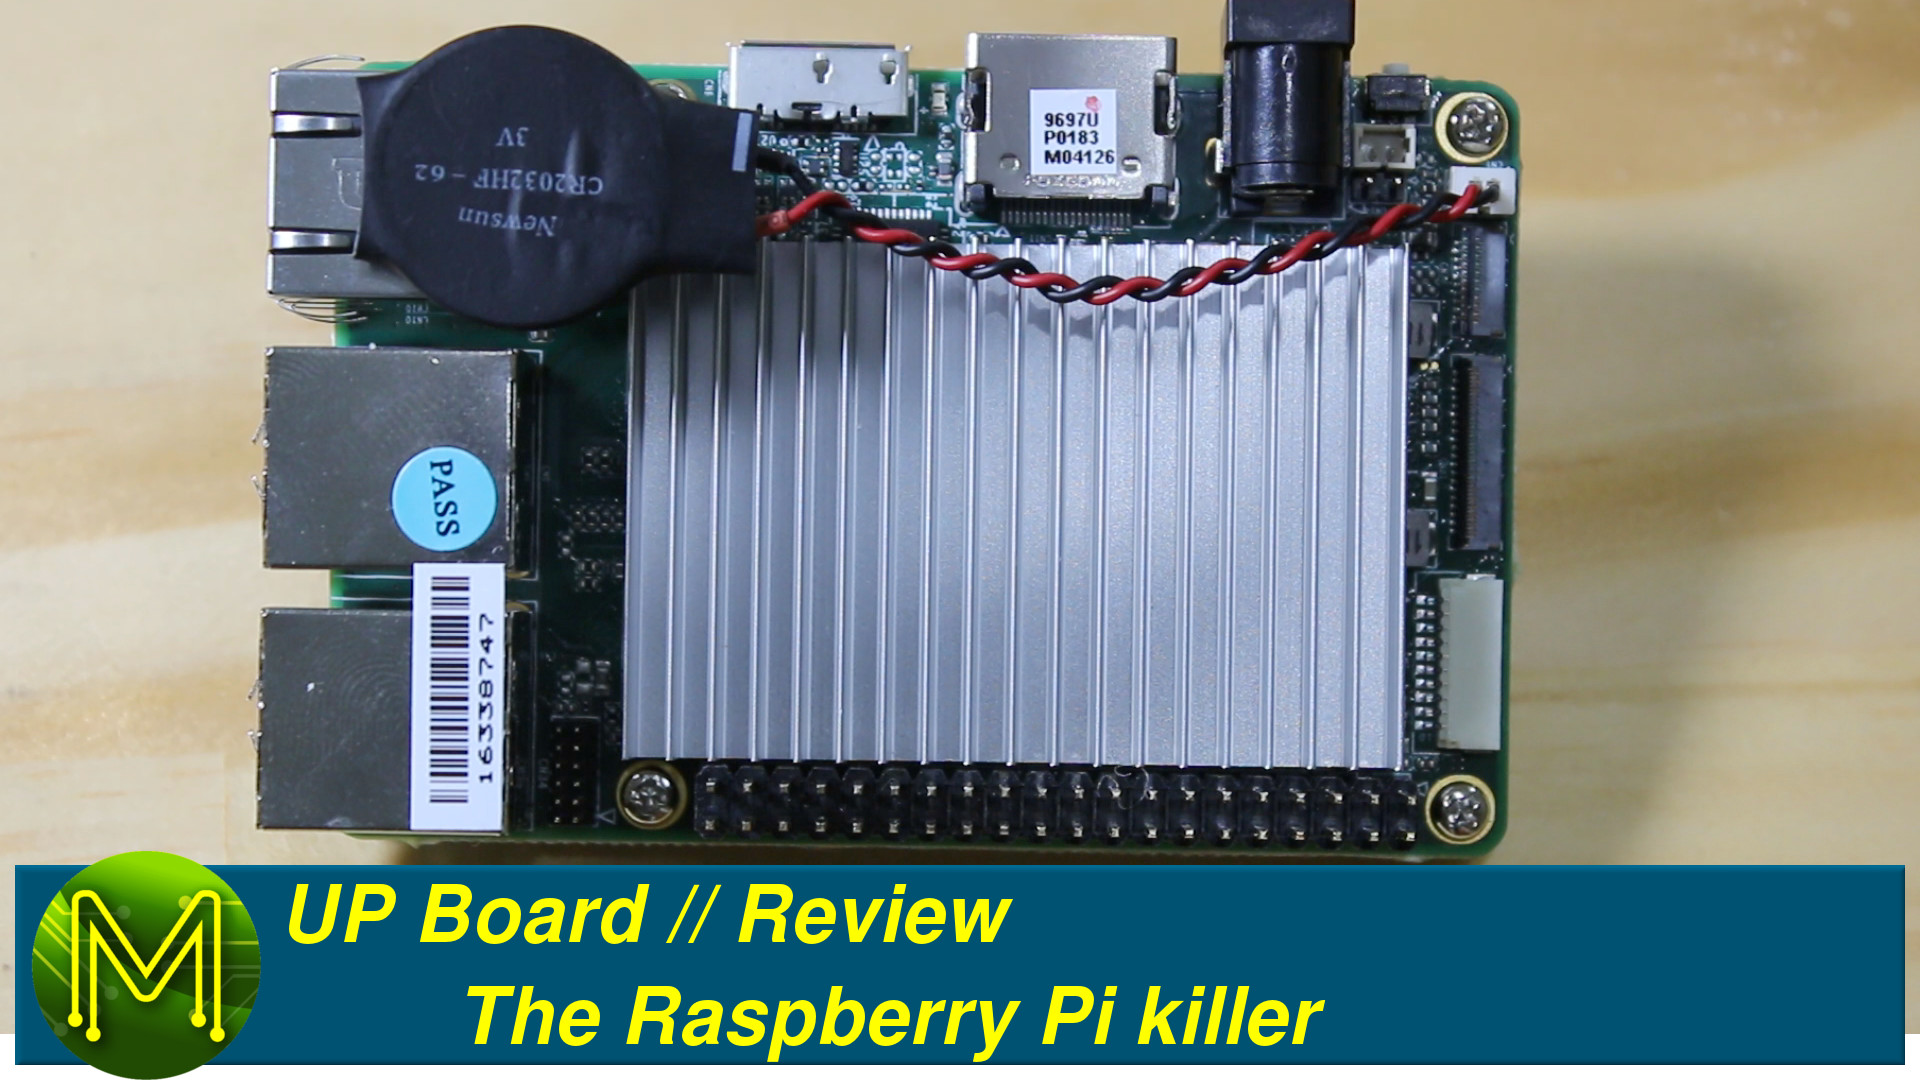
The Up Board claims to be a 100% Raspberry Pi compatible electrically and physically.
So you should be able to drop it in place of a Pi without changing anything. As it turns out it’s not 100% accurate, but before we get on to that Let’s see what you get on the board.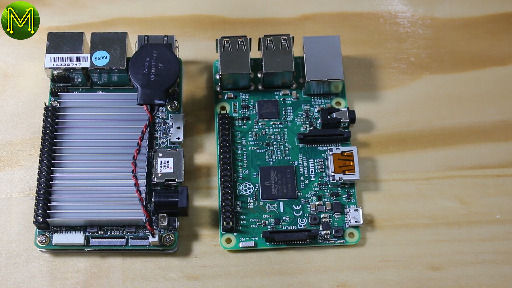

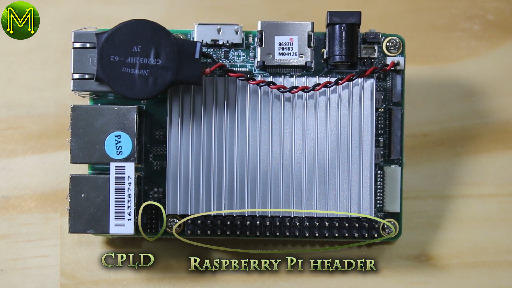
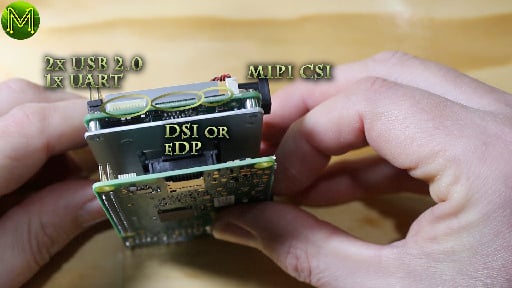
You get and RTC with battery and MIPI CSI, (which isn’t pin for pin compatible with Pi).
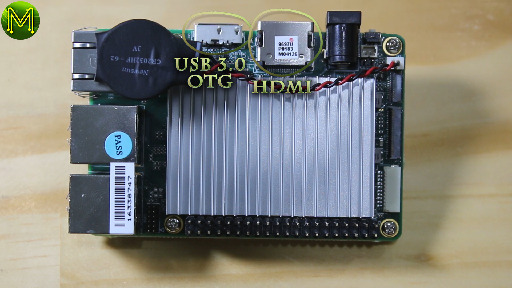
DSI and eDP on the one connector and a header for 2x USB2.0 and UART which can act as a console.Stock standard Raspberry Pi GPIO header. This is 100% compatible and to ensure this the board has a CPLD chip which allows some very interesting changes to be made to GPIO pins. You can change things such as slew rates, driver strength, diode clamps, pullup/down resistors, and create Finite State Machines. Very nice!An additional 4x USB2.0 and 1Gb ethernet.USB 3.0 OTG and HDMI.5v power, reset header, power header and power button.Finally you get the Intel x5-z8350 CPU with 4 cores running at a max of 1.92GHz. This final point changes the game. It means that you have, essentially, a standard desktop PC. This means that you will have access to all the plethora of software that exists for the desktop, which is far more than exists for ARM based CPUs.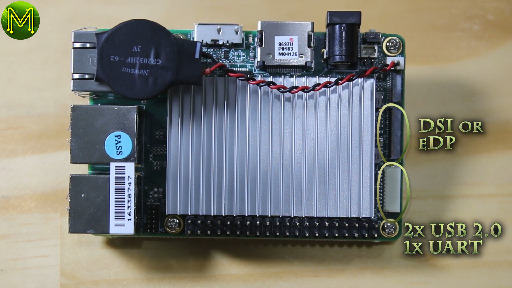


What don’t you get
There are a number of things that you don’t get compared to the recent Raspverry Pi 3. For example there is no onboard WiFi or Bluetooth. You also don’t have analog audio in/out.
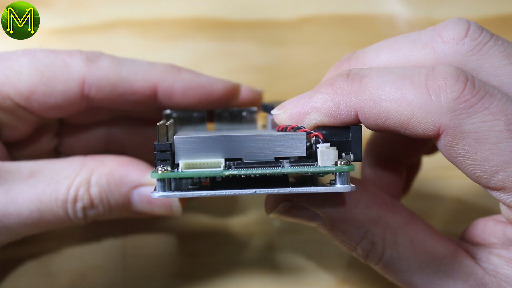
When it comes to the physical size, it is exactly the same size as the Pi. However, there are a few elements that make it hard to fit into a Pi case.
The USB OTG aand 5v power connectors of course aren’t present on the Pi, and so would make it impossible to fit into a Pi case unless you had a handy dremmel tool.The power button matches up with the Pi’s USB power connector and is set back far enough for it not to be an issue.The other side that causes issues is where the MIPI CSI, DSI/eDP, and USB/UART connectors are. You will have to get out your dremmel if you want to use these whilst being put in a Pi case.The only other aspect that may cause issues is the height of the heatsink, which protrudes enough for it to be an issue with some Pi hats… Possibly. Most Pi hats usually have a header block which should keep it clear of the metallic heat sink.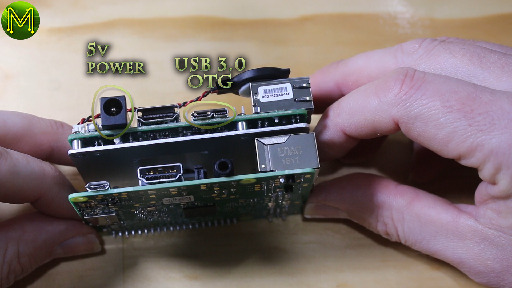

Booting up
Booting and install the OS was very trivial. I tried UbiLinux, which is UpBoard’s custom Debian 8 Jessie distribution, and includes important kernel changes. I also tried Windows 10. Windows IoT isn’t available yet, and Android is not yet at beta.
Download the UbiLinux ISO image and burn it to a USB flash drive.
Since the UpBoard is a plain old desktop it includes a complete BIOS with UEFI booting. So this gives you many more options for booting and installing software.Once you have the ISO image on USB flash, chuck it into any USB slot, connect up keyboard/mouse, Ethernet, HDMI and finally power. Installation is very basic, no need to go into this as it follows a plain old desktop install.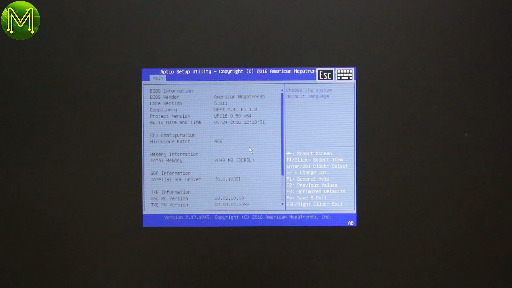
Linux testing
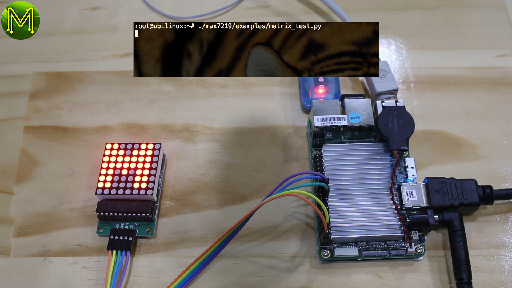
Since this is targeted to be a Maker board, the first thing to test out is the GPIO header.
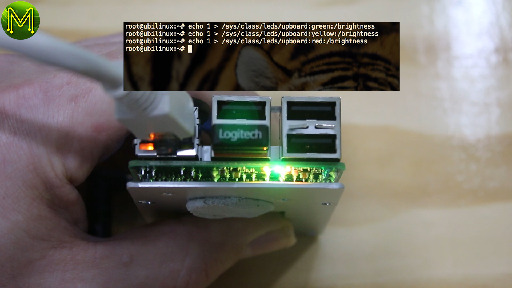
I first tested out the basic functionality of the GPIO with a simple LED test, which worked as expected. You have raw access to the GPIO in the standard Raspbian way.Next I tested out the SPI port with a cheap MAX7219 8x8 LED multiplexor which also worked as expected. No problems there.You also have access to three on-board red, yellow and green LEDs which are easily accessible.
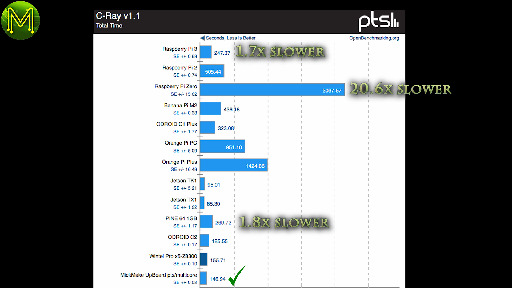
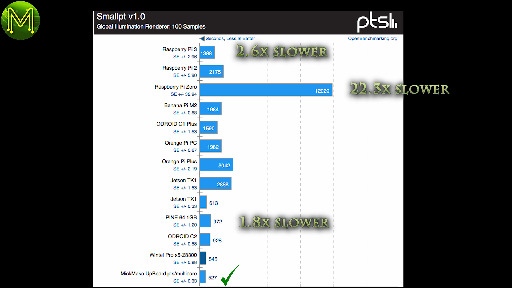
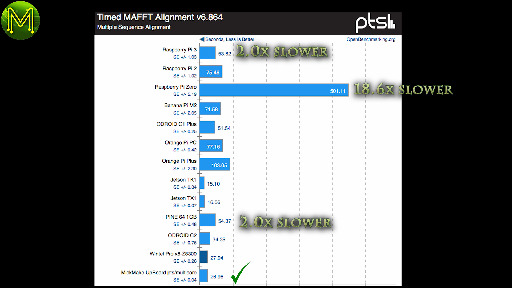
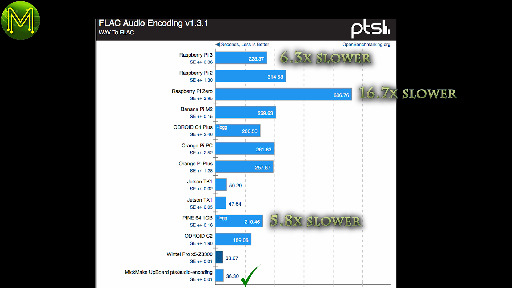
So what about CPU and graphics performance? I tried out Geeks3D GPUtest, which gave the expected low performance results. Bear in mind that this is only a $99 SBC, and not a games machine. However, it should be fast enough to run most of the MAME arcade ROMs.
I uploaded the results into open openbenchmarking.org, so you can check out and compare the results there. I’ll be doing this for all my SBC reviews and you can search for “MickMake” to see all of them.
For most of the results the UpBoard came in between 1.7x and 6.3x faster than the Pi 3, and 1.8x to 5.8x faster than the Pine64. Definitely an improvement.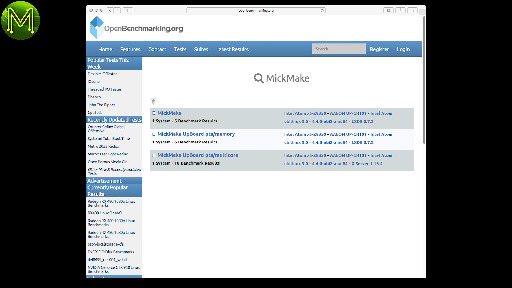


Windows testing
Installing Windows was also straightforward, once I managed to get the installer image loaded up correctly. First download the Windows ISO installer.
If you intend to use Windows, then make sure that you follow the UpBoard community suggestion of:
- Use Rufus to write the image.
- Partition scheme and target system type: MBR partition scheme for UEFI
- File system: FAT32 (default)
- Cluster Size: 4096 (Default)
- New Volume Label: Doesn’t matter
- Quick Format
- Create bootable disk using ISO image: Use the downloaded ISO image.Once you have Windows installed make sure you also download the additional drivers and install those.
For testing, I used GFXBench.
Which came back with the predictable, (but slightly faster than Linux), results of a not-so-fast 3D graphics engine. Putting it on par with a Google Nexus 9 and a Samsung Galaxy S7.It was, however, miles better than the Pine64.

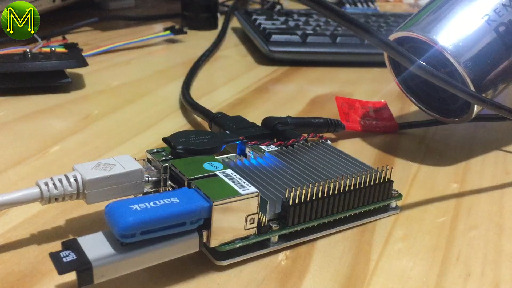
The CPU did get very hot under load, and since I didn’t have a heat sink fan, had to improvise.
Summary
The strengths of the UpBoard lies in it’s 100% compatibility with the GPIO header and the Intel Atom CPU. Both these together make the UpBoard a formidable foe to the old Raspberry Pi and we will be seeing a lot more of them appear in the future. Since the Intel Atom is essentially a desktop/notebook CPU it has the incredible advantage of a slew of software that can be used on it. Much more than is available for ARM cpus.
There are several negatives: 1. No analog audio in/out. 2. Not quite 100% physically compatible with the Pi. 3. Raised heatsink may cause issues with certain Pi hats. 4. No onboard WiFi/BLE. Since the CPU is a plain old common x86 based CPU, points 1 and 4 can easily be solved with a USB adaptor. Don’t forget you have three additional USB ports over the Pi!