How to connect your washer to the Internet // Project
In this video I’ll show you how to connect your washing machine to the internet without opening it up. It’s easy!
The problem
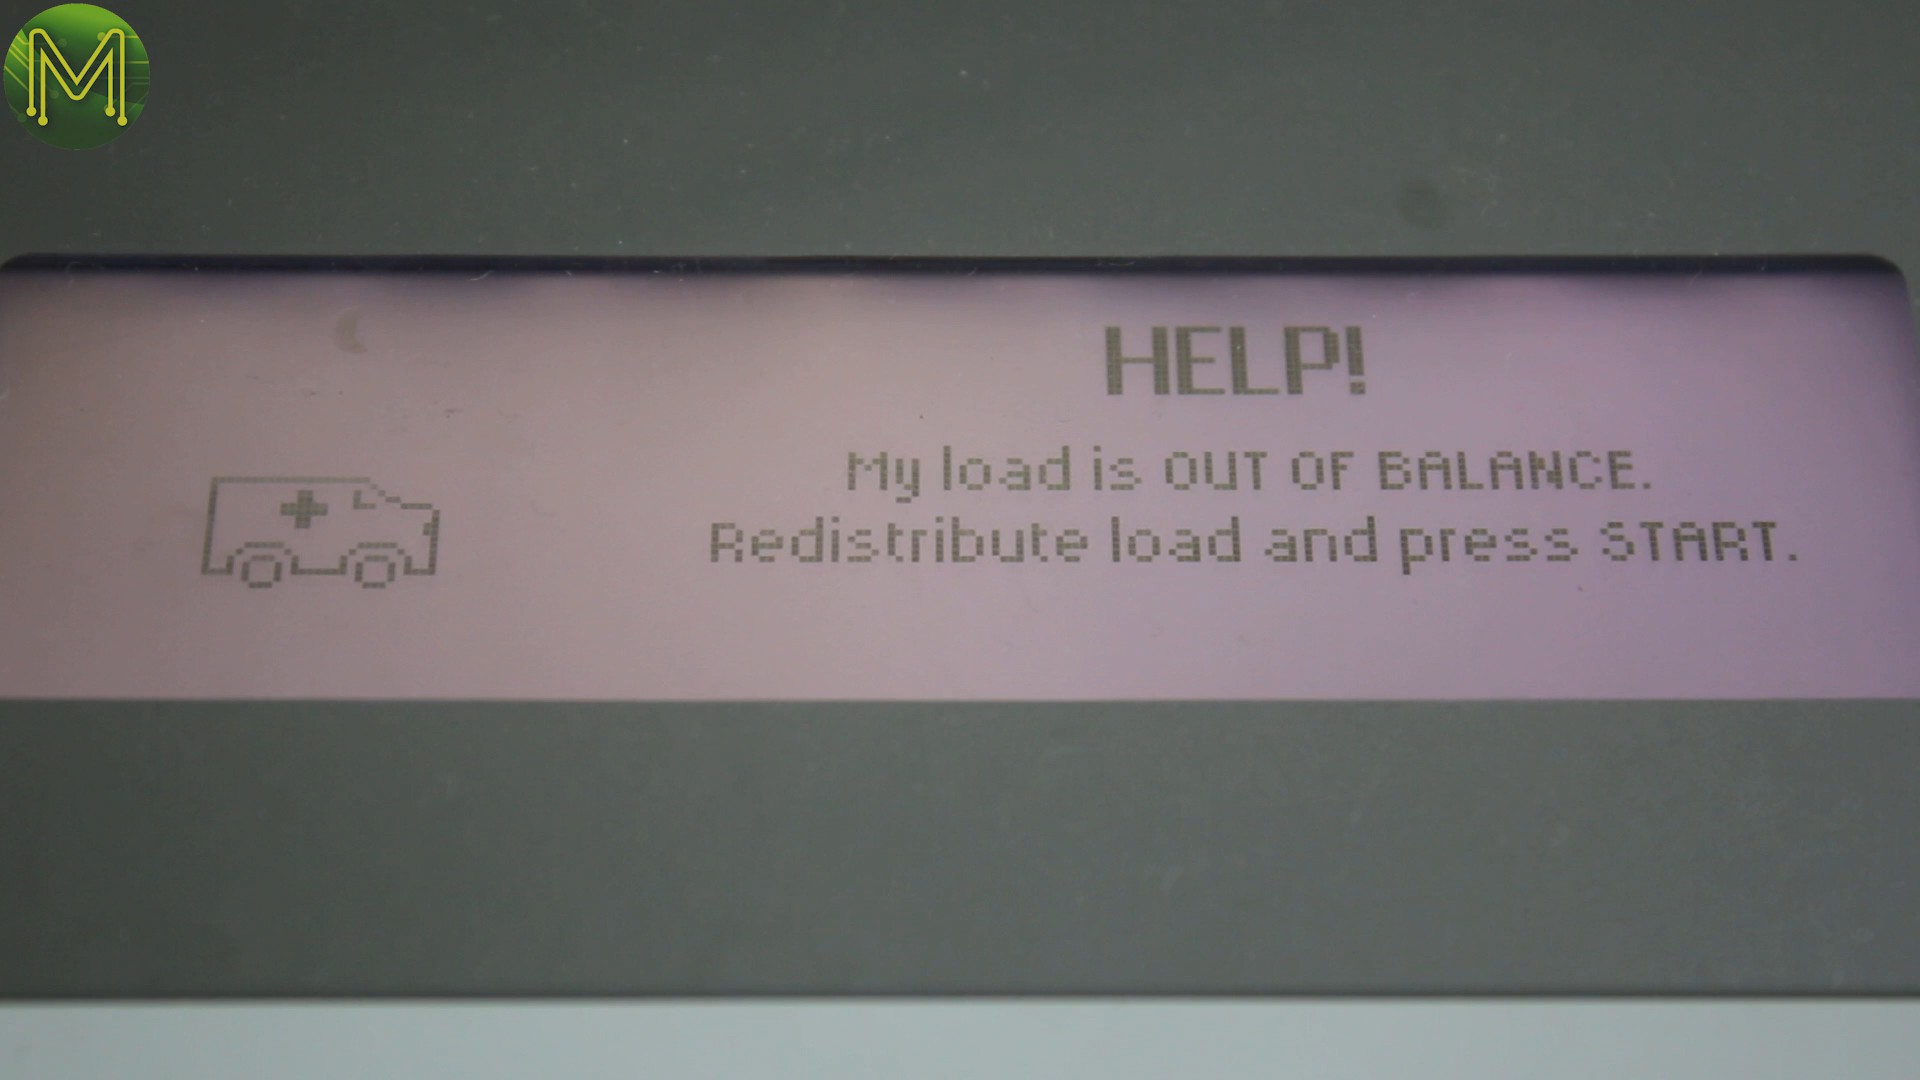
One of the issues I commonly have with my washing machine is that it sometimes gets out of balance …

… and because I have such a large family it’d be nice to know when it finishes so the next load can go in.
This quick hack will allow you to get push alerts on your phone whenever it goes out of balance or whenever it finishes. All you’ll need is an accelerometer, a light sensor, and an ESP8266, I used AdaFruit’s Feather Huzzah with ESP8266.

Product Links:
Adafruit Feather HUZZAH ESP8266
- https://www.adafruit.com/product/2821
- https://littlebirdelectronics.com.au/products/adafruit-feather-huzzah-with-esp8266-wifi
Adafruit TSL2561 Lux sensor
- https://www.adafruit.com/product/439
- https://littlebirdelectronics.com.au/products/adafruit-tsl2561-digital-luminosity-lux-light-sensor-breakout
DFRobot MPU6050
- http://www.robotshop.com/en/6-dof-gyro-accelerometer-imu-mpu6050.html
- https://littlebirdelectronics.com.au/products/6-dof-sensor-mpu6050
Building
So the first step is to get your hands on an ESP8266 module. The reason why I chose the Feather Huzzah is because it came with onboard LiPo battery support. If power gets disrupted, then it’ll still work.
If you want to make it easier for yourself; put the headers into a breadboard before soldering. This’ll line them up nicely.
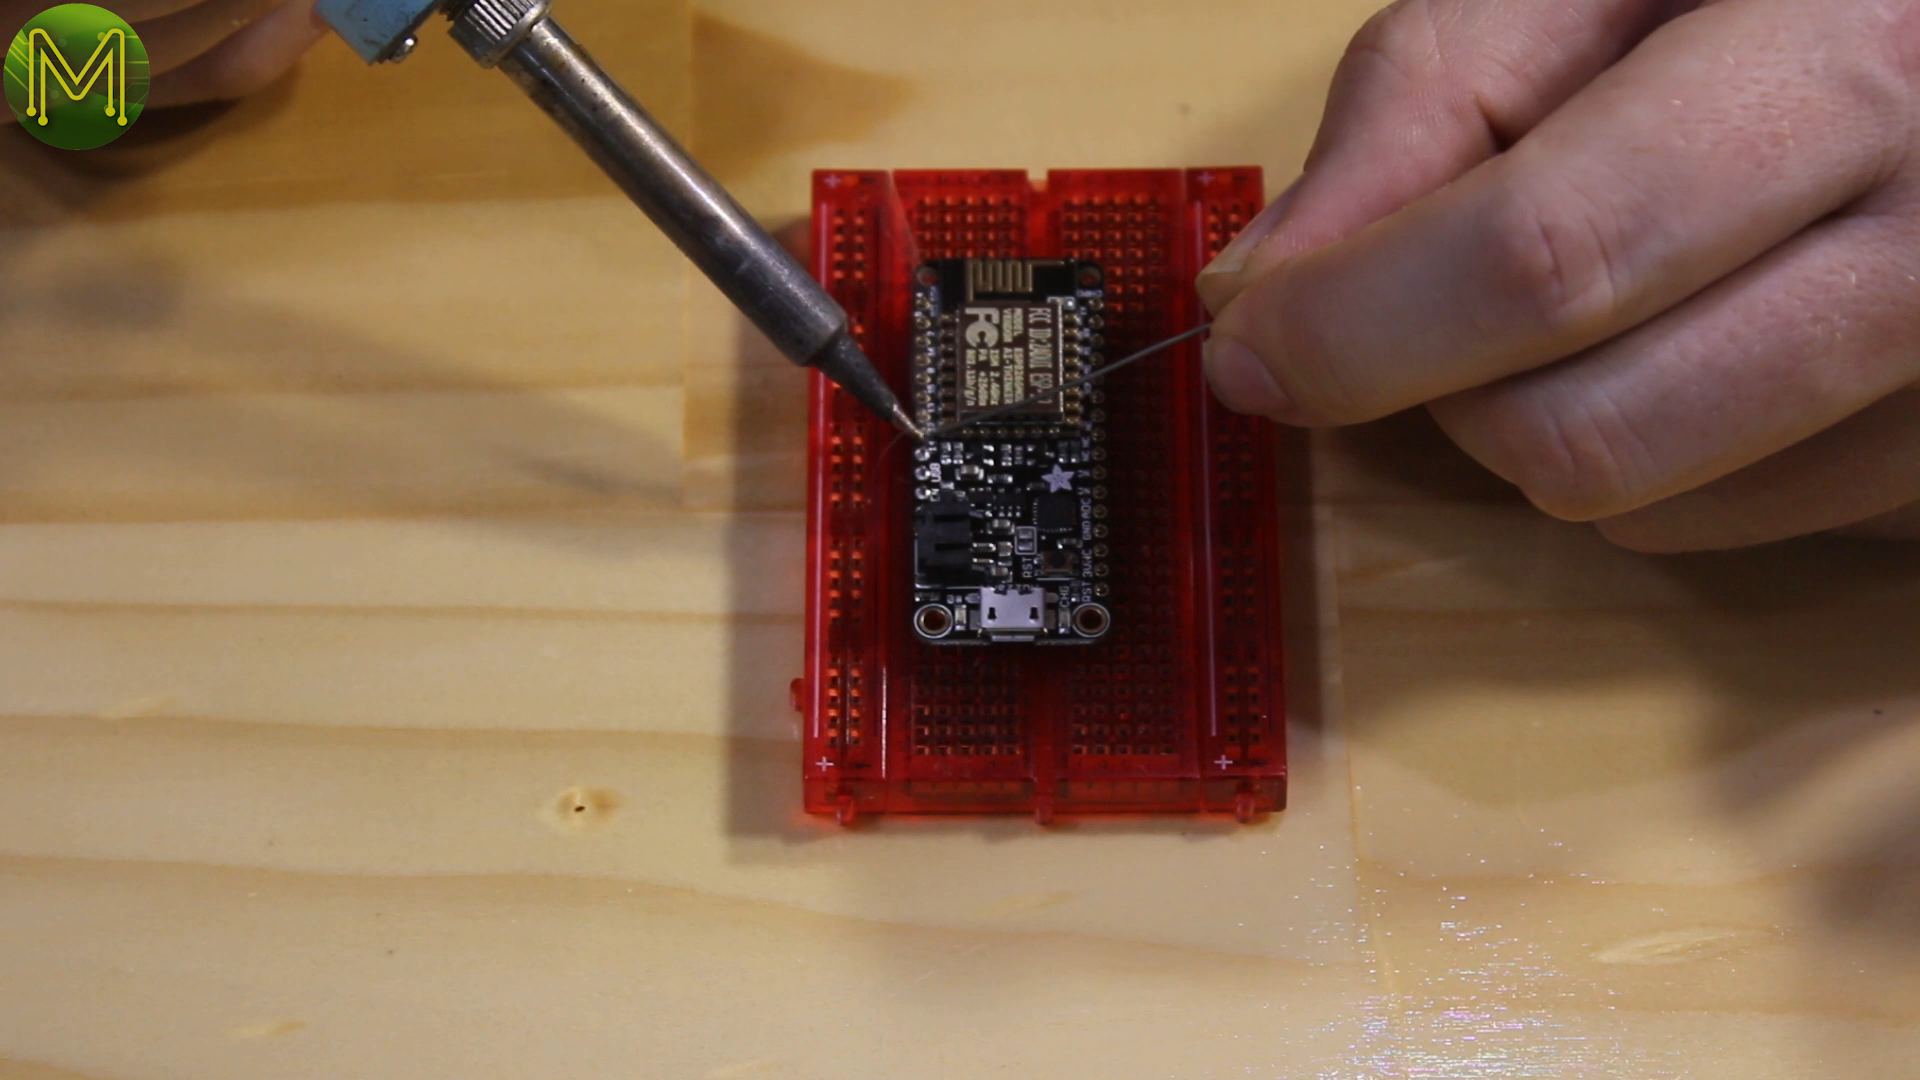
Make sure all your soldering is perfect. You don’t want any dry solder joints.

Installing Software
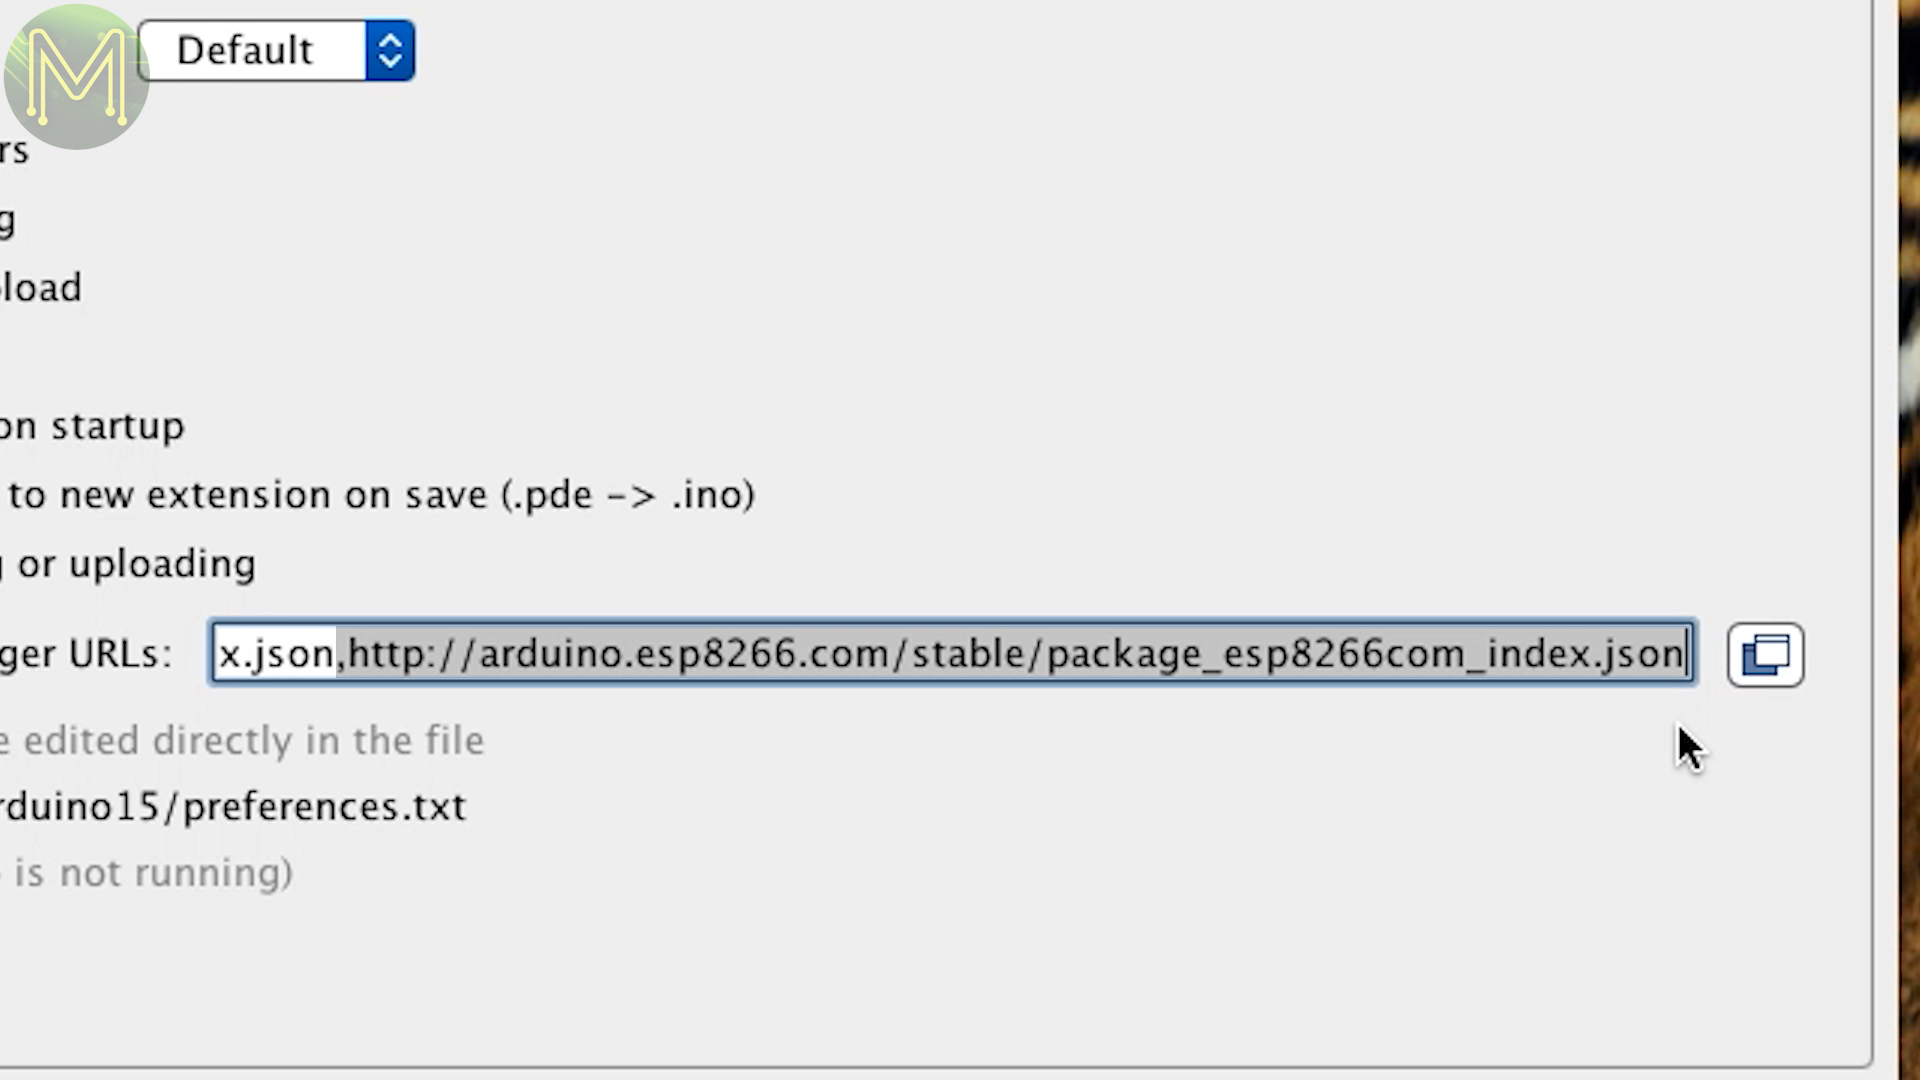
Next you’ll want to make sure you have support for the ESP8266 board loaded up in your Arduino IDE.
Add this to the “Additional Board Managers URL”.
Then go into the Board Manager and enter ESP8266 in the search field.
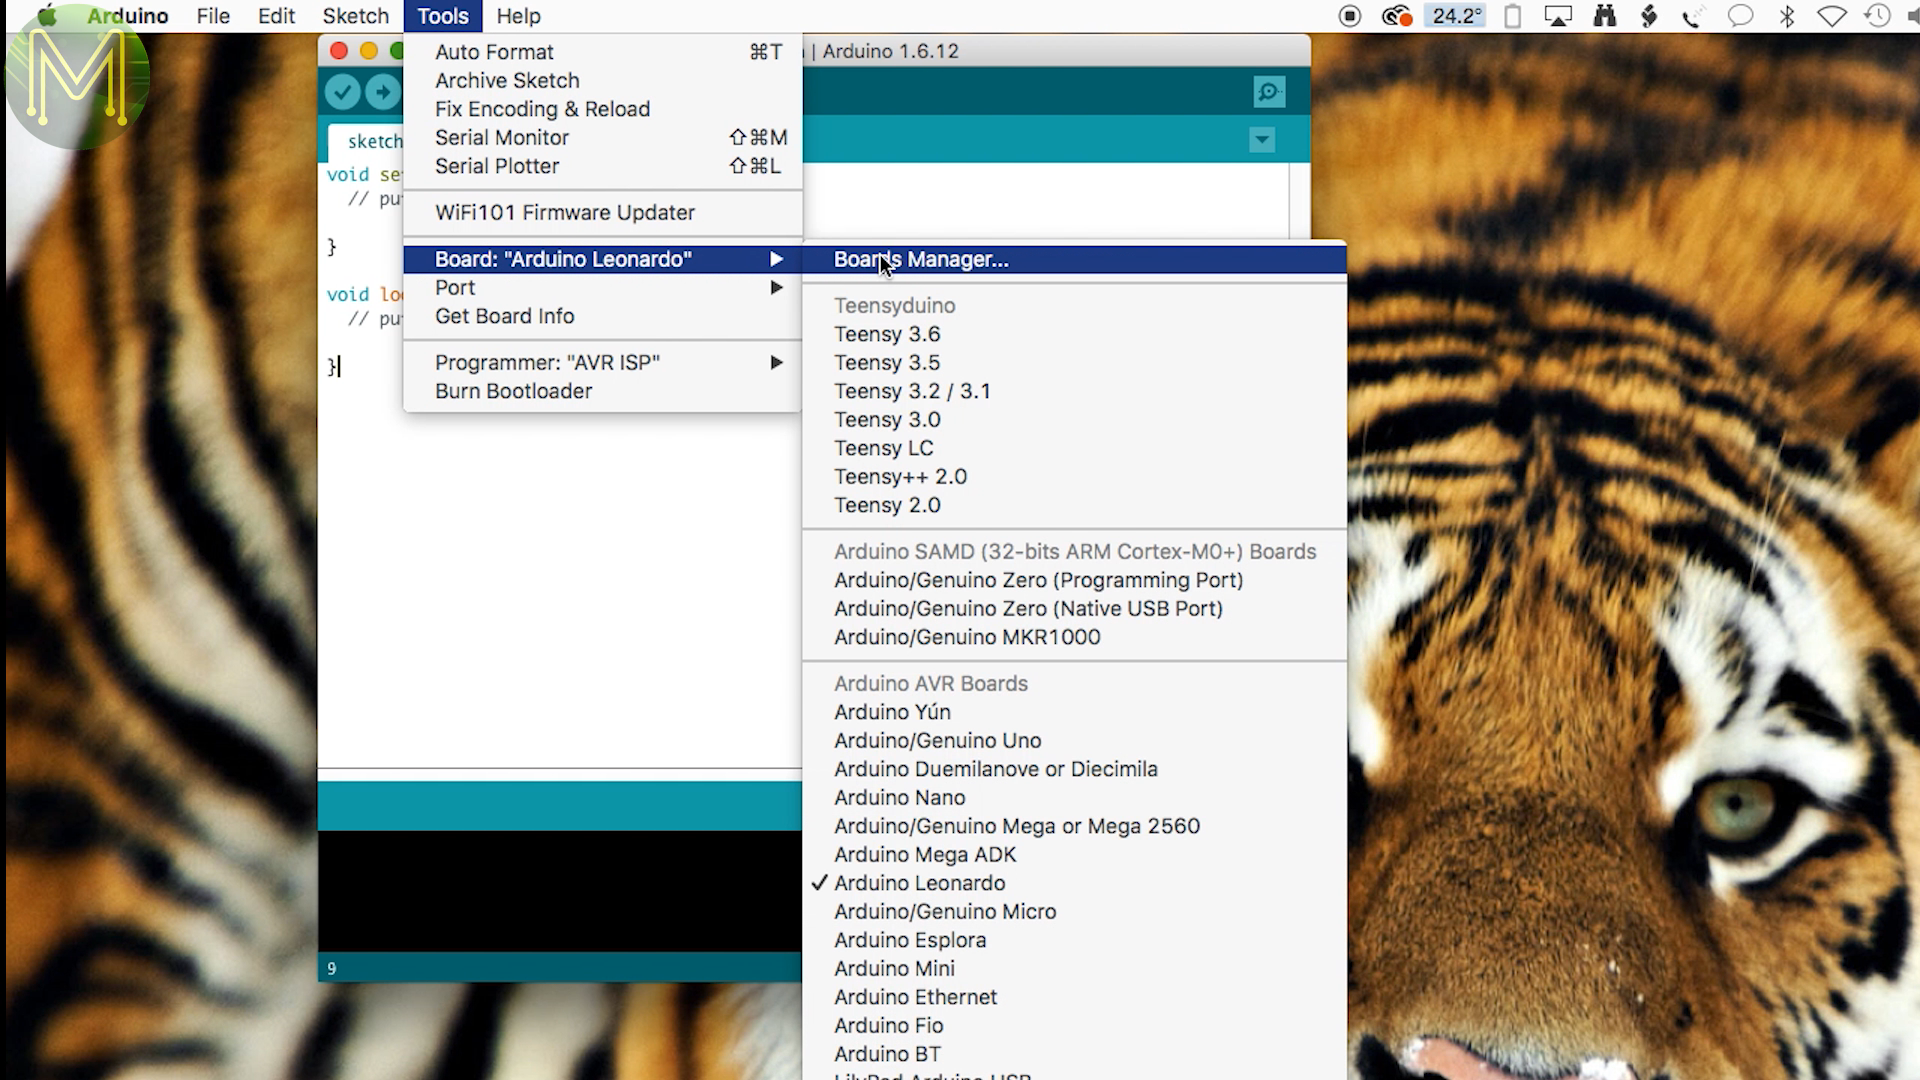
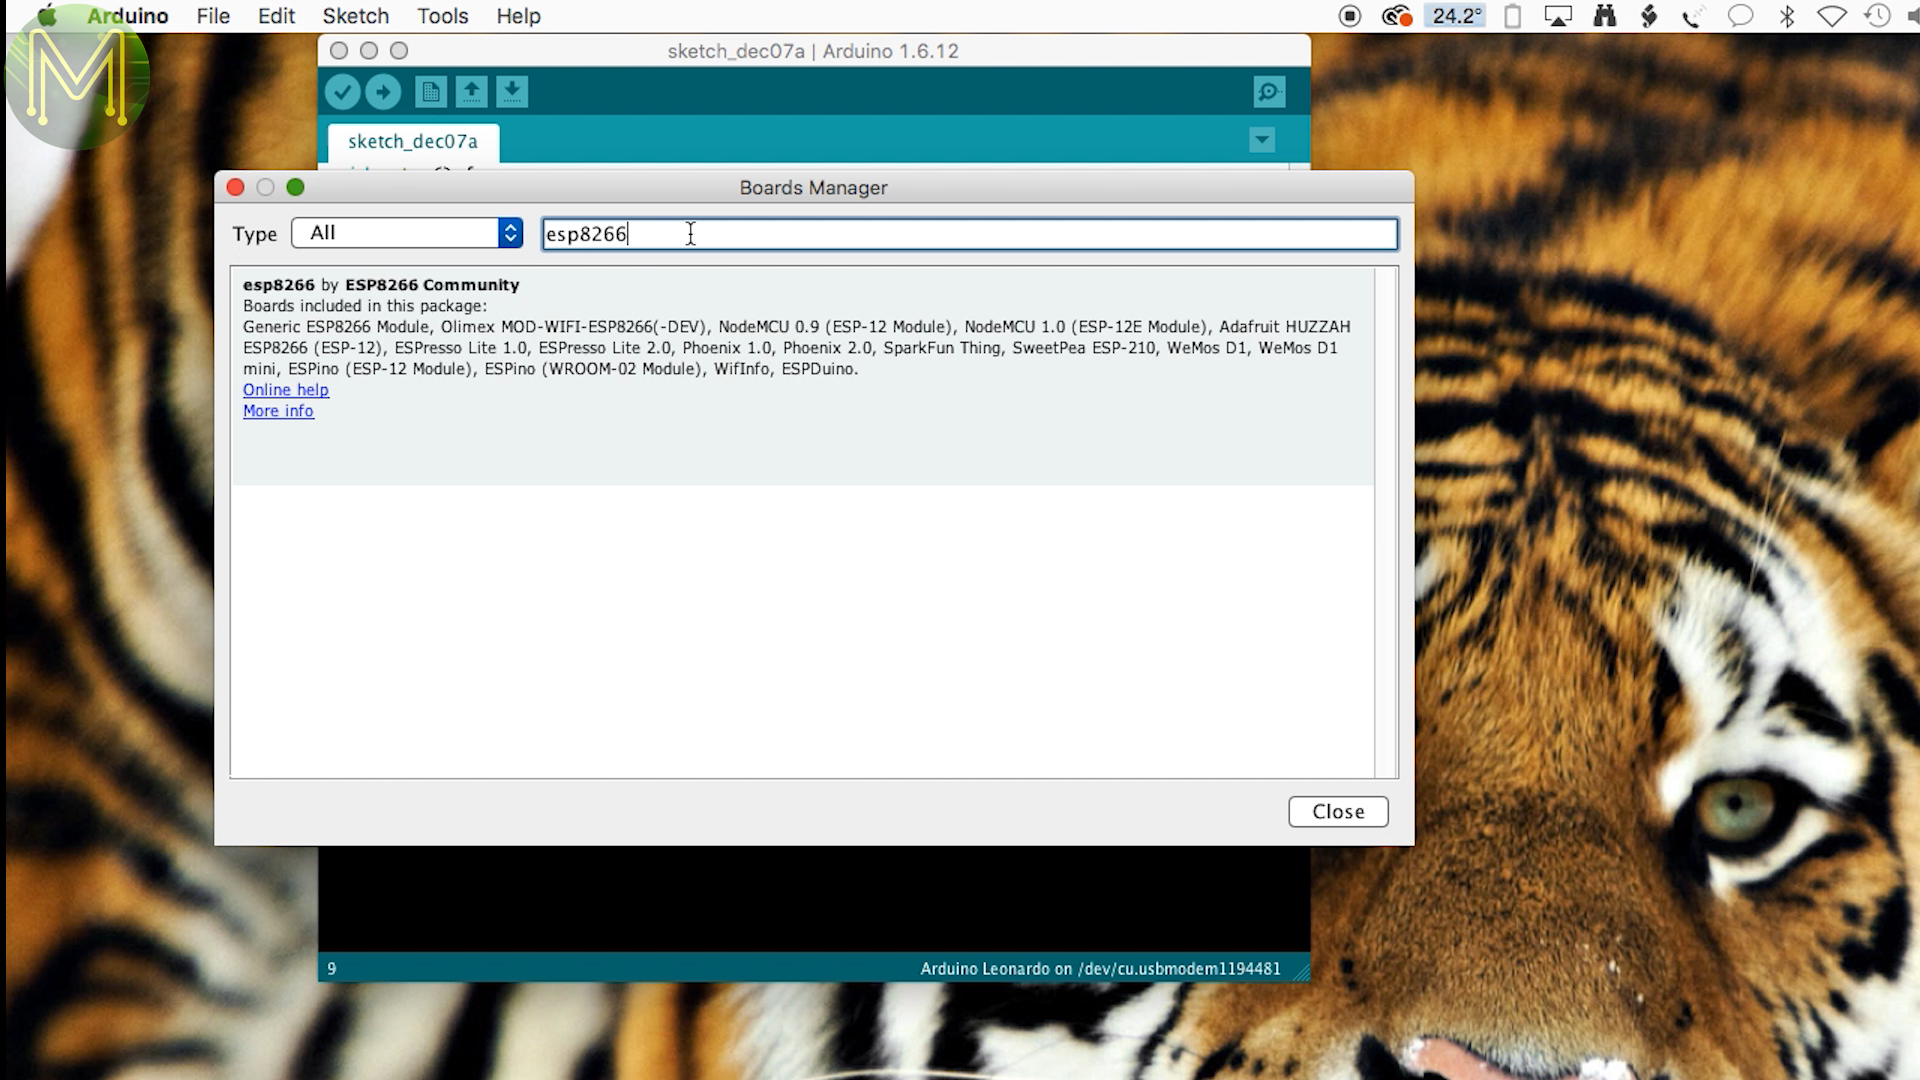
Click install and once it’s finished you’ll see all the ESP8266 boards appear in the menu.

Detecting Audio
Now I initially thought I’d use the beeping of the washing machine to tell me when it was out of balance.
So I used another AdaFruit part based on the MAX9814.
Soldered and wired it up and used an algorithm called Fast Fourier Transforms to detect the beep frequencies coming from the washing machine, but I found it to be using far too much CPU, and it wasn’t that reliable.

So I ditched that idea.
Breadboarding
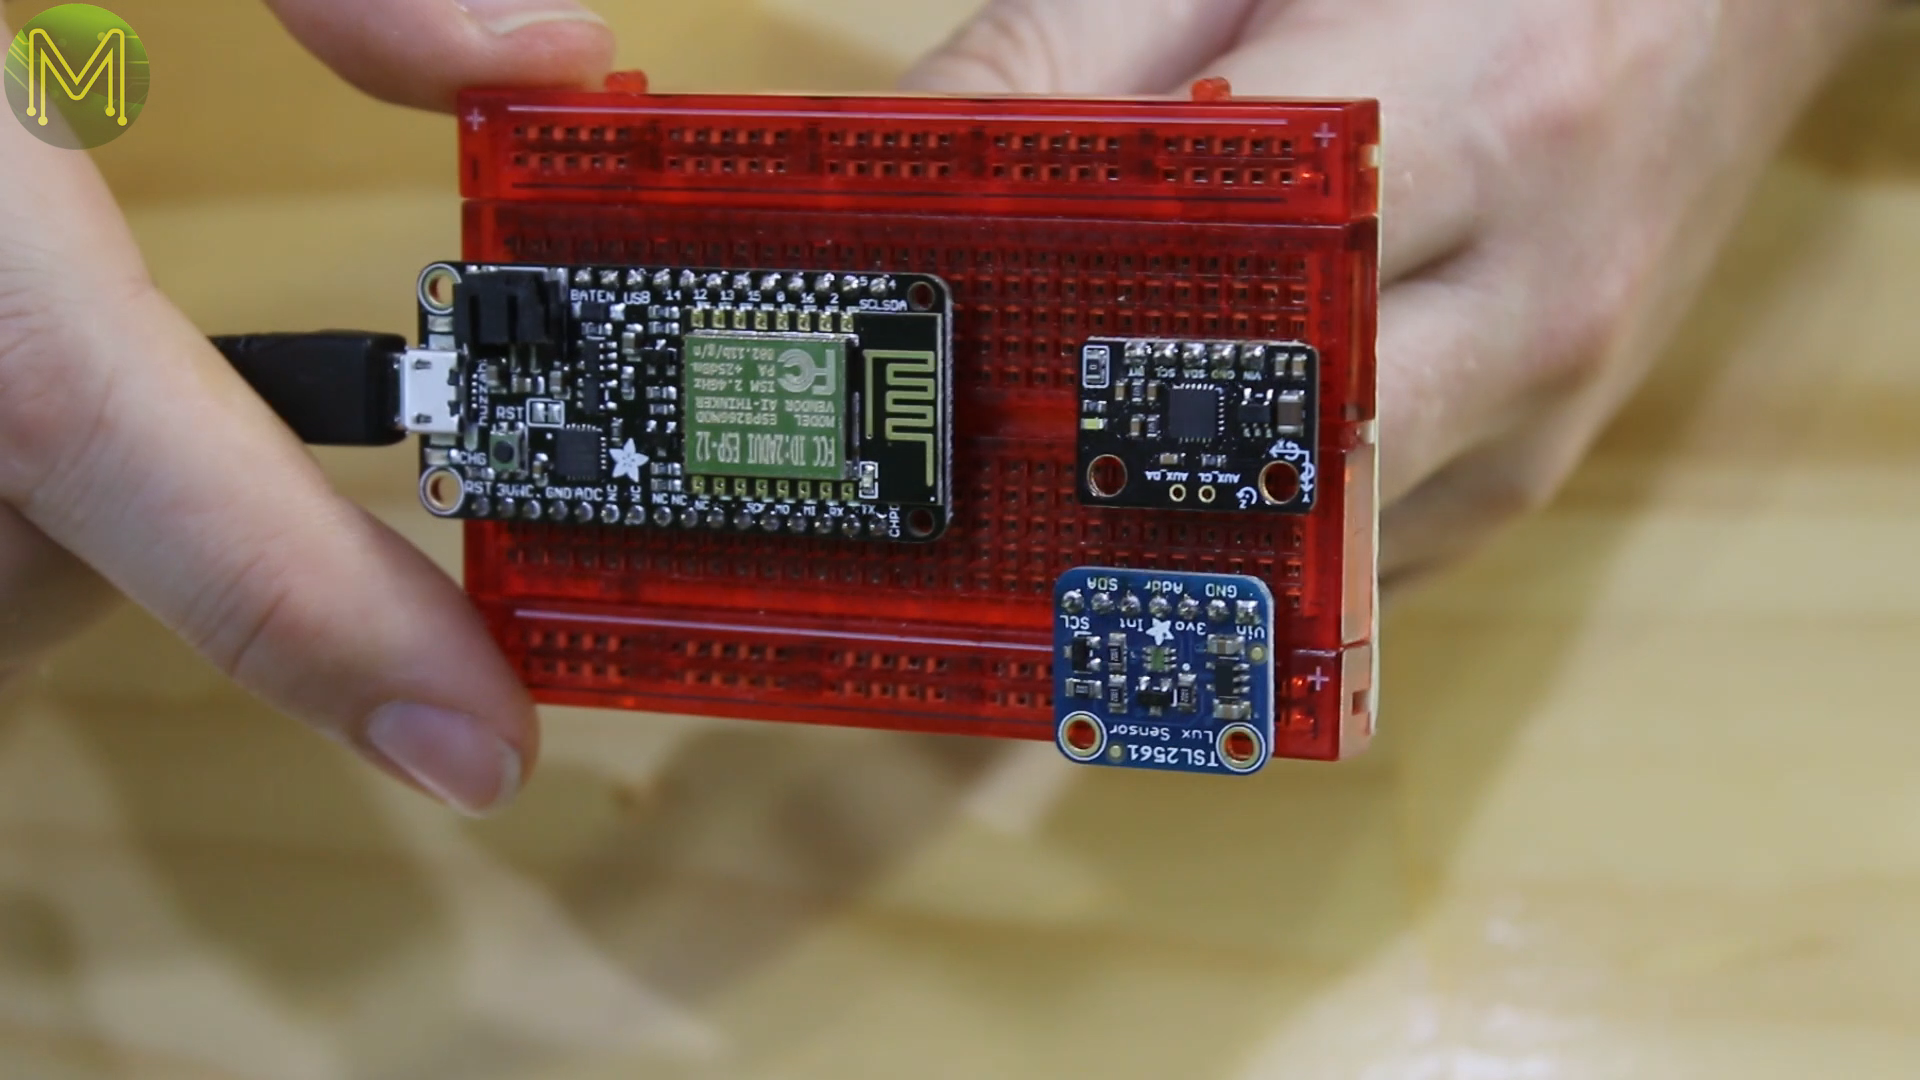
I moved on to using an accelerometer instead. I used an MPU6050, which is overkill. All you really need is a basic accelerometer.
I also used a Lux sensor based on the TSL2561, but you could replace this with a cheap photoresistor.
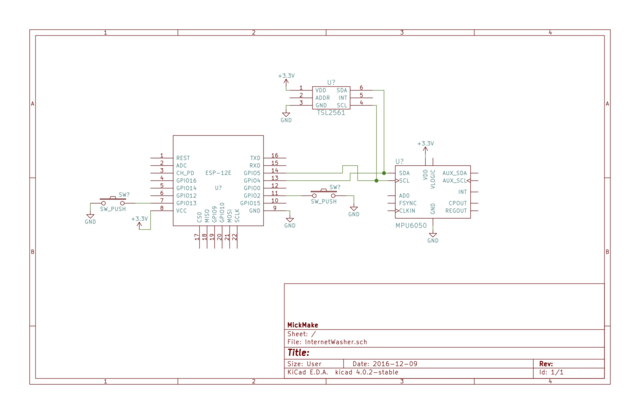
Here’s the circuit. There’s also two buttons which allows you to set the resting position or calibration point of the two sensors.
Wiring up time! I chucked it all onto a breadboard, daisy chaining the two sensor breakouts onto the I2C bus.

Veroboard
Once all my initial testing was completed I moved onto a more permanent solution.
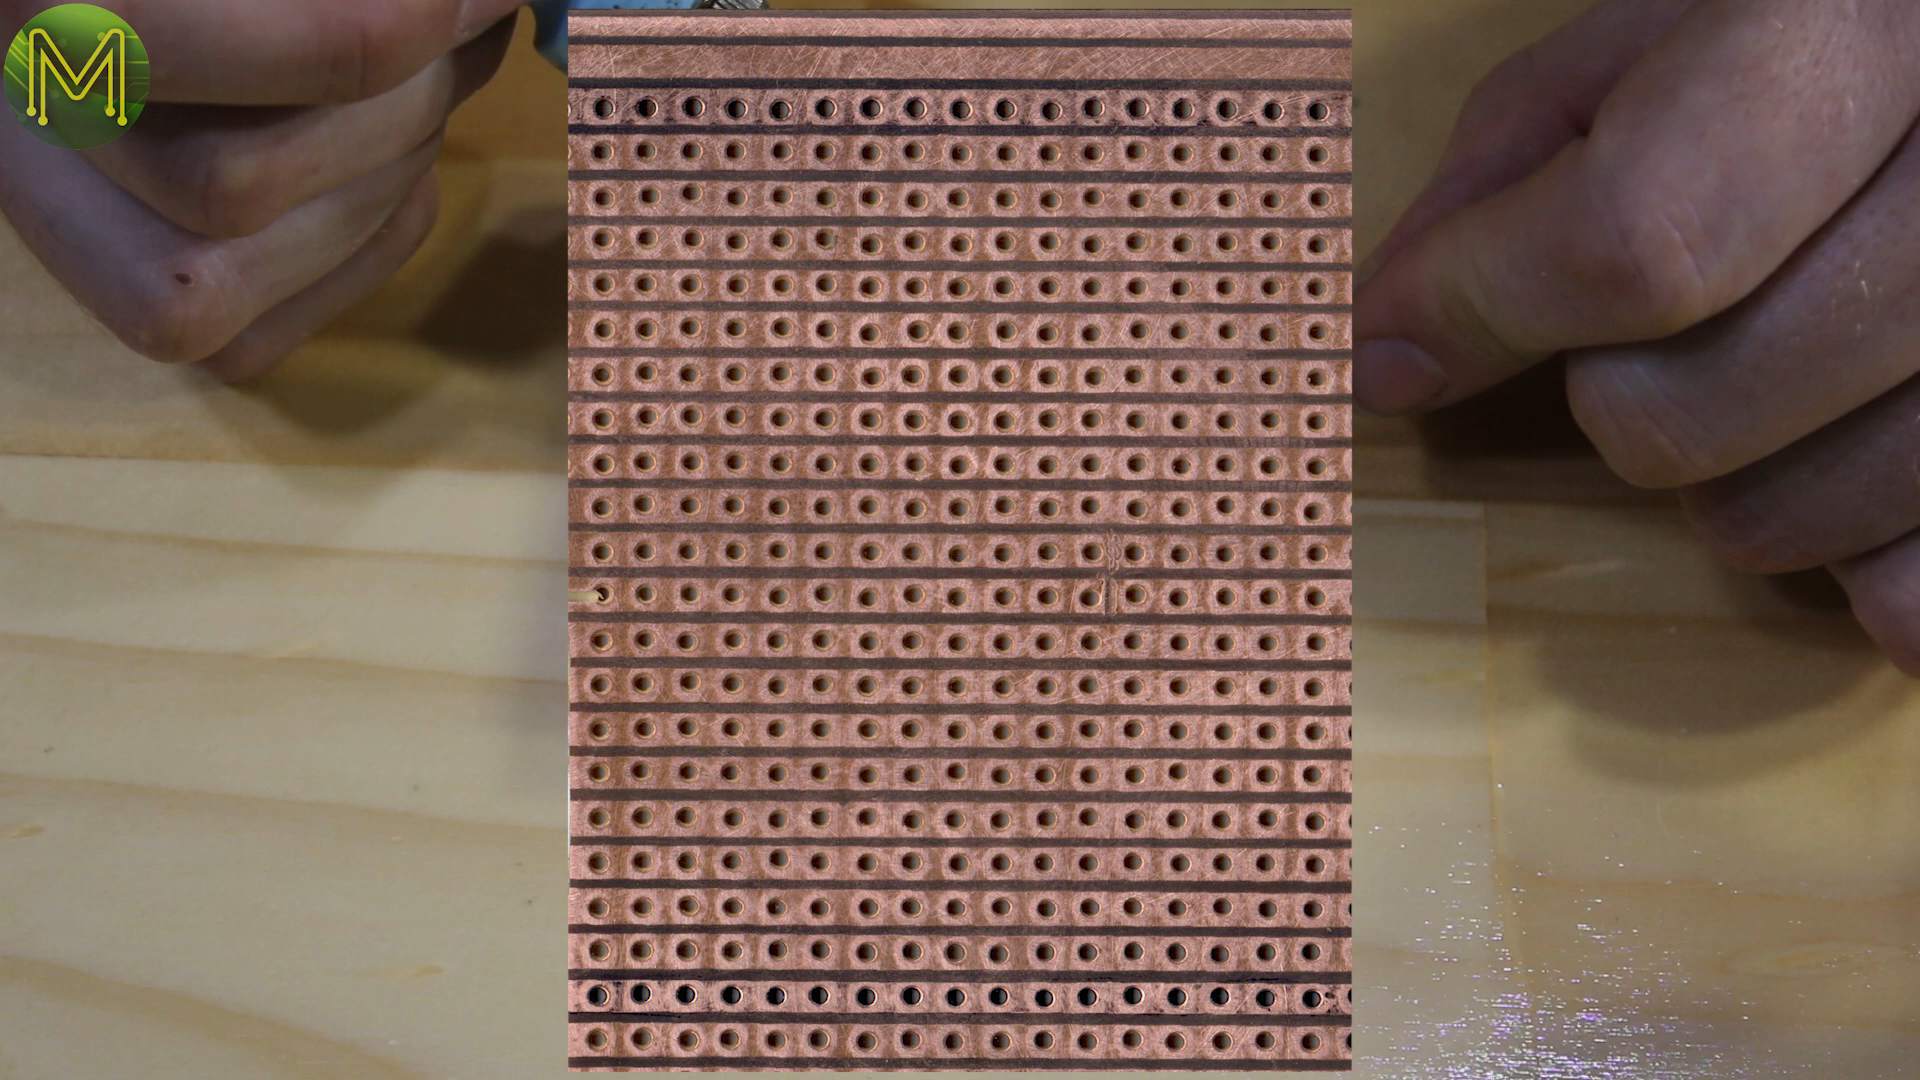
If you’re going to build one yourself, then I used veroboard of this size.
You will want the components to be sitting in these positions, but on the other side.
So, if the components were visible through the PCB, they’d be like this:

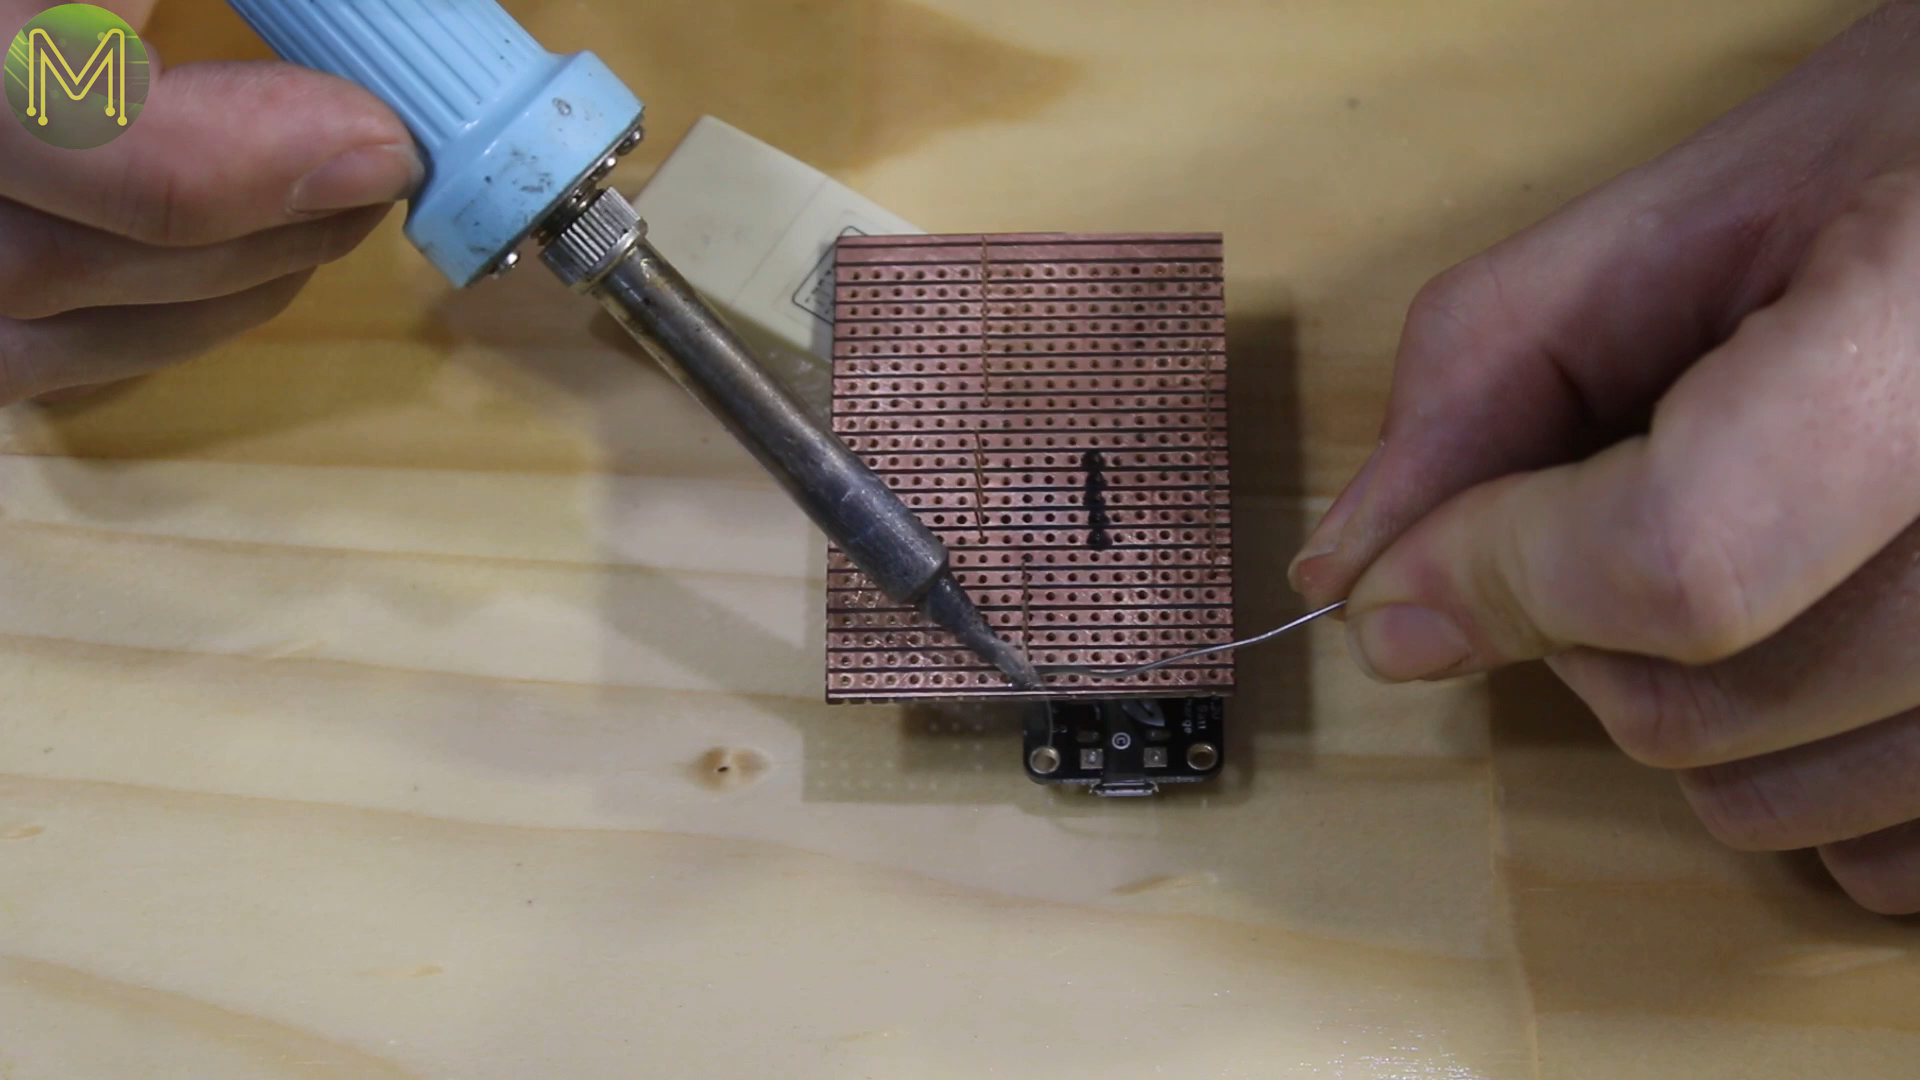
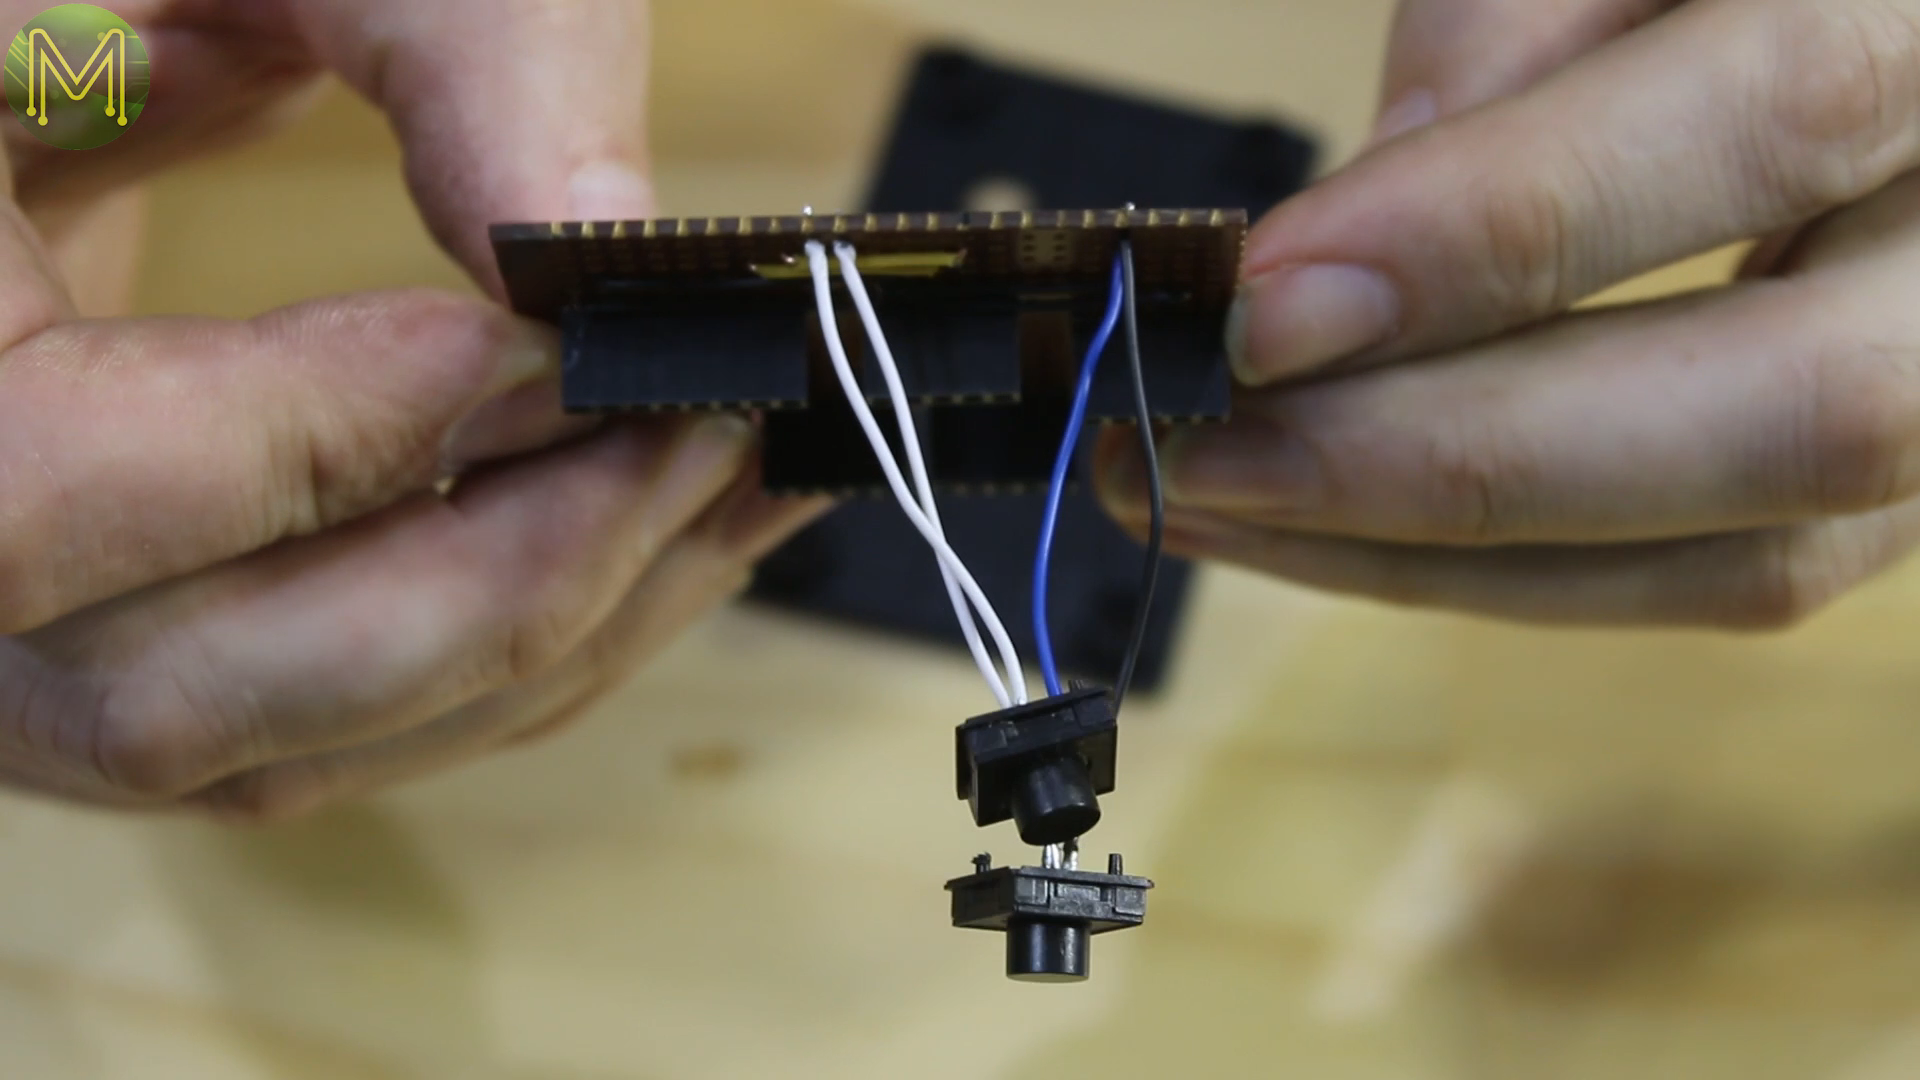
Solder up the crossover wires, red for Vcc, black for Ground, and yellow and blue for the two I2C bus wires.

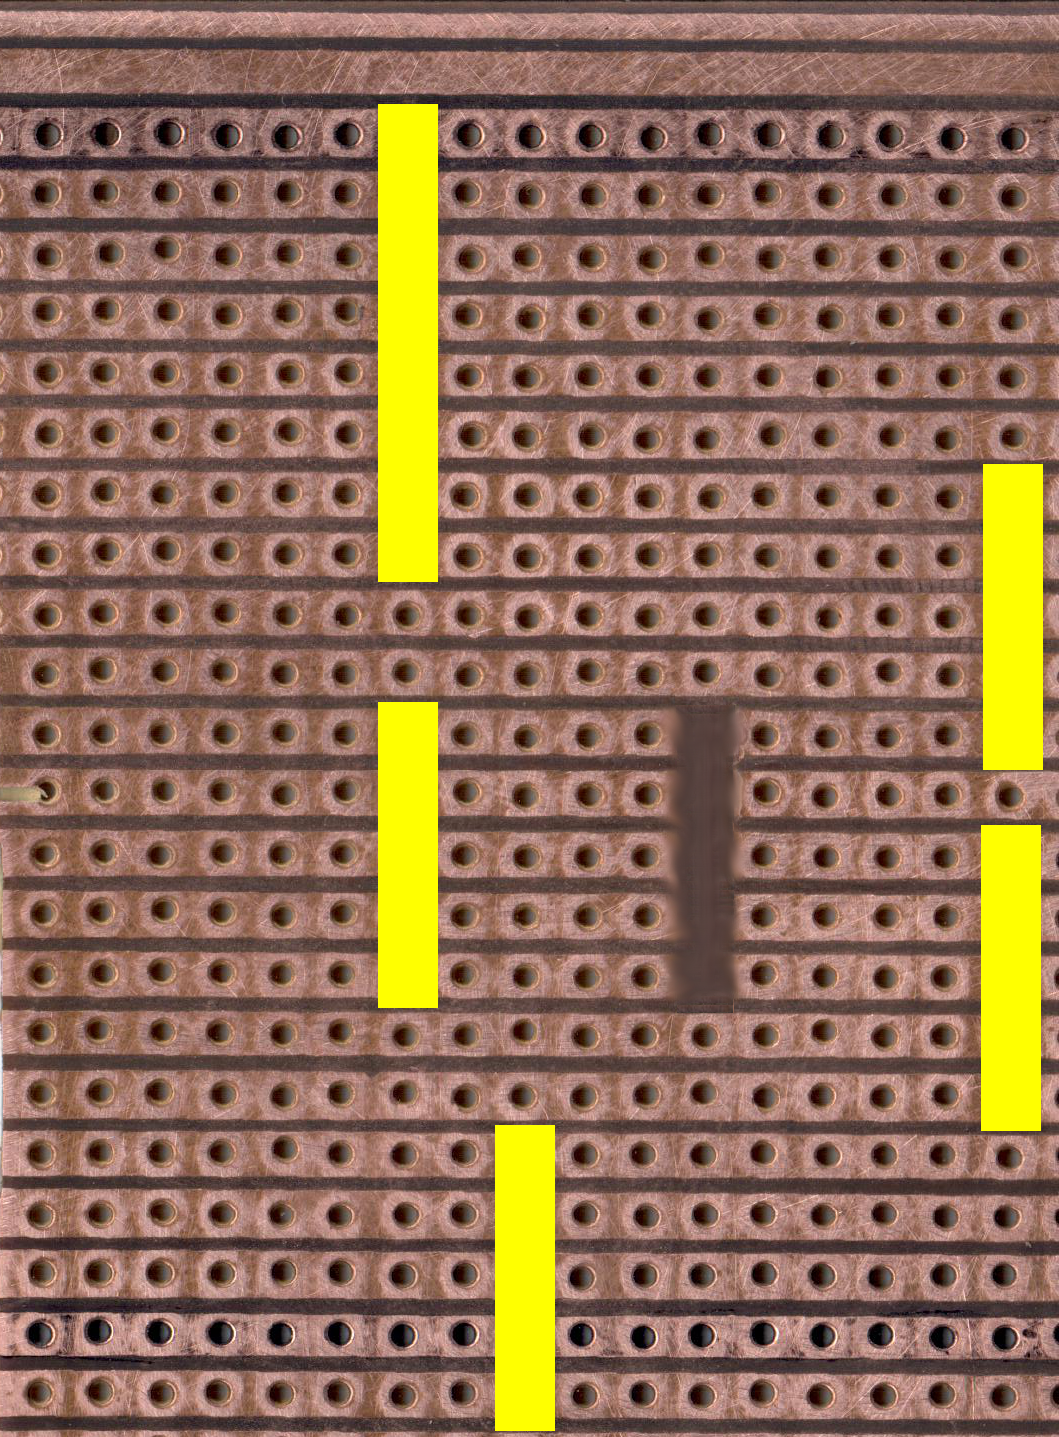
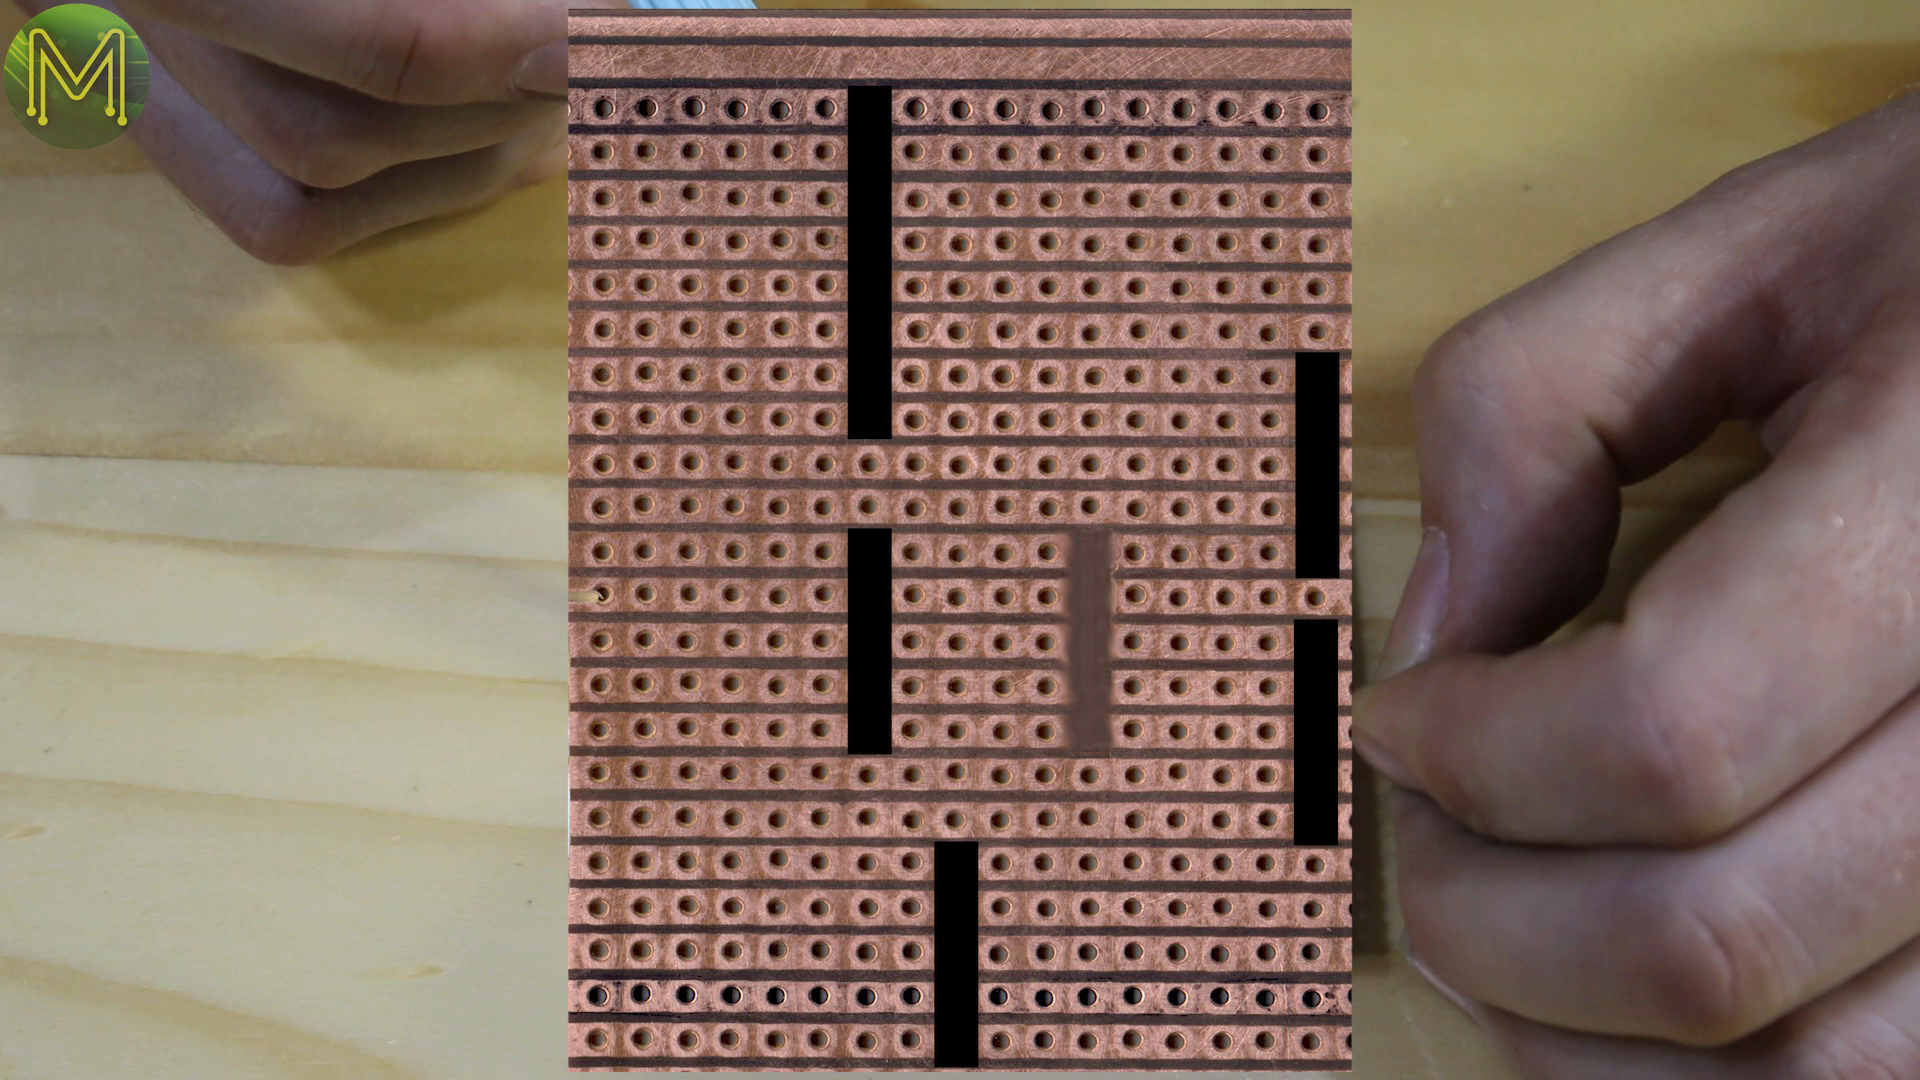
There were several tracks that I didn’t want to collide, so I used a dremel to cut the tracks away.

I used headers so that I could easily reuse the parts later. You don’t need to do this yourself and can directly solder.

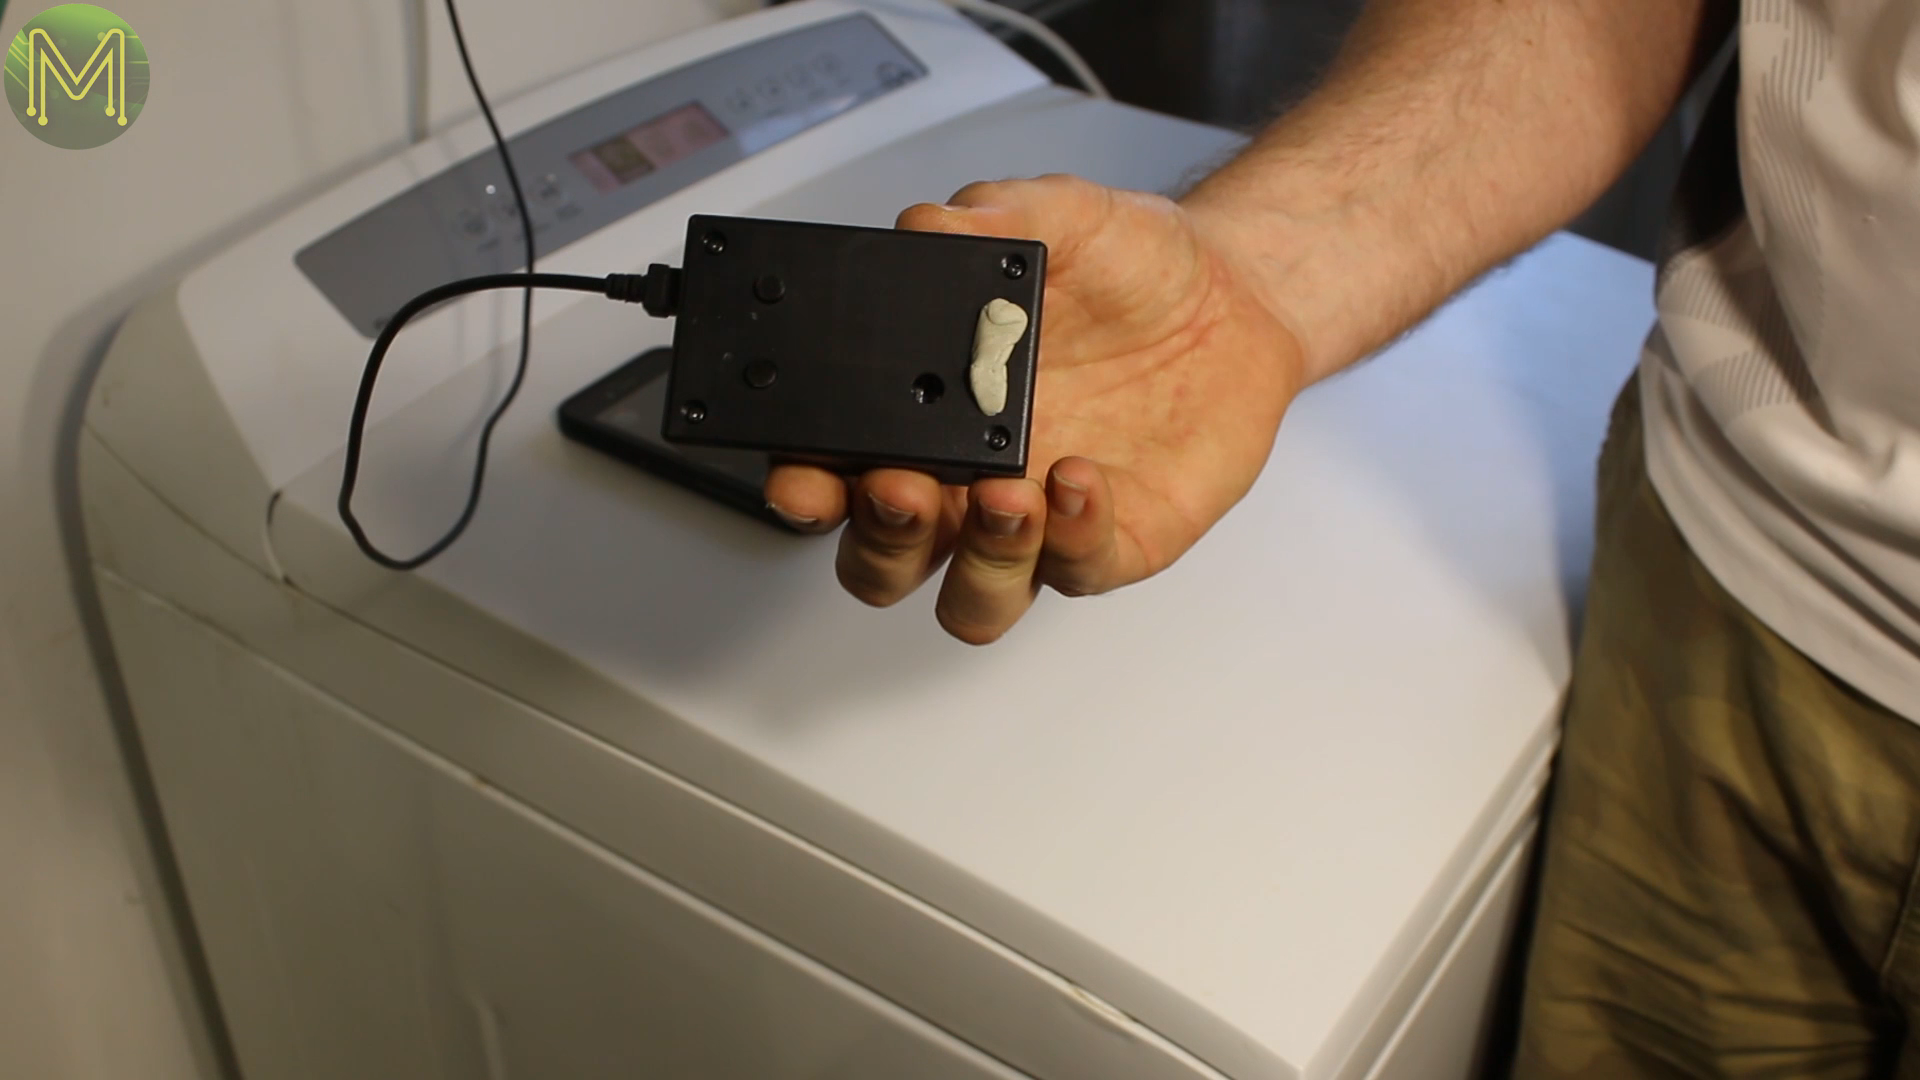
I found this great box that fitted everything perfectly …
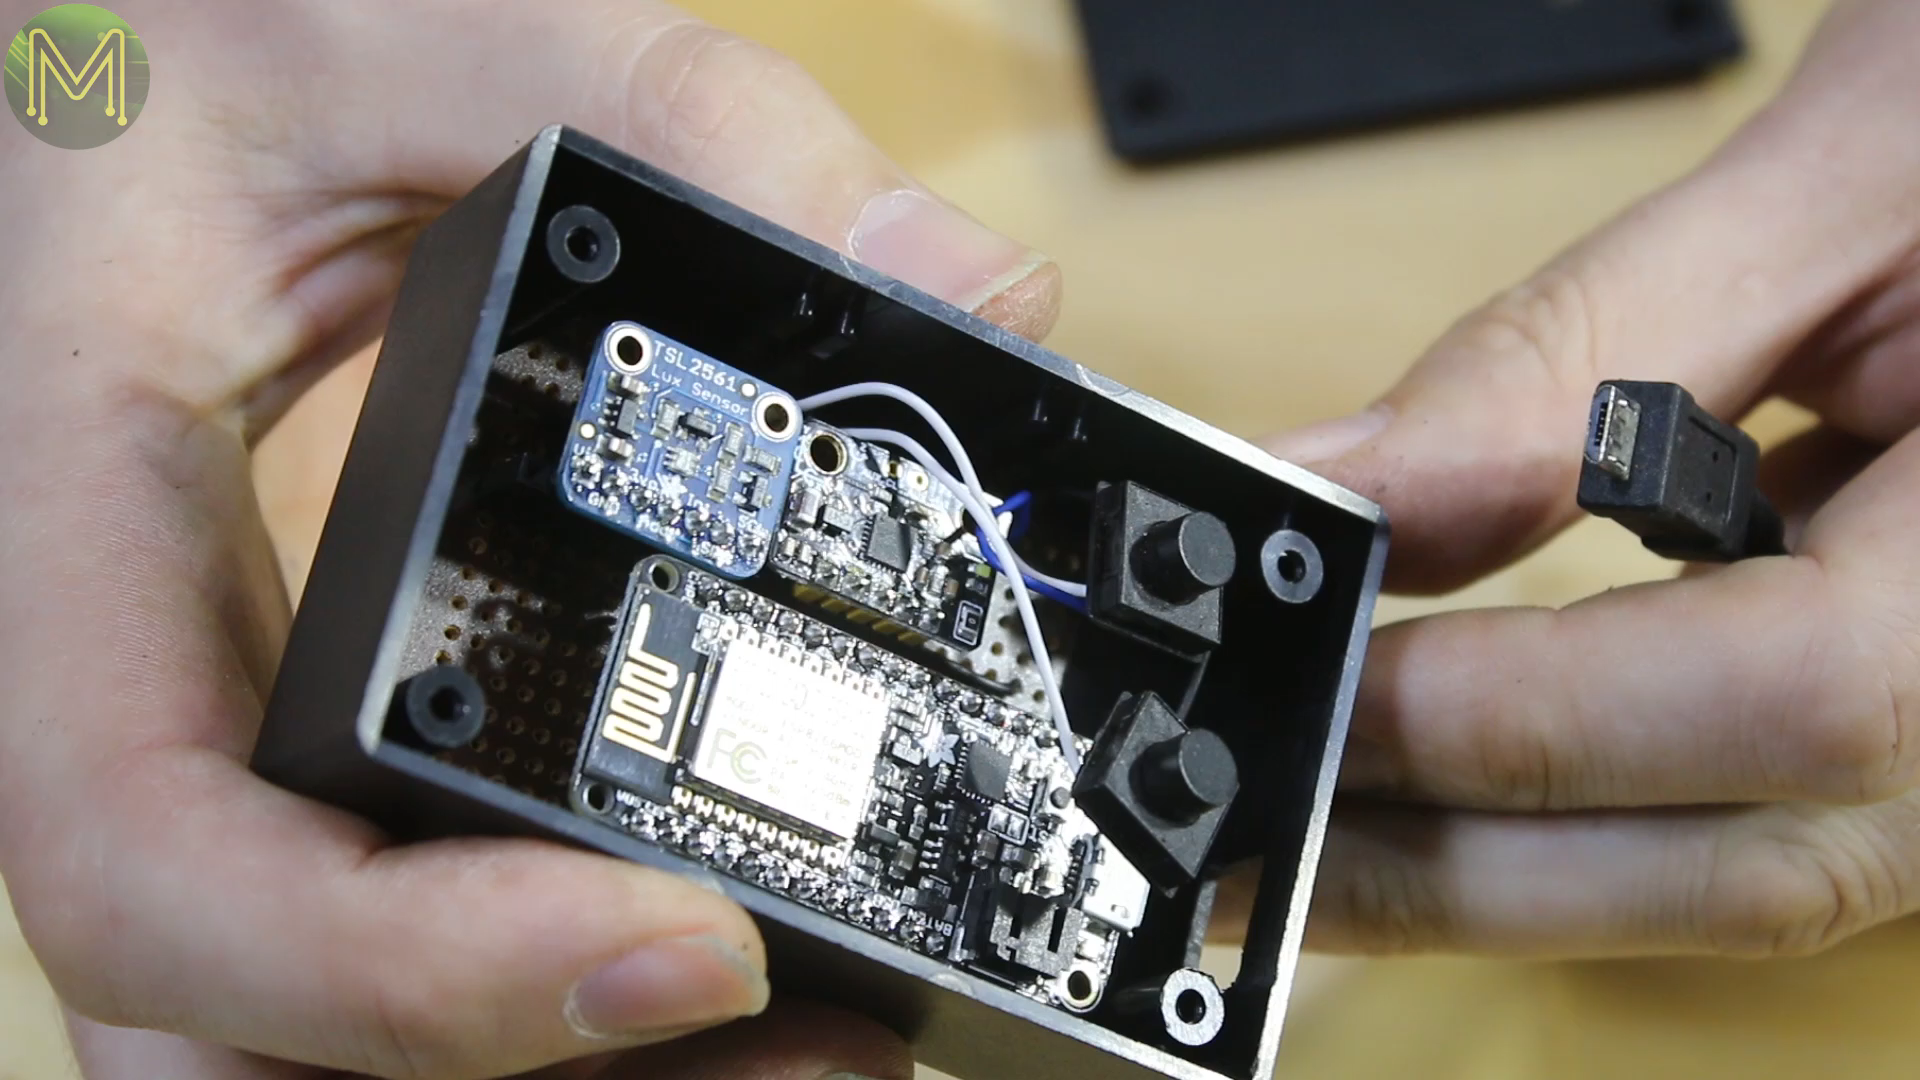
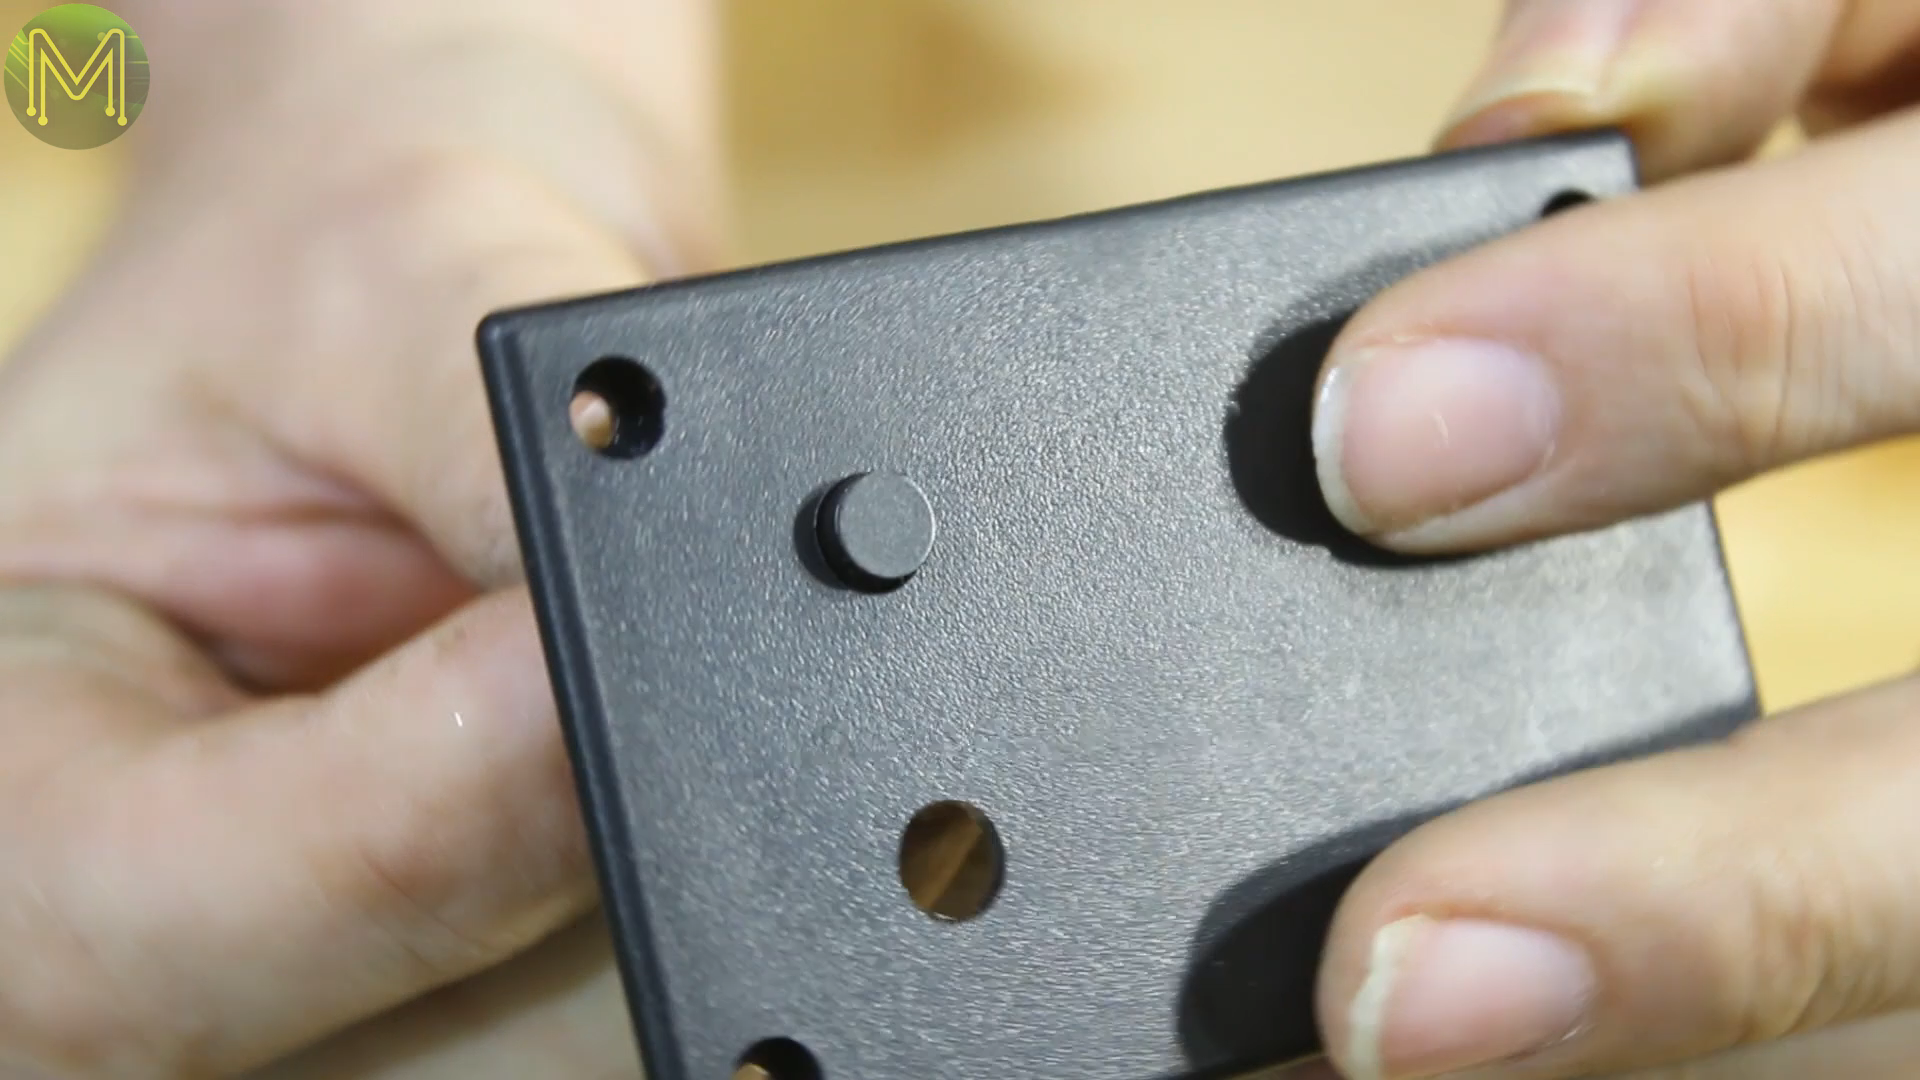
… and also these small PCB switches. I drilled out two holes in the lid and they fitted perfectly.
Then closed it all up. Notice the extra drill hole in the lid for the light sensor. Depending on your washing machine you may want to place it elsewhere.

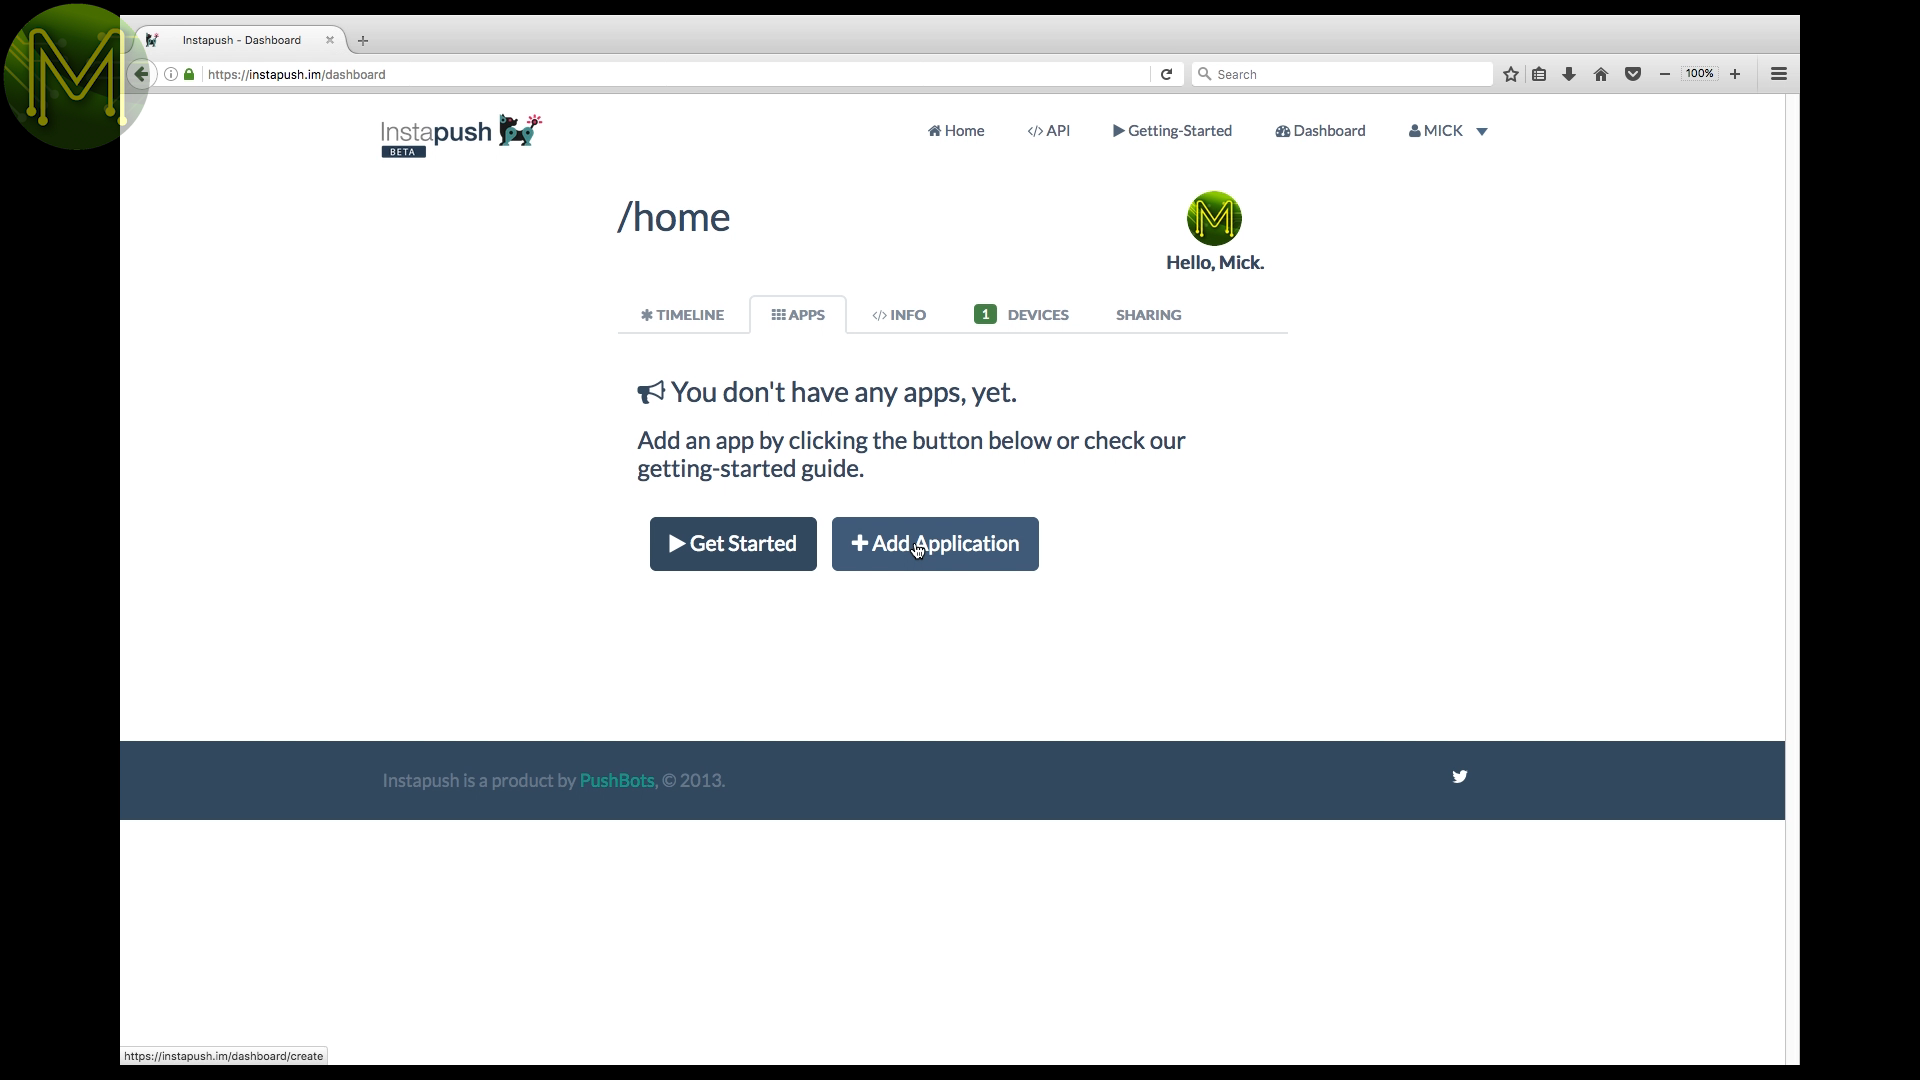
Instapush signup
Next you’ll need to signup on the instapush website, which will allow you to receive alerts.

Next add an application, then an event. Make sure you enter in these fields like this.
Click on “Add Event” and you’re done!

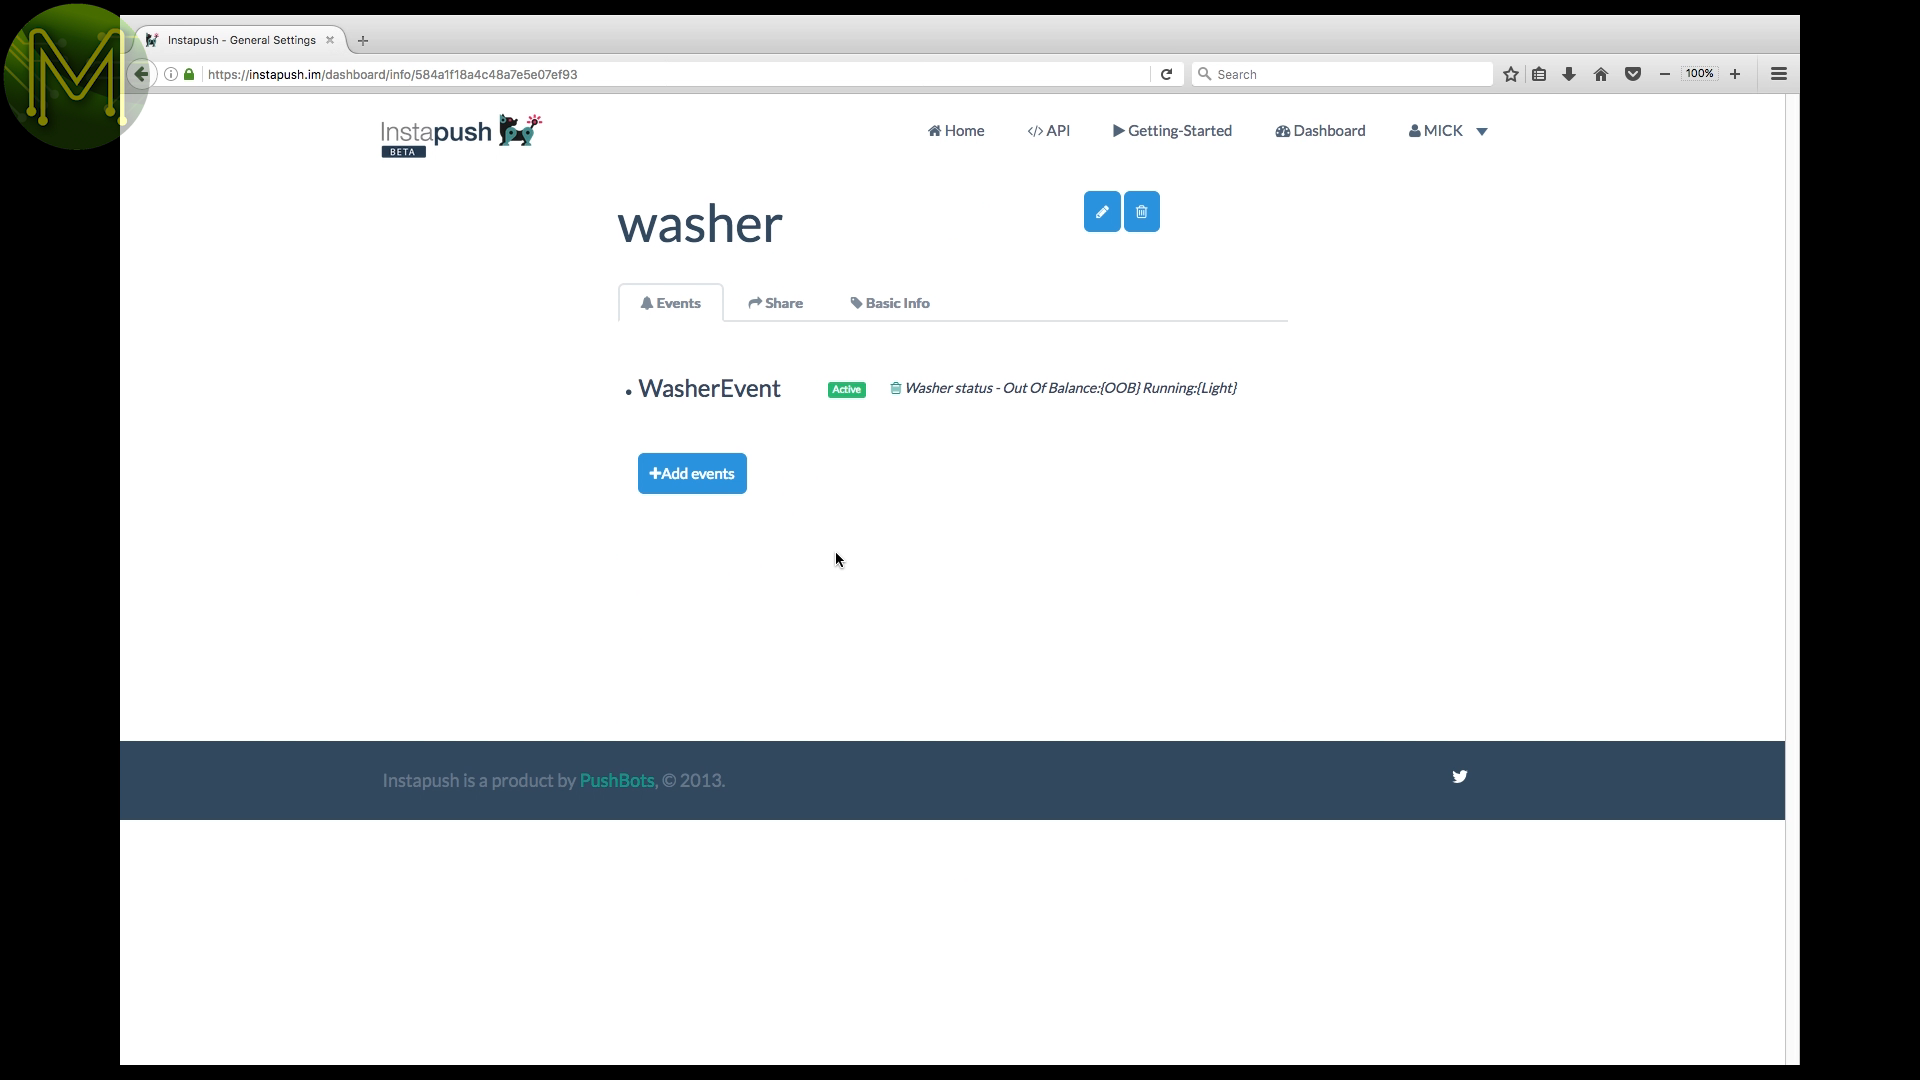
Next you’ll need to click on the “Basic Info” tab and record the Application ID and secret somewhere.

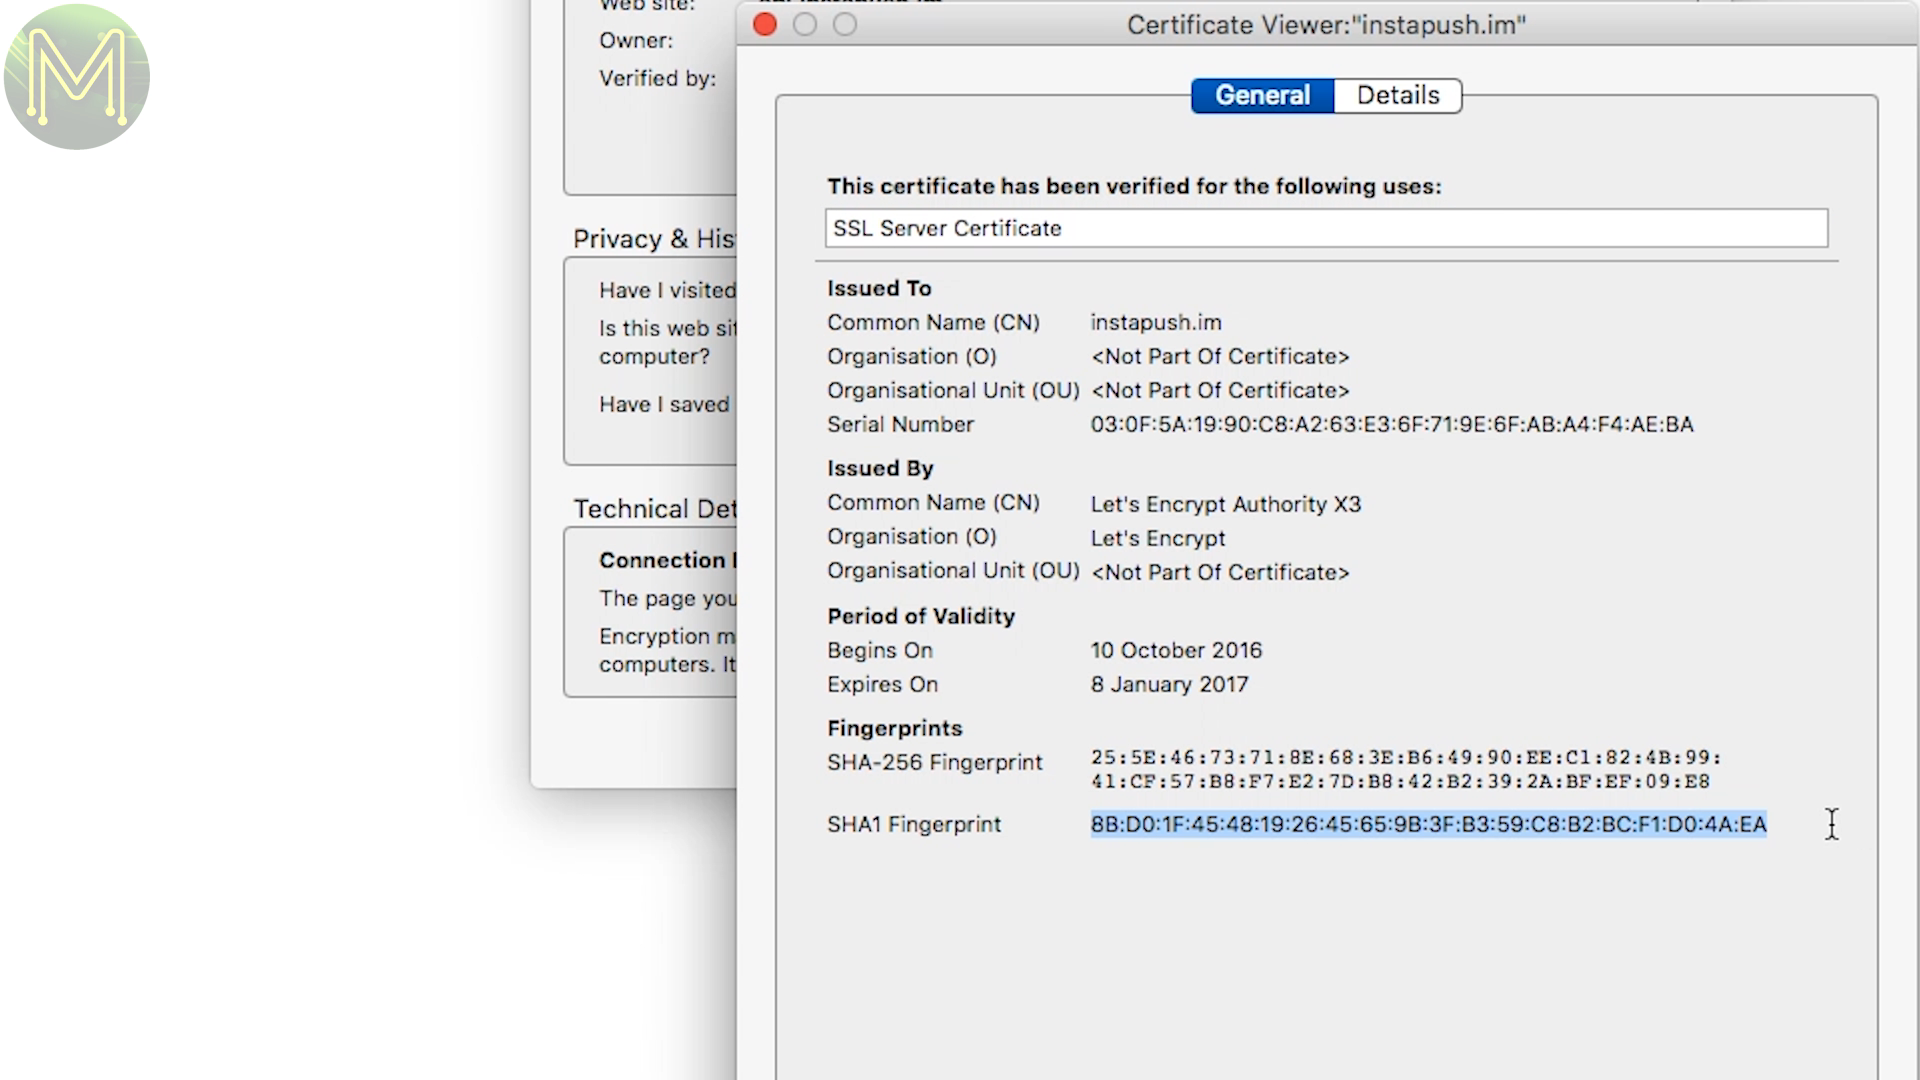
Then go to this address in your browser, and if you’re using Firefox you should be able to view the certificate and find the SHA1 fingerprint. Record this as well as you’ll need it.


Then open up my Internet Washer sketch and update these three variables with the information you’ve just collected.
Also update the SSID and password for your WiFi access point.

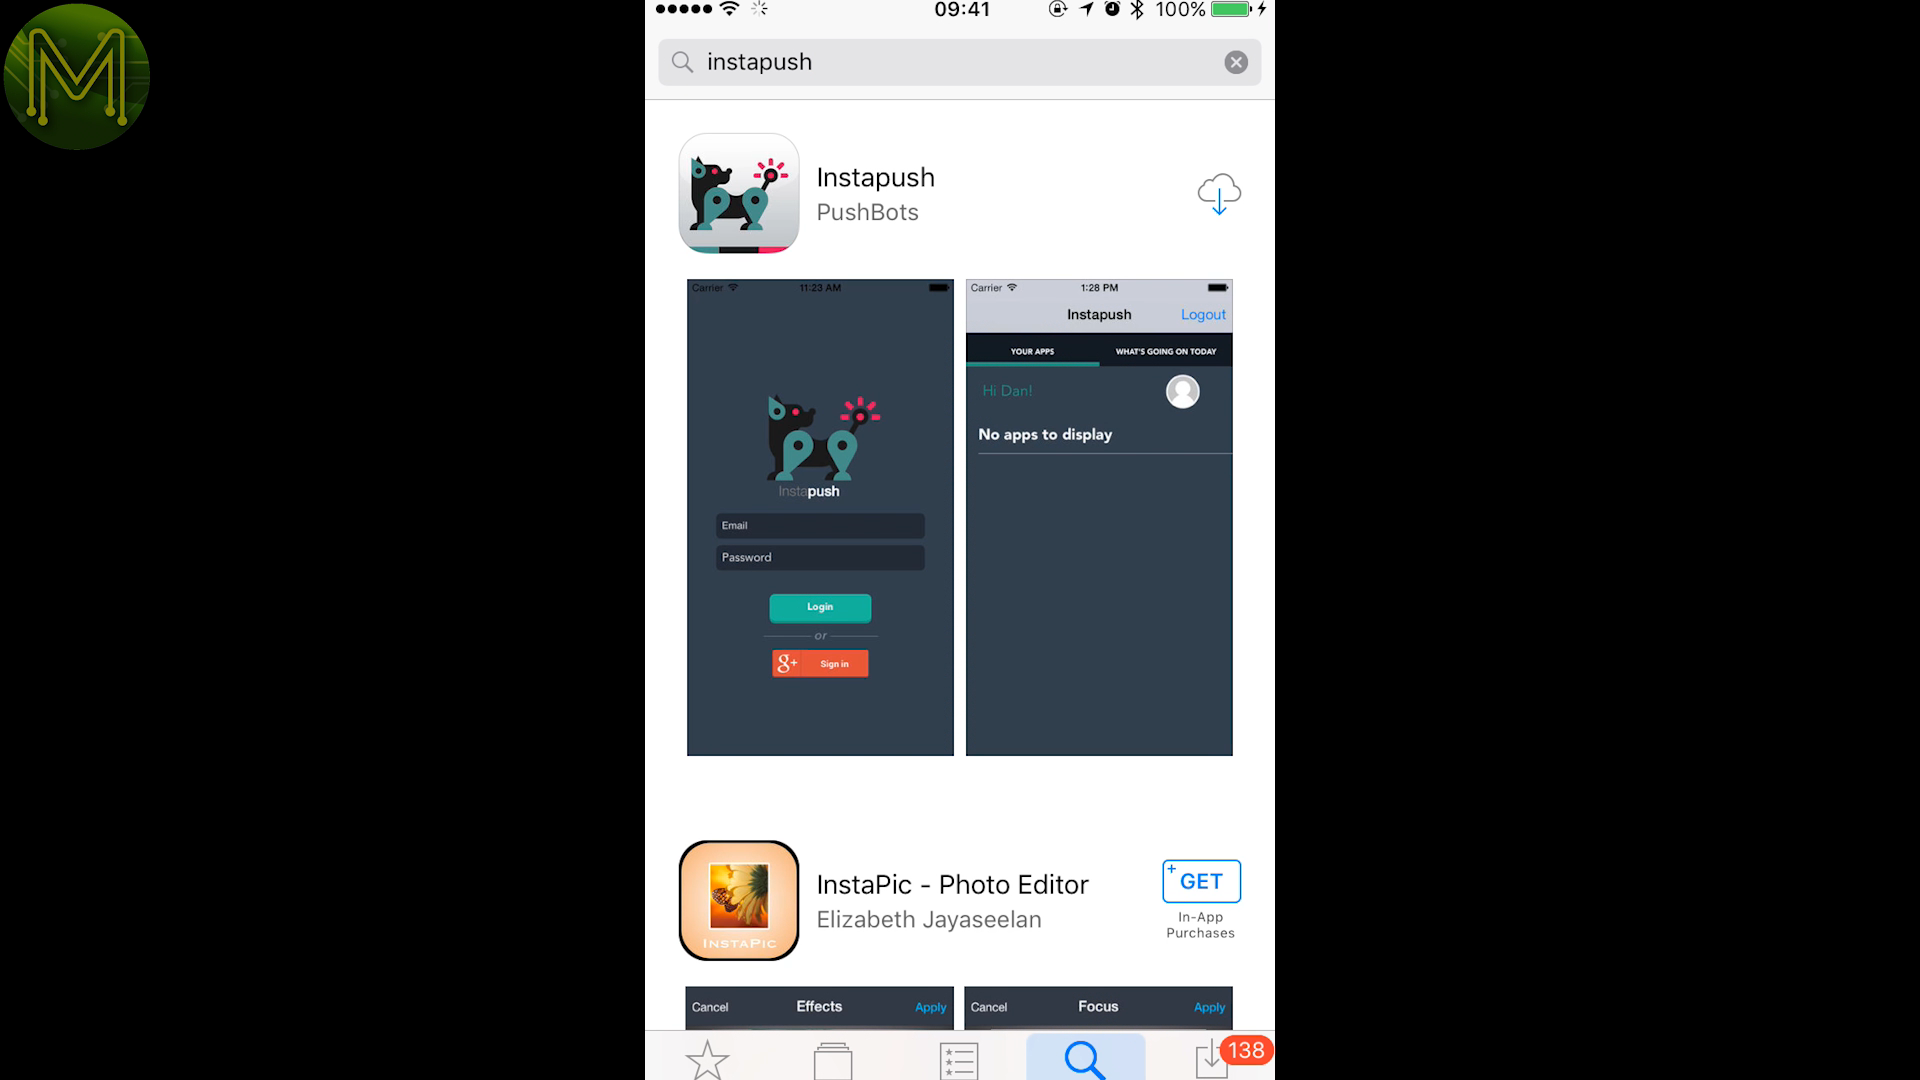
Next download and install instapush on your phone. It’s available on both Android and iOS Sign in using the same credentials as on the website.
Testing
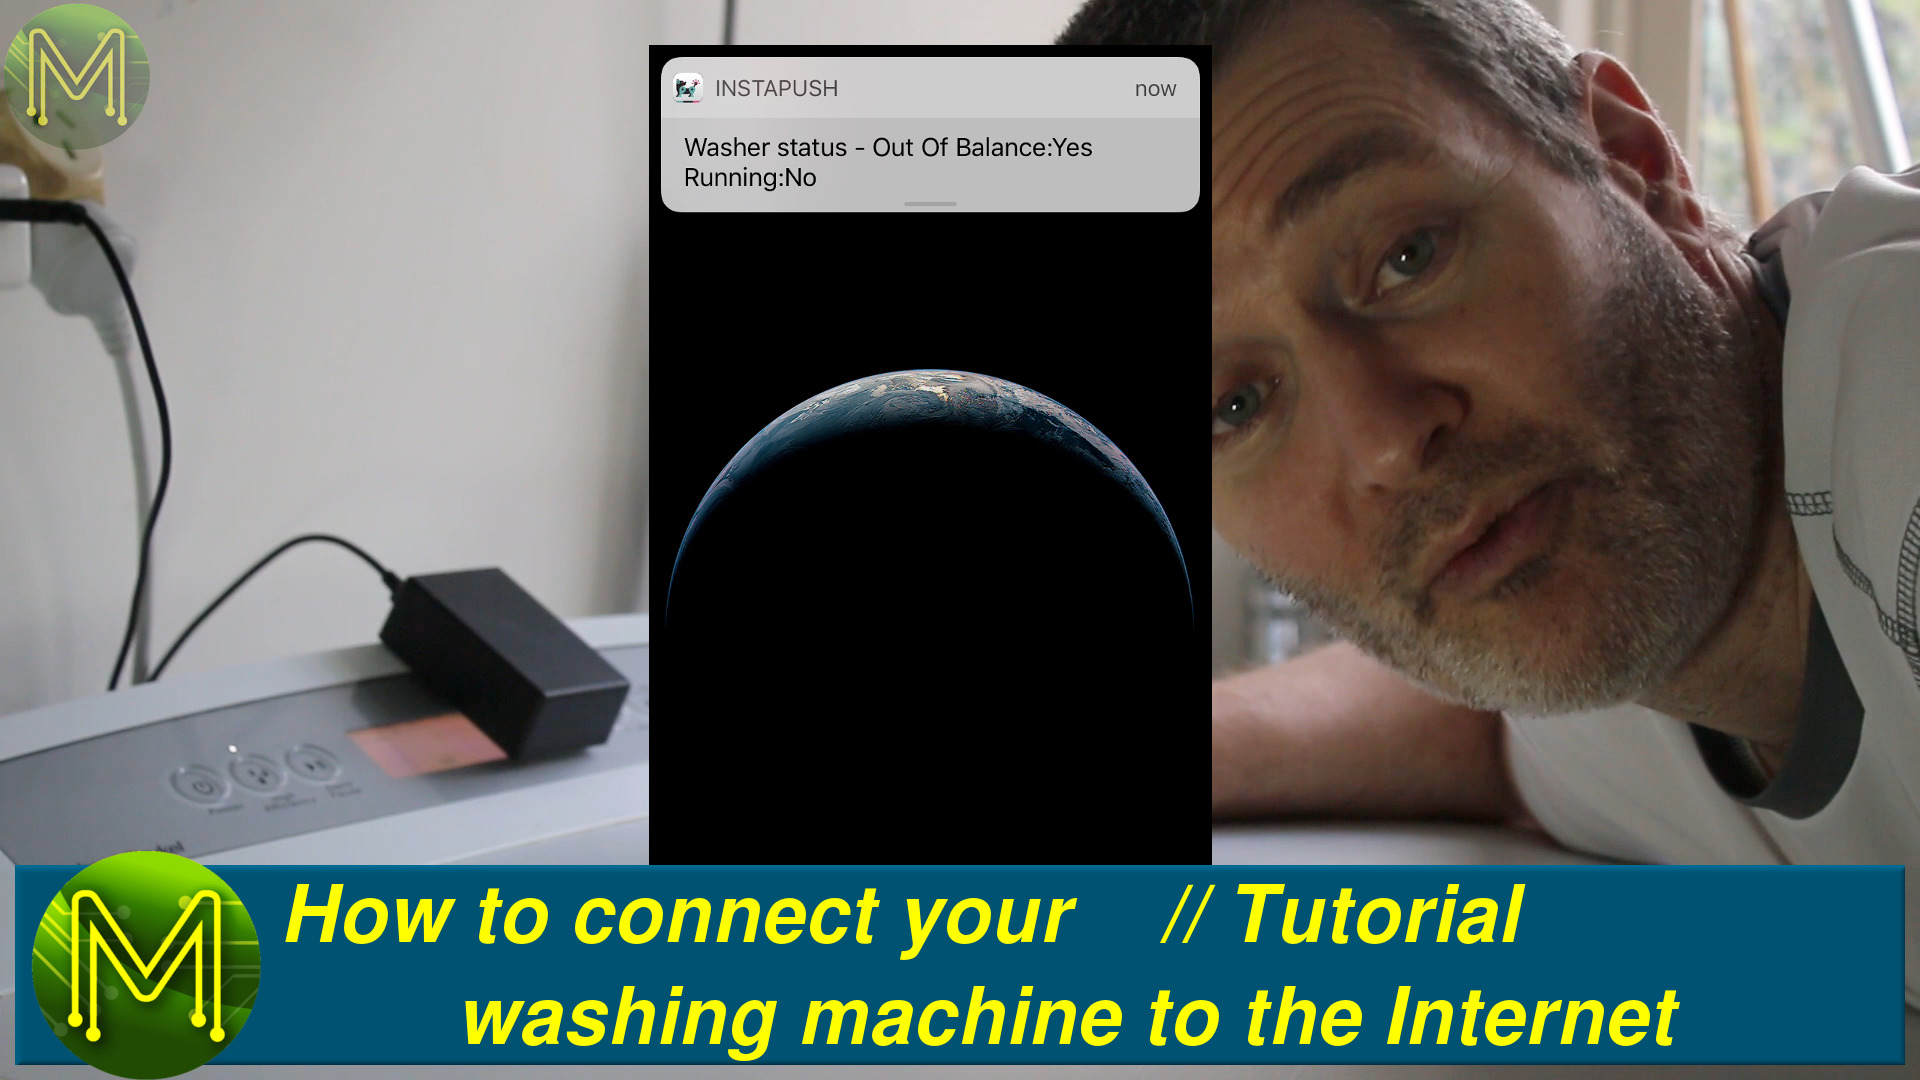
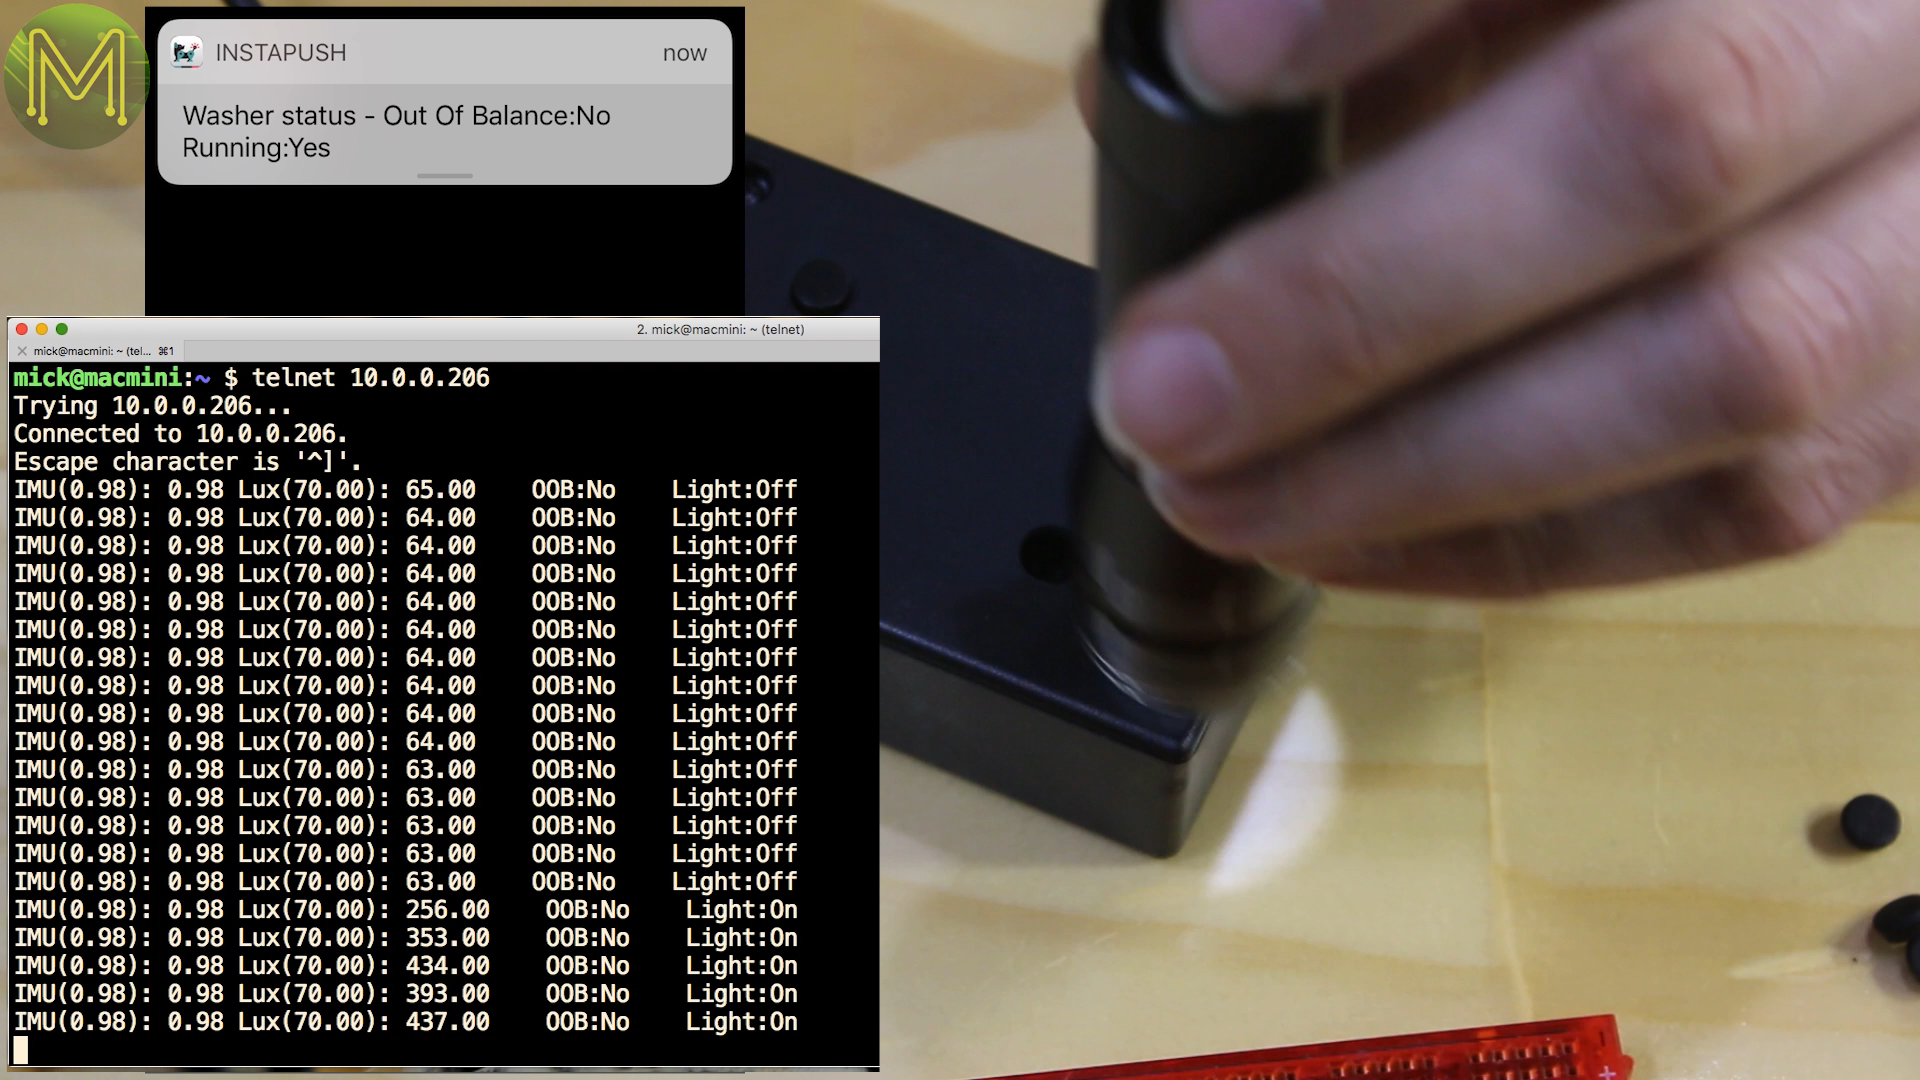
Testing time! Seems to all work. In my software I’ve also provided a handy method of being able to control it across the network by telnetting to the IP address.
Installing
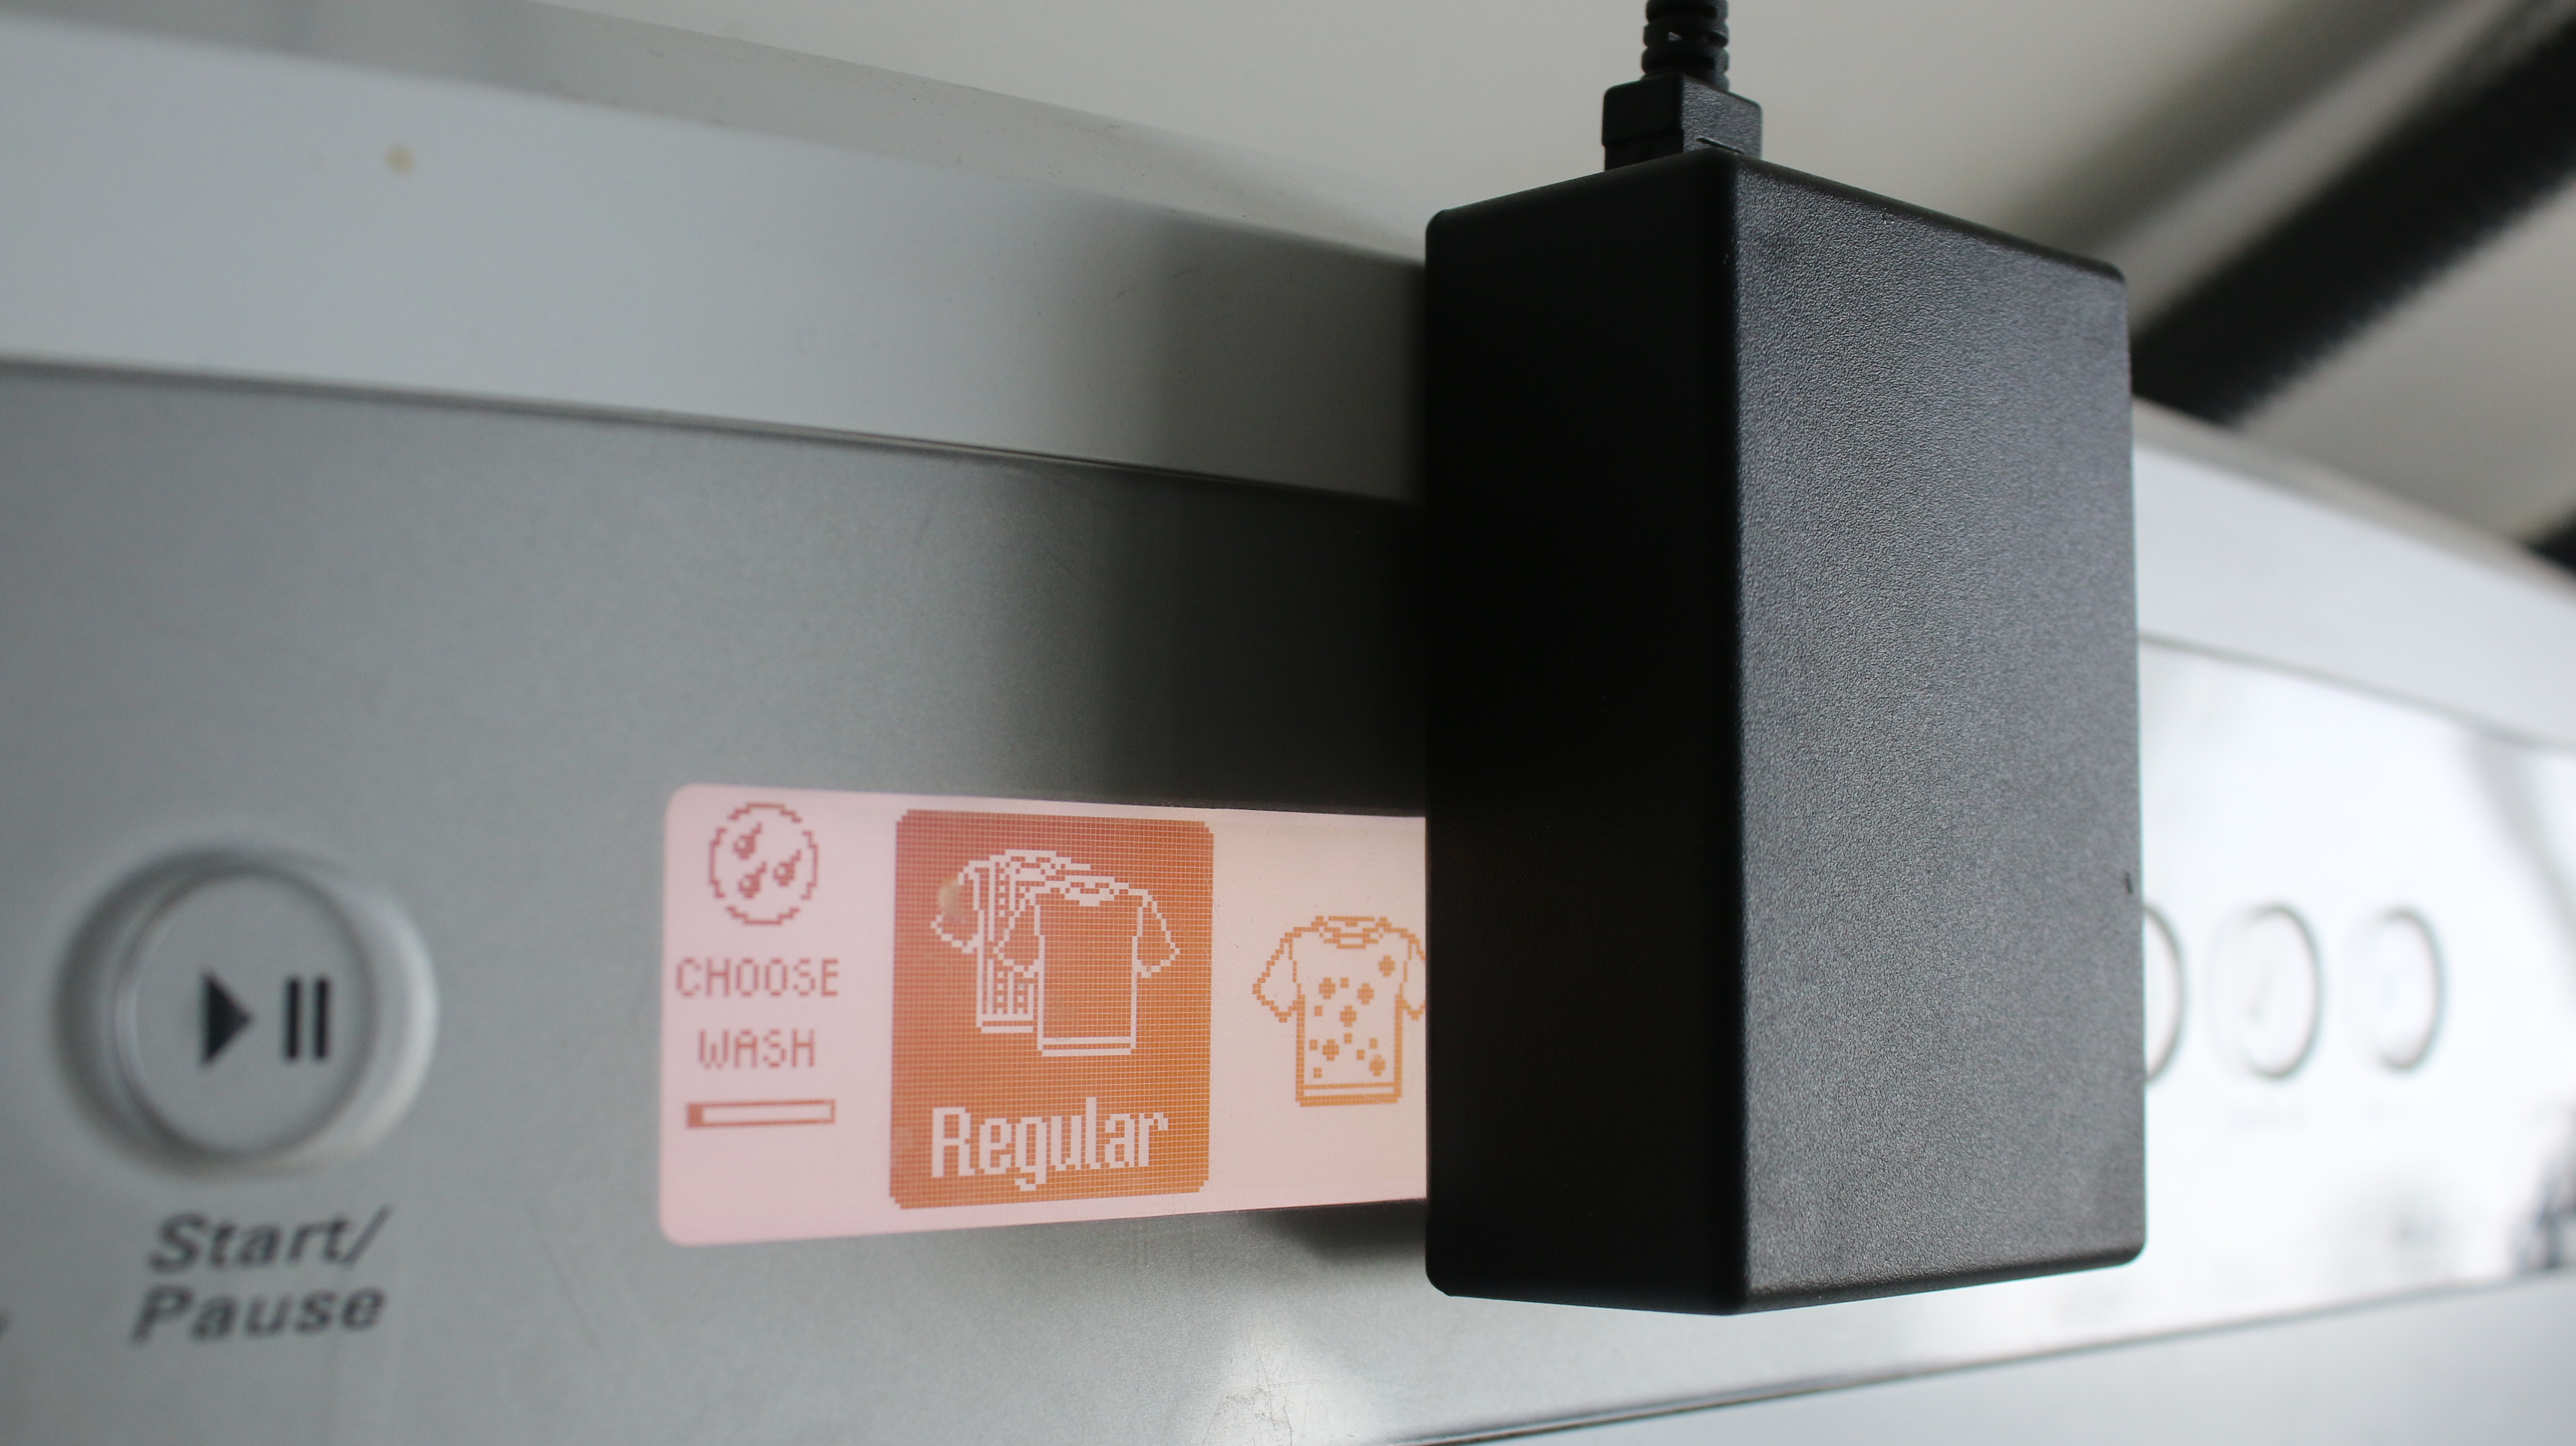
So I used a bit of blue tak to secure it to the washing machine display.
This allows the light to shine onto the sensor and therefore tell me when the washing cycle has finished.
When I power on the machine it’ll send an alert and when the cycle has finished it’ll turn the display off.
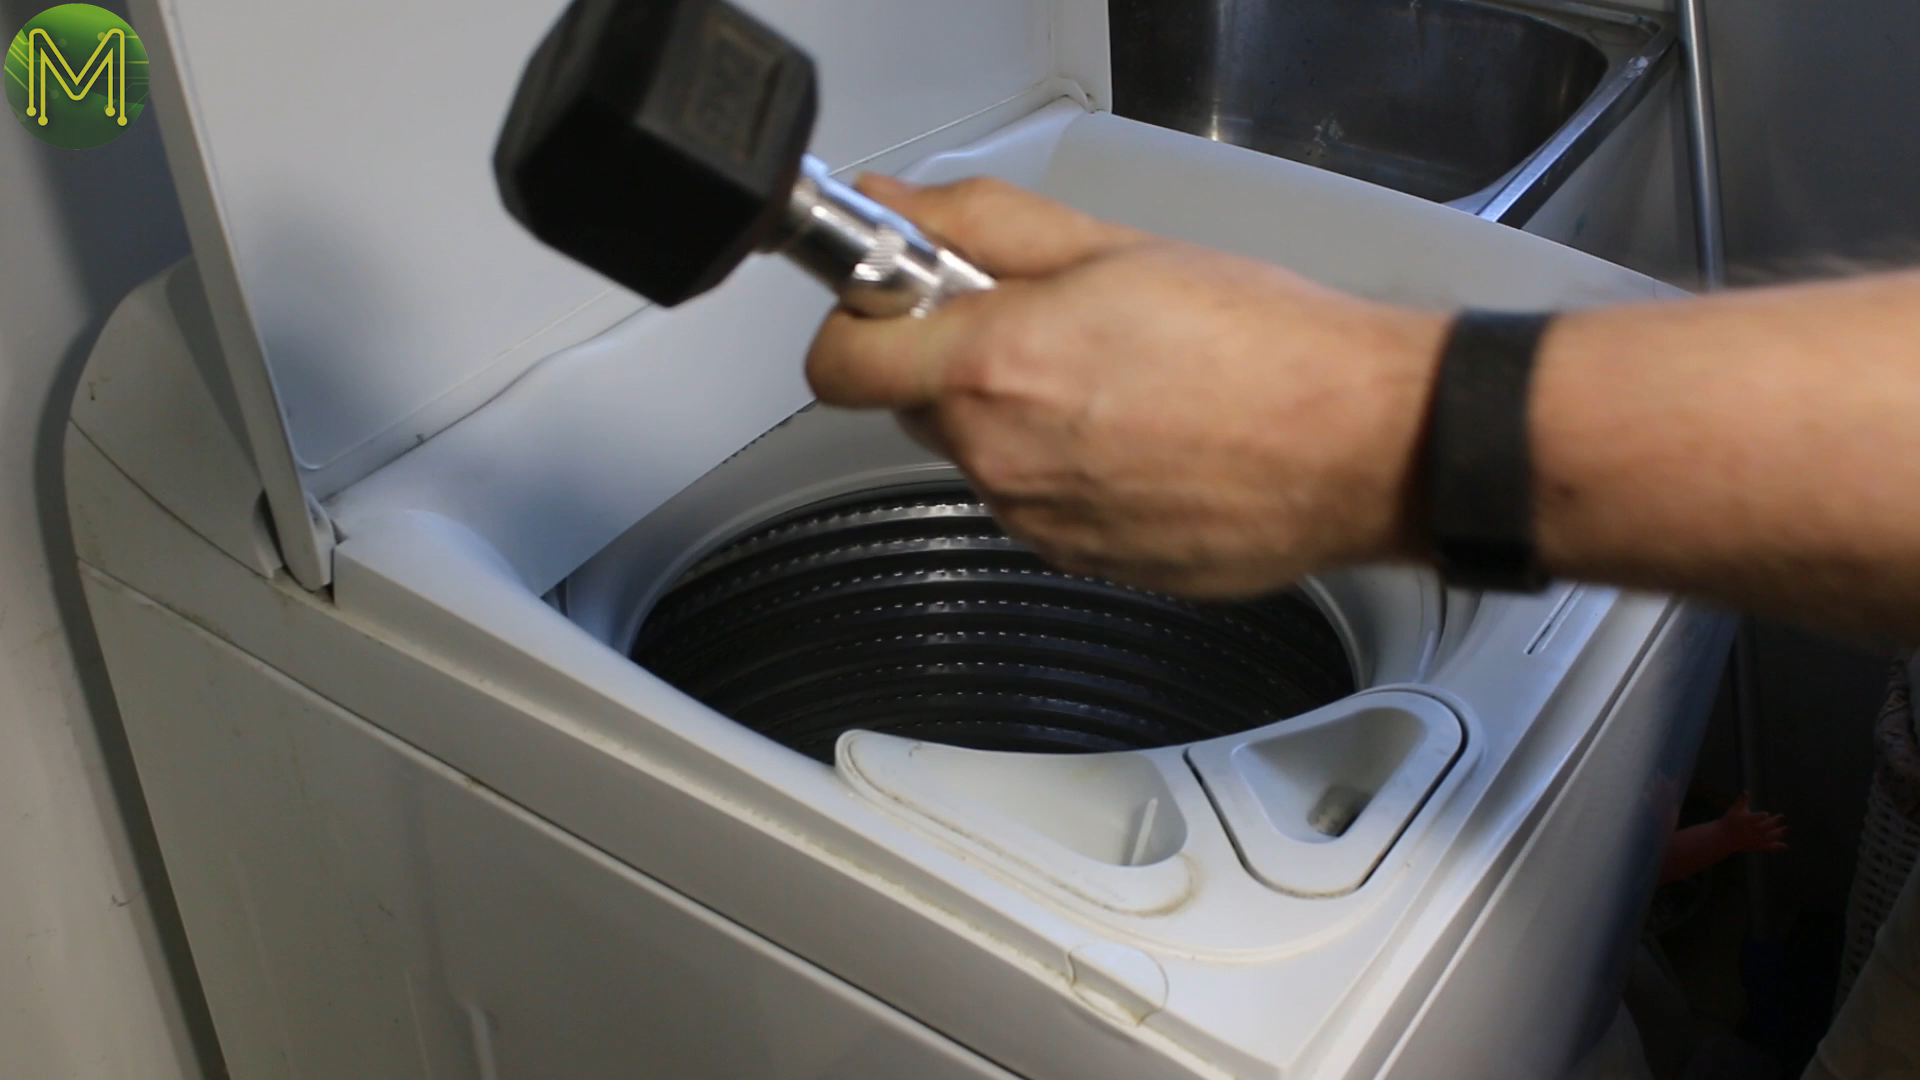
Testing for out of balance is easy. Just use some old gym weights.
If you’ve made one yourself would be great to hear from you! Also if you’ve made any improvements or bug fixes.