Build an MQTT based RGB LED panel! // Project
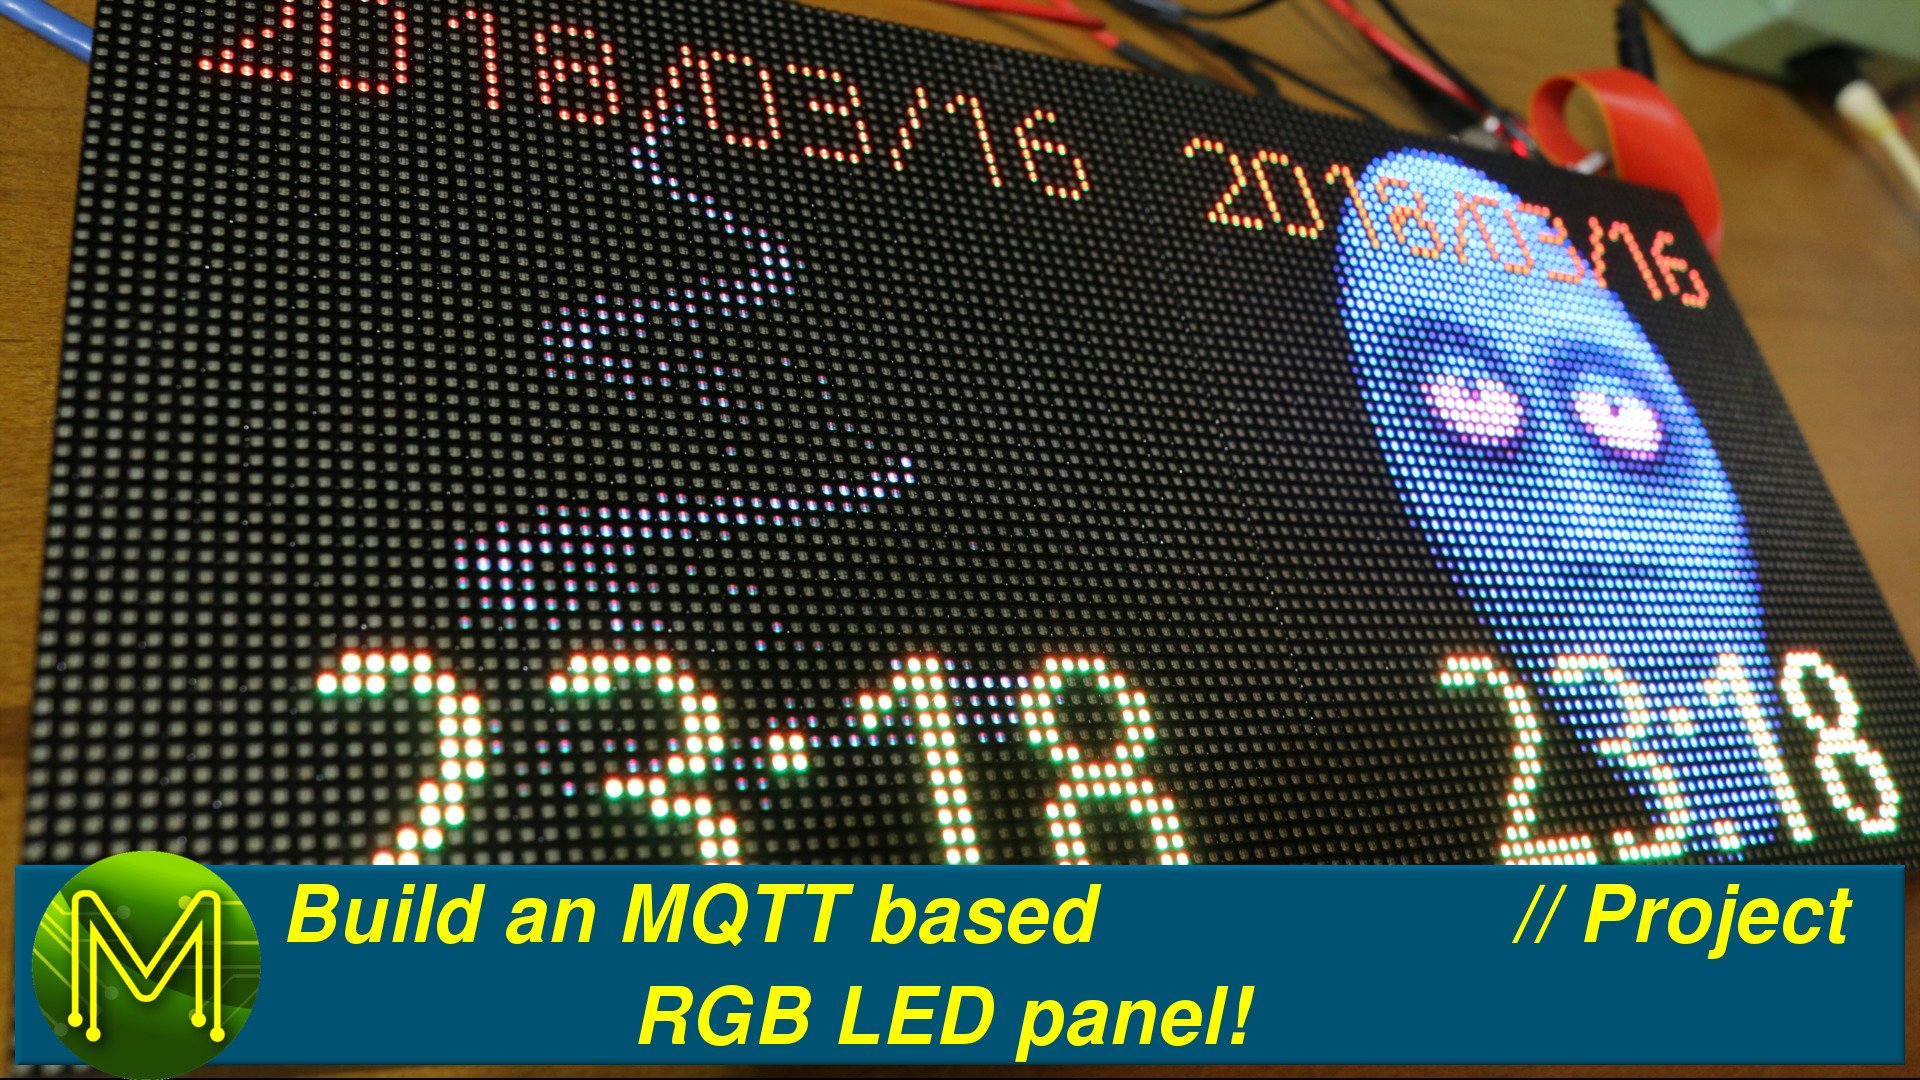
This quick project shows you how to build an MQTT controlled RGB LED matrix panel in under 30 minutes, but I reckon it should take you a lot less.
I’ve been asked several times about why am I promoting Docker for embedded systems.
Well, this project is an answer to that question - building an MQTT controlled RGB LED matrix panel from scratch in under 30 minutes and probably a whole lot less. I’ll also be soon running a video series called DockerFu, which will be similar to my LinuxFu series - getting you from knowing nothing, to knowing everything about Docker.
Back in MickMakeMail #27 you would have seen me un-box two RGB LED matrix panels. The goal was to be able very quickly setup the panels to display arbitrary messages using MQTT. This would allow me to tie it in to services such as IFTTT, but it wasn’t enough to just write some code. I wanted to be able to make it very easy for anyone to run the software without having all that messy installation process.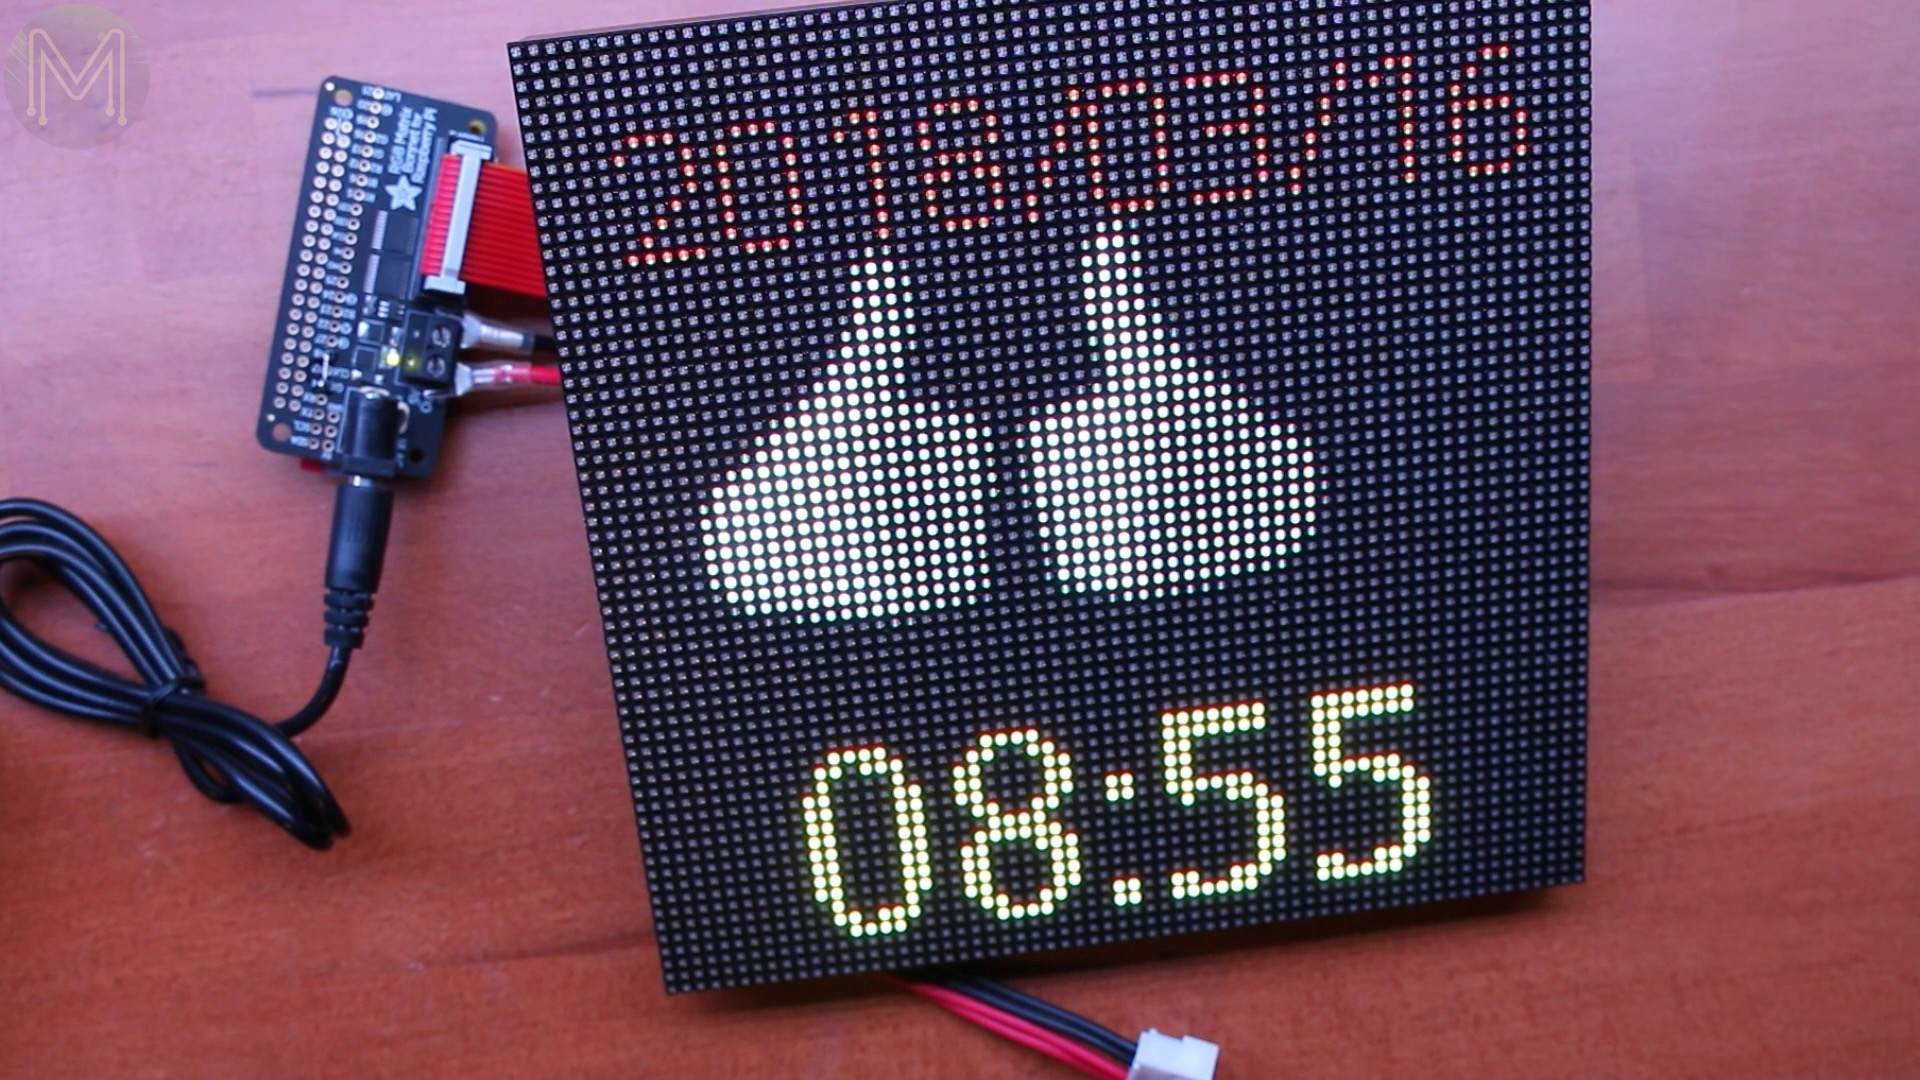
This is where Docker comes in.
Parts required
To make this project, you’ll need to have:
- an RGB matrix panel - I used a 64 by 64 LED panel from AdaFruit.
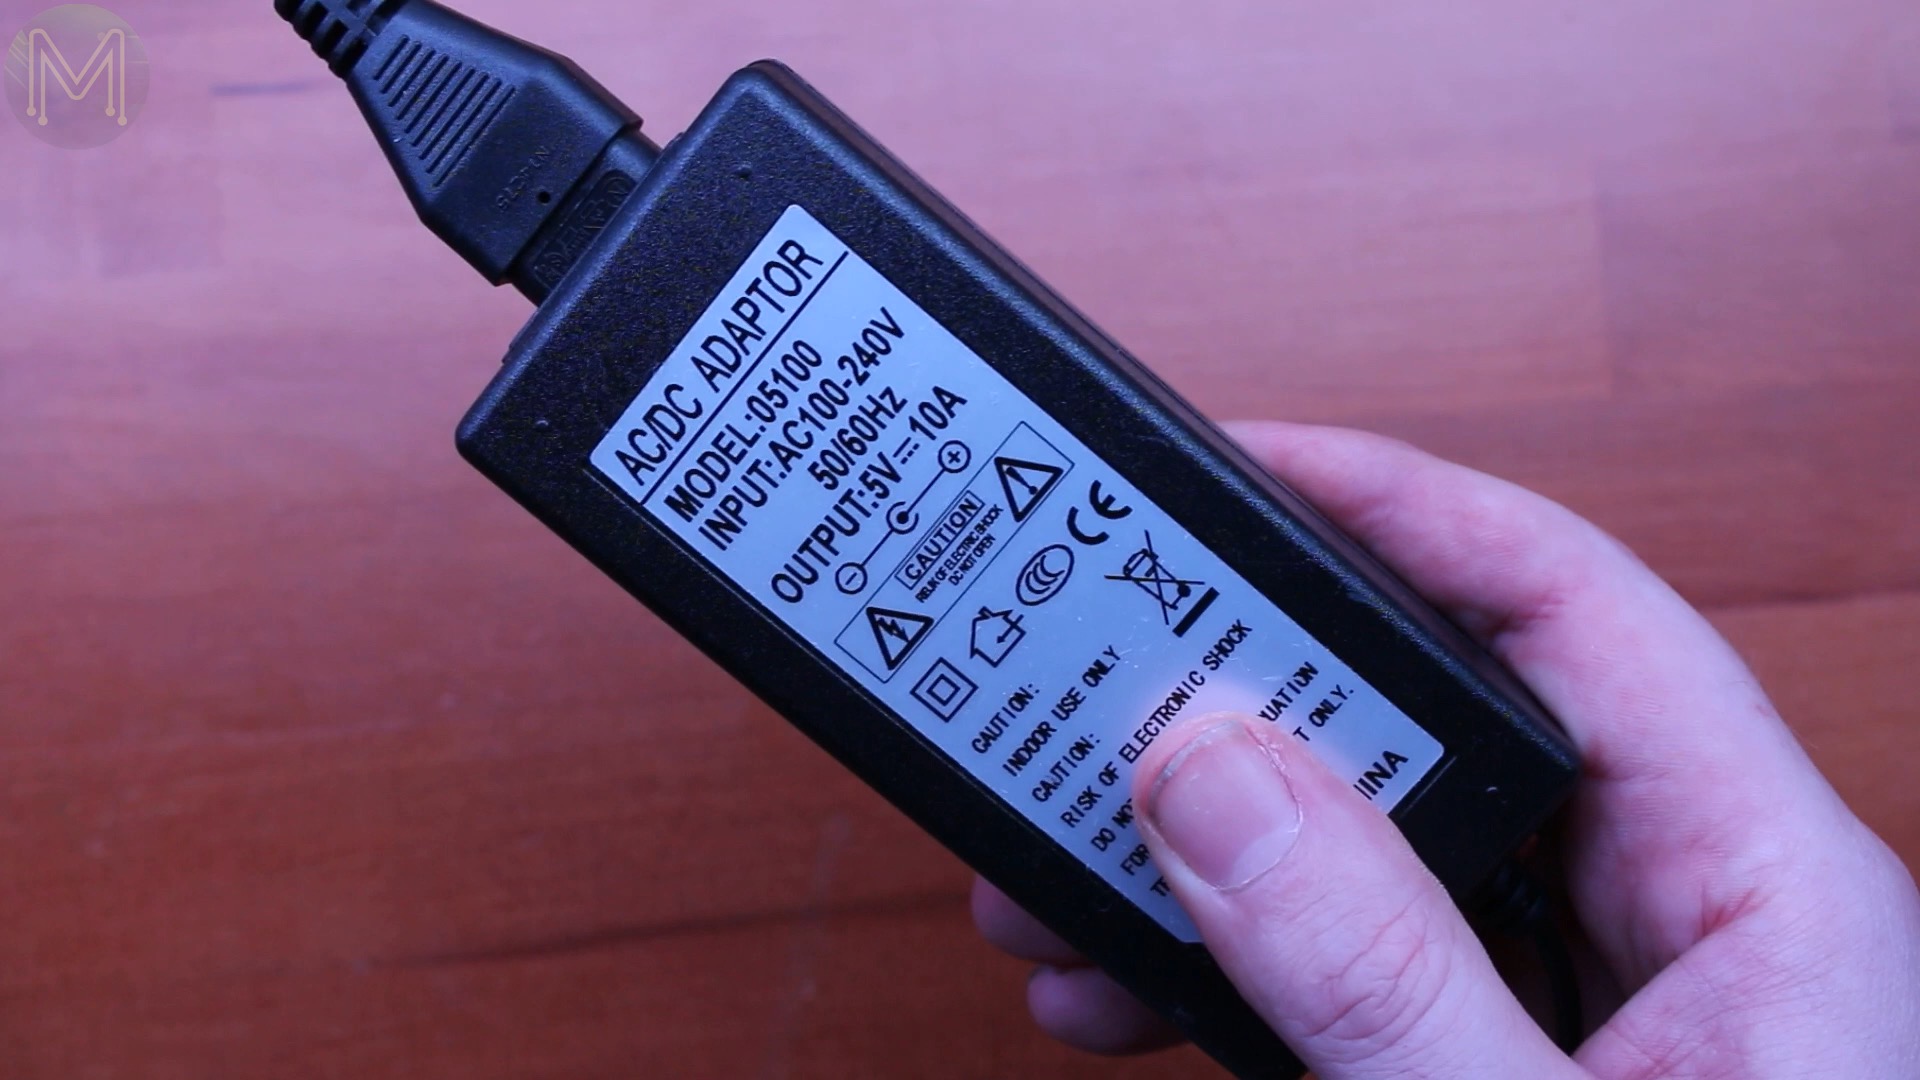
- and because there’s a heck of a lot of LEDs, I’d strongly suggest getting one of AdaFruit’s RGB matrix controller Pi hats. Of course you’ll also need a Pi Zero W and an SD card. You can use any Pi for this but I wanted it to be as compact as possible.You’ll also need a pretty hefty 5v power supply. I used a 10A switch-mode power supply, which had plenty of juice.

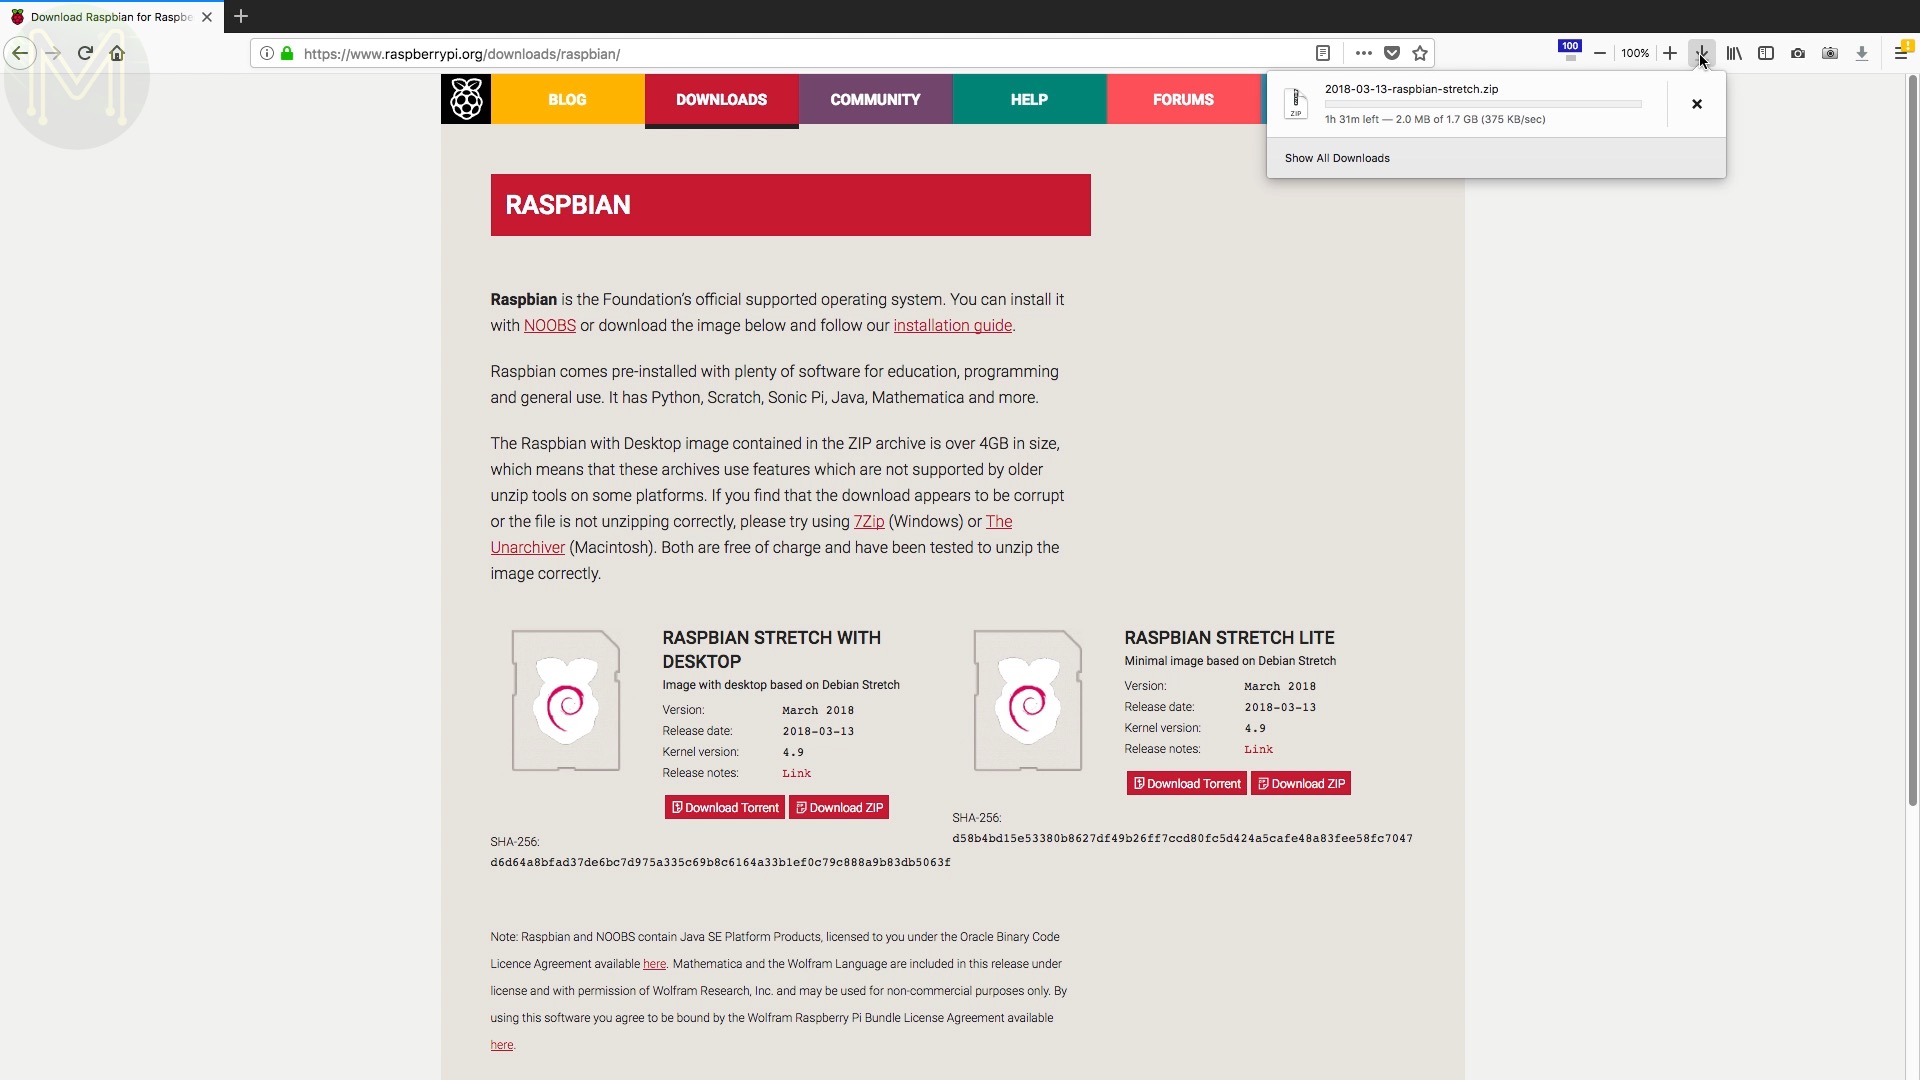
Download Raspbian
Once you have all your bits, download the latest Raspbian image from the Raspberry Pi website.
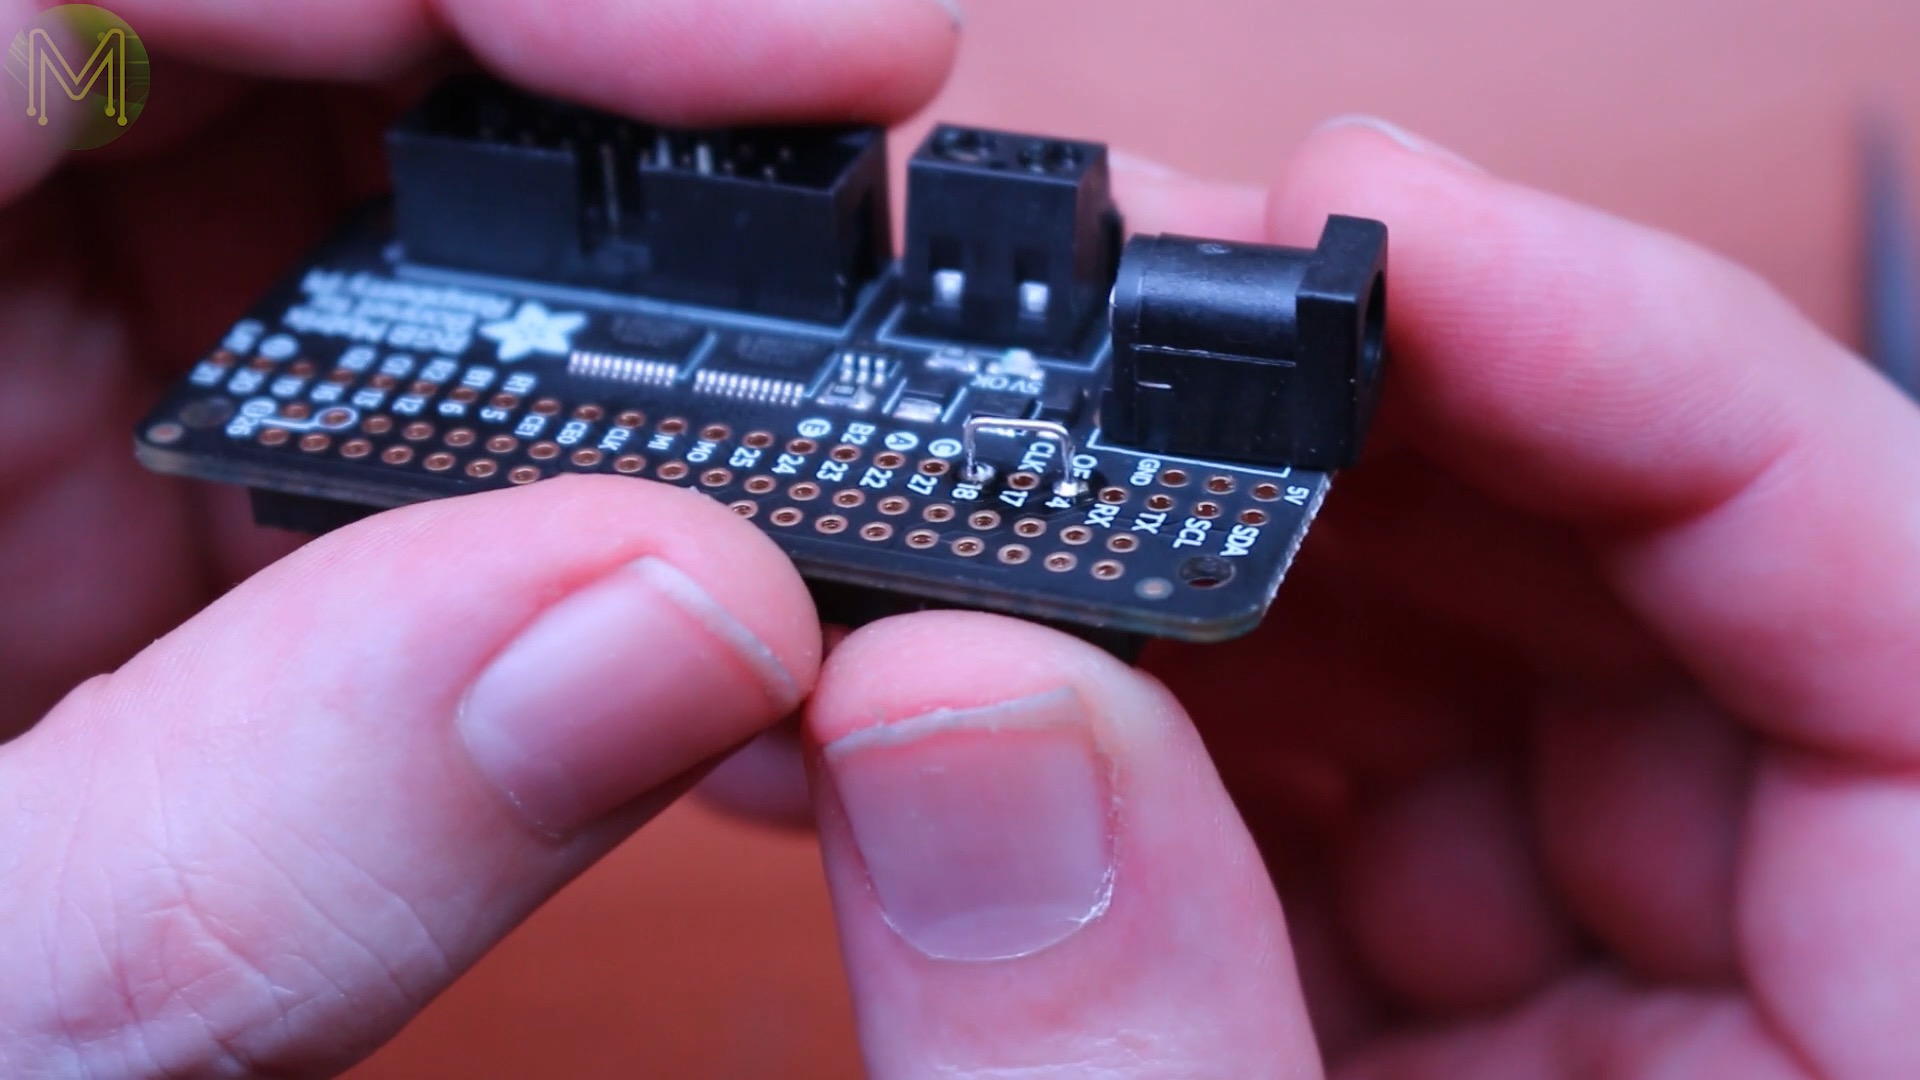
Soldering the Pi hat
While that is happening, you’ll need to make a choice between having a slow panel with audio, or a fast panel without audio. The slower panels can be a little flickery sometimes.
So, if you’re happy without any audio, then you can make this small change on the matrix hat, which is connecting up GPIO 4 to GPIO 18.
Burning the SD
By now your download should have finished. Fire up the SD burner of your choice and burn that to an SD card.
While that’s happening … you can solder up a header to the Pi Zero W. Of course this header is already provided on most Pis.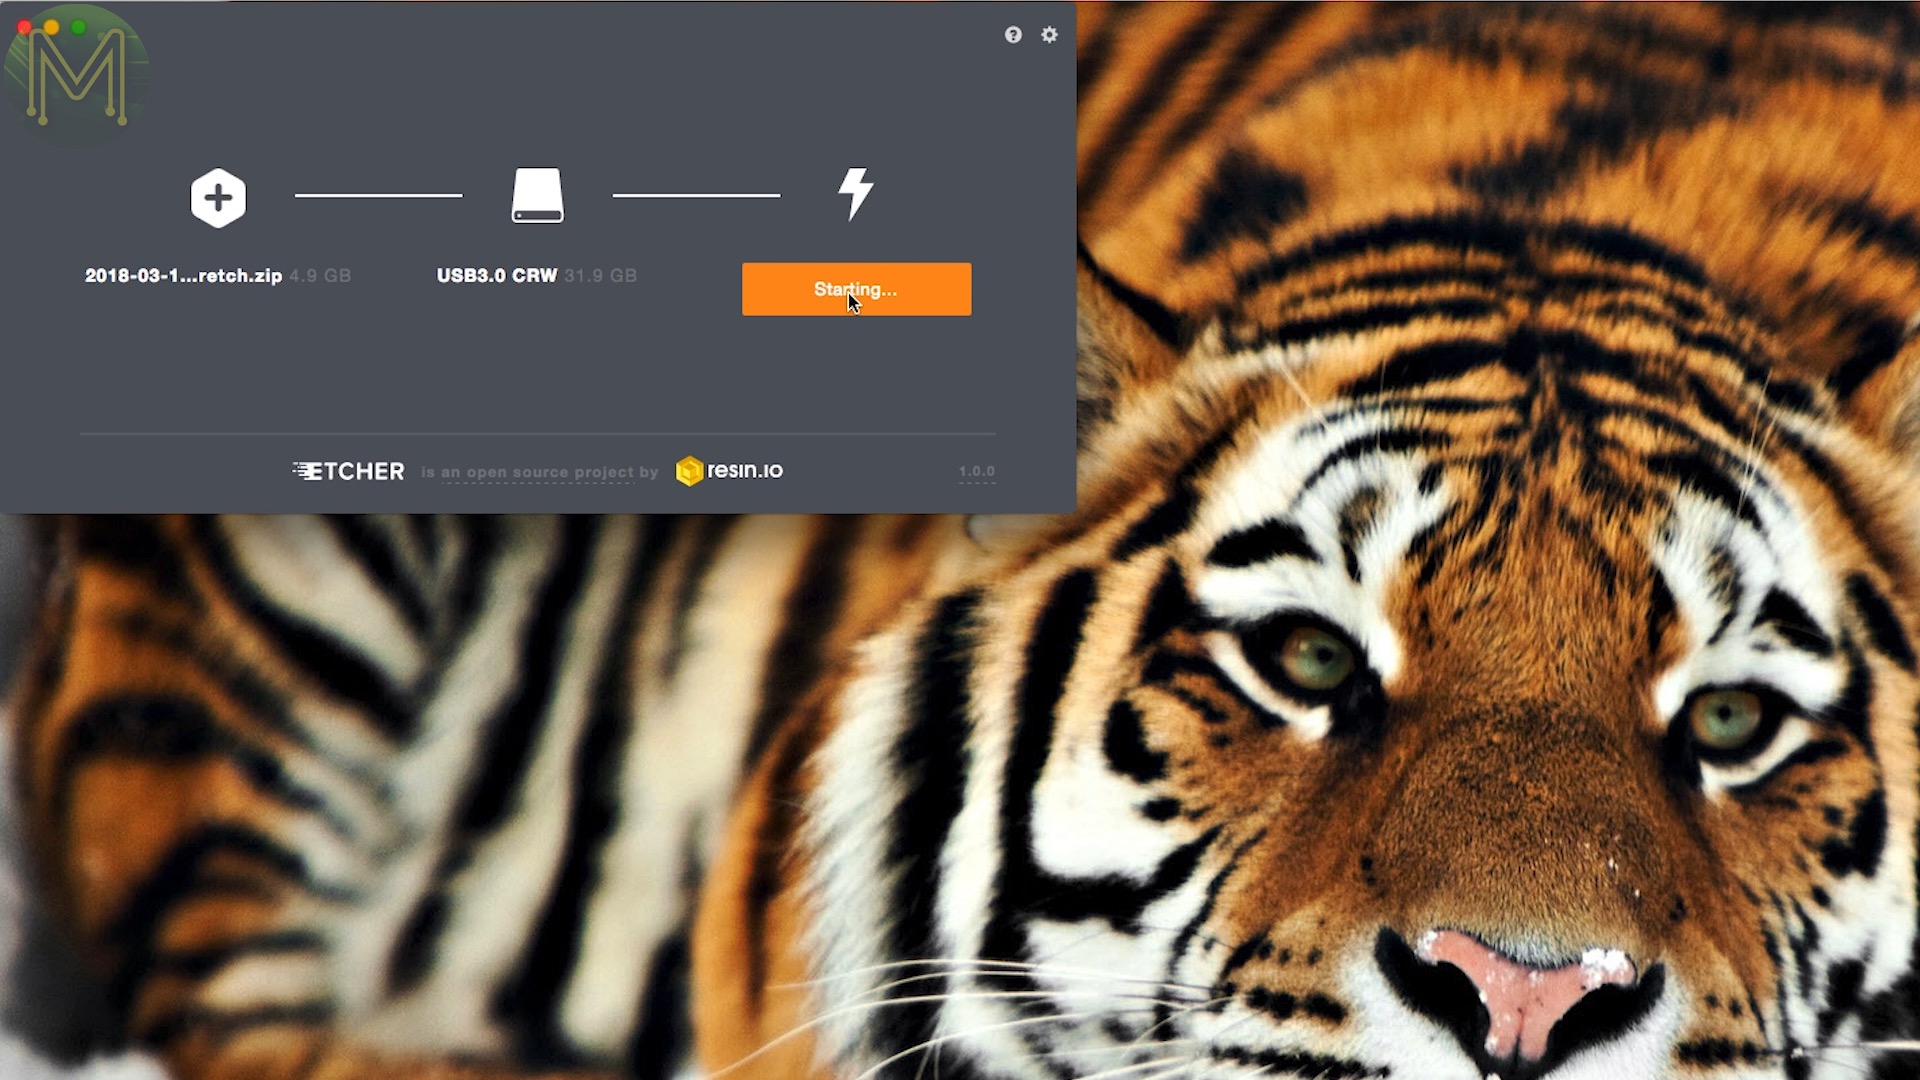

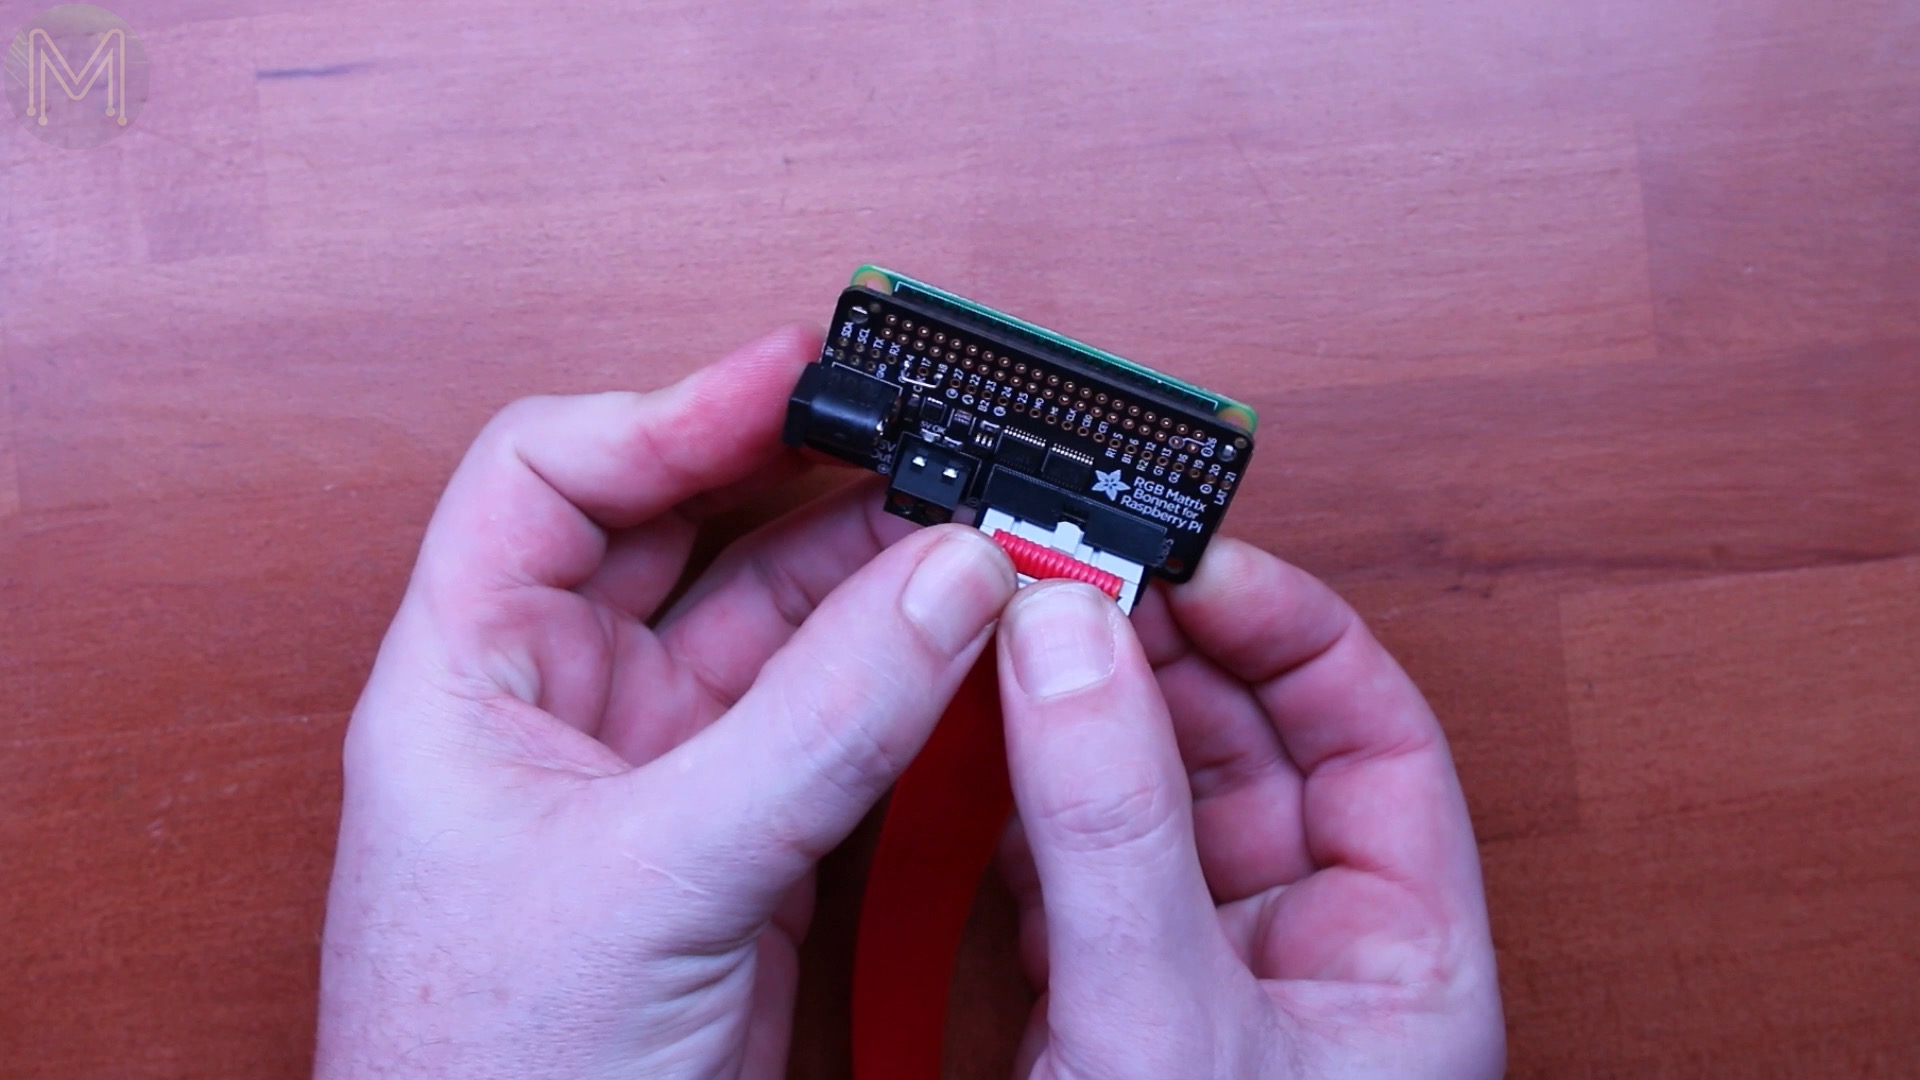
Connecting up the panel
Next you’ll need to connect up the matrix hat to the provided cable and then to the panel.
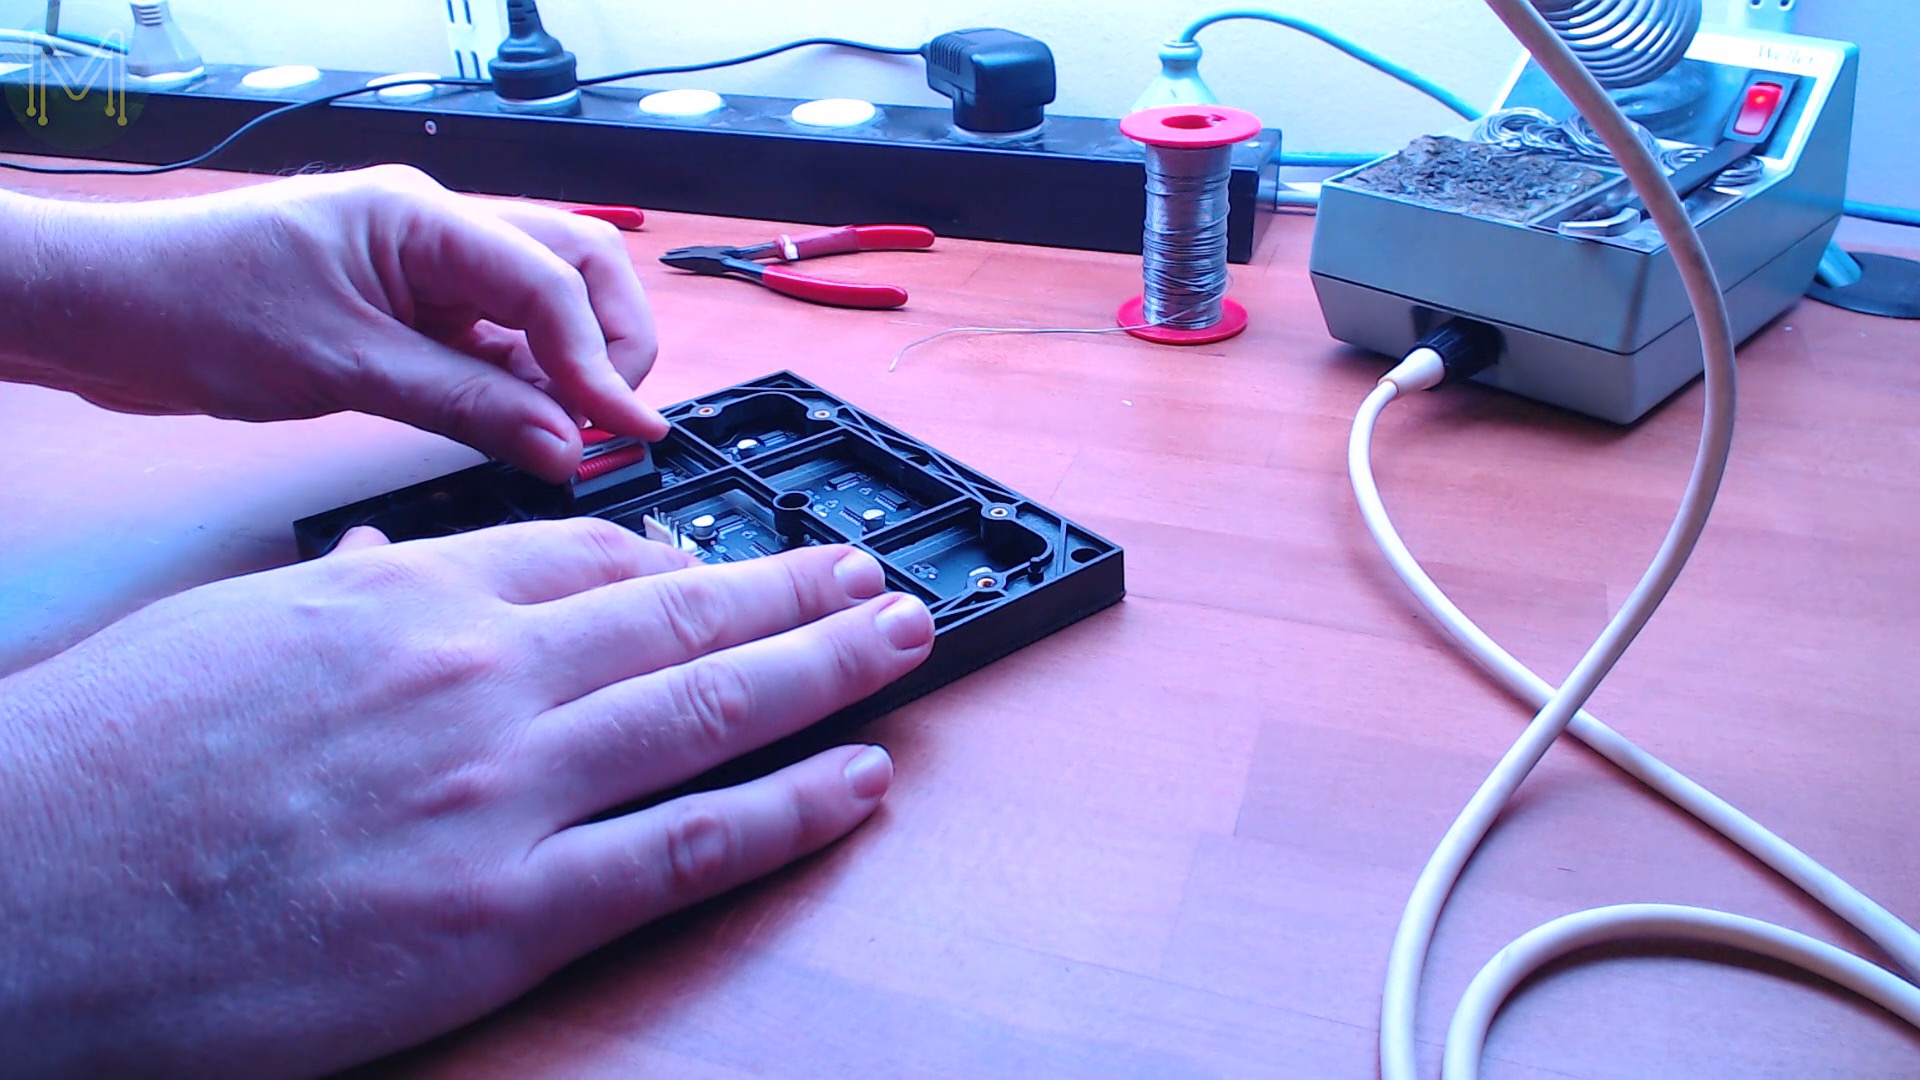
Next connect the power cable to the panel
and then the other end to the screw terminals of the Pi hat.Make sure you have the correct orientation, with the red and black cables in this position.

SD card changes
Now that your SD card has finished burning, you’ll need to make some changes so that it’ll connect to your WiFi Access Point.
First edit the config.txt file and add this line at the end. Also make sure that you disable audio.
dtparam=audio=off
dtoverlay=dwc2
Next edit the wpa supplicant file and add your WiFi Access Point details.
ctrl_interface=DIR=/var/run/wpa_supplicant GROUP=netdev
update_config=1
country=AU
network={
 ssid="Your SSID"
 psk="Your password"
 key_mgmt=WPA-PSK
}
Then create a blank file called ‘ssh’.
Then eject and chuck it into your Pi Zero and wait for it to boot.
Enable root logins
Now the next step is optional, which is to allow root logins. It’s just something that I do on all Pis.
Edit the /etc/ssh/sshd_config file and change the PermitRootLogin line to yes and then save.
Change the root password to something that will annoy you in future and restart SSH.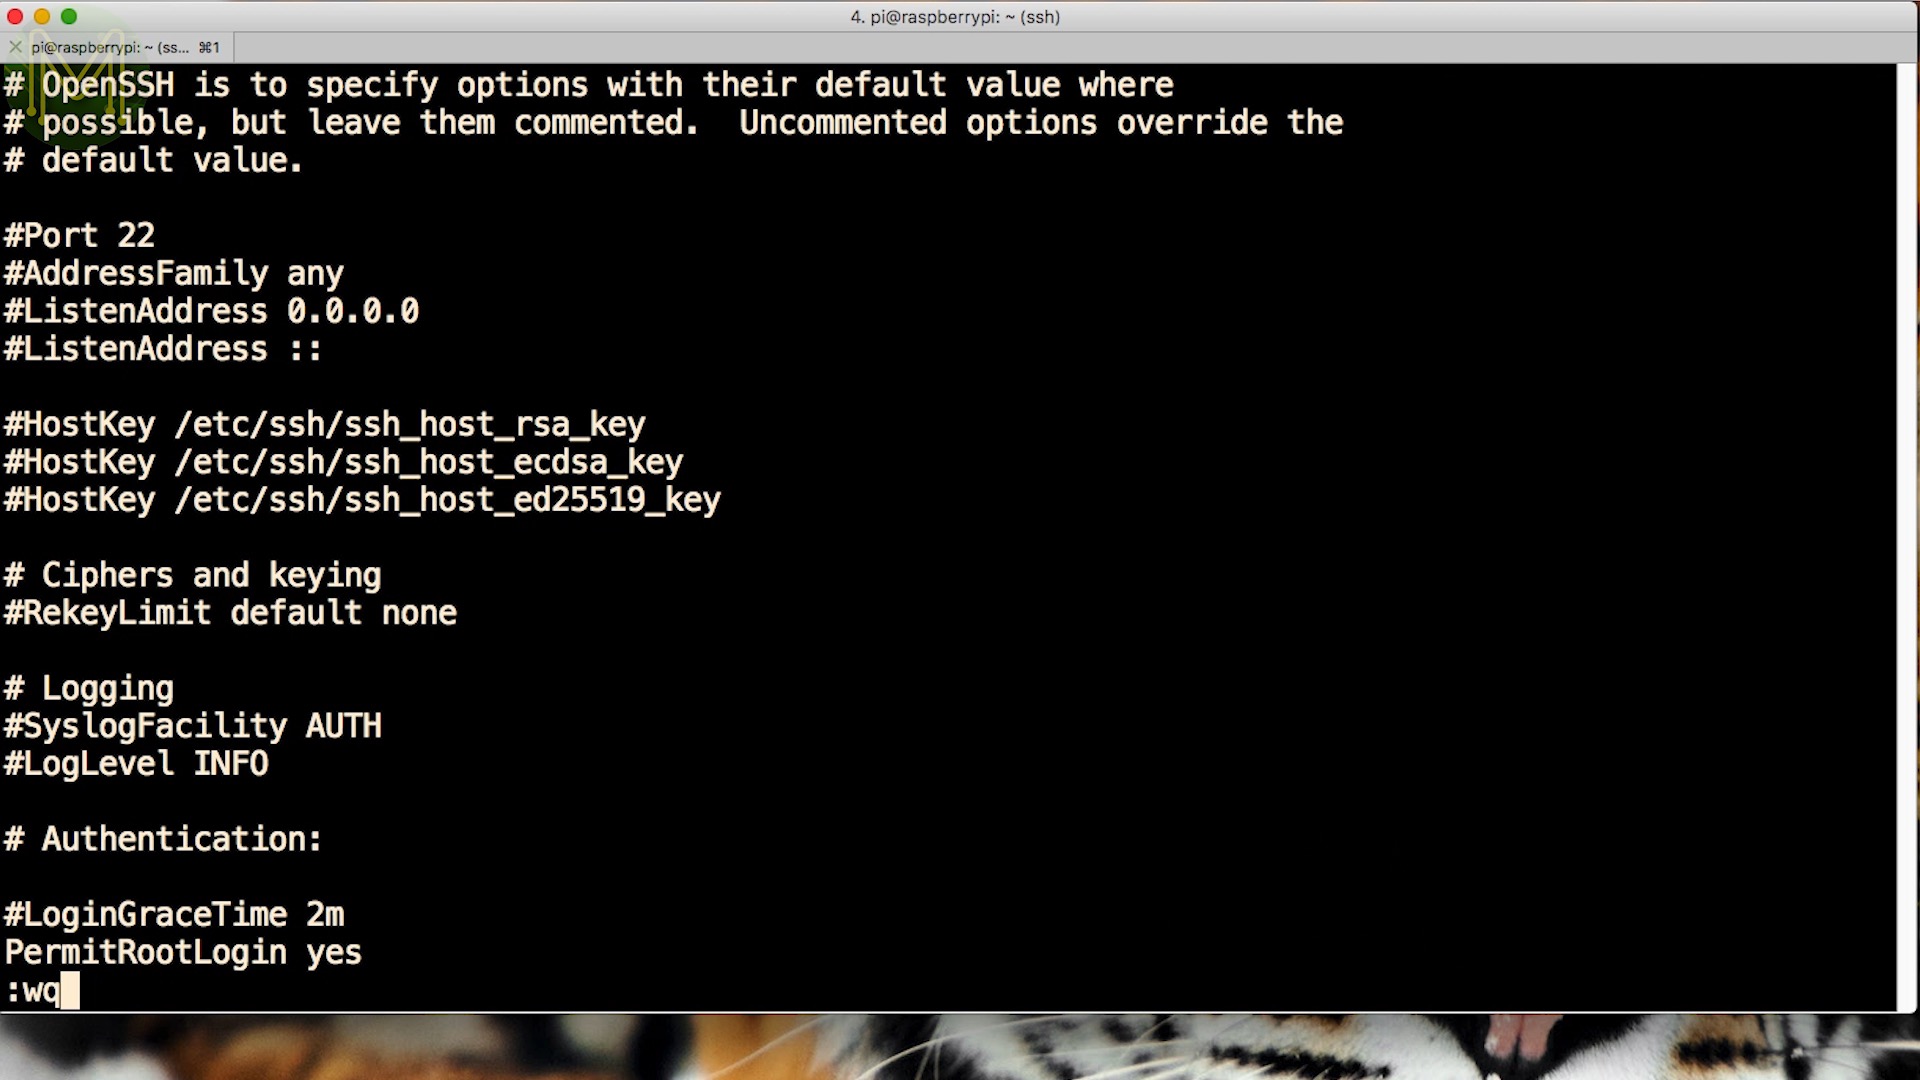
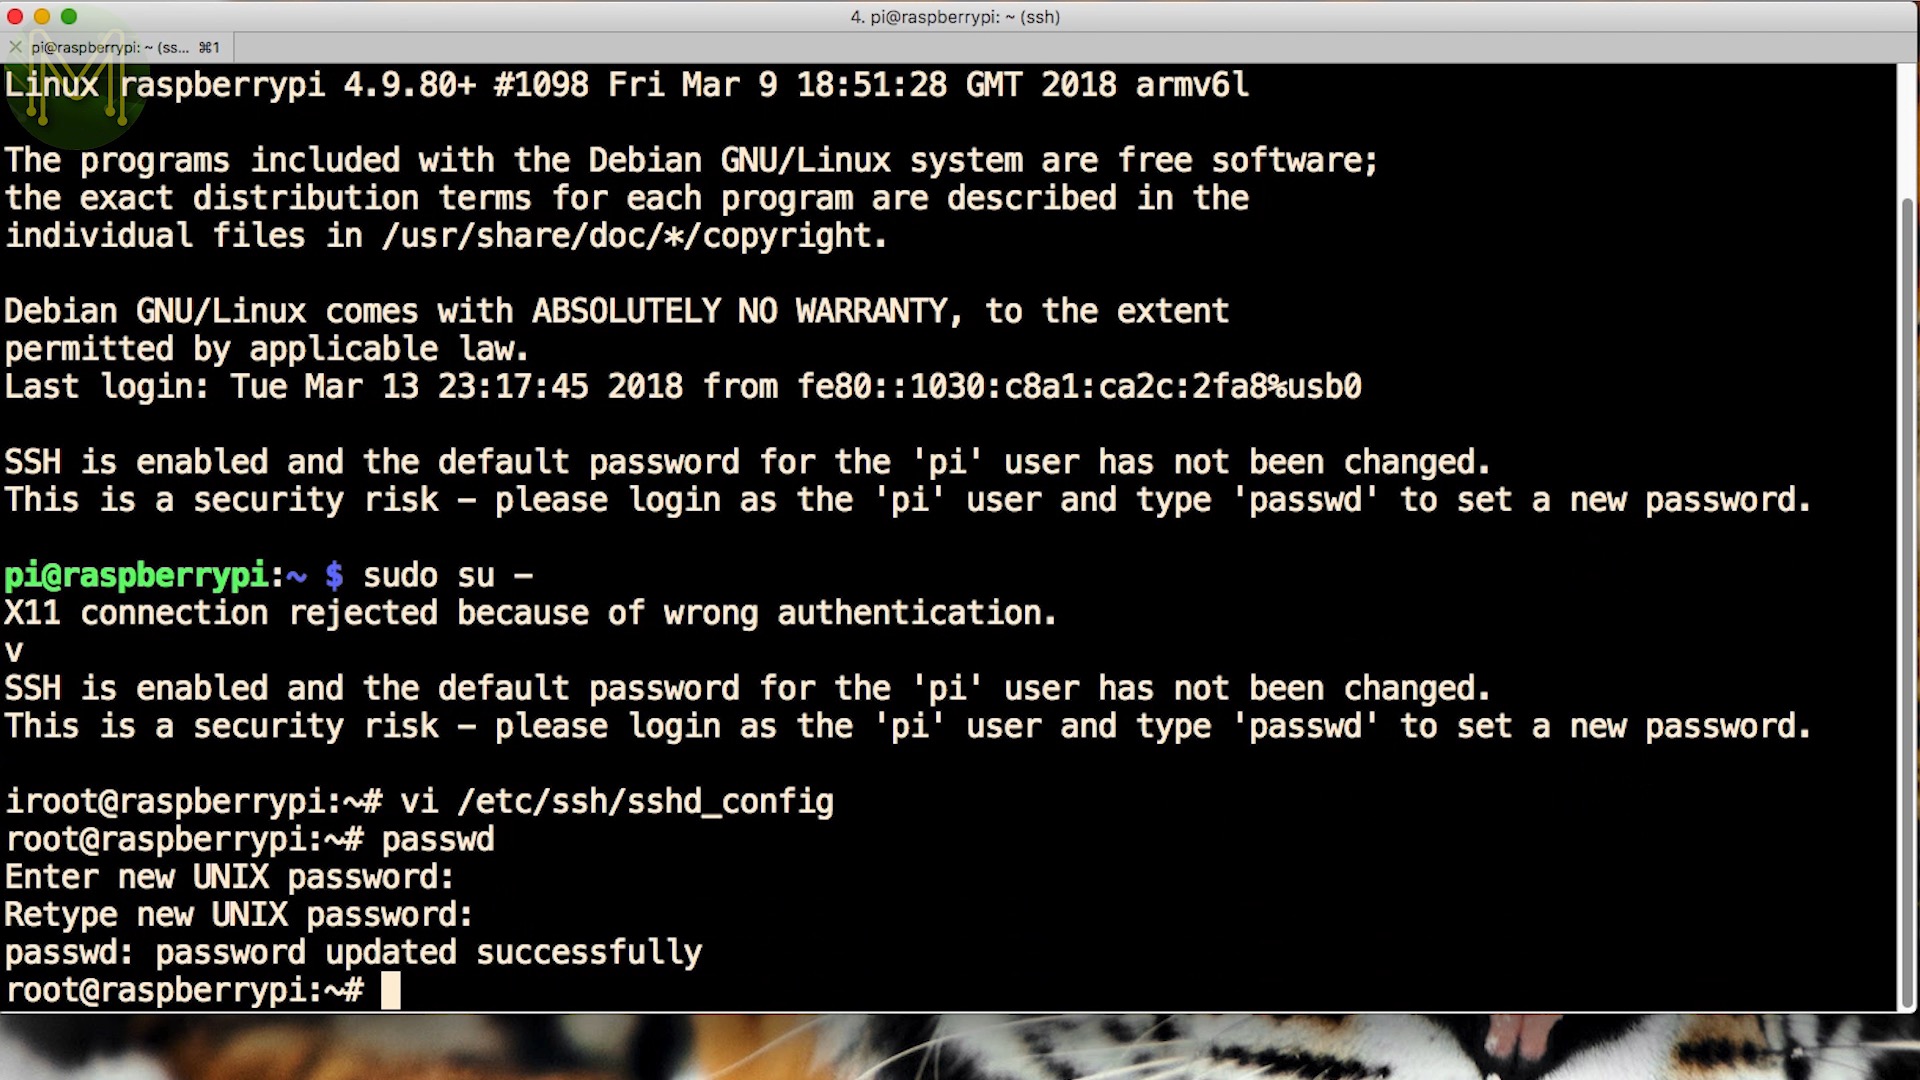
/etc/init.d/ssh restart
Then you can login to your Pi directly as root.
Installing Docker
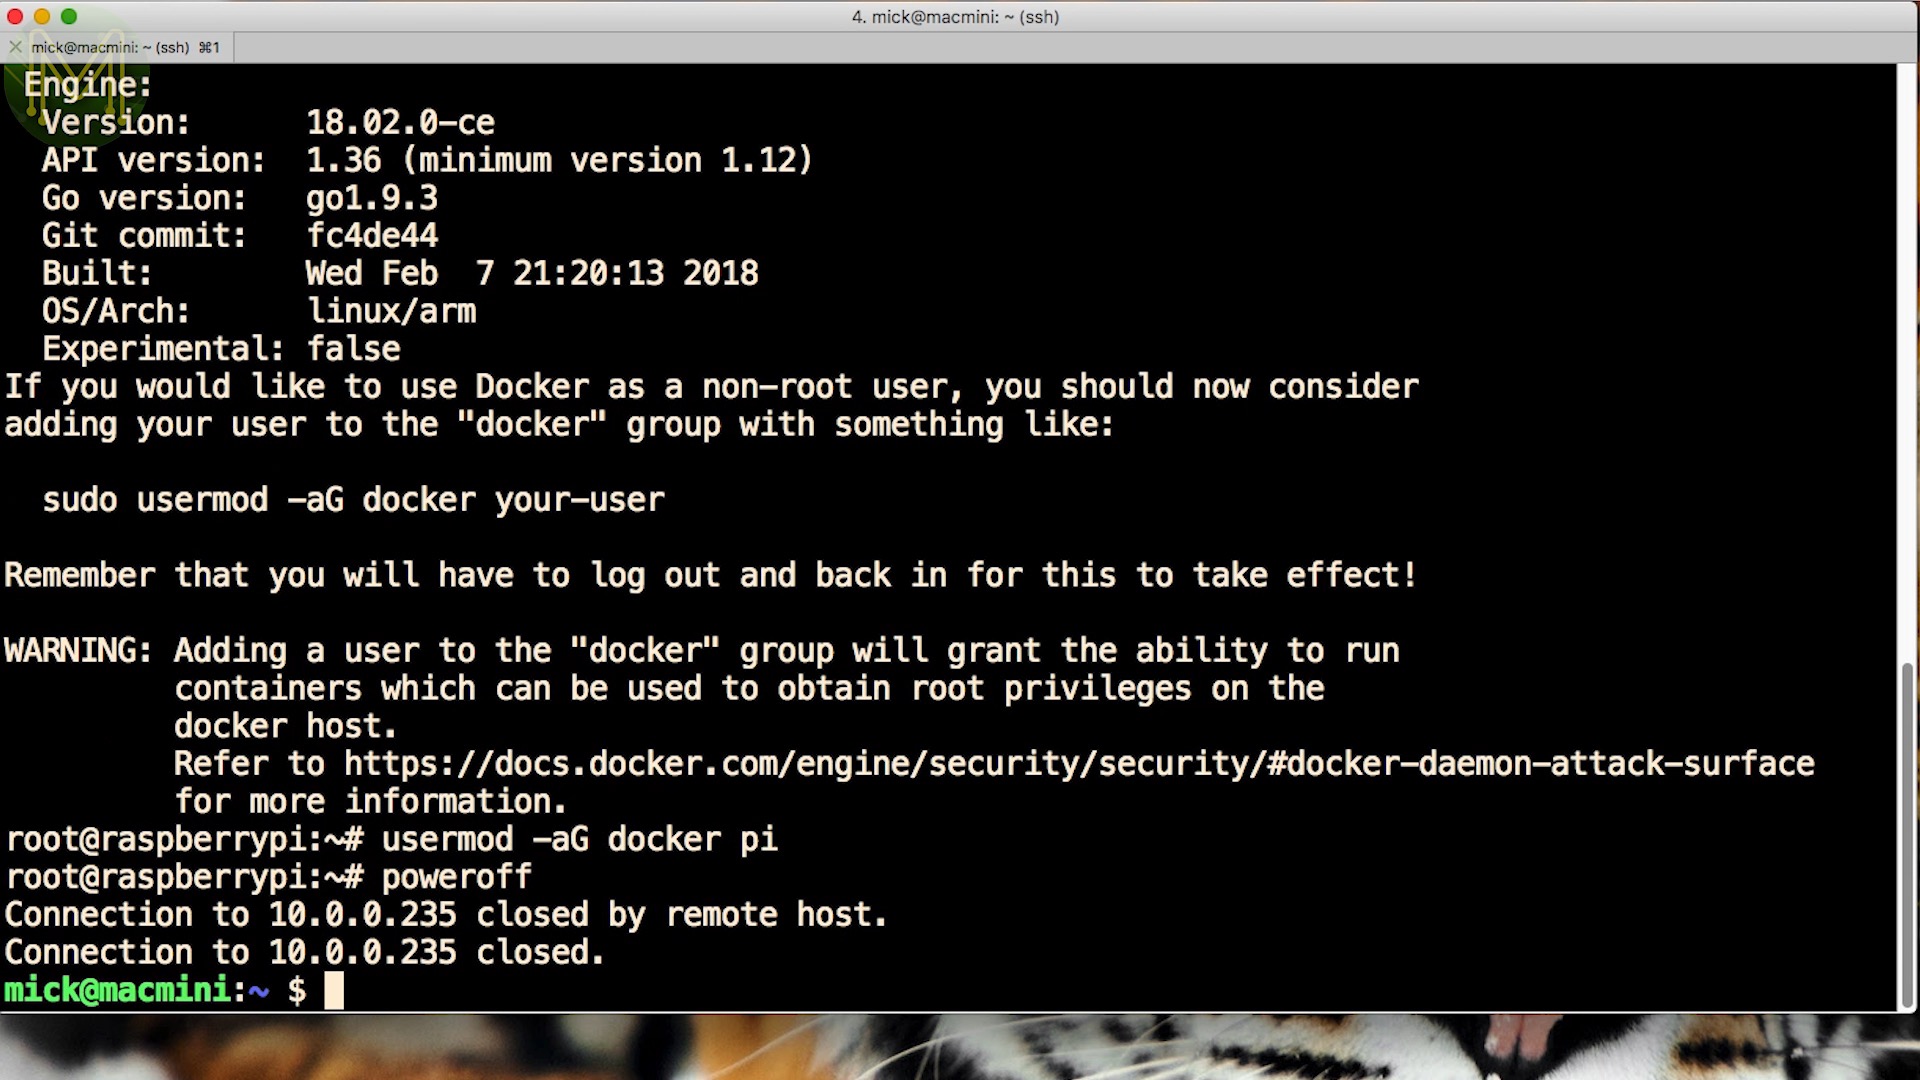
Next on to installing Docker. This is very trivial and all it requires is running this command
which will take around 4 minutes to complete.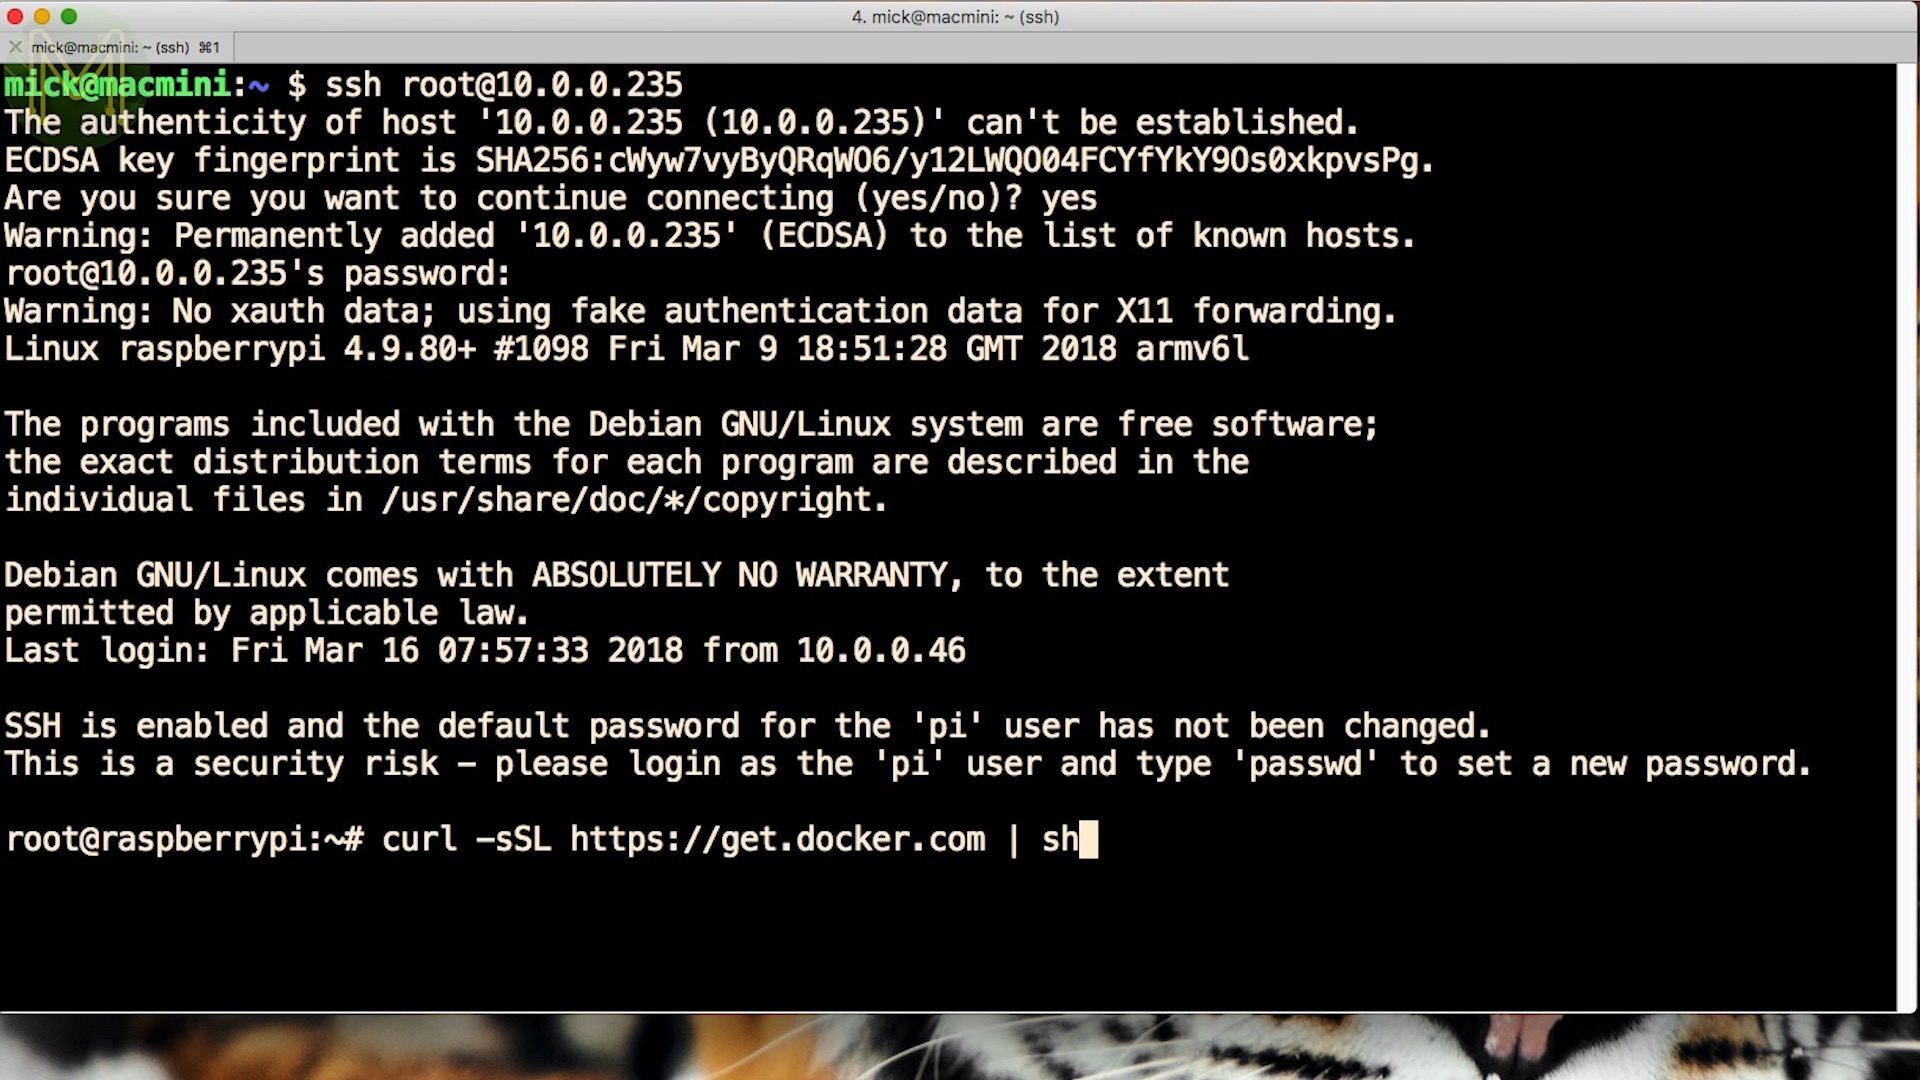
If you use the pi user account often then don’t forget to give access to Docker for that user account.
usermod -aG docker pi
Now on to the good bit. I’ve created a Docker image that you can download that has my snazzy MQTT panel driver as well as all the C and Python libraries supporting it. So you can use my app, or write your own.
The source code is also up on GitHub along with handy shell scripts for creating, starting and stopping this container.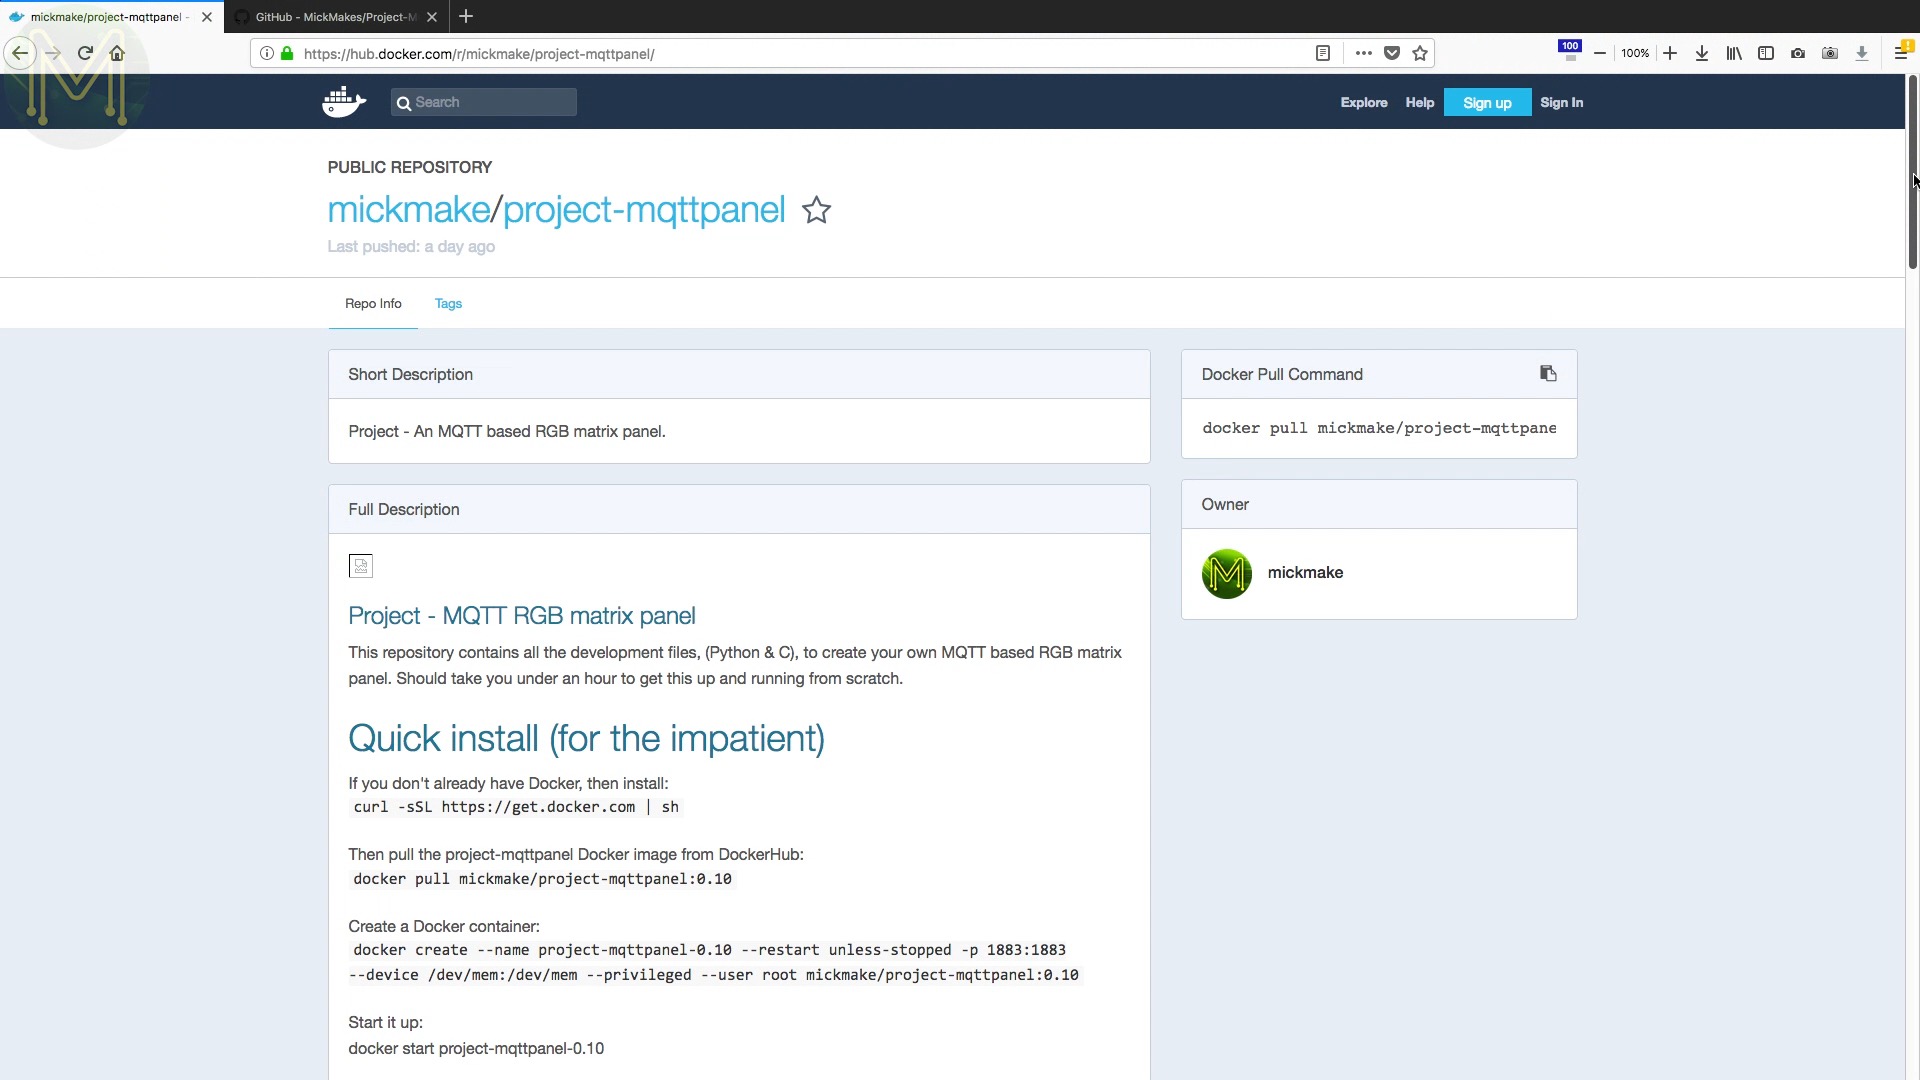
You can pull this container by running this command.
docker pull mickmake/project-mqttpanel:latest
Once it’s finished downloading and extracting, you’ll need to create a container from the image by running this command.
docker create --name project-mqttpanel --restart unless-stopped -p 1883:1883 --device /dev/mem:/dev/mem --privileged --user root mickmake/project-mqttpanel:latest
and typing this command will show that it has indeed been created.
docker ps -as
Then you can start it by typing this command.
docker start project-mqttpanel
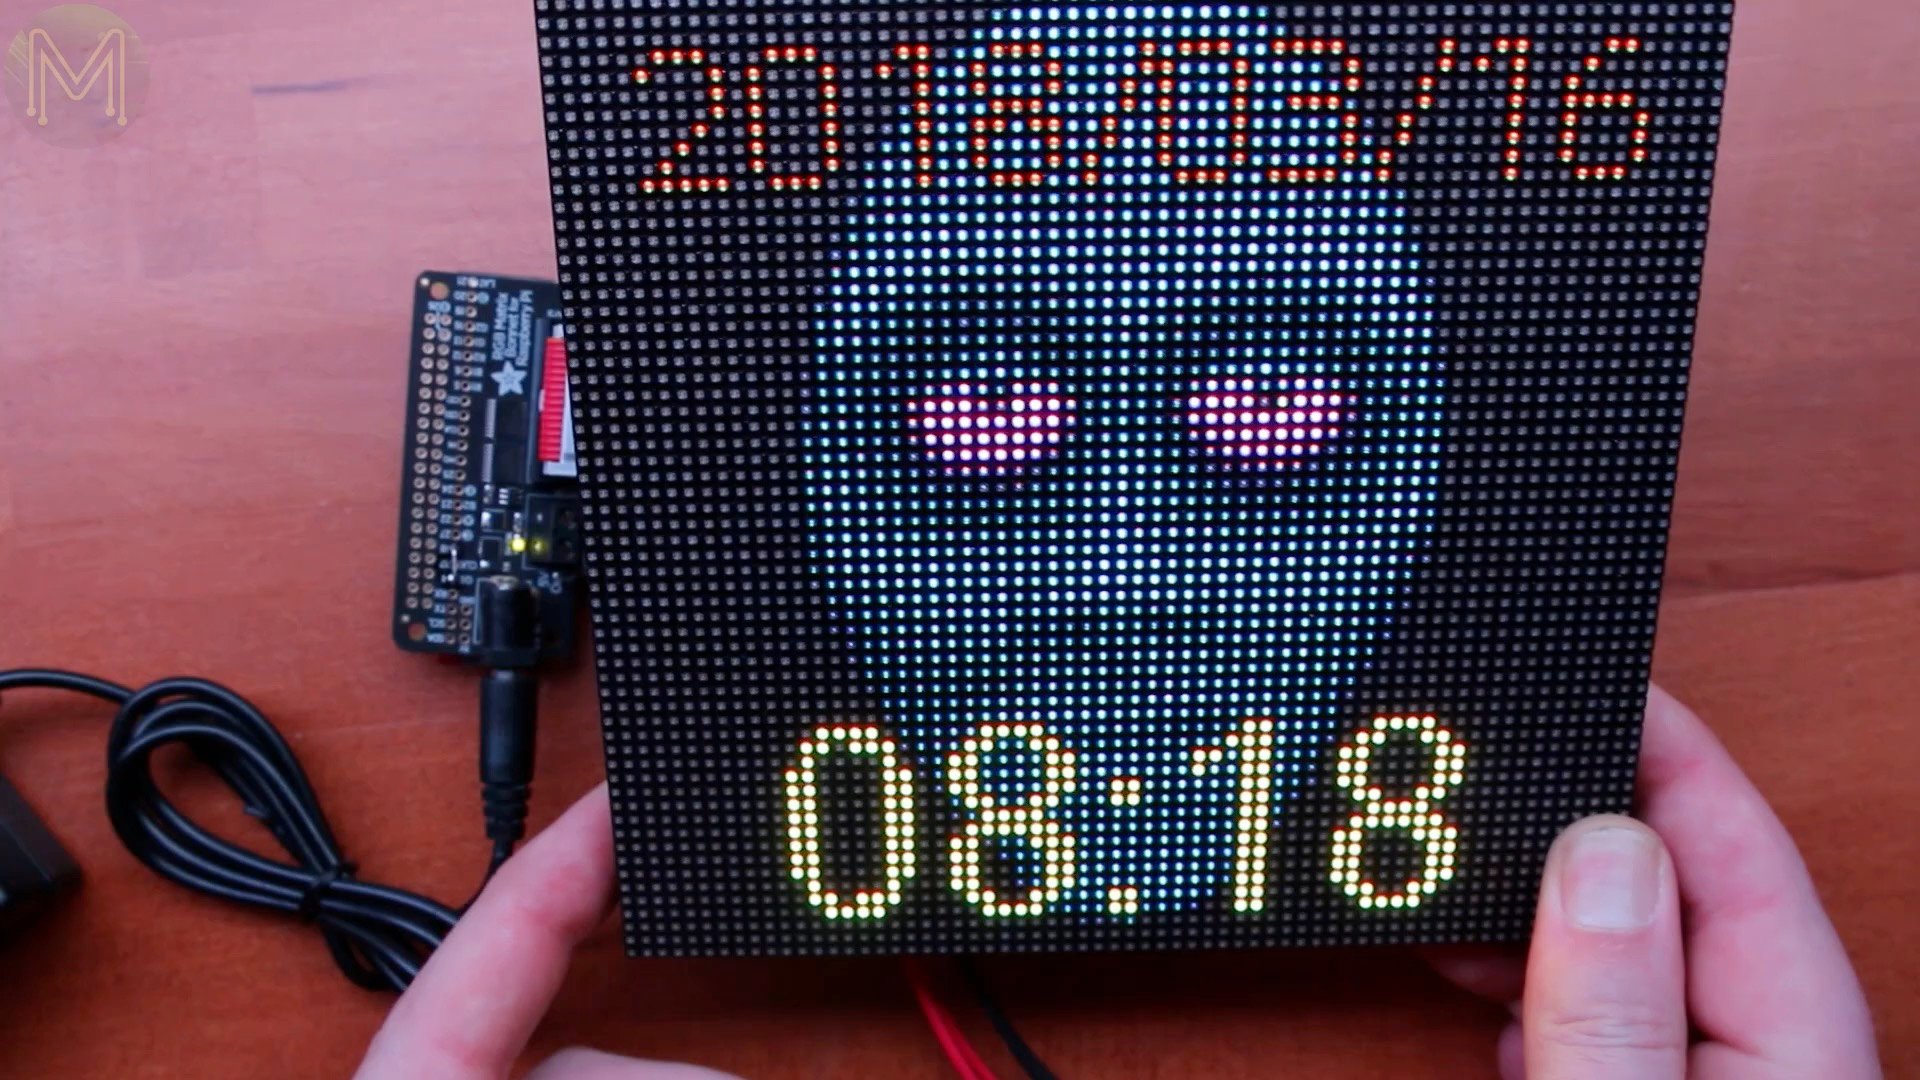
This will start up the container and execute my pre-loaded app. The default display will be an animated GIF of a creepy alien guy in the background along with the date and time. This is completely configurable via MQTT publish commands.
Runtime
If you have any MQTT clients installed on your PC, you’ll be able to send MQTT messages to the panel. For example you can change the background image to an animated heart beat.
mosquitto_pub -d -h 172.17.0.1 -t /display/background/load -m HeartBeat.gif

You can also send MQTT messages on the Pi itself. To make it easier for yourself create a script. This will run the Mosquitto client within a Docker container.
Or you can use the scripts from the GitHub page.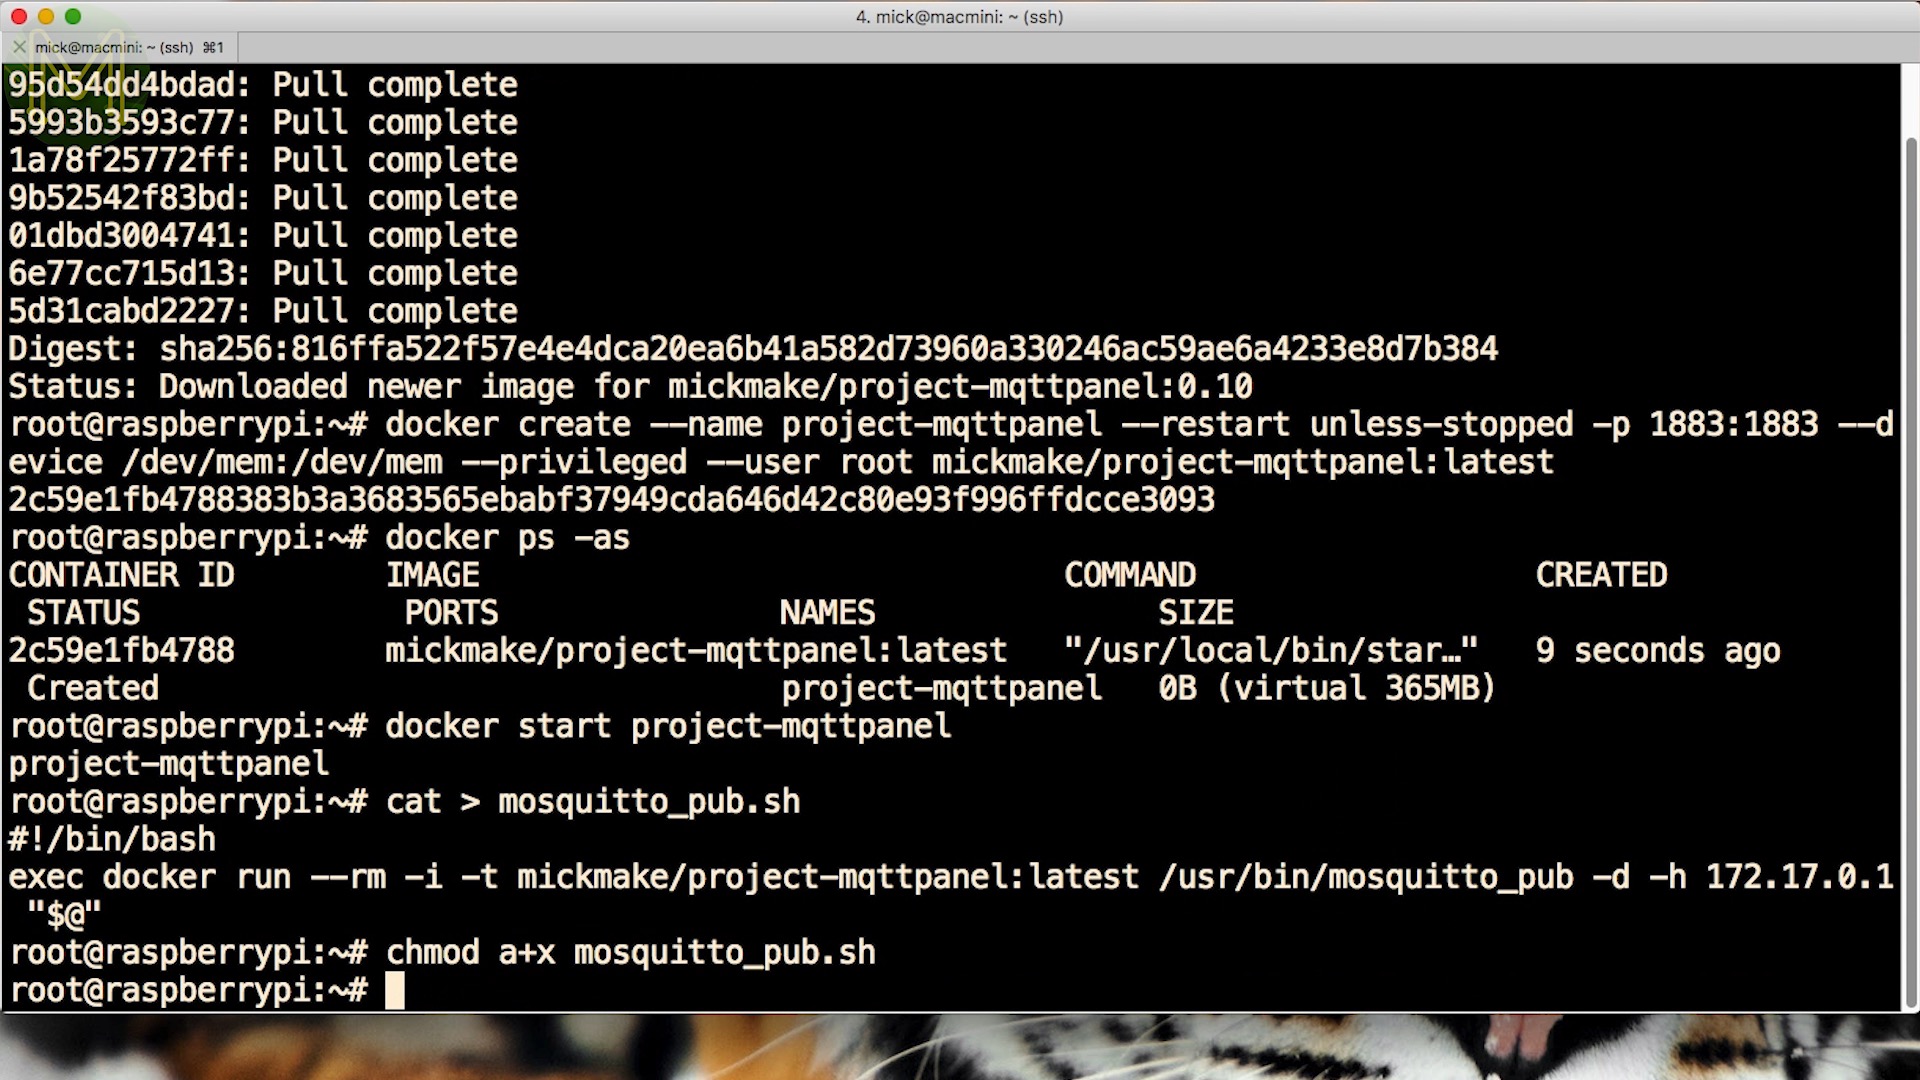
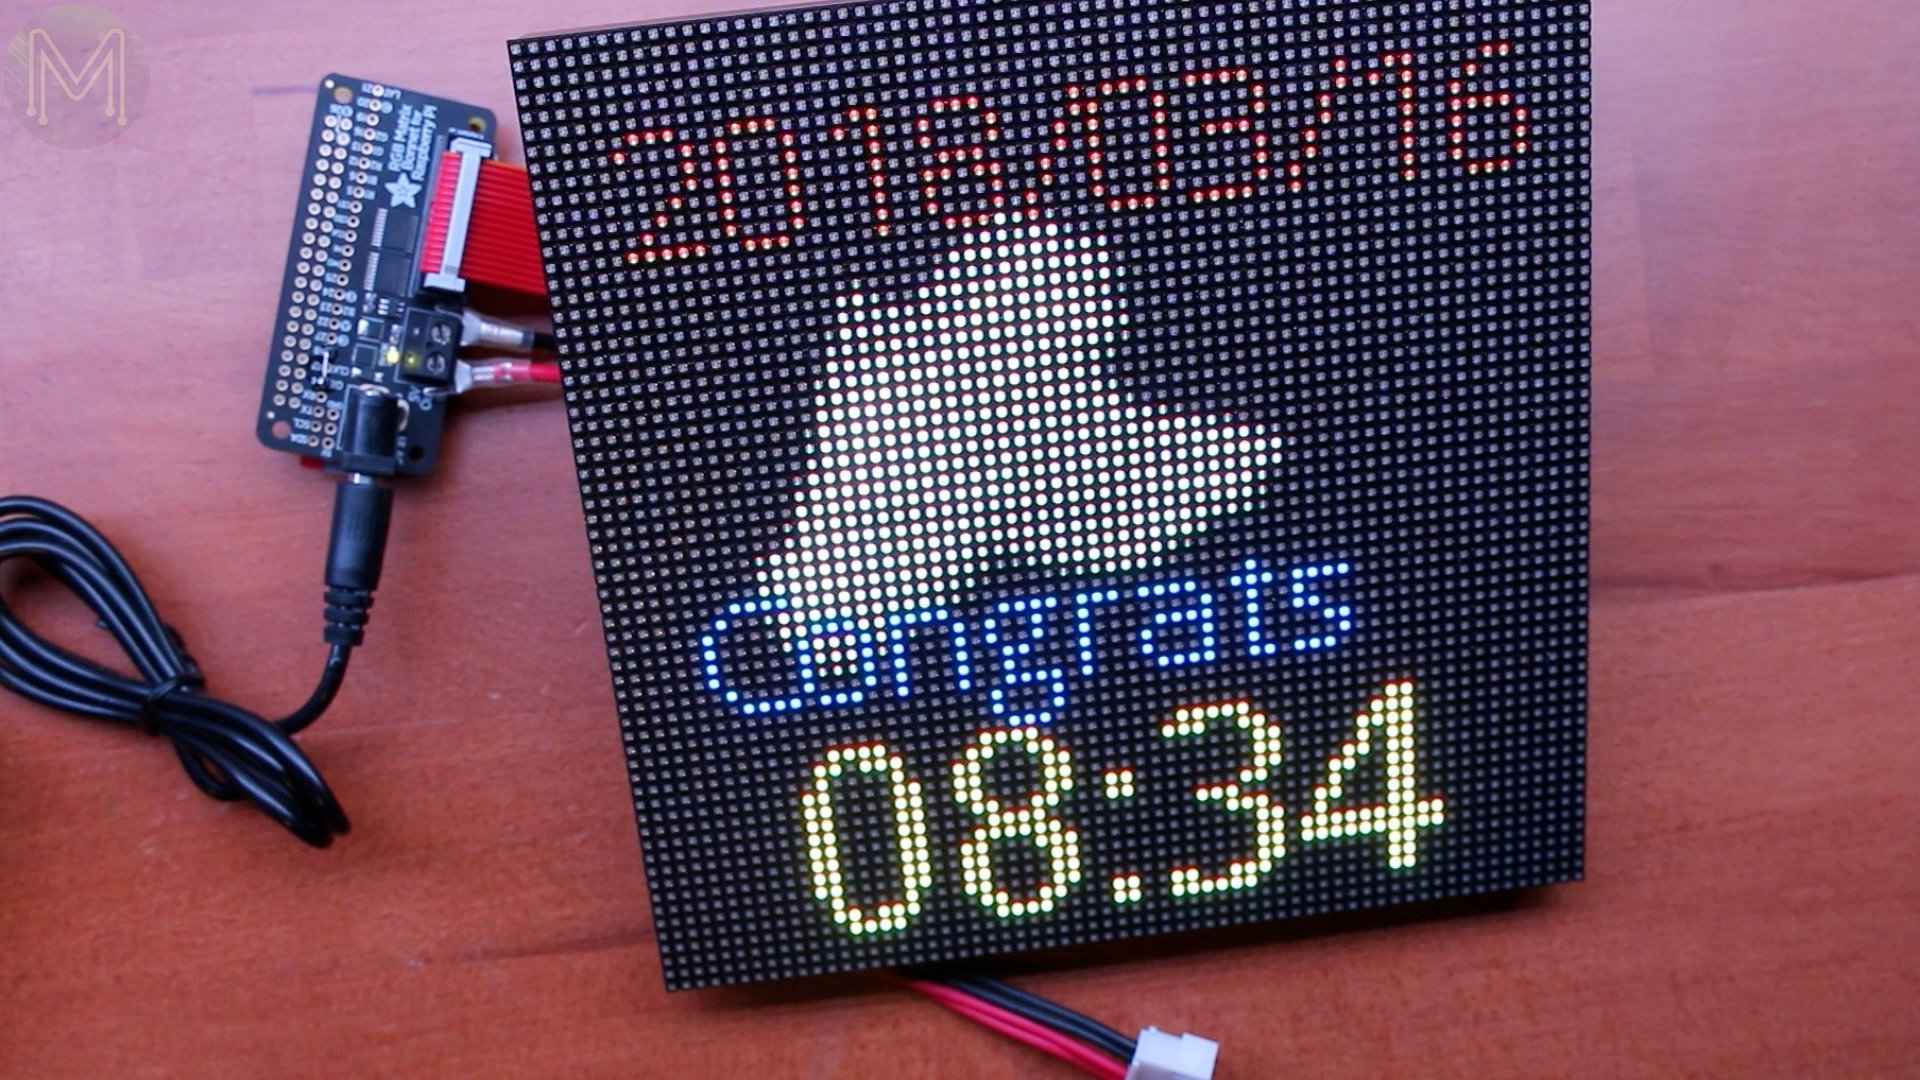
Then you can issue the same commands. For example; Display ‘congrats’ in blue text with clapping hands as the background.
mosquitto_pub -d -h PI_HOST -t /display/text/format -m 'Congrats'
mosquitto_pub -d -h PI_HOST -t /display/text/color -m '#00FF00'
mosquitto_pub -d -h PI_HOST -t /display/background/load -m Hand3.gif
mosquitto_pub -d -h PI_HOST -t /display/text/format -m 'Warning'
mosquitto_pub -d -h PI_HOST -t /display/text/color -m '#FF0000'
mosquitto_pub -d -h PI_HOST -t /display/background/load -m DancingSkeletons.gif
mosquitto_pub -d -h PI_HOST -t /display/date/show -m 0
mosquitto_pub -d -h PI_HOST -t /display/time/show -m 0

Heat and speed
The Pi Zero can keep up with the display without issue, although for larger animated GIFs, you may want to use a Pi2 or Pi3.
As you can see, my MQTTpanel executable and Mosquitto server consume almost 70% of the CPU.

If you find things a bit laggy, you can always stop and disable the LightDM service, as desktop logins won’t ever be needed.
systemctl stop lightdm.service
systemctl disable lightdm.service
Also, the Pi will get quite hot. The peak temperature is around 50C with an ambient 30C room temperature. When you build an enclosure for this, make sure that there is adequate ventilation.

Speaking of enclosures… You can do away with the long cable if you buy a female to female header and mount the Pi hat directly to the panel. This is something that I’ll definitely be doing.
Pretty easy stuff.
Summary
So, hopefully you’ll see how Docker simplifies software installation which is just as important on embedded systems as it is on large data-centers. One of the issues that plagues the SBC Maker scene is software configuration and dependencies.
Docker solves that and gets you up and running quickly.
Hope you enjoyed this quick video. If you’d like to see more of them, then consider supporting me on Patreon or directly. My current Patrons, along with sponsorships, have been a great help to me.
I’ve always tried to produce high quality videos packed full of content that are easily digestible, but I’d really like to be able to take it to the next level. So, with your help, I’ll be able to reach that goal.
And if it’s not possible to support me that way, you can always subscribe to this channel or like this video.